NSFOCUS ADS M User manual

Version: V4.5R90F02 (2020-02-28)
NSFOCUSADS M
Installation Guide
© 2020 NSFOCUS

■ Copyright © 2020 NSFOCUS Technologies, Inc. All rights reserved.
Unless otherwise stated, NSFOCUS Technologies, Inc. holds the copyright for the content of this document,
including but not limited to the layout, figures, photos, methods, and procedures, which are protected under the
intellectual property and copyright laws. No part of this publication may be reproduced or quoted, in any form
or by any means, without prior written permission of NSFOCUS Technologies, Inc.

NSFOCUS ADS M Installation Guide
Copyright © NSFOCUS
i
V4.5R90F02 (2020-02-28)
Contents
Preface ................................................................................................................................................1
Scope......................................................................................................................................................................1
Audience ................................................................................................................................................................1
Organization...........................................................................................................................................................1
Conventions ...........................................................................................................................................................2
Customer Support...................................................................................................................................................2
1 Overview.........................................................................................................................................3
1.1 Introduction......................................................................................................................................................3
1.2 Product Appearance..........................................................................................................................................3
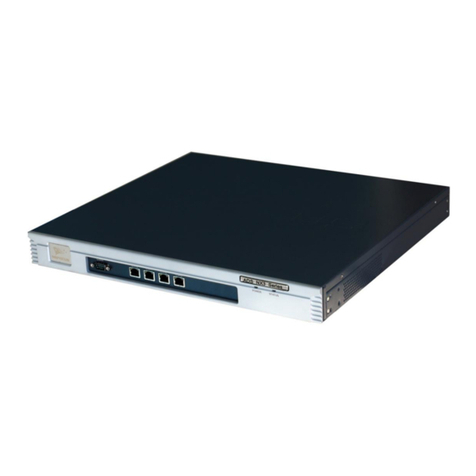
1.2.1 ADS NX3-M1600E.................................................................................................................................3
1.2.2 ADS-M NX3-HD2700............................................................................................................................4
1.3 Basic Information.............................................................................................................................................5
1.4 LEDs ................................................................................................................................................................6
2 Preparation .....................................................................................................................................8
2.1 Accessories Supplied with the Device..............................................................................................................8
2.2 User-Provided Tools.........................................................................................................................................9
2.3 Others...............................................................................................................................................................9
3 Installation....................................................................................................................................10
3.1 Installation Procedure.....................................................................................................................................10
3.2 Connecting to the Power Supply....................................................................................................................10
3.2.1 AC Power Supply.................................................................................................................................. 11
3.2.2 DC Power Supply ................................................................................................................................. 11
3.3 Connecting to the Network ............................................................................................................................12
3.4 Rack-mounting...............................................................................................................................................13
3.5 Shutdown .......................................................................................................................................................13
4 Basic Configuration ....................................................................................................................14
4.1 Login to the Console......................................................................................................................................14
4.2 Network Configuration on the Console..........................................................................................................15
4.3 Login to the Web-based Manager...................................................................................................................16
4.4 Network Configuration on the Web-based Manager......................................................................................19
A Default Parameters ....................................................................................................................21
A.1 Default Parameters for the Communication Interface ...................................................................................21
NSFOCUS ADS M Installation Guide
Copyright © NSFOCUS
ii
V4.5R90F02 (2020-02-28)
A.2 Default Account of the Web Administrator ...................................................................................................21
A.3 Default Account of the Console Administrator .............................................................................................21
A.4 Communication Parameters of the Console Port...........................................................................................21
NSFOCUS ADS M Installation Guide
Copyright © NSFOCUS
iii
V4.5R90F02 (2020-02-28)
Figures
Figure 1-1 Front panel of ADS NX3-M1600E.......................................................................................................3
Figure 1-2 Rear panel of ADS NX3-M1600E........................................................................................................4
Figure 1-3 Front panel of ADS-M NX3-HD2700..................................................................................................4
Figure 1-4 Rear panel of ADS-M NX3-HD2700 ...................................................................................................5
Figure 3-1 Installation flowchart..........................................................................................................................10
Figure 3-2 DC power supply module of ADS M ................................................................................................. 11
Figure 3-3 DC power supply plug of ADS M ......................................................................................................12
Figure 3-4 Installing rack-mount ears ..................................................................................................................13
Figure 4-1 Main menu of the console ..................................................................................................................15
Figure 4-2 Security alert dialog box.....................................................................................................................16
Figure 4-3 Login page..........................................................................................................................................17
Figure 4-4 Change Password page.......................................................................................................................17
Figure 4-5 Selecting the UI language...................................................................................................................18
Figure 4-6 Configuring the time zone ..................................................................................................................19

NSFOCUS ADS M Installation Guide
Copyright © NSFOCUS
iv
V4.5R90F02 (2020-02-28)
Tables
Table 1-1 Hardware specifications of ADS NX3-M1600E....................................................................................6
Table 1-2 Power LED.............................................................................................................................................6
Table 1-3 Status LED.............................................................................................................................................7
Table 1-4 Link/Act LED ........................................................................................................................................7

NSFOCUS ADS M Installation Guide
Copyright © NSFOCUS
1
V4.5R90F02 (2020-02-28)
Preface
Scope
This document describes the basic information and detailed installation procedure ofADS
NX3-1600E and ADS-M NX3-HD2700 ("ADS M" for short).
This document is provided for reference only. It may slightly differ from the actual product
due to version upgrade or other reasons.
Audience
This document is intended for the following users:
Users who wish to know main features and usage of this product
System administrator
Network administrator
This document assumes that you have knowledge in the following areas:
Network security
Linux and Windows operating systems
TCP/IP protocols
Organization
Chapter
Scope
1 Overview
Describes features and appearance of ADS M.
2 Preparation
Describes installation preparations of ADS M.
3 Installation
Describes the detailed installation procedure of ADS M.
4 Basic Configuration
Describes the basic configuration of ADS M.
A Default Parameters
Describes default parameters of ADS M.

NSFOCUS ADS M Installation Guide
Copyright © NSFOCUS
2
V4.5R90F02 (2020-02-28)
Conventions
Convention
Description
Bold font
Keywords, names of screen elements like buttons, drop-down lists or fields, and
user-entered text appear in bold font.
Italic font
Document titles, new or emphasized terms, and arguments for which you supply
values are in italic font.
Reminds users to take note.
Indicates a tip to make your operations easier.
Indicates a situation in which you might perform an action that could result in
equipment damage or loss of data.
Indicates a situation in which you might perform an action that could result in
bodily injury.
A > B
Indicates selection of menu options.
Customer Support
Email: support@nsfocusglobal.com
Portal: https://nsfocus.desk.com/
Contacts:
USA: +1-844-673-6287 or +1-844-NSFOCUS
UK: +44 808 164 0673 or +44 808 164 0NSF
Australia: +61 2 8599 0673 or +61 2 8599 0NSF
Netherlands: +31 85 208 2673 or +31 85 208 2NSF
Brazil: +55 13 4042 1673 or +55 13 4042 1NSF
Japan: +81 3-4510-8673 or +81 3-4510-8NSF
Singapore: +65 3158 3757
Hong Kong +852 5803 2673 or +852 5803 2NSF
Middle East: +973 1619 7607

NSFOCUS ADS M Installation Guide
Copyright © NSFOCUS
3
V4.5R90F02 (2020-02-28)
1 Overview
1.1 Introduction
As an integrated device, ADS NX3-M1600E and ADS-M NX3-HD2700, in standard
configuration, apply to 1000M network environments, but can be expanded to support the
10G capability. That is to say, ADS NX3-M1600E can be expanded to become a high-end
product.
1.2 Product Appearance
Real products of different lots or models may differ slightly. Images shown in this document
are indicative only. Actual colors may vary due to monitor display differences.
1.2.1 ADS NX3-M1600E
Front Panel
Figure 1-1 Front panel ofADS NX3-M1600E
①Management port
②Management port
③Serial port (RJ45)
④USB port

NSFOCUS ADS M Installation Guide
Copyright © NSFOCUS
4
V4.5R90F02 (2020-02-28)
⑤Reset LED
⑥Power LED
⑦Status LED
⑧System LED
⑨Working port: GE
electrical (RJ45)
⑩Working port: GE
optical (SFP)
-
-
Rear Panel
Figure 1-2 Rear panel ofADS NX3-M1600E
①Ground connector
②Heat dissipation holes
③Power switch
④Power supply 1
⑤Power supply 2
⑥Mute button: The device supports two
power supplies. If only one power supply
is configured, a sound alert will be
generated. To clear the alert, press the
mute button.
1.2.2 ADS-M NX3-HD2700
Front Panel
Figure 1-3 Front panel ofADS-M NX3-HD2700
PWR: power LED
SYS: system LED
STA: status LED
RJ45 serial port
USB port
M: management port
Hot standby port
Expansion slot
Monitor

NSFOCUS ADS M Installation Guide
Copyright © NSFOCUS
6
V4.5R90F02 (2020-02-28)
Table 1-1 Hardware specifications ofADS NX3-M1600E
Interface
1 x serial port (RJ45)
2 x USB 2.0 port
2 x management port (RJ45)
4 x 1000M electrical port
4 x 1000M SFP optical port
Weight
16.6 kg
Height
88 mm
Width
432 mm
Depth
575 mm
Rack
2U rack-mount model
Power Supply
AC input: 100 V AC–240 V AC
Maximum power: 350 W
MTBF
60,000 hours
Operating
Temperature
0°C to 45°C
Storage Temperature
–20°C to +65°C
1.4 LEDs
There are three types of LEDs on the front panel of the chassis: power LED, status LED, and
Link/Act LED.
Power LED
Table 1-2 describes the power LED.
Table 1-2 Power LED
LED Status
Description
On
The power is normal.
Off
The power is off or abnormal.
Status LED
Table 1-3 describes the status LED.

NSFOCUS ADS M Installation Guide
Copyright © NSFOCUS
7
V4.5R90F02 (2020-02-28)
Table 1-3 Status LED
LED Status
Description
Blink
The system is reading and writing data
Off
The system is idle.
Link/Act LED
Table 1-4 describes the Link/Act LED.
Table 1-4 Link/Act LED
LED Status
Description
Link On
A link has been established.
Link LED Off
The link is not established.
Act On
The device is transmitting or receiving data.
Act Off
No data is transmitted or received.

NSFOCUS ADS M Installation Guide
Copyright © NSFOCUS
8
V4.5R90F02 (2020-02-28)
2 Preparation
2.1 Accessories Supplied with the Device
Before the installation, verify that the accessory box delivered with the device includes the
following items:
Straight-through cable (green)
Used for network connection
Crossover cable (yellow)
Used to connect a computer to the management port ofADS M so that you can log in to
the web-based manager
Power cable
One or two power cables for each device
Rubber pad
Cut into four pieces along the dotted line and attached to four angles or tabs of the device
chassis to avoid abrasion
Rack-mount ears
Used to fasten the device onto the rack
Rack-mount screw
Used to fasten the device onto the rack
RJ-45 serial cable
Used to connect the serial port (RJ-45) on the front panel of the ADS-M NX3-1600E or
NX3-HD2700 for the console-based configuration
Accessories supplied may vary with the product model. Please refer to the packing list.
In addition to items in the accessory box, ensure that the following are ready:
IPAddress
IP address reserved forADS M
Computer

NSFOCUS ADS M Installation Guide
Copyright © NSFOCUS
9
V4.5R90F02 (2020-02-28)
Directly connected to the management port ofADS M so that you can log in to the web-
based manager of the device in HTTPS mode for management
Terminal software
Connected to the console port, such as HyperTerminal, that comes with the Windows
operating system
Browser
Internet Explorer 10 or later, Chrome, or Firefox
2.2 User-Provided Tools
Screwdrivers and screws of various specifications
Devices and meters such as terminal and multi-meter
Antistatic wrist strap
2.3 Others
Environment
Well-ventilated and excellent heat elimination
Temperature: 0°C–45°C
Relative humidity: 10%–95% (non-condensing)
ESD Prevention
Make sure thatADS M and the floor are well grounded.
Take dust-proof measures for the equipment room.
Maintain the temperature and humidity at a proper level.
Always wear ESD gloves or wrist straps when touching a circuit board.
Rack-mounting
Make sure that the rack is sturdy enough and its size is appropriate for the device.

NSFOCUS ADS M Installation Guide
Copyright © NSFOCUS
10
V4.5R90F02 (2020-02-28)
3 Installation
3.1 Installation Procedure
Figure 3-1 Installation flowchart
3.2 Connecting to the Power Supply

NSFOCUS ADS M Installation Guide
Copyright © NSFOCUS
11
V4.5R90F02 (2020-02-28)
ADS NX3-M600A uses theAC power supply only, while ADS NX3-M1600E andADS M
NX3-HD2700 support both theAC and DC power supplies. The following sections describe
how to connect to the power supply.
3.2.1 AC Power Supply
For theAC power supply, the 100–240 V input voltage is appropriate toADS M. Before the
power connection, verify that the power supply specification is consistent with that of the
device room to avoid possible damage.
To connect theAC power cable, follow these steps:
Step 1 Make sure that the power switch on ADS M is in the OFF position.
Step 2 Connect one end of the power cable to the power socket on ADS M'S rear panel.
Step 3 Connect the other end of the power cable to AC power supply socket.
----End
3.2.2 DC Power Supply
For the DC power supply, the -48V input voltage is appropriate toADS M. Before the power
connection, verify that the power supply specification is consistent with that of the device
room to avoid possible damage.
To connect the DC power cable, follow these steps:
Step 1 Make sure that the power switch on ADS M is in the OFF position.
Step 2 Take out the DC power plug from the accessory box. The socket is as shown in Figure 3-2.
(The DC power supply module of ADS M has a plug and socket. The plug is included in the
accessory box, and the socket is integrated in the chassis).
Figure 3-2 DC powersupply module ofADS M
Step 3 Insert three leads of the -48V DC power supply into the three jacks on the plug respectively
(ensure that leads match jacks). As shown in Figure 3-3, the jack marked "+" is connected to

NSFOCUS ADS M Installation Guide
Copyright © NSFOCUS
12
V4.5R90F02 (2020-02-28)
the anode of the power supply; the jack marked "-" is connected to the cathode of the power
supply; the jack marked " " is connected to the PGND cable.
Figure 3-3 DC powersupply plug ofADS M
Step 4 Insert the DC power plug into the DC socket at the rear panel of the DC power supply, and
fasten the two screws on both ends of the plug with a screw driver to tighten the power cables.
Step 5 For the dual power supply, repeat Step 3 and Step 4 to connect the other power cable.
----End
3.3 Connecting to the Network
Please connect the ADS M to the network according to the actual network structure.
Pay attention to the following during the connection:
Use straight-through cables to connect the switch to the communication interface of the
device.
ADS M can be deployed anywhere in the network. However, to achieve the optimal
performance, you are recommended to connect it to the switch in the backbone network
of the company.
After deployment, please modify network settings immediately to ensure smooth
network connections. For details on default parameters of ADS M, see appendix
A Default Parameters.
You can modify network settings at the following interfaces:
Console management interface.
Web management interface. For details, see chapter 4 Basic Configuration.

NSFOCUS ADS M Installation Guide
Copyright © NSFOCUS
13
V4.5R90F02 (2020-02-28)
3.4 Rack-mounting
For the rack mounting, you need to first install rack-mount ears, as shown in Figure 3-4. Then
place the device on the rack and fasten it with screws.
Figure 3-4 Installing rack-mount ears
3.5 Shutdown
To shut downADS M, switch the power switch to the OFF position.

NSFOCUS ADS M Installation Guide
Copyright © NSFOCUS
14
V4.5R90F02 (2020-02-28)
4 Basic Configuration
The device can operate properly after you complete simple network configuration and import
a valid license. The network configuration involves the following:
IP address
Subnet mask
Gateway
DNS server
The network configuration can be conducted on the console or web-based manager. Both
approaches require a computer and accessories (included in the accessory box). Choose an
approach as required.
To perform configurations on the console, you need to connect the device to a computer with
a serial cable. The console port rate ofADS M is 115200 bps. After login, you can perform
configurations by selecting menus. For details, see section 4.2 Network Configuration on the
Console.
To perform configuration on the web-based manager, follow these steps:
Step 1 Use a crossover cable (included in the accessory box) to connect the working port on the
device to the network port on the computer.
Step 2 Configure computer-related parameters to make it on the same network segment as the
device. See appendix A Default Parameters.
Step 3 Log in to the web-based manager in HTTPS mode and configure the device. For details, see
sections 4.3 Login to the Web-based Manager and 4.4 Network Configuration on the Web-
based Manager.
----End
The certificate file can be imported only on the web-based manager. You are advised to import
a certificate file the first time you log in to the web-based manager.
4.1 Login to the Console
Before logging in to the console, prepare the following:
One computer
One serial cable included in the accessory box
This manual suits for next models
2
Table of contents
Other NSFOCUS Network Hardware manuals

NSFOCUS
NSFOCUS 100M WAF NX3 Series User manual

NSFOCUS
NSFOCUS ADS NX3 2000 Series User manual

NSFOCUS
NSFOCUS ADS NX3-M 600A User manual

NSFOCUS
NSFOCUS ADS NX3-800E User manual

NSFOCUS
NSFOCUS ADS Series User manual

NSFOCUS
NSFOCUS ADS User manual

NSFOCUS
NSFOCUS ADS 2010 User manual

NSFOCUS
NSFOCUS NFNX3 Series User manual
Popular Network Hardware manuals by other brands

Perle
Perle IOLAN SCG Series Hardware installation guide

Tosibox
Tosibox Lock 500 quick start guide

Billion
Billion BiPAC 8501 Specifications

Rorke Data
Rorke Data Galaxy LX5 Series Configuration and system integration guide

Satro
Satro SK-RP08 user manual

Sun Microsystems
Sun Microsystems Ray 3 Plus Client Getting started guide