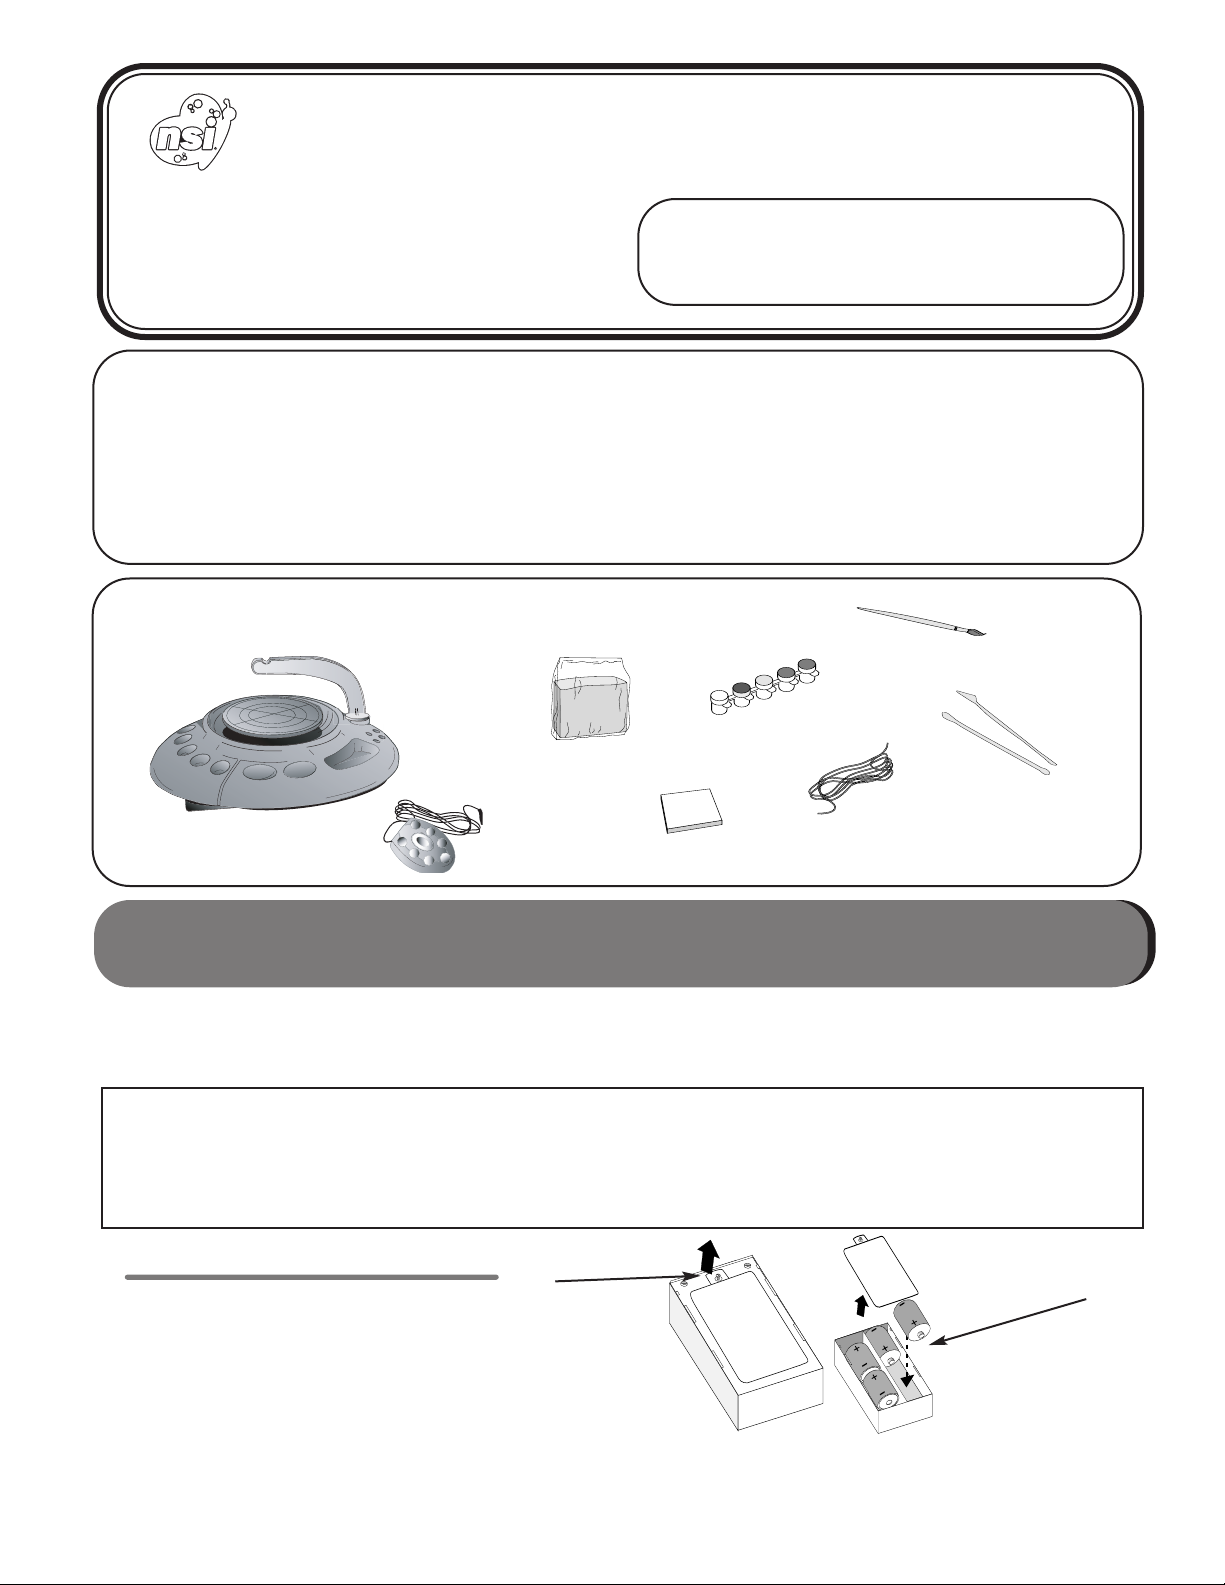
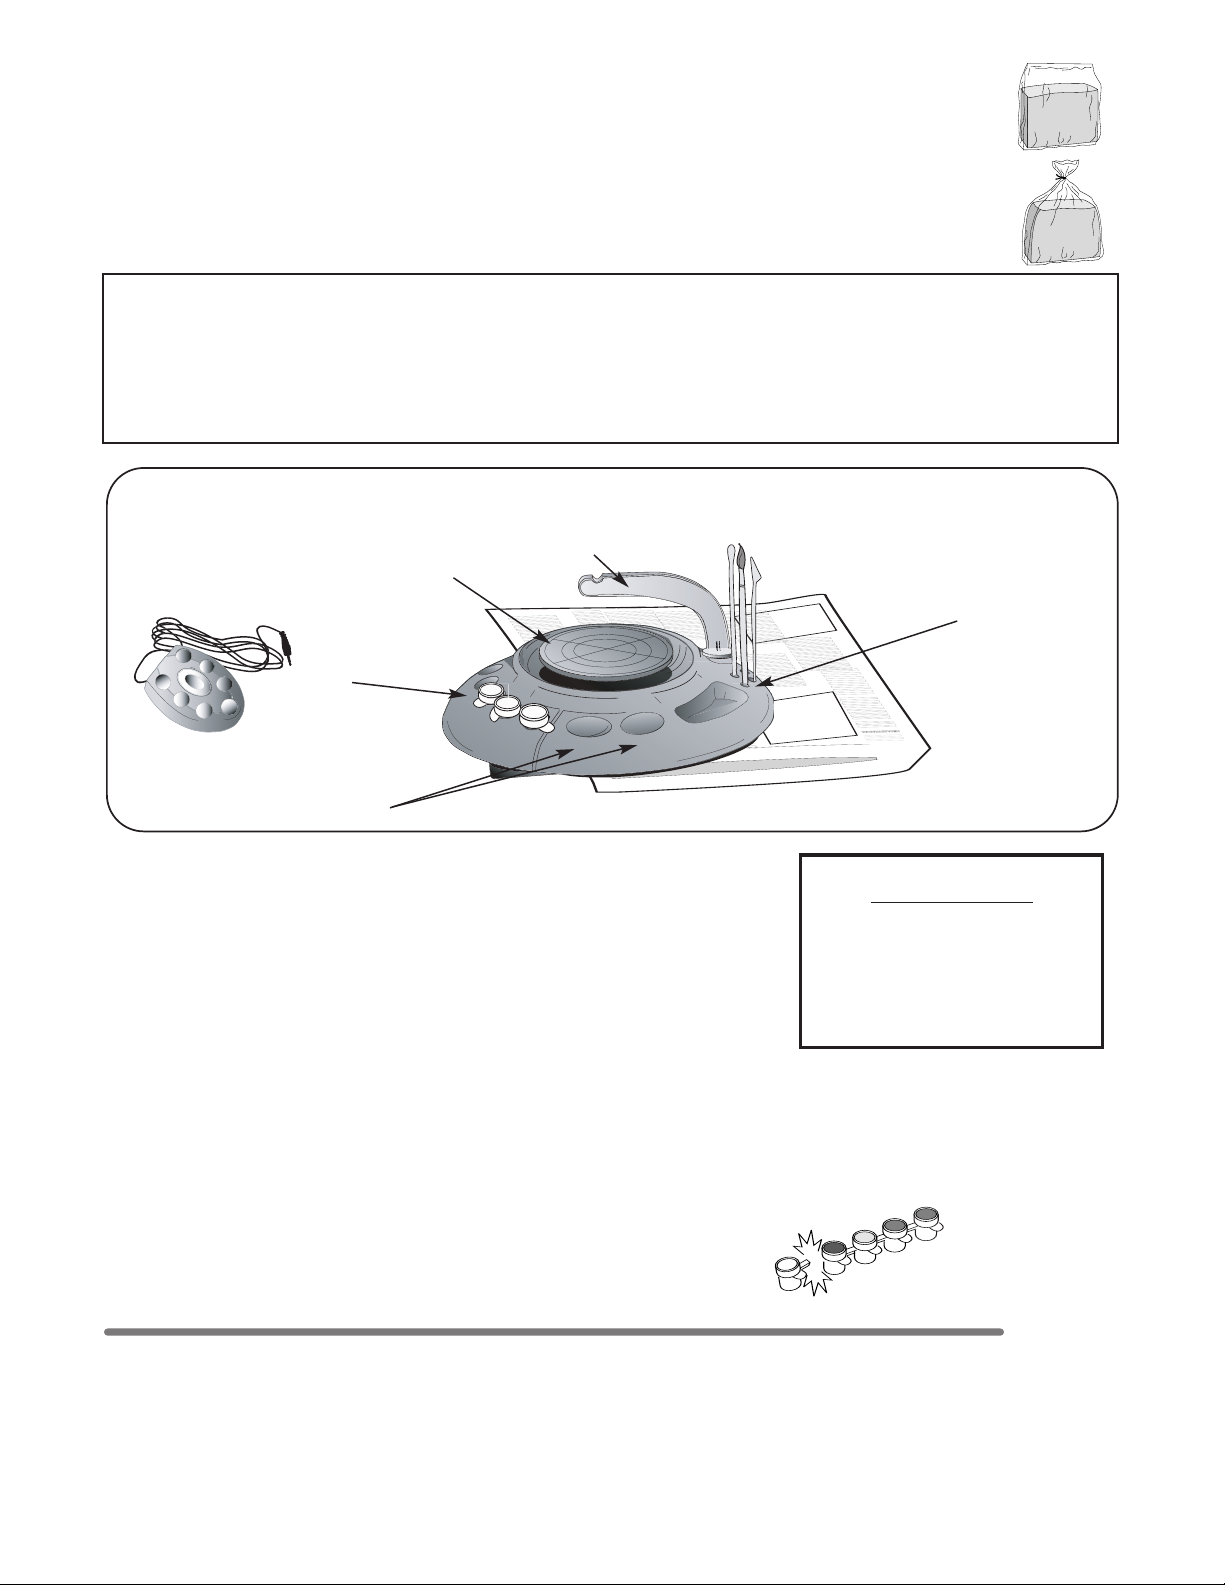
3
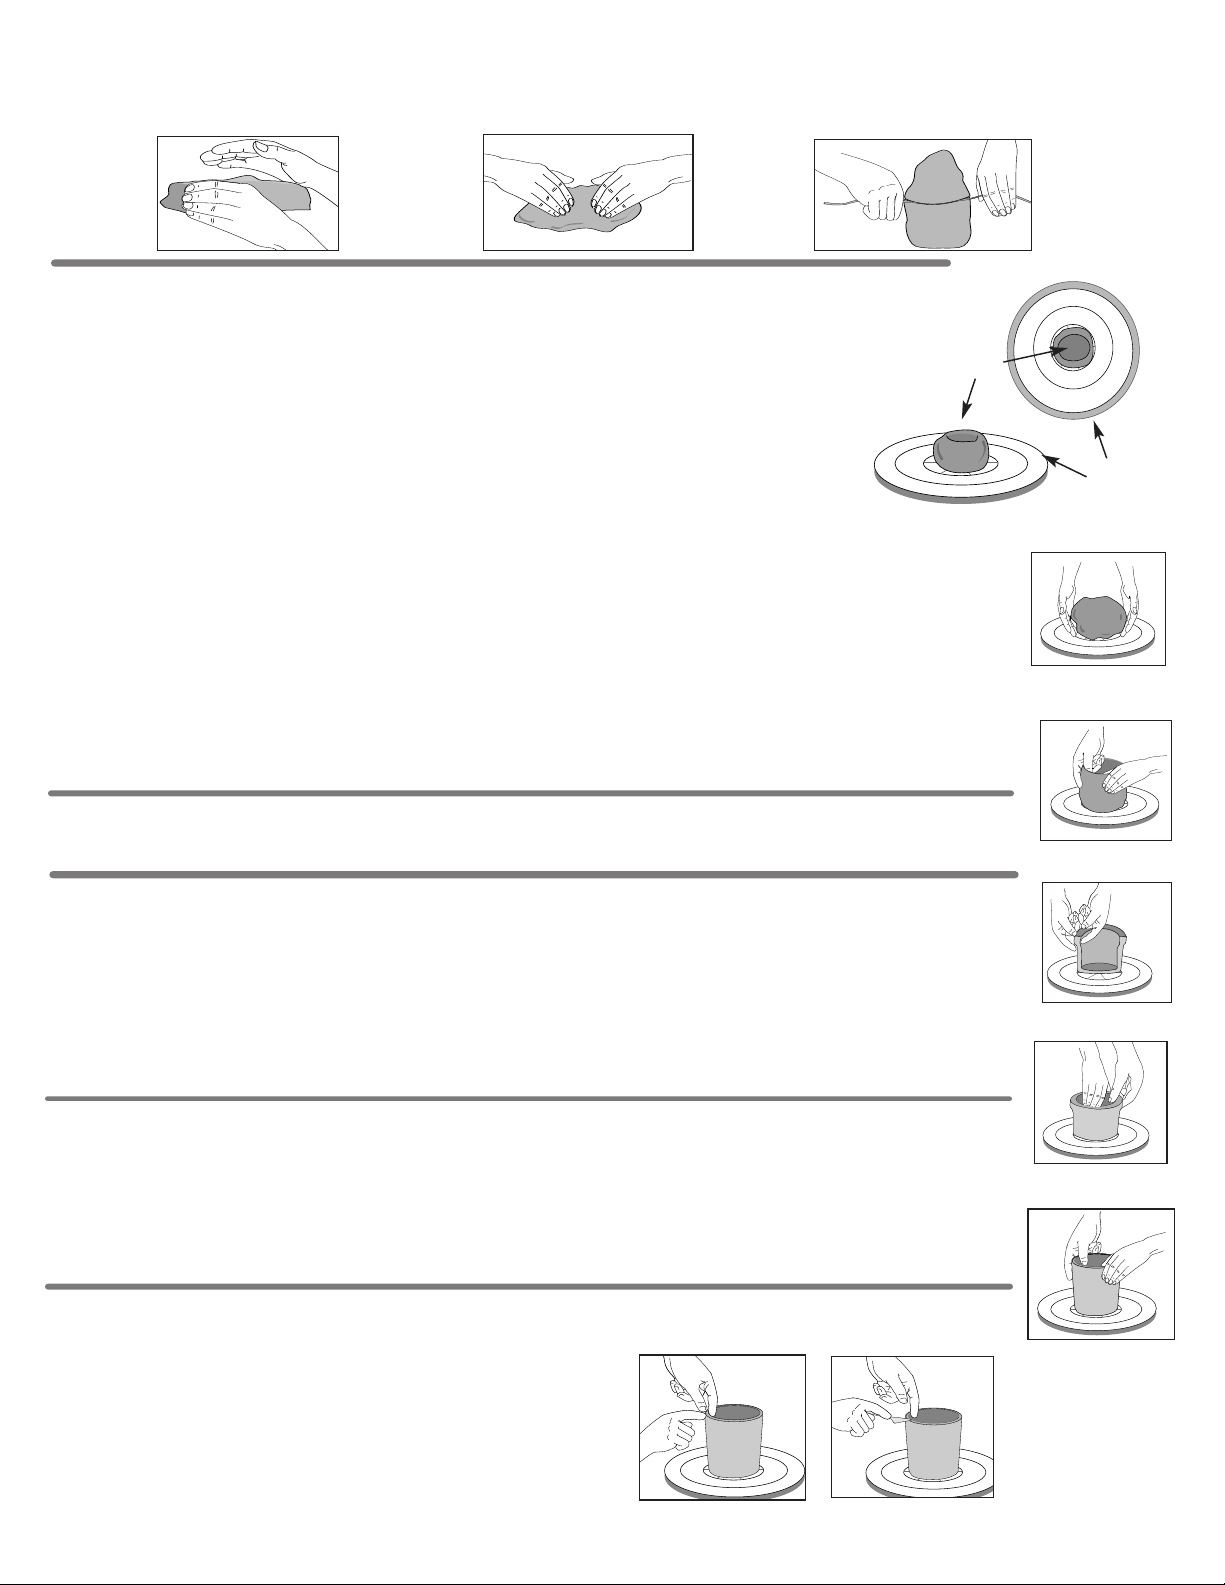
•Pull up the edge of the clay farthest from you until it is standing up. Then pull it toward you and push it down again with the heels of your hands. The purpose of this is to make the clay uniform in texture
and remove air bubbles (see Figures 1 and 2).
Repeat above steps several times. To see if the clay needs more wedging, cut the piece open with your Cutting String by pulling the string through the clay (see Figure 3). If there are any air pockets or lumps, you
need to continue wedging.
When you have finished wedging the clay, it is customary to roll it into a ball. It is easiest to start most projects from this shape.
Figure 2
Figure 1 Figure 3
STARTING THE POT
1. Properly wedge about a half-pound (225 grams) of clay. (Since your set contains about two pounds (900 grams), you will need one quarter of that.) Form it into a ball and press it firmly onto the
pottery wheel – exactly in the center.
2. Centering is the first, most important, and most difficult step in using a pottery wheel. The lump of clay is forced, by the firm and constant pressure of your hands, into a symmetrical mound in
the center of the wheel.
You must understand the word “symmetrical.” It means that if you looked down on a piece of properly centered clay it would look like a perfect circle.
Nothing else will do! And always remember that the key to a good finished project is proper centering.
Some problems in centering are:
1. If you take your hands off the clay too quickly, you will see that it is distorted, uneven and/or off center. Keep in kind that when working on a pottery wheel, all of your
motions must be made smoothly and gradually.
2. If the bottom of the clay is off center on the wheel, your hands will ride it unevenly and throw everything off.
3. If the top of the clay tears off while you are raising it, you are pushing too hard. Also, the clay may be too dry or too wet.
4. Turn on the machine. As you work, keep in mind that if you press too much on the clay, the wheel will stall.
5. Keep the clay, and your hands, wet. The clay should slip by your hands easily. But be careful: if the clay gets too wet your project may lose its shape.
6. Work the clay with the palms of your hands. Lean forward over the center of the wheel so that you are looking down over the clay.
7. Squeeze the clay with your palms by pushing your hands together as if you were clapping (see Figure 4). Push firmly – do not let your hands ride with the bumps in the clay.
8. Keep your arms braced against your body to steady your hands.
9. Press the clay toward the center and up. Then press it down again and repeat. Press with the heel of your hand. You want to keep this going until the cylinder of clay is turning in the center of the wheel
without wobbling.
Remember – “practice makes perfect.” You must learn to center well, if you want to be successful in using your Pottery Wheel.
Clay
Wheel
Figure 4
Figure 6
Figure 7
Figure 5
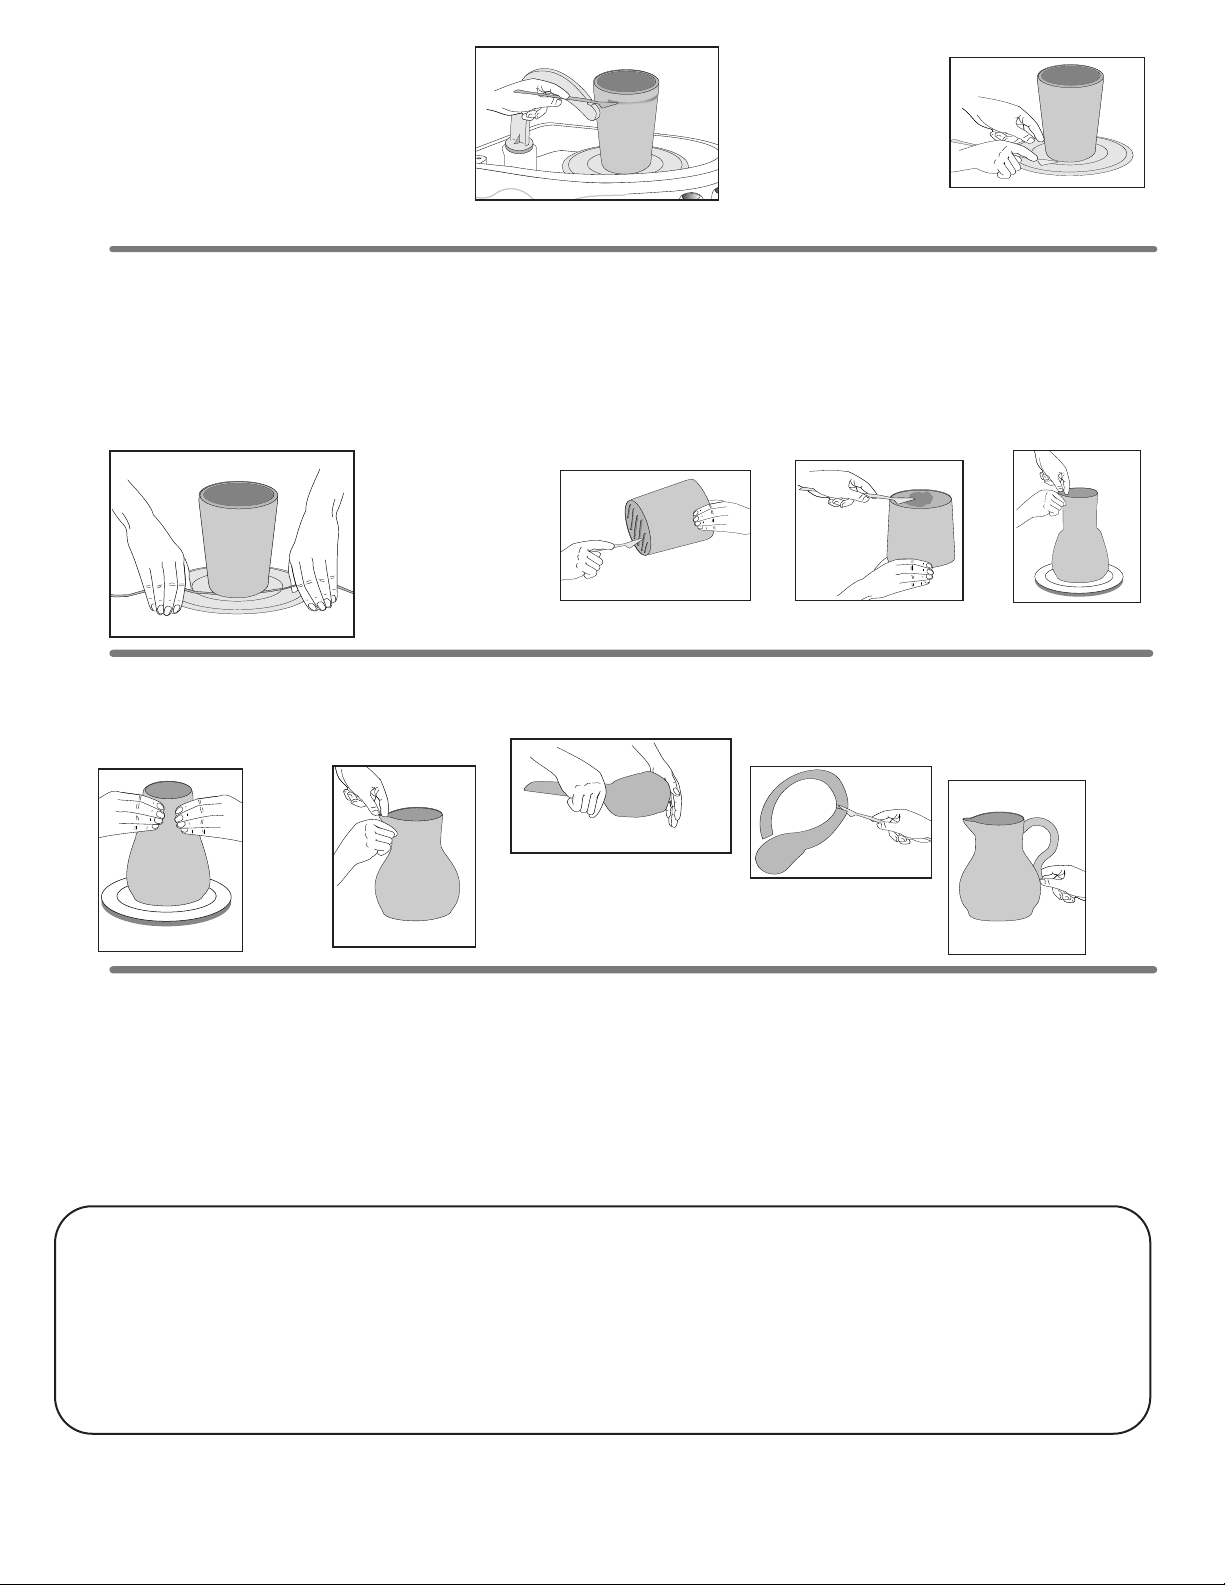
OPENING THE POT
Now you make the cylinder hollow. Press down in the middle of the cylinder. (Keeping it well lubricated with water.) Press evenly so the hole is centered and the wall even (see Figure 5). Leave enough clay at
the bottom so it will be solid. Keep the distance between the thumbs and fingers even. Don’t press too rapidly. Let clay move at its own speed.
PULLING UP THE WALLS
Using the brace fingers, start at the bottom of the cylinder and squeeze gently, keeping the fingers the same distance apart and pull the wall up – don’t try to move too much clay at a time (see Figure 6).
Keep the clay well moistened with water inside and out. Do not use so much that you weaken the walls to the point of slumping.
Don’t take too long getting the wall pulled up for this also will make it collapse.
Don’t work down – just up.
If you get too much water in the pot, soak out some with a sponge or paper towels.
Keep the fingers braced so they stay a constant distance apart.
Important: If the cylinder begins to wobble, center it again with the hands on the outside (see Figure 7). Squeeze in very gently starting at the bottom and sliding to the top. You can use your damp sponge to
smooth the clay while the pot is still spinning.
SHAPING
Before you start forming different shapes, make sure you can do the beginning cylinder well.
The pot can be shaped by pressing out as you pull up. It can be shaped by pressing with the hands on the outside (see Figure 8). Endless variations are possible, but strive to keep the walls even and the pot cen-
tered. Press gently and don’t make quick movements.
VARIATIONS IN SHAPING
Once you have mastered the basic shapes, you can guide your clay into an endless variety of interesting shapes. Don’t force the clay. Guide it while keeping your fingers evenly apart so you are not squeezing the
clay. Even as the pot assumes its new shape, you want the walls even and the pot centered. Practice is needed for shaping as in all other steps.
TRIMMING
While the machine is running, the top can be made even by trimming. Take the sharpest sculpting tool and press it against the outside edge while pressing from the inside with the fingers (see Figure 9). After
going all the way around, lift off the cut-off piece. This may require a little practice.
Brace the hand, or use the tool rest, to ensure that the tool remains at the same height as the pot spins around.
The pot will not trim well if you have gotten it too wet. You can always stop and let the pot dry out a little before continuing. If
the edge is a little rough after trimming, you can touch it up with a wet finger.
Save the clay that comes off in trimming.
The edge can be shaped with the fingers (see Figure 10). The top can be rounded or flattened or turned out and down. Avoid thin
edges.
While working on the edge, be careful that the pot remains symmetrical.
Figure 8
Figure 9
Figure 10