manuals.online logo
Brands
  1. Home
  2. •
  3. Brands
  4. •
  5. NuAire
  6. •
  7. Fan
  8. •
  9. NuAire AXUS SVT Series Instruction Manual

NuAire AXUS SVT Series Instruction Manual

AXUS SVT 300oC for 2hr
High Temperature Impulse Axial Fans
Installation and Maintenance
Introdu tion
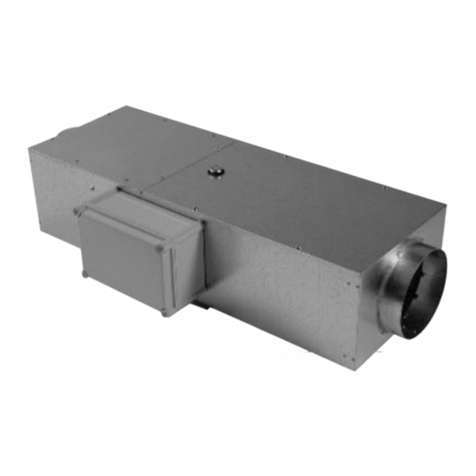
The Nuaire SVT impulse unit omprises a high temperature
axial fan with spe ially designed inlet and outlet attenuators
whi h, along with the fan unit, are en ased in a Galvanised
steel a ousti en losure.
Fan Coding Des riptions
SVT 1 (A-E)
123
1. AXUS Impulse fan
2. Case size
3. Impeller blade angle
The Nuaire SVT unit comprising fan/motor assembly, and
inlet & outlet silencers shall be certified for high temperature
operation at 300 C for 2 hours, the range shall have been type
tested to EN12101-3.
The units shall be either 2 speed or inverter driven providing,
low speed for day to day environmental ventilation and one off
operation for emergency ventilation (S1 duty). They shall also
be suitable for reversible operation.
Fully reversible options (i.e similar duty in both airflow
directions) are available, please contact Nuaire for details.
The unit shall have a unique mounting bracket, which shall
enable the bracket to be positioned as a “first fix” component
with the unit being fitted as a “second fix” component, avoiding
possible mechanical damage.
The Nuaire SVT unit shall have inlet guards for safety purposes
and also to prevent debris being sucked through the fan. It also
has a specially designed airflow deflector to direct the jet
stream from the fan at the required angle sufficient to overcome
the natural buoyancy effect of the smoke.
EN12101-3 compliant, refer to EC certificate of conformity
10086-CPD-467873.
Handling
Always handle the units carefully to avoid damage and
distortion. If mechanical aids are used to lift the unit,
spreaders should be employed and
positioned so as to prevent the
slings, webbing etc. making
contact with the casing.
Installation
Installation must be carried out by competent personnel in
accordance with the appropriate authority and conforming
to all statutory governing regulations.
1) Fixing unit jig and bra kets together
Check that you have 2 off support brackets (SVT-BRKT2)
along with the unit jig. Attach the 2 brackets to the jig as
shown below in figure 2.
Figure 2.
2) Fixing support bra kets to eiling
Using the four 30mm x 12mm slots in the top side of the two
brackets attach the jig and support brackets to the ceiling.
3) Remove the jig
Remove the jig so only the support brackets are in position on
the ceiling. (see figure 3).
4) Fit main SVT unit to bra kets
The SVT unit can now be raised up into position between the
two support brackets on the ceiling and attached when required.
1Leaflet Number 671256 November 2006
Nuaire Limited Western Industrial Estate Caerphilly United Kingdom CF83 1NA
Telephone: 029 2085 8200 Facsimile: 029 2088 7033
Email: [email protected] www.nuaire.co.uk
Support brackets (2 off)
Support brackets
attach to jig
Unit jig
50mm
602mm
616mm ctrs
673mm
Attach SVT unit to
support brackets
positioned
on the ceiling
Figure 3.
Figure 1.
Figure 4.
Installation and Maintenan e AXUS SVT High Temperature Impulse Axial Fans
2
Ele tri al Information
Motors are totally enclosed and protected to IP55 (Dust and
low pressure water jets). Motors comply with BS5000,
EN600034 and IEC34-1. Enclosures are to IP55 with class H
insulation. Motors are tested in accordance with EN12101-3
2002. NB Please note the requirements for maintenance of
the motor. Failure to omply with the re ommendations will
invalidate any warranty laim.
Wiring
Electrical supply wiring connection is to an externally mounted
terminal box on the case exterior. The box is pre-wired to the
motor with heat resisting cable.
Conne tion details
Check that the voltage full load and starting current on the fan
rating label is suitable for your supply.
Two speed motors
Two speed motors are supplied Tap or Pam single winding.
All two speed motors are designed for Dire t On Line starting
on both speeds only unless otherwise spe ified.
Note: Tap wound motors require a three onta tor ontrol.
Individual wiring instructions are included with each unit.
Leaflet Number 671256 November 2006
Dimensions
B
C
A
Airflow
Model A B C Weight
SVT1 2610 320 602mm 94kg
SVT2 2610 400 602mm 110kg
Figure 6.
Start up pro edure
Ensure that the impeller rotation follows the label arrow
indicator on the casing. Should the direction be incorrect on
three phase units, reverse any two of the supply leads. Care
should be taken to set correct rotation as incorrect rotation
may result in damage to the motor. Equipment should be run
for approx. 30 minutes to ensure correct operation. If any fault
occurs, the equipment should be switched off. Do not re-start
until the fault has been re tified.
Maintenan e
General
Nuaire recommends all products maintained in accordance with
the HVCA “Standard Maintenance Specification for Mechanical
Services in Buildings” - Volume II Ventilating and Air
Conditioning. For guidance only due to the different periods
of operation from the time of installation and conditions of
use, no rigid inspection and maintenance periods can be
recommended. We suggest, therefore that the inspection and
if necessary cleaning should be carried out at regular intervals
of 1000 hours of operation or 3 months, whichever is the sooner.
For a routine inspection, check the tightness of all nuts, keys,
grub screws and endbolts etc. Remove any build up of dirt or
dust with a brush.
Motors
n going maintenance - Induction motors, by their very nature
require minimal maintenance. However, a regular regime of
inspection is recommended to ensure minor problems do not
escalate into breakdowns. Typical intervals would be 1000
hours of operation or 3 months, whichever is the sooner.
Che klist
■No visible damage i.e. impeller cracked,fan cowl bent, foot
cracked etc.
■No accumulation of dust or fibres on the frame or around
the fan inlet.
■No significant corrosion of the lifting lugs/eyebolts.
■No excessive vibration.
■No loose fasteners.
■Cables and earths are sound.
■Sealing of the motor and gland plate in good condition.
■Insulation resistance adequate, imperative this is checked
after prolonged shutdown.
Two speed 3 phase TAP/PAM wound motors (D.O.L.
starting both speeds)
Two speed 3 phase TAP/PAM wound motors (D.O.L.
starting both speeds)
A mat hed Nuaire Inverter Speed Control is available.
Please onta t Nuaire.
1U
1V
1W
2U
2V
2W
400V 3 phase
50Hz supply
Link
(if no control
is used)
High speed
Low speed
L1
L2
L3
1U
1V
1W
2U
2V
2W
L1
L2
L3
N TE: If a two speed starter is used it must have 3 contactors.
Individual wiring diagrams are included with each unit.
Figure 6.
Figure 5.
3Leaflet Number 671256 November 2006
Installation and Maintenan e AXUS SVT High Temperature Impulse Axial Fans
Spe ifi Commissioning and
Servi ing Requirements
Motors for Smoke Extra t Fans
Exposure temperature/time: 300oC for 120 minutes.
These motors are used to provide a SAFETY FUNCTI N for
people in the event of fire in public premises :
they are therefore subject to strict constraints concerning
their operating and maintenance.
Operating onstraints
i. Check on the nameplate that the selected motor corresponds
to the maximum exposure temperature and duration.
ii. Non ventilated motors MUST be placed in the airflow from
the driven fan. Ventilated motors can be placed outside the
flow.
iii. AFTER THE MOTOR HAS BEEN SUBJECTED TO ONE
EMERGENCY DUTY OPERATION, IT MUST BE REPLACED.
iv. With variable speed control. Ensure that the maximum speed
never exceeds the speed of the motor supplied by the mains
and that the delivered power corresponds to the previous
definitions.
These qualifi ations ensure the qualifi ation of the driven
fan by the manufa turer.
Repla ement of parts
When ordering spares it is important to state the unit serial
number to ensure that the correct spares will be supplied.
Notes - Fixing bolts, nuts, studs, screws, spacers or washers
are not included with these parts and if required, should be
clearly specified on the order in addition to the part description
number.
Warranty
The three year warranty starts from the day of delivery and
includes parts and labour for the first year. The labour element
is subject to full, free and safe access to the equipment as
recommended by the CDM regulations.
The remaining two years covers replacement parts only.
Note: Installation and maintenance of the equipment must be
undertaken as directed in the instructions provided with the
unit.
Enquiries
Please contact Nuaire Limited for information on any aspects
of the motor performance that may need clarification. Contact
must be made prior to any remedial action being taken under
the warranty.
Please quote the motor serial number in all such cases with
detailed description of the problem.
Servi e Enquiries
ur service department will be happy to provide any assistance
or further information required. If you have any comments or
queries on any of our products or services please write to the
Product Information Manager at the main address on page one
of this document.
Customer Servi es Department
Tel: 02920 858 585
Fax: 02920 858 586
Leaflet Number 671256 November 2006
We de lare that the ma hinery named below is intended to be
assembled with other omponents to onstitute a system of
ma hinery. The ma hinery shall not be put into servi e until the
system has been de lared to be in onformity with the provisions of the
EC Coun il Low Voltage Dire tive.
Designation of ma hinery: Axus Axial SVT Impulse Fan
Ma hinery Types: SVT
Relevant EC Coun il Dire tives: 98/37/EC (Machinery Directive)
Applied Harmonised Standards: EN292-1, EN292-2,
BS EN IS 12100-2003
Applied National Standards: BS848 Parts ne, Two and Five
Signature of manufa ture representatives:
Name: Position: Date:
1) C. Biggs Technical Director 11. 10. 06
2) W. Glover Manufacturing Director 11. 10. 06
DECLARATION OF INCORPORATION AND INFORMATION FOR SAFE INSTALLATION,
OPERATION AND MAINTENANCE
DECLARATION OF CONFORMITY
We de lare that the ma hine named below onforms to the
requirements of EC Coun il Dire tives relating to Ele tromagneti
Compatibility and Safety of Ele tri al Equipment.
Designation of ma hinery: Axus Axial SVT Impulse Fan
Ma hinery Types: SVT
Relevant EC Coun il Dire tives: 89/336/EEC, 92/31/EEC (EMC)
73/23/EEC, 93/68/EEC (Low Voltage
Directive)
Applied Harmonised Standards: EN55014-1, EN55014-2,
EN60204-1, EN60335-2-80
Basis of Self Attestation: Quality Assurance to BS EN IS 9001
BSI Registered
Certificate No. FM 149
Signature of manufa ture representatives:
Name: Position: Date:
1) C. Biggs Technical Director 11. 10. 06
2) W. Glover Manufacturing Director 11. 10. 06
To omply with EC Coun il Dire tives 73/23/EEC Low Voltage Dire tive
To be read in onjun tion with the relevant Produ t Do umentation (see 2.1)
1.0 GENERAL
1.1 The equipment referred to in this De laration of In orporation is supplied by
Nuaire to be assembled into a ventilation system which may or may not include
additional components.
The entire system must be considered for safety purposes and it is the responsibility
of the installer to ensure that all of the equipment is installed in compliance with the
manufacturers recommendations and with due regard to current legislation and
codes of practice.
2.0 INFORMATION SUPPLIED WITH THE EQUIPMENT
2.1 Each item of equipment is supplied with a set of documentation which provides the
information required for the safe installation and maintenance of the equipment.
This may be in the form of a Data sheet and/or Installation and Maintenance
instruction.
2.2 Each unit has a rating plate attached to its outer casing. The rating plate provides
essential data relating to the equipment such as serial number, unit code and
electrical data. Any further data that may be required will be found in the
documentation. If any item is unclear or more information is required, contact
Nuaire.
2.3 Where warning labels or notices are attached to the unit the instructions given must
be adhered to.
3.0 TRANSPORTATION, HANDLING AND STORAGE
3.1 Care must be taken at all times to prevent damage to the equipment. Note that
shock to the unit may result in the balance of the impeller being affected.
3.2 When handling the equipment, care should be taken with corners and edges and that
the weight distribution within the unit is considered. Lifting gear such as slings or
ropes must be arranged so as not to bear on the casing.
3.3 Equipment stored on site prior to installation should be protected from the weather
and steps taken to prevent ingress of contaminants.
4.0 OPERATIONAL LIMITS
4.1 It is important that the specified operational limits for the equipment are adhered to
e.g. operational air temperature, air borne contaminants and unit orientation.
4.2 Where installation accessories are supplied with the specified equipment eg. wall
mounting brackets. They are to be used to support the equipment only.
ther system components must have separate provision for support.
4.3 Flanges and connection spigots are provided for the purpose of joining to ductwork
systems. They must not be used to support the ductwork.
4.4 In the event of RF interference the fan may increase in speed or make high pitched
noises. This is normal and will have no adverse effect on the fan. The speed and
noise will return to normal once the interference has subsided.
5.0 INSTALLATION REQUIREMENTS
In addition to the particular requirements given for the individual product, the
following general requirements should be noted.
5.1 Where access to any part of equipment which moves, or can become ele tri ally live
are not prevented by the equipment panels or by fixed installation detail
(eg ducting), then guarding to the appropriate standard must be fitted.
5.2 The electrical installation of the equipment must comply with the requirements of the
relevant local electrical safety regulations.
6.0 COMMISSIONING REQUIREMENTS
6.1 General pre-commissioning checks relevant to safe operation consist of the following:
Ensure that no foreign bodies are present within the fan or casing.
Check electrical safety. e.g. Insulation and earthing.
Check guarding of system.
Check operation of Isolators/Controls.
Check fastenings for security.
6.2 ther commissioning requirements are given in the relevant product documentation.
7.0 OPERATIONAL REQUIREMENTS
7.1 Equipment access panels must be in place at all times during operation of the unit,
and must be secured with the original fastenings.
7.2 If failure of the equipment occurs or is suspected then it should be taken out of
service until a competent person can effect repair or examination. (Note that certain
ranges of equipment are designed to detect and compensate for fan failure).
8.0 MAINTENANCE REQUIREMENTS
8.1 Specific maintenance requirements are given in the relevant product documentation.
8.2 It is important that the correct tools are used for the various tasks required.
8.3 If the access panels are to be removed for any reason the electrical supply to the
unit must be isolated.
8.4 A minium period of two minutes should be allowed after electrical disconnection
before access panels are removed. This will allow the impeller to come to rest.
NB: Care should still be taken however sin e airflow generated at some other
point in the system an ause the impeller to “windmill” even when power is not
present.
8.5 Care should be taken when removing and storing access panels in windy conditions.
INFORMATION FOR SAFE INSTALLATION, OPERATION AND MAINTENANCE
OF NUAIRE VENTILATION EQUIPMENT
Technical or commercial considerations may, from time to time, make it necessary to alter the design, performance and
dimensions of equipment and the right is reserved to make such changes without prior notice.

This manual suits for next models

3

Other NuAire Fan manuals

NuAire NE25BTX User manual

NuAire

NuAire NE25BTX User manual

NuAire ILM Series User manual

NuAire

NuAire ILM Series User manual

NuAire SVTC8 User manual

NuAire

NuAire SVTC8 User manual

NuAire MRXBOXAB-ECO3B-1ZSW User manual

NuAire

NuAire MRXBOXAB-ECO3B-1ZSW User manual

NuAire OPUS 40 User manual

NuAire

NuAire OPUS 40 User manual

NuAire AXUS SVT2 Instruction Manual

NuAire

NuAire AXUS SVT2 Instruction Manual

NuAire DRI-ECO-HEAT-HCS User manual

NuAire

NuAire DRI-ECO-HEAT-HCS User manual

NuAire MRXBOX95ABWM2QA12338 Instruction Manual

NuAire

NuAire MRXBOX95ABWM2QA12338 Instruction Manual

NuAire FAITH Series User manual

NuAire

NuAire FAITH Series User manual

NuAire Ecosmart Instruction Manual

NuAire

NuAire Ecosmart Instruction Manual

NuAire MRXBOXAB-ECO3B User manual

NuAire

NuAire MRXBOXAB-ECO3B User manual

NuAire MRXBOX-FF4 Instruction Manual

NuAire

NuAire MRXBOX-FF4 Instruction Manual

NuAire IAQ-PURGE Instruction Manual

NuAire

NuAire IAQ-PURGE Instruction Manual

NuAire AVT1-R User manual

NuAire

NuAire AVT1-R User manual

NuAire TRA Series User manual

NuAire

NuAire TRA Series User manual

NuAire AX User manual

NuAire

NuAire AX User manual

NuAire R Series Instruction Manual

NuAire

NuAire R Series Instruction Manual

NuAire XB-W8-3L User manual

NuAire

NuAire XB-W8-3L User manual

NuAire MRXBOX95B-WHI Instruction Manual

NuAire

NuAire MRXBOX95B-WHI Instruction Manual

NuAire AX Series User manual

NuAire

NuAire AX Series User manual

NuAire Genie/tops M in-line Instruction Manual

NuAire

NuAire Genie/tops M in-line Instruction Manual

NuAire MEV Ecosmart Instruction Manual

NuAire

NuAire MEV Ecosmart Instruction Manual

NuAire AXUS-SC Series Instruction Manual

NuAire

NuAire AXUS-SC Series Instruction Manual

NuAire AVS Series Instruction Manual

NuAire

NuAire AVS Series Instruction Manual

Popular Fan manuals by other brands

HAEGER SF-16W.006A User instructions

HAEGER

HAEGER SF-16W.006A User instructions

Fanimation The Caruso FP7000 Series Specification sheet

Fanimation

Fanimation The Caruso FP7000 Series Specification sheet

teko BF-20B operating instructions

teko

teko BF-20B operating instructions

Greenheck CSP-A700 Installation, operation and maintenance manual

Greenheck

Greenheck CSP-A700 Installation, operation and maintenance manual

Samsung SER 450 installation manual

Samsung

Samsung SER 450 installation manual

Meltem M-WRG-K user manual

Meltem

Meltem M-WRG-K user manual

Fanaway LED EVO1 installation instructions

Fanaway

Fanaway LED EVO1 installation instructions

Gallet Blizzard VEN31 instruction manual

Gallet

Gallet Blizzard VEN31 instruction manual

ProKlima FN-110142.1 instruction manual

ProKlima

ProKlima FN-110142.1 instruction manual

Bionaire BT91R Instruction leaflet

Bionaire

Bionaire BT91R Instruction leaflet

Parrot Uncle F6273 Installation & operating instructions

Parrot Uncle

Parrot Uncle F6273 Installation & operating instructions

LTG FVS Eco2School Translation of Original Installation/Use/Maintenance Instructions

LTG

LTG FVS Eco2School Translation of Original Installation/Use/Maintenance Instructions

Vectaire MBOX 125/2DC Installation, Operating and Maintenance Instruction

Vectaire

Vectaire MBOX 125/2DC Installation, Operating and Maintenance Instruction

Monte Carlo Fan Company 5RH52 Series owner's manual

Monte Carlo Fan Company

Monte Carlo Fan Company 5RH52 Series owner's manual

Hubbell Progress Lighting P250018 installation manual

Hubbell

Hubbell Progress Lighting P250018 installation manual

Black & Decker BXEFF60E Original instructions

Black & Decker

Black & Decker BXEFF60E Original instructions

Craftmade DE52CH4 installation guide

Craftmade

Craftmade DE52CH4 installation guide

Williams-Sonoma Kestrel A4725 Assembly instructions

Williams-Sonoma

Williams-Sonoma Kestrel A4725 Assembly instructions

manuals.online logo
manuals.online logoBrands
  • About & Mission
  • Contact us
  • Privacy Policy
  • Terms and Conditions

Copyright 2025 Manuals.Online. All Rights Reserved.