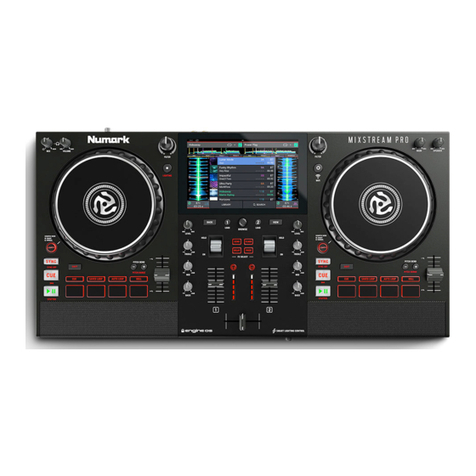
Numark MIXSTREAM PRO User manual

2
Quickstart Guide (English)
Introduction
Thank you for purchasing the Mixstream Pro. At Numark, we know how serious music is to
you. That’s why we design our equipment with only one thing in mind—to make your
performance the best it can be. We’re honored and excited to play a part in your musical &
creative DJ journey!
Box Contents
Mixstream Pro
Power Supply
USB Cable
Engine DJ Software Download Card
Display Cleaning Cloth
Quickstart Guide
Safety & Warranty Manual
Important: Visit numark.com and find the webpage for Mixstream Pro to download the
complete User Guide.
Support
For the latest information about this product (documentation, technical specifications, system
requirements, compatibility information, etc.) and product registration, visit numark.com.
For additional product support, visit numark.com/support.
Product Registration
Your product may include exclusive software and/or promotions which can only be accessed
by registering your new product on the Numark website.
To check eligibility and access the available content, please register your product by following
the instructions below.
1. Visit numark.com.
2. Click “My Account” to access your existing account or to create a new account.
3. Once signed in, click “Register A Product”.
4. Complete the form and click “Submit Registration”.
5. Upon successful registration, any applicable software downloads, exclusive content, and
promotional offers will be shown in your account.

3
Setup
Items not listed under the Introduction >Box Contents are sold separately.
Important: Occasionally, we may update Mixstream Pro’s firmware to add exciting new
features and improvements. Visit numark.com to check for available firmware and
documentation updates, especially after you update your software (firmware updates may
address new software features). You can also check for updates directly from your device with
a valid internet connection by going to the Control Center > Settings > About/Update menu.
1. Visit numark.com and log into your account. (Create an account if this is your first
Numark product.)
2. In your account, download and install the latest firmware version of Engine DJ. Double-
click the .exe (Windows) or .dmg (macOS) installer file you downloaded, and then follow
the on-screen instructions to install Engine DJ.
3. Transfer your music to a media device to be used with Mixstream Pro.
4. Connect input sources (microphones, CD players, etc.) to Mixstream Pro.
5. Connect output devices (headphones, power amplifiers, loudspeakers, etc.) to Mixstream Pro.
6. Plug all devices into power sources, and turn on devices in proper order:
•When starting a session, turn on (1) input sources, (2) Mixstream Pro, (3) output
devices.
•When ending a session, turn off (1) output devices, (2) Mixstream Pro, (3) input sources.
7. To use Engine OS (standalone playback):Insert a USB flash drive or SD card (with an
Engine-configured music library) to Mixstream Pro’s USB port or SD Card Slot. You can
also start with the demo tracks preloaded on Mixstream Pro, or use any of the partnered
streaming or cloud services.
Headphones Microphone
Powered
Loudspeakers
Power
USB Hard Drive

4
Features
Top Panel
2
1
4
56
7
3
10 10
8
1. Touchscreen: This full-color, multi-touch display shows information relevant to
Mixstream Pro's current operation. Touch the touchscreen (and use the hardware
controls) to control the Mixstream Pro interface.
2. Browse Knob: Turn this knob to navigate through lists. Press the knob to move forward
in the touchscreen or select a song to load on either deck.
Press and hold Shift and press this knob to load the selected track to the Prepare list.
3. Load 1: Press this button to load the selected track to Deck 1. Quickly double-press this
button to instant double the track currently playing on Deck 2 to Deck 1.
4. Load 2: Press this button to load the selected track to Deck 2. Quickly double-press this
button to instant double the track currently playing on Deck 1 to Deck 2.
5. Back: Press this button to move back in the touchscreen.
6. View: Press this button to cycle between the Library and Performance views. Double-press
this button to open the Engine Lighting menu, which allows you to control connected
lighting devices such as DMX fixtures and Smart Lights using SoundSwitch to seamlessly
sync your music and lights. See soundswitch.com for more information.
Press and hold Shift and press the View button to switch between horizontal and vertical
waveform views in Performance view.
7. Source / Lighting: Press this button to open the Source menu.
Press and hold Shift and press this button to open the Engine Lighting menu.
8. Control Center: Press this button to open the Control Center menu, where you can quickly
adjust commonly used settings and navigate to other pages, such as the Wi-Fi connection
menu. See the User Guide for more information.
9. Shift: Press and hold this button to access secondary functions of other controls.
10. Channel Level: Turn this knob to adjust the level of the pre-fader, pre-EQ audio signal
for the channel.
11. Channel EQ: Turn these knobs to boost or cut the high, mid-range, and low frequencies
for the channel.

5
12. Filter: Turn this knob to apply a filter to the channel. Starting from the center (12:00)
position, turn it counter-clockwise to apply a low-pass filter, or turn it clockwise to apply
a high-pass filter.
13. FX Select: Press these buttons to enable or disable the selected effect: Echo, Delay,
Flanger or Phaser.
14. Effects Toggle: Move this toggle switch away from you to activate the selected effect—
the toggle will latch to that position. Pull the toggle back to the center position to
deactivate the effects.
Pull and hold this toggle toward you to activate the selected effect momentarily, and
release the toggle to deactivate the effect—the toggle will return to the center position.
15. Channel Fader: Use this fader to adjust the channel’s volume level.
16. Crossfader: Use the crossfader to mix between Deck 1 and Deck 2.
17. Main Level Meters: These LEDs display the audio signal level of the main mix (sent out
of the Main Outputs).
18. Headphone Preview: Press this button to preview the channel in the headphones. Use
the Headphone Mix knob to adjust the mix between the channel’s pre-fader signal and
the headphones’ cue channel.
19. Headphone Mix: Turn this knob to adjust the blend of the pre-fader and master channels
together in the headphones.
20. Headphone Volume: Adjusts the volume for headphone cueing.
21. Platter: This capacitive, touch-sensitive platter controls the audio playhead when the
wheel is touched and moved.
22. Smart Scratch: When this button is enabled, Smart Scratch mode will be active. In this
mode, the track's timeline continues (the lower half of the waveform in the display will
continue moving forward) when you use the platter to "scratch" the track. When you
release the platter, the track will resume normal playback from where it would have been
if you had never moved the platter.
When Smart Scratch is enabled, press and hold Shift and press this button to enable jog
mode. In this mode, touch the platter and move it to temporarily adjust the track’s speed.
Press this button again to disable Smart Scratch and enable vinyl mode for the platter.
You can use the platter to “scratch” the track as you would with a vinyl record.
Note: Smart Scratch is enabled by default and can be adjusted in the Settings menu.
Press and hold Smart Scratch to enter/exit Grid Edit Mode.
23. Sync /Sync Off: Press this button to activate sync.
Press and hold Shift and press this button to deactivate Sync. You can also set Sync to
deactivate without using Shift by changing the Sync Button Action setting in the User
Profile menu.
24. Cue / Previous: When the Deck is paused, you can set a Temporary Cue Point by
moving the platter to place the playhead at the desired location and then pressing the
Cue Button.
During playback, you can press the Cue Button to return the track to this Temporary Cue
Point. (If you did not set a Temporary Cue Point, then it will return to the beginning of the
track.)
If the Deck is paused, you can press and hold the Cue Button to play the track from the
Temporary Cue Point. Releasing the Cue Button will return the track to the Temporary
Cue Point and pause it. To continue playback without returning to the Temporary Cue
Point, press and hold the Cue Button, then press and hold the Play Button, and then
release both buttons.
Press and hold Shift and then press this button to return to the beginning of the track.
6
25. Play/Pause: This button pauses or resumes playback.
Press and hold Shift and then press this button to “stutter-play” the track from the initial
cue point.
26. Pitch Fader: Move this fader to adjust the speed (pitch) of the track.
Press and hold Shift and then press one of the Pitch Bend buttons to adjust the total
range.
27. Pitch Bend –/+: Press and hold one of these buttons to momentarily reduce or increase
(respectively) the speed of the track.
Press and hold Shift and then press one of these buttons to set the range of the pitch
fader.
28. Performance Pads: These pads have different functions on each deck depending on the
current pad mode. See the full User Guide for more information.
29. Cue: Press this button to enter Cue mode. Press the button again to enter a second bank
of cues. To assign a cue to a pad, press a pad at the desired location in the track. To
clear a cue from a pad, press Shift and the desired pad.
30. Saved Loop: Press this button to enter Saved Loop mode. Press the button again to
enter a second bank of saved loops. To assign a loop to a pad and activate it, press a
pad to create a Loop In point at the current location, and then press it again to create the
Loop Out point at another location. To deactivate or reactivate a loop, press the
corresponding pad. To delete a loop, press Shift and the desired pad.
31. Auto Loop: Press this button to enter Auto Loop mode. Press the button again to enter a
second bank of auto loop lengths. To activate an auto loop, press a pad. To deactivate
an auto loop, press the pad again.
32. Roll: Press this button to enter Roll Mode. Press the button again to enter a second bank
of roll lengths. To trigger a roll, press a pad.
33. Speakers: These speakers will play the same current audio as the Main Outputs. Use the
Speaker Level knob to adjust the volume of the speakers.
34. Main Level: Turn this knob to adjust the volume level of the Main Outputs.
35. Speaker Level: Turn this knob to adjust the volume level of the speakers.
Front Panel
2
13
1. Headphones (1/4”, 1/8”)(6.35 mm, 3.5 mm):Connect your 1/4” or 1/8” (6.35 mm or 3.5
mm) headphones to this output for cueing and mix monitoring. The headphone volume is
controlled using the Cue Gain knob.
2. Mic Input (1/4” /6.35 mm):Use a standard 1/4” (6.35 mm) cable (not included) to
connect a standard dynamic microphone to this input.
3. Mic Level: Turn this knob to adjust the volume level of the microphone input. You can
adjust the microphone attenuation and routing in the Settings menu.

7
Rear Panel
21 45
6
73 8
9
1. Main Outputs (XLR, balanced):Use standard XLR cables to connect these outputs to
loudspeakers or an amplifier system. Use the Main knob on the top panel to control the
volume level.
2. Main Outputs (RCA, unbalanced):Use standard RCA cables to connect these outputs
to loudspeakers or an amplifier system. Use the Main knob on the top panel to control
the volume level.
3. SD Card Slot: Insert a standard SD card to this slot. You can use the touchscreen to
select and load tracks from your SD card.
4. USB-A Ports: Connect a standard USB drives to these USB ports. When you select a
USB drive as a source, you can use the touchscreen to select and load tracks from your
USB drive. You can also connect a keyboard to these ports to easily search through your
library.
Note: Although Mixstream Pro can play tracks that have not been analyzed yet, pre-
analyzing them allows its features to work most effectively. We recommend using the
Engine DJ software to configure your music library on your SD card or USB flash drive
before connecting to Mixstream Pro. See the full User Guide for more information.
5. PC USB-B Port: Use a standard USB cable (included) to connect this USB port to an
available USB port on your computer.
6. Power Adapter Restraint: Secure the power adapter cable to this restraint to prevent it
from accidentally unplugging.
7. Power Input: Use the included power adapter to power the unit.
8. Power Button: Press this button to power Mixstream Pro on. Power on Mixstream Pro
only after you have connected all of your input devices and before you power on your
amplifiers and loudspeakers.
To power off Mixstream Pro, press this button and follow the prompts on the
touchscreen. Power off your amplifiers and loudspeakers before powering off Mixstream
Pro.
9. Vent: Make sure this vent is unobstructed while using Mixstream Pro.

8
Mix and Beat-Match Using Sync
Below is an example of how to mix tracks using the Sync function on Mixstream Pro:
1. Insert a USB drive or SD card with tracks into the
respective port on the rear panel. You can also start
with the demo tracks preloaded on Mixstream Pro.
2. Start with the Level and EQ knobs on Mixstream
Pro at the 12 o’clock position. You can adjust these
after the tracks are loaded.
3. Press the Source button to view available sources including
connected media devices and streaming services. Tap to select your
desired source.
If you would like to use a partnered streaming or cloud service:
i. First make sure you are connected to Wi-Fi. Press the Control Center button to open the
Control Center, and then tap Wi-Fi to open the network setup menu. Find your local
network and tap to connect. If there is a password, you will be prompted to enter it.
ii. Next, open the Control Center again and tap Source to open the source menu. Tap to
select the desired streaming or cloud service at the bottom of the screen. You will be
prompted to enter login credentials or use a web browser or mobile device to activate
Mixstream Pro on your account.
4. Press the View button to open Library view to browse the contents of
your device or connected streaming service library. In Library View,
you can:
Swipe a list up or down to browse through it (e.g., your list of playlists, or your list of
tracks).
Tap and drag the scroll bar to quickly browse through tracks.
Tap an icon or item in a list to select it (e.g., the icons for Playlists, Prepare List, History,
Files, or Search on the left side of the Library).
Tap and hold your finger on a track to show its information window. Tap the information
window anywhere to close it.
Tap the track art to preview the track. Tap again to stop the preview. While previewing, tap
along the track entry to scrub through the track.
Tap the Search field and use the keyboard that appears in the display to search through
your tracks by keyword.
5. Turn the Browse knob to scroll through the selected music library.
6. Load tracks with similar BPM onto Decks 1 and 2 by pressing the
Load 1 and Load 2 buttons.
7. Move the crossfader on Mixstream Pro all the way to the left to send
the audio from Deck 1 to the main outputs and speakers.

9
8. Play the track that is loaded on Deck 1.
9. Raise the Channel Fader for Deck 1 so your audience can hear the
track.
10. Now that you have one track playing, you can preview the next track
and get ready to mix it. First, press the Sync button on Deck 1 to
make it the primary BPM source.
11. Press the Headphone Preview button on Deck 2.
12. Play the track that is loaded on Deck 2 so you can preview it in your
headphones.
13. Adjust the Headphone Volume knob to turn up the volume in your
headphones, and adjust the Headphone Mix knob so you can hear
both tracks playing.
14. Press Sync on Deck 2 to match its BPM with Deck 1.
15. While the track is playing, press the Cue button to return to the
beginning of the track.
16. Bring up the Channel Fader for Deck 2 so your audience will be able
to hear the track.
17. When you are ready to mix into the new track, play the track that is
loaded on Deck 2.
18. Move the crossfader on Mixstream Pro toward the right to crossfade
from Deck 1 to Deck 2.
You can now repeat this process to keep mixing new tracks like a
pro!

10
Guía de inicio rapido (Español)
Introducción
Gracias por comprar el Mixstream Pro. En Numark, sabemos que usted se toma la música en
serio. Por eso es que diseñamos nuestros equipos con una sola cosa en mente—hacer que
pueda tocar su mejor interpretación. ¡Nos sentimos muy honrados y entusiasmados de
participar en su viaje musical y creativo como DJ!
Contenido de la caja
Mixstream Pro
Adaptador de alimentación
Cable USB
Tarjeta de descarga de Engine DJ software
Paño de limpieza de la pantalla
Guía de inicio rapido
Manual sobre la seguridad y garantía
Importante: Descargue la guía del usuario completa de Mixstream Pro de numark.com.
Soporte
Para obtener la información más reciente acerca de este producto (documentación,
especificaciones técnicas, requisitos de sistema, información de compatibilidad, etc.) y
registrarlo, visite numark.com.
Para obtener soporte adicional del producto, visite numark.com/support.
Registro del producto
Su producto puede incluir software y/o promociones exclusivas a las que sólo se puede
acceder registrando su producto nuevo en el sitio web de Numark.
Para verificar su elegibilidad y acceso al contenido disponible, sírvase registrar su producto
siguiendo las instrucciones a continuación:
1. Visite numark.com.
2. Haga clic en "My Account" (Mi cuenta) para acceder a su cuenta existente o cree una
nueva.
3. Una vez que haya iniciado sesión, haga clic en "Register A Product"(Registrar un
producto).
4. Complete el formulario y haga clic en "Submit Registration (Enviar registro).
5. Una vez registrado exitosamente, toda descarga de software, contenido exclusivo y
ofertas promocionales aplicables se mostrarán en su cuenta.

11
Instalación
Los elementos que no se enumeran en Introducción >Contenido de la caja se venden por separado.
Importante: Ocasionalmente, es posible que actualicemos el firmware del Mixstream Pro para
añadir excitantes mejoras y características. Visite numark.com para encontrar las actualizaciones
de firmware y documentación disponibles, especialmente luego de actualizar su software (las
actualizaciones de firmware pueden contemplar las nuevas características del software). También
puede comprobar si hay actualizaciones directamente desde su dispositivo con conexión a internet
accediendo al menú Control Center > Settings > About/Update.
1. Visite numark.com e inicie sesión con su cuenta. (Cree una cuenta si este es su primer
producto Numark).
2. En su cuenta, descargue e instale la última firmware versión de Engine DJ. En su cuenta,
descargue e instale la última versión de Engine DJ. Haga doble clic en el archivo instalador
.exe (Windows®) o .dmg (macOS®) descargado y luego siga las instrucciones en pantalla para
instalar Engine DJ.
3. Transfiera su música a un dispositivo de medios que se usará con el Mixstream Pro.
4. Conecte los dispositivos de salida (auriculares, amplificadores de potencia, altavoces, etc.) al
Mixstream Pro.
5. Enchufe todos los dispositivos a la fuente de alimentación y enciéndalos en el orden correcto:
•Al iniciar la sesión, encienda (1) las fuentes de entrada, (2) el Mixstream Pro y (3) los
dispositivos de salida.
•Al finalizar la sesión, encienda (1) los dispositivos de salida, (2) el Mixstream Pro y (3) las
fuentes de entrada.
6. Cómo utilizar el Engine OS (reproducción autónoma):Inserte una unidad de almacenamiento
USB o tarjeta SD (con una biblioteca musical configurada para Engine) en el puerto USB o
ranuras para tarjeta SD del Mixstream Pro. También puede comenzar con las pistas demo
precargadas en el Mixstream Pro o utilizar cualquiera de los servicios asociados de streaming
o de la nube.
Auriculares Micrófono
Altavoces activos
Toma de corriente
Memoria
USB

12
Características
Panel superior
2
1
4
56
7
3
10 10
8
1. Pantalla táctil: Esta pantalla multitáctil a todo color muestra información relevante para el
funcionamiento actual del Mixstream Pro. Toque la pantalla táctil (y utilice los controles de
hardware) para controlar la interfaz del Mixstream Pro.
2. Perilla de desplazamiento: Gire esta perilla para recorrer las listas. Pulse la perilla para
moverse hacia delante en la pantalla táctil o seleccionar una canción para cargar en cualquiera
de los mazos.
Mantenga presionada la tecla Shift y presione el botón Browse para agregar una pista a la
lista Preparar.
3. Load 1: Pulse este botón para cargar la pista seleccionada en la bandeja 1. Realice una doble
pulsación rápida sobre este botón para duplicar instantáneamente la pista que se está
reproduciendo actualmente en la bandeja 2 a la bandeja 1.
4. Load 2: Pulse este botón para cargar la pista seleccionada en la bandeja 2. Realice una doble
pulsación rápida sobre este botón para duplicar instantáneamente la pista que se está
reproduciendo actualmente en la bandeja 1 a la bandeja 2.
5. Back: Pulse este botón para desplazarse hacia atrás por la pantalla.
6. View: Pulse este botón para alternar entre la vista de la biblioteca y la vista de la actuación.
Pulse este botón dos veces para abrir el menú del Engine Lighting, el cual le permitirá controlar
dispositivos de iluminación conectados tales como DMX y luces inteligentes utilizando
SoundSwitch para sincronizar música y luces de forma transparente. Visite soundswitch.com
para obtener más información.
Mantenga pulsado Shift y pulse el botón View para alternar entre las vistas de forma de onda
horizontal y vertical.
7. Fuente / Iluminación: Pulse este botón para abrir el menú de fuentes.
Mantenga pulsado Shift y pulse este botón para abrir el menú del Engine Lighting.
8. Centro de control: Mantenga pulsado este botón para abrir el menú del centro de control en
donde podrá modificar rápidamente los ajustes comúnmente utilizados y navegar hacia otras
páginas, tales como el menú de conexión Wi-Fi Para más información, consulte la Guía del
usuario.
9. Shift: Mantenga pulsado este botón para acceder a las funciones secundarias de otros controles.
10. Nivel del canal: Gire esta perilla para ajustar el nivel de la señal de audio del pre-fader y pre-
ecualizador del canal.

13
11. Ecualizador de canal: Gire estas perillas para aumentar o disminuir las frecuencias altas,
medias y bajas del canal.
12. Filtro: Gire esta perilla para aplicar un filtro al canal. Comenzando desde la posición central (12
en punto), gírela en sentido antihorario para aplicar un filtro pasabajos o gírela en sentido
horario para aplicar un filtro pasaaltos.
13. FX Select: Pulse estos botones para activar o desactivar el efecto deseado: Echo, Delay,
Flanger o Phaser.
14. Conmutador Effects: Mueva este interruptor de conmutación alejándolo de usted para activar
los efectos—el conmutador se bloqueará en esa posición. Tire del conmutador hacia la
posición central para desactivar los efectos.
Tire y sostenga el conmutador en dirección a usted para activar los efectos
momentáneamente, y suelte el interruptor de conmutación para desactivar los efectos—el
interruptor regresará a la posición central.
15. Fader de canal: Utilice este fader para ajustar el nivel del volumen del canal.
16. Crossfader: Utilice el crossfader para mezclar entre la bandeja 1 y la bandeja 2.
17. Medidores de nivel principal: Estos LED exhiben el nivel de la señal de audio de la mezcla
maestra (enviada hacia afuera por las salidas principales).
18. Vista previa con auriculares: Pulse este botón para previsualizar el canal en los auriculares.
Utilice la perilla Headphone Mix (mezcla de auriculares) para ajustar la mezcla entre la señal
prefader del canal y el canal de cue de los auriculares.
19. Mezcla de auriculares: Gire esta perilla para ajustar la mezcla del pre-fader y los canales
maestros en los auriculares.
20. Volumen de auriculares: Permite ajustar el volumen del cue por los auriculares.
21. Plato: Este plato capacitivo sensible al tacto controla el cabezal de reproducción cuando se
toca y se mueve la rueda.
22. Smart Scratch: Cuando se activa este botón, se activa el modo Smart Scratch. En este modo,
la línea de tiempo de la pista continúa (la mitad inferior de la forma de onda en la pantalla
continuará moviéndose hacia delante) cuando utilice el plato para «rayar» la pista. Cuando
suelte el plato, se reanuda la reproducción normal de la pista desde donde estaría si nunca lo
hubiera movido.
Cuando se activa el modo de Smart Scratch, mantenga pulsado Shift y pulse este botón para
activar el modo de avance. En este modo, toque el plato y muévalo para modificar
momentáneamente la velocidad de la pista.
Pulse este botón para desactivar Smart Scratch y activar el modo vinilo para el plato. Puede
utilizar el plato para "rayar" la pista como si se tratara de un disco de vinilo.
Nota: Smart Scratch está activado por defecto y se puede ajustar desde el menú de ajustes.
Mantenga presionado Scratch para ingresar / salir del modo de edición de cuadrícula.
23. Sync /Sync desactivada: Pulse este botón para activar la sincronización.
Mantenga pulsado Shift y pulse este botón para desactivar la sincronización. También puede
configurar la sincronización para que se desactive sin tener que usar Shift modificando el ajuste
Sync Button Action en el menú de perfil del usuario.
24. Cue / Anterior: Cuando la bandeja se pone en pausa, puede establecer un punto de cue
temporal moviendo el plato para colocar el puntero de audio en el lugar deseado y pulsando
luego el botón Cue.
Durante la reproducción, puede pulsar el botón Cue para que la pista vuelva a este punto de cue
temporal. (Si no estableció un punto de cue temporal, volverá al principio de la pista.) Si la
bandeja está en pausa, puede mantener pulsado el botón Cue para reproducir la pista desde el
punto de cue temporal. Al soltar el botón Cue, la pista vuelve al punto de cue temporal y se pone
en pausa. Para continuar la reproducción sin volver al punto de cue temporal, mantenga pulsado
el botón Cue, luego mantenga pulsado el botón de reproducir y luego suelte ambos botones.
Durante la reproducción, mantenga pulsado Shift y pulse este botón para establecer el punto
de cue inicial.
Mantenga pulsado Shift y pulse este botón para volver al comienzo de la pista.

14
25. Play/Pause: Con este botón se pone en pausa o reanuda la reproducción.
Mantenga pulsado Shift y pulse este botón para que la pista "tartamudee" desde el punto de
cue inicial.
26. Fader de tono: Mueva este fader para ajustar la velocidad (tono) de la pista.
Mantenga pulsado Shift y luego pulse uno de los botones Pitch Bend para ajustar el rango
completo.
27. Pitch Bend –/+: Mantenga pulsado uno de estos botones para reducir o aumentar
(respectivamente) la velocidad de la pista momentáneamente.
Mantenga pulsado Shift y pulse uno de estos botones para ajustar el rango del fader de pitch.
28. Pads para actuaciones en vivo: Estos pads tienen distintas funciones en cada bandeja en
función del modo de pad activo. Consulte la Guía del usuario completa para obtener más
información.
29. Cue: Pulse este botón para entrar al modo de Cue. Púlselo nuevamente para entrar a un
segundo banco de cues. Para asignar un cue a un pad, pulse un pad en la posición de la pista
deseada. Para quitar un punto de cue de un pad, pulse Shift y luego el pad deseado.
30. Saved Loop: Pulse este botón para entrar al modo de bucle guardado. Púlselo nuevamente
para entrar a un segundo banco de bucles guardados. Para asignar un bucle a un pad y
activarlo, pulse un pad para crear un punto de entrada de bucle en la ubicación actual y luego
púlselo nuevamente para crear un punto de salida de bucle en otra posición. Para activar o
reactivar un bucle, pulse el pad correspondiente. Para eliminar un bucle, pulse Shift y el pad
deseado.
31. Auto Loop: Pulse este botón para entrar al modo de bucle automático. Púlselo nuevamente
para entrar a un segundo banco de longitudes de bucles automáticos. Para activar un bucle
automático, pulse un pad. Para desactivar un bucle automático, pulse el pad nuevamente.
32. Roll: Pulse este botón para entrar al modo redoble. Púlselo nuevamente para entrar a un
segundo banco de longitudes de redobles. Para disparar un redoble, pulse un pad.
33. Altavoces: Estos altavoces reproducirán el mismo audio actual que las salidas principales.
Utilice la perilla Speaker Level para controlar el volumen de los altavoces.
34. Nivel principal: Gire esta perilla para ajustar el volumen de las salidas principales.
35. Nivel altavoces: Gire esta perilla para ajustar el volumen de los altavoces.
Panel frontal
2
13
1. Auriculares (1/4, 1/8 pulg.) (6,35, 3,5 mm): Conecte sus auriculares de 6,35 o 3,5 mm (1/4 o
1/8 pulg.) a esta salida para búsqueda de punto inicial (cue) y monitorización de la mezcla. El
volumen de los auriculares se controla con la perilla Ganancia de cue.
2. Entrada de micrófono (1/4 pulg. / 6,35 mm): Utilice un cable de 6,35 mm (1/4 pulg.) estándar
(no incluido) para conectar un micrófono dinámico estándar a esta entrada.
3. Nivel de micrófono: Gire esta perilla para ajustar el nivel de volumen de la entrada de
micrófono. Puede ajustar la atenuación y encaminamiento del micrófono en el menú de
utilidades.

15
Panel trasero
21 45
6
73 8
9
1. Salidas principales (XLR, balanceadas):Utilice cables XLR estéreo para conectar estas salidas a
un sistema de altavoces o amplificador. Utilice la perilla nivel principal ubicada en el panel
superior para controlar el nivel de volumen.
2. Salidas principales (RCA, no balanceadas):Utilice cables RCA estéreo para conectar estas
salidas a un sistema de altavoces o amplificador. Utilice la perilla nivel principal ubicada en el
panel superior para controlar el nivel de volumen.
3. Ranura para tarjeta SD: Puede utilizar la pantalla táctil para seleccionar pistas desde su
tarjeta SD.
4. Puertos USB-A: Conecte una unidad USB estándar a este puerto USB. Cuando selecciona
una unidad USB como fuente, puede usar la pantalla táctil para seleccionar y cargar pistas
desde su unidad USB. También puede conectar un teclado a estos puertos para facilitar las
búsquedas en su biblioteca.
Nota: Aunque Mixstream Pro puede reproducir pistas que aún no se han analizado, el análisis
previo permite que sus funciones funcionen de manera más efectiva. Recomendamos utilizar el
software Engine DJ para configurar su biblioteca de música en su tarjeta SD o unidad flash
USB antes de conectarse a Mixstream Pro. Consulte la Guía del usuario completa para obtener
más información.
5. Puerto USB-B PC: Utilice un cable USB (incluido) para conectar este puerto USB a un puerto
USB disponible en su ordenador.
6. Presilla del adaptador de corriente: Asegure el cable del adaptador de corriente a esta
presilla para evitar que se desconecte accidentalmente.
7. Entrada de alimentación: Utilice el adaptador de corriente incluido para suministrar corriente
a la unidad o cargar la batería de ion litio interna.
8. Botón de encendido: Pulse este botón para encender el Mixstream Pro. Encienda el
Mixstream Pro después de haber conectado todos sus dispositivos de entrada y antes de
encender sus amplificadores y altavoces.
Para apagar el Mixstream Pro, pulse este botón y siga las indicaciones en la pantalla táctil.
Apague sus amplificadores y altavoces antes de apagar el Mixstream Pro.
9. Ventilación: asegúrese de que esta ventilación no esté obstruida mientras usa Mixstream Pro.

16
Mezcla y sincronización de beats utilizando la sincronización
A continuación, se presenta un ejemplo de cómo cargar y mezclar pistas utilizando la función
de sincronización del Mixstream Pro:
1. Inserte una unidad USB o tarjeta SD con las pistas en el
puerto USB del panel trasero. También puede comenzar
con las pistas demo precargadas en el Mixstream Pro o
utilizar cualquiera de los servicios asociados de streaming
o de la nube.
2. Comience moviendo las perillas Level y EQ del Mixstream
Pro a la posición de las 12 en punto. Podrá ajustarlas una
vez cargadas las pistas.
3. Pulse el botón Source para ver las fuentes disponibles incluyendo los
dispositivos de medios conectados y los servicios de streaming. Toque la
fuente deseada para seleccionarla.
Si desea utilizar un servicio asociado de streaming o de la nube:
i. Primero asegúrese de estar conectado al Wi-Fi. Pulse el botón Centro de control para abrir el
centro de control y luego toque Wi-Fi para abrir el menú de ajustes. Busque su red local y
tóquela para conectarse. Si la red tiene contraseña, se le pedirá que la ingrese.
ii. A continuación, abra nuevamente el centro de control y toque Source (fuente) para abrir el
menú de fuente. Toque el servicio de streaming o de la nube deseado para seleccionarlo en
la parte inferior de la pantalla. Se le solicitará que introduzca credenciales de inicio de sesión
o utilice un navegador web o dispositivo móvil para activar Mixstream Pro en su cuenta.
4. Pulse el botón View para abrir la vista de la biblioteca para explorar el
contenido de su dispositivo o biblioteca de servicio de streaming
conectada. En la vista de la biblioteca, podrá:
Deslizar una lista hacia arriba o abajo para recorrerla (es decir, su lista de cajas, su lista
de listas de reproducción o su lista de pistas).
Tocar y arrastrar la barra de desplazamiento para explorar rápidamente las pistas.
Tocar el icono o elemento de una lista para seleccionarlo (es decir, los iconos de las
listas de reproducción, listas de preparación, historial, archivos o búsqueda del lado
izquierdo de la biblioteca).
Tocar y mantener su dedo sobre una pista para desplegar su ventana de información.
Tocar la ventana de información en cualquier parte para cerrarla.
Tocar la imagen de la pista para previsualizar la pista. Tóquela nuevamente para
detener la previsualización. Durante la previsualización, toque a lo largo de la entrada de
la pista para barrer la pista.
Tocar el campo Search y utilizar el teclado que aparece en la pantalla para buscar sus
pistas según una palabra clave.
5. Gire la perilla Browse para desplazarse por la biblioteca de música seleccionada.
6. Cargue pistas con BPM similares en las bandejas 1 y 2 pulsando los
botones Load 1 y Load 2.
7. Mueva el crossfader del Mixstream Pro completamente hacia la
izquierda para enviar el audio de la bandeja 1 a las salidas principales
y los altavoces.

17
8. Reproduzca la pista cargada en la bandeja 1.
9. Eleve el fader de canal de la bandeja 1 para que su audiencia pueda
escuchar la pista.
10. Ahora que tiene una pista reproduciéndose, podrá previsualizar la
siguiente pista y prepararse para mezclarla. Primero, pulse el botón Sync
de la bandeja 1 para convertirla en la fuente de BPM principal.
11. Pulse el botón vista previa con auriculares de la bandeja 2.
12. Reproduzca la pista cargada en la bandeja 2 para poder previsualizarla
a través de sus auriculares.
13. Ajuste la perilla Volumen de auriculares para subir el volumen en sus
auriculares y ajuste la perilla Mix de auriculares de manera que pueda
escuchar ambas pistas reproduciéndose.
14. Pulse Sync en la bandeja 2 para sincronizar sus BPM con la bandeja 1.
15. Mientras la pista se está reproduciendo, pulse el botón Cue para
regresar al comienzo de la pista.
16. Eleve el fader de canal de la bandeja 2 para que su público pueda
escuchar la pista.
17. Cuando esté listo para hacer la mezcla con la nueva pista, reproduzca
la pista que está cargada en la bandeja 2.
18. Mueva el crossfader del Mixstream Pro para realizar un fundido
cruzado desde la bandeja 1 hacia la bandeja 2.
¡Ahora puede repetir este proceso y seguir mezclando pistas nuevas
como un profesional!

18
Guide d’utilisation rapide (Français)
Présentation
Merci d’avoir fait l’acquisition du Mixstream Pro. Chez Numark, nous savons à quel point
la musique est importante pour vous. C’est pourquoi nous concevons nos produits avec une
seule chose en tête — faire de votre performance la meilleure qui soit. Nous sommes honorés et
enthousiastes de pouvoir jouer un rôle dans votre parcours de création musicale dans
l’univers du DJing.
Contenu de la boîte
Mixstream Pro
Adaptateur d’alimentation
Câble USB
Carte de téléchargement de Engine DJ logiciel
Chiffon de nettoyage pour l’écran
Guide d’utilisation rapide
Consignes de sécurité et informations concernant la garantie
Important : Téléchargez le guide d’utilisation complet pour le Mixstream Pro sur numark.com.
Assistance
Pour les toutes dernières informations concernant la documentation, les spécifications
techniques, la configuration requise, la compatibilité et l’enregistrement du produit, veuillez
visiter numark.com.
Pour de l’assistance supplémentaire, veuillez visiter numark.com/support.
Enregistrement du produit
L’achat du produit peut inclure de logiciels exclusifs et/ou des promotions accessibles
uniquement par l’enregistrement de votre produit sur le site Web de Numark.
Pour vérifier votre admissibilité et accéder au contenu disponible, veuillez enregistrer votre
produit en suivant les instructions ci-dessous :
1. Visitez numark.com.
2. Cliquez sur Sign In pour accéder à votre compte existant ou pour créer un nouveau
compte.
3. Une fois connecté, cliquez sur My Registered Products.
4. Remplissez le formulaire et cliquez sur Submit Registration (Soumettre l'inscription).
5. Une fois l'enregistrement réussi, tous les téléchargements de logiciels, contenus exclusifs
et offres promotionnelles applicables figureront sur votre compte.

19
Démarrage
Les éléments qui ne figurent pas dans la section Présentation >Contenu de la boîte sont vendus
séparément.
Important : À l’occasion, il se peut que nous procédions à des mises à jour du progiciel du
Mixstream Pro afin d’ajouter des fonctionnalités et d’améliorer sa performance. Veuillez visiter
numark.com afin de vérifier s’il y a des mises à jour du progiciel et documentation disponibles,
surtout si vous mettez à jour votre logiciel (les mises à jour du progiciel peuvent permettent
l’utilisation des nouvelles fonctionnalités logicielles). Vous pouvez également rechercher des mises à
jour directement depuis votre appareil avec une connexion Internet en accédant au menu Control
Center > Settings > About/Update.
1. Visitez numark.com et ouvrez une session. Veuillez créer un compte si c'est votre premier
produit Numark.
2. À partir de votre compte, veuillez télécharger et installer la toute dernière version du logiciel
Engine DJ. À partir de votre compte, téléchargez et installez la dernière version du logiciel
Engine DJ. Double-cliquez sur le fichier d'installation téléchargé .exe (Windows®) ou .dmg
(macOS®), puis suivez les instructions à l'écran pour installer Engine DJ.
3. Transférez votre musique sur le périphérique multimédia que vous allez utiliser avec Mixstream Pro.
4. Branchez tous les appareils de sortie (casque d’écoute, amplificateurs de puissance, enceintes,
etc.) au Mixstream Pro.
5. Branchez tous les appareils à des prises secteurs, puis mettez-les sous tension dans l’ordre
approprié :
•Lorsque vous démarrez une session, commencez par allumer (1) les sources d’entrée, (2)
le Mixstream Pro, puis (3) les appareils de sortie.
•Lorsque vous fermez une session, commencez par fermer (1) les appareils de sortie, (2) le
Mixstream Pro, puis (3) les sources d’entrée.
6. Pour utiliser Engine OS (lecture autonome) :Insérez une clé USB ou une carte SD (contenant une
bibliothèque musicale configurée pour Engine) dans le port USB ou lecteur de carte SD du
Mixstream Pro. Vous pouvez également commencer avec les pistes de démonstration préchargées
sur le Mixstream Pro, ou utiliser l'un des services de streaming ou de cloud partenaires.
Casque
d’écoute
Microphone
Haut-parleurs
actives
Prise de courant
Clé
USB

20
Caractéristiques
Panneau supérieur
2
1
4
56
7
3
10 10
8
1. Écran tactile : Cet écran tactile multipoint couleur affiche les informations pertinentes aux
opérations en cours du Mixstream Pro. Touchez l'écran et utilisez les commandes matérielles
pour contrôler l’interface du Mixstream Pro.
2. Bouton Browse : Tourner ce bouton permet de parcourir les listes. Appuyer sur ce bouton
permet de faire avancer le curseur sur l’écran ou de sélectionner une chanson à charger sur
l'un ou l'autre paquet.
Maintenez Shift et appuyez sur le bouton Browse pour ajouter une piste à la liste Préparer.
3. Load 1 : Cette touche permet de charger la piste sélectionnée sur le module 1. Appuyer
rapidement deux fois sur cette touche permet de copier instantanément sur le module 1 la
piste en cours de lecture sur le module 2.
4. Load 2 : Cette touche permet de charger la piste sélectionnée sur le module 2. Appuyer
rapidement deux fois sur cette touche permet de copier instantanément sur le module 2 la
piste en cours de lecture sur le module 1.
5. Back : Cette touche permet de faire reculer le curseur sur l’écran.
6. View : Cette touche permet de basculer entre les modes d’affichage Library et Performance.
Appuyez deux fois sur cette touche pour afficher le menu Engine Lighting, où vous pouvez
commander les appareils d'éclairage connectés tels que les appareils DMX et les Smart Lights à
l'aide du SoundSwitch afin de synchroniser de manière transparente votre musique et votre
éclairage. Veillez visiter soundwitch.com pour plus d'informations.
Maintenir la touche Shift enfoncée et appuyer sur la touche View permet de basculer entre les
modes d’affichage horizontal et vertical de la forme d’onde.
7. Source / Lighting : Cette touche permet d’accéder au menu Source.
Maintenir la touche Shift enfoncée et appuyer sur cette touche permet d’afficher le menu
Engine Lighting.
8. Control Center : Appuyer sur cette touche permet d'afficher le menu Control Center, où vous
pouvez ajuster rapidement les paramètres couramment utilisés et parcourir d’autres pages,
comme le menu de connexion Wi-Fi. Veuillez consulter le guide d’utilisation pour plus
d’information.
9. Shift : Maintenir cette touche enfoncée permet d’accéder aux fonctions secondaires des autres
commandes.
10. Niveau du canal : Ce bouton permet d'ajuster le niveau du signal audio pré-égalisation et pré-
atténuation du canal.
Other manuals for MIXSTREAM PRO
3
Table of contents
Languages:
Other Numark Dj Equipment manuals

Numark
Numark NS6 User manual

Numark
Numark NDX 400 User manual

Numark
Numark iCDMIX 2 User manual

Numark
Numark Party Mix Pro User manual

Numark
Numark M2 User manual

Numark
Numark NuVJ User manual

Numark
Numark CM200USB User manual

Numark
Numark MIXDECK EXPRESS User manual

Numark
Numark NS7III User manual

Numark
Numark FUSION 111 User manual

Numark
Numark UPM User manual

Numark
Numark DJ2Go2 User manual

Numark
Numark NDX 800 Operator's manual

Numark
Numark DDS User manual

Numark
Numark PHAT TRAK User manual

Numark
Numark DJ2GO User manual

Numark
Numark D2 Director User manual

Numark
Numark Orbit User manual

Numark
Numark NV User manual

Numark
Numark Mixtrack Pro 3 User manual