Language
Select Language, press the ENTER button to confirm, present mode will blink on the display, use
the UP/DOWN button to select English or Chinese. Press the MENU button back to the last menu
or let the unit idle one minute to exit menu mode.
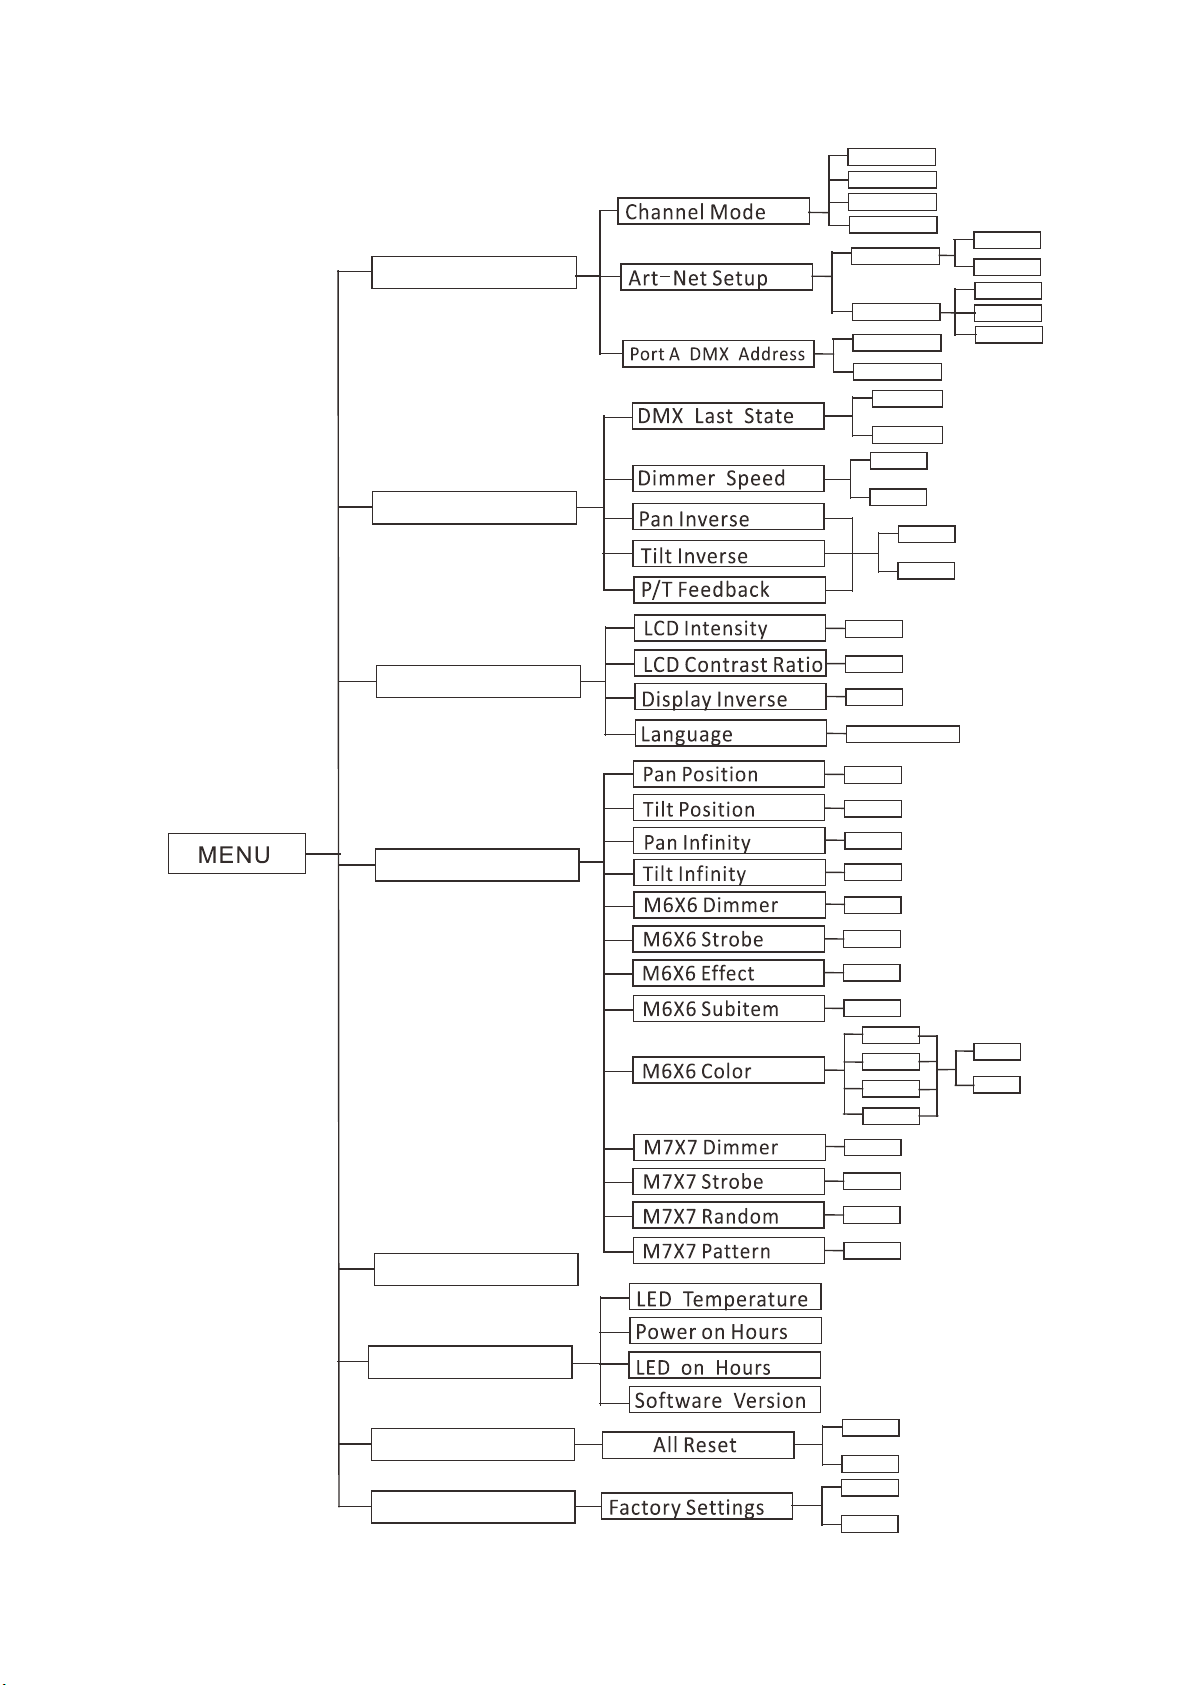
Manual Mode
Enter menu mode, select Manual Mode, press the ENTER button to confirm, use the UP/DOWN
button to select Pan Position, Tilt Position, Pan Infinity, Tilt Infinity , M6X6 Dimmer, M6X6
Strobe, M6X6 Effect ,M6X6 Subitem, M6X6 Color,M7X7 Dimmer, M7X7 Strobe, M7X7 Random
or M7X7 Pattern Color.
Pan Position
Select Pan Position,press the ENTER button to confirm, present mode will blink on the display,
use the UP/DOWN button to adjust value from 0 to 255, press the ENTER button to store. Press
the MENU button back to the last menu or let the unit idle one minute to exit menu mode.
Tilt Position
Select Tilt Position,press the ENTER button to confirm, present mode will blink on the display,
use the UP/DOWN button to adjust value from 0 to 255, press the ENTER button to store. Press
the MENU button back to the last menu or let the unit idle one minute to exit menu mode.
Pan Infinity
Select Pan Infinity,press the ENTER button to confirm, present mode will blink on the display, use
the UP/DOWN button to adjust value from 0 to 255, press the ENTER button to store. Press the
MENU button back to the last menu or let the unit idle one minute to exit menu mode.
Tilt Infinity
Select Tilt Infinity,press the ENTER button to confirm, present mode will blink on the display, use
the UP/DOWN button to adjust value from 0 to 255, press the ENTER button to store. Press the
MENU button back to the last menu or let the unit idle one minute to exit menu mode.
M6X6 Dimmer
Select M6X6 Dimmer,press the ENTER button to confirm, present mode will blink on the display,
use the UP/DOWN button to adjust value from 0 to 255, press the ENTER button to store. Press
the MENU button back to the last menu or let the unit idle one minute to exit menu mode.
M6X6 Strobe
9F