Please note that this function doesn’t substitute the Warming function. At
the end of the cycle the nal temperature of the milk will reach max 20°C.
1.
2.
3.
4.
5.
6.
7.
8.
WARMING OF BABY BOTTLES (HOME USE - NUVITA 1161 AND 1165)
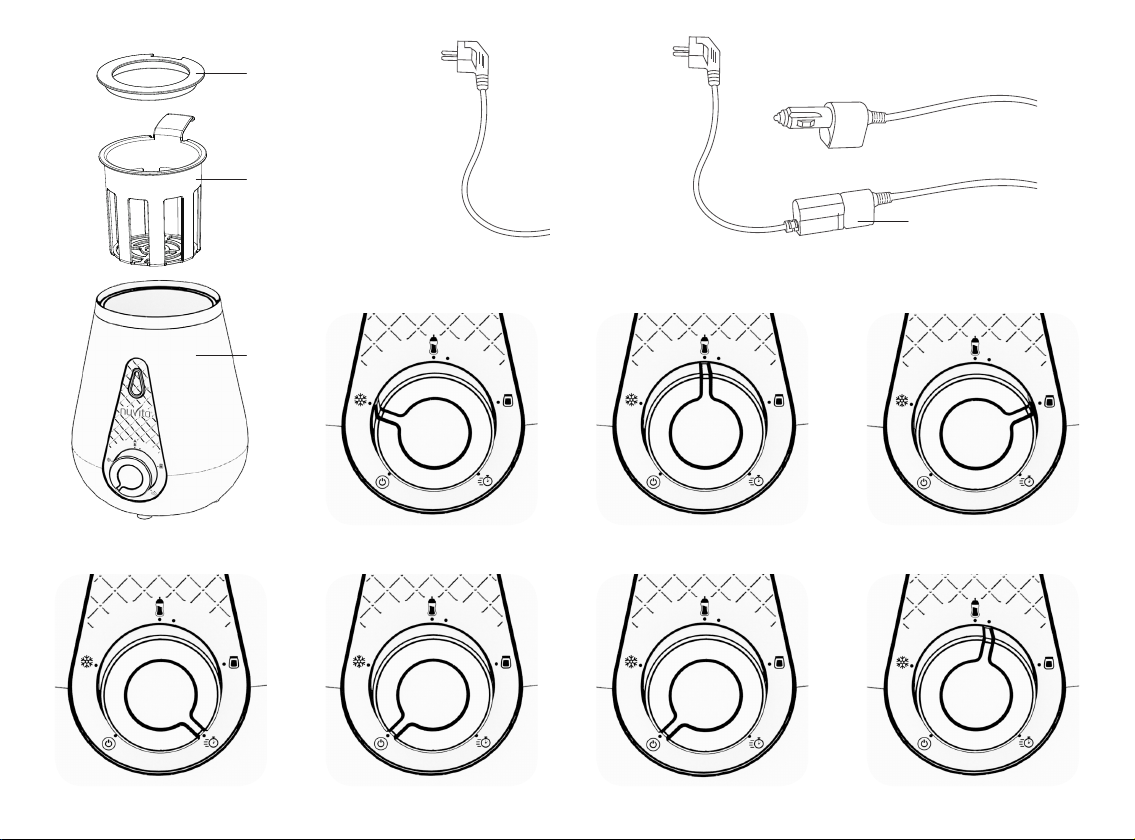
Insert the basket and adapter ring accordingly. See fig.1.
Fill the tank with water as suggested. Do not overow.
Turn the knob to the bottle position. See fig.5
The indicator lamp will switch on to indicate the device is on or a cycle
is running.
Slowly place the bottle in the water-lled container. See fig.9
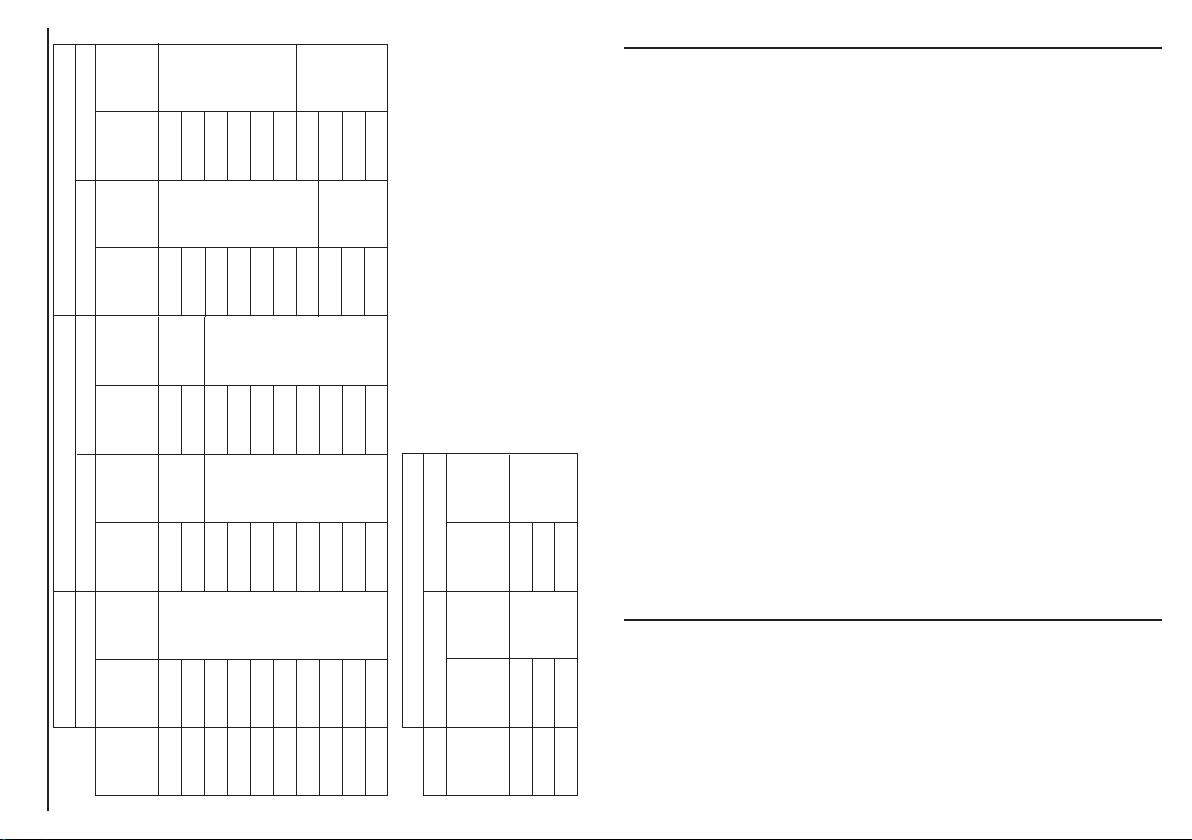
When the time that is specied in the chart ends, remove the bottle
from the container.
Slowly shake the bottle to create an even distribution of heat. Pour a few
drops on the back of your hand to ensure the milk temperature is not
too hot before feeding the baby.
Switch o the device by turning the knob back to o position. See fig.8
KEEP WARM: To keep the ideal temperature inside the bottle, leave the
knob position as it is.
1.
2.
3.
4.
5.
6.
7.
8.
WARMING OF BABY BOTTLES (CAR USE - NUVITA 1165)
Insert the basket and adapter ring accordingly.
Fill the tank with water as suggested. Do not overow.
Turn to the bottle position. See fig.10.
The indicator lamp will switch on to indicate the device is on or a cycle
is running.
Slowly place the bottle in the water lled container. See fig.9
When the time that is specied in the chart ends, remove the bottle
from the container.
Slowly shake the bottle to create an even distribution of heat. Pour a few
drops on the back of your hand to ensure the milk temperature is not
too hot before feeding the baby.
Switch o the device by turning the knob back to o position. See fig.8
KEEP WARM: To keep the ideal temperature inside the bottle, leave the
knob position as it is.
1.
2.
3.
4.
5.
6.
7.
FAST WARMING
Insert the basket and adapter ring accordingly. See fig.1.
Fill the tank with water as suggested. Do not overow.
Turn the knob to the stopwatch position. See fig.7.
The indicator lamp will switch on to indicate the device is on or a cycle
is running.
Slowly place the bottle in the water-lled container. See fig.9
When the time that is specied in the chart ends, promptly remove the
bottle from the container to avoid overheating.
Slowly shake the bottle to create an even distribution of heat. Pour a few
drops on the back of your hand to ensure the milk temperature is not
too hot before feeding the baby.
Switch o the device by turning the knob back to o position. See
fig.8.
This bottle warmer has a fast warming function that will warm the bottles
and jars in a shorter time.
NOTE
Follow the “Warming of baby bottles” instruction above. To start warming
when in the car, turn the knob to the dot icon position (see fig.10).
1.
2.
3.
4.
5.
6.
WARMING OF BABY FOOD JARS (ONLY FOR HOME USE)
Insert the basket.
Remove the food jar cover. Place the jar inside the basket and ll the
tank with enough water to reach the same level of the food inside the
jar. Do not allow the water to enter the jar.
Turn the knob to the jar icon position. See fig.6.
The indicator lamp will switch on to indicate the device is on or a cycle
is running.
While immersed in water, stir the jar slowly with caution.
Promptly remove the jar from the container after the cycle ends to avoid
overheating.
Switch o the device by turning the knob back to o position. See
fig.8.