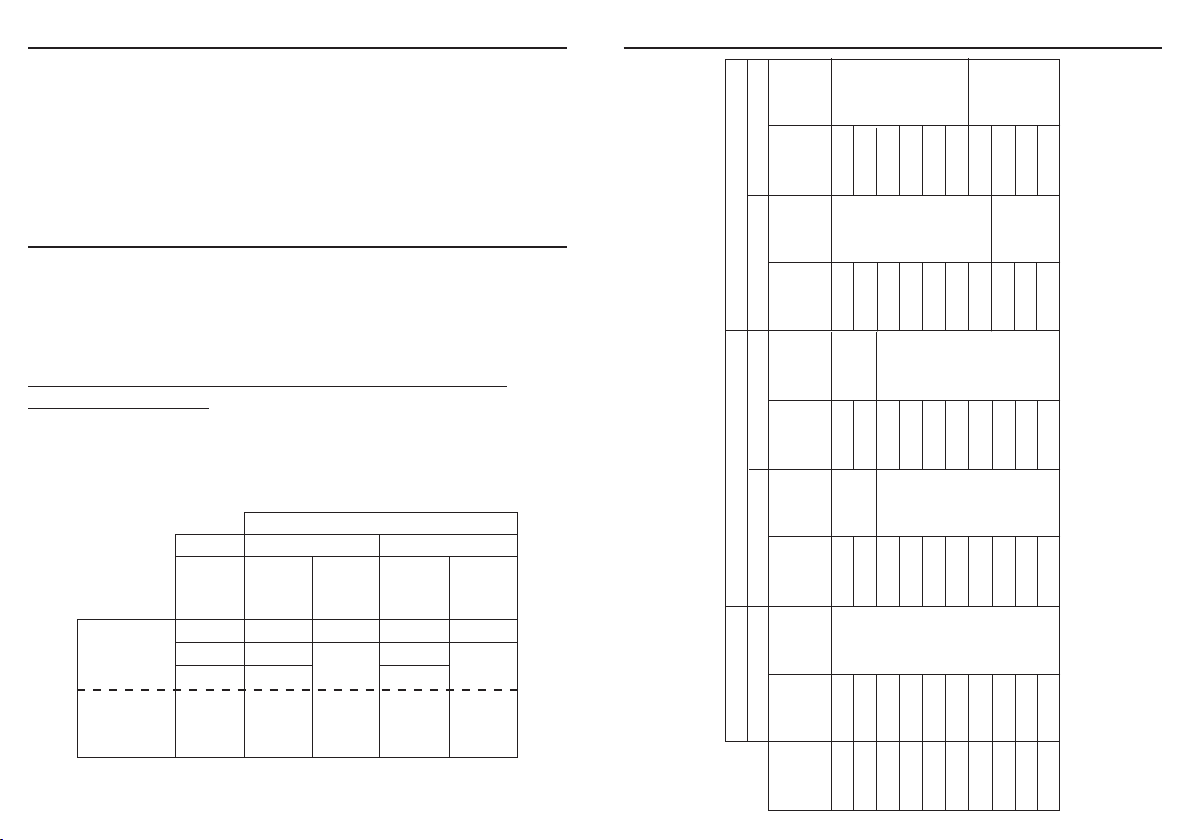
Please refer to the SETTING GUIDE section for table of volume and
warming times
1.
2.
3.
4.
5.
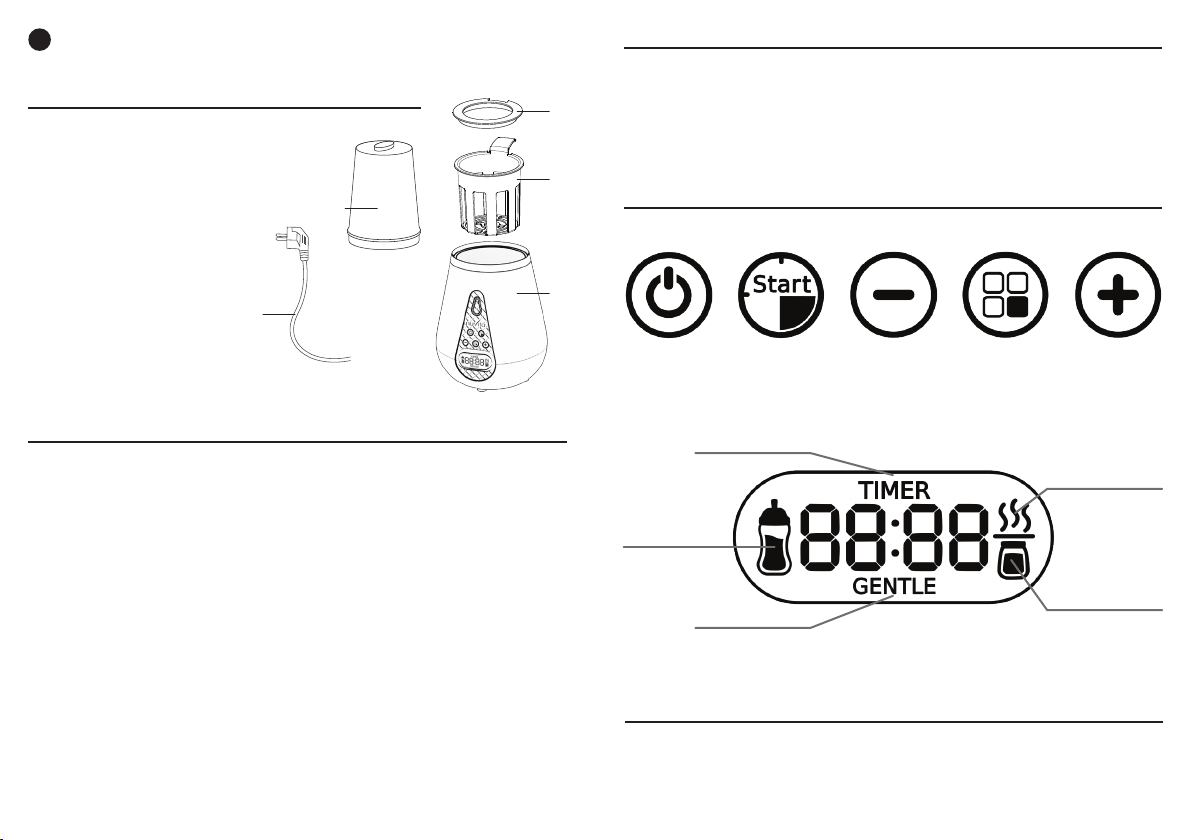
operation
WARMING BABY BOTTLES
Insert the basket and adapter ring accordingly.
Fill the tank with water as suggested . Do not overow.
Place the bottle inside the warmer.
Plug the device into a power outlet. Press the on/o button once to
turn the unit on. The display will show the bottle icon, digits 0:00 and
indicator light will switch on. Function 1 will be the default function.
Digits will start blinking after 1 second to indicate the time can be set
by pressing the +/- buttons (30 sec for each press and 1 min with long
press up to 40 minutes).
(If there will be no actions chosen within 30 seconds the bottle warmer
will shut o automatically).
Once the time has been set, press the START button. When cycle ends,
device will beep 3 times before to shifts automatically to the keep
warming mode.
AUTOMATIC KEEP WARMING MODE
At the end of the cycle, indicator light will blink continuously showing
the bottle icon and the digits “37”. When the temperature goes down by
about 3 °C, the device will stop blinking which indicates that the warming
feature started again. Keep warming mode will run continuously unless
switched o manually or until water nishes
1.
2.
3.
4.
WARMING FOOD JAR
Insert the basket and adapter ring accordingly.
Remove the food jar cover. Place the jar inside the basket and ll the
tank with enough water to reach the same level of the food inside the
jar. Do not allow the water to enter the jar.
Plug the device into a power outlet and switch the device on by
pressing the on/o button. To select Function 2, press the MENU button
once, device will show food jar icon and default digits 10:00 will blink
to indicate the time can be set by pressing the +/- buttons (1 min each
press or long press for a faster setting up to 20 min).
Once the time has been set, press the START button. When cycle ends,
device will beep 3 times and switch o automatically.
Before using the bottle warmer, ensure the mains outlet is of correct
voltage.
The bottle warmer must be out of reach of children, placed on a stable
surface.
Plug the cable to a power outlet.
To turn on the bottle warmer, choose the following functions in the
OPERATION section of this manual
1.
2.
3.
4.
device setup
CAUTION
-This device is for home use only and is no way to be use outdoors.
-Always ensure to avoid any water over ow once a lled baby bottle is inside.
-Always use the bottle warmer with water inside it.
-Re-heating food is not recommended.
6. Switch o the device by pressing the on/o button if the keep warming
function is not needed.
1.
2.
3.
4.
5.
GENTLE DEFROST
Insert the basket and adapter ring accordingly
Fill the tank with water as suggaested . Do not overow
Place the bottle inside the warmer
Plug the device into a power outlet and switch the device on by
pressing the on/o button. To select Function 3, press the MENU button
twice, device will show GENTLE icon and default digits 00:30 * will blink
to indicate the time can be set by pressing the +/- buttons (10 minutes
for each press or 30 minutes long press up to 3 hours)
Once the time has been set, press the START button. When cycle ends,
device will beep 3 times and switch o automatically.