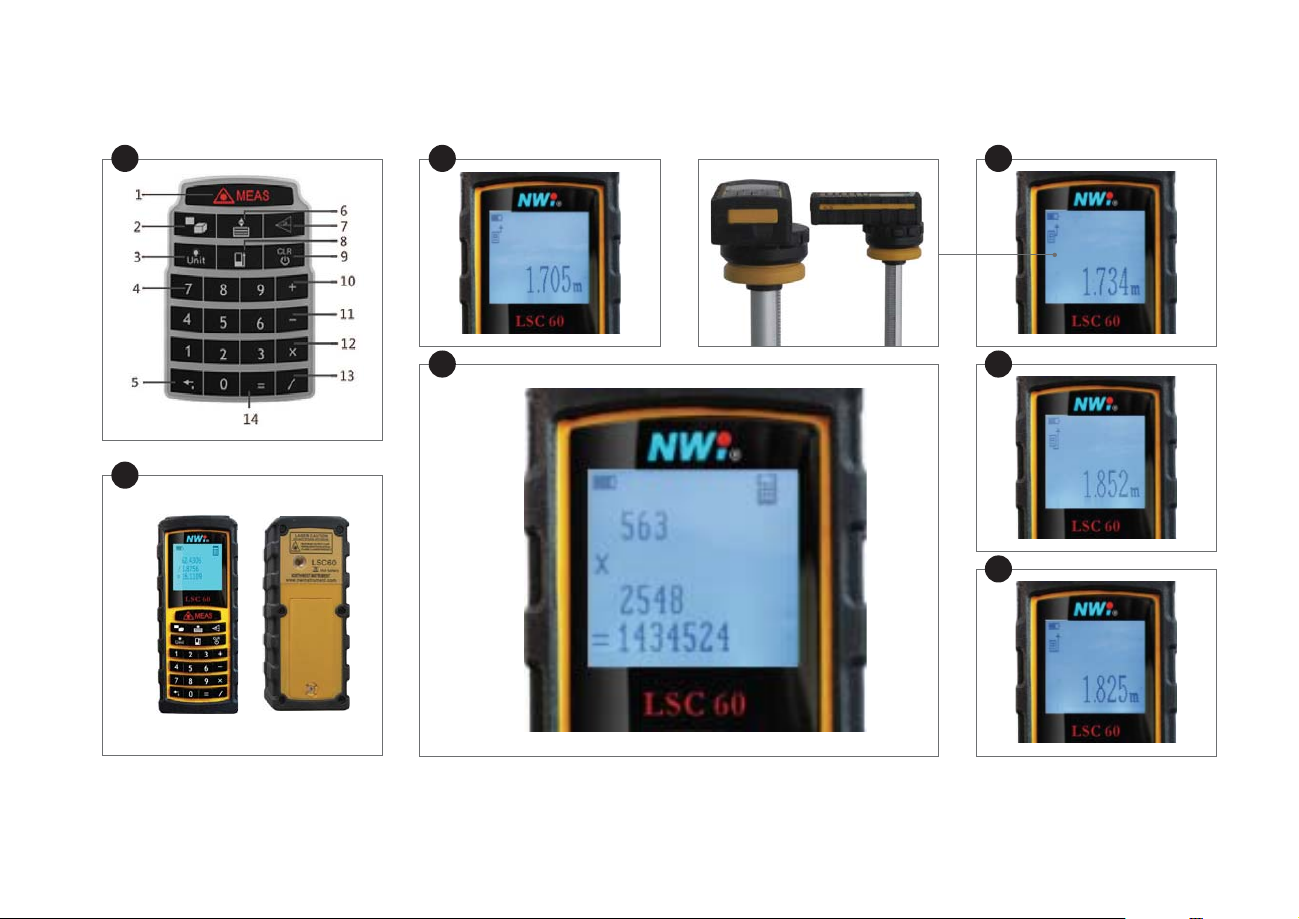
Laser Site Calculator LSC60Laser Site Calculator LSC60 55
EN
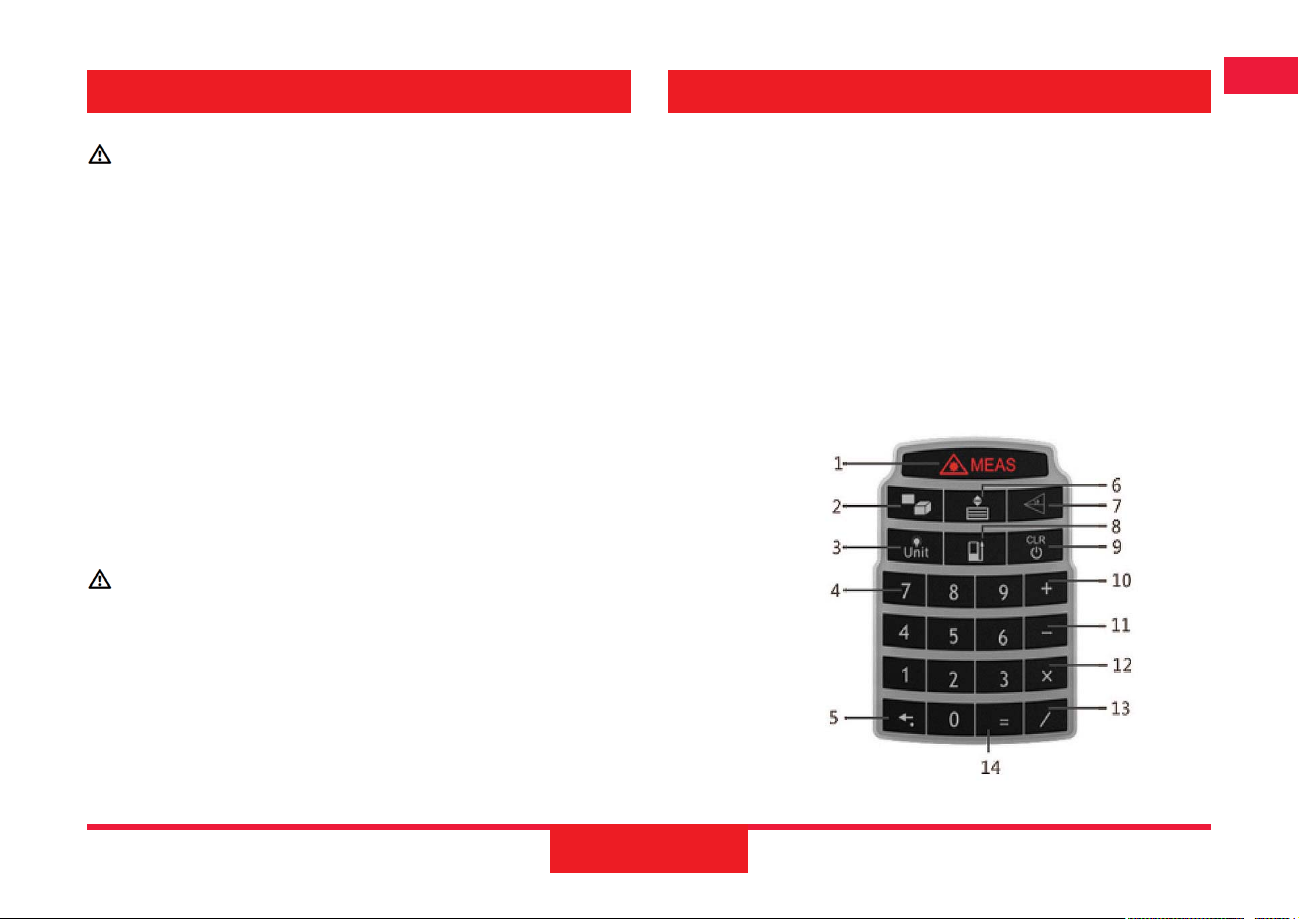
LSC60
Volume Measurement
Press twice, the symbol appears on display.
Following the hint, press to activate laser, and aim at the target,
measure the width, and then height, the result of volume will be seen in
the summary line.
Indirect Measurement
This device can measure distance to inaccessible points, such as the
distance to a wall which is blocked by obstacles, or the height of a tree,
using trigonometric function.
To ensure measuring accuracy, indirect measurement should be based
on the following conditions:
(1) The measuring points of the object which is to be measured should
be on the same horizontal or vertical line.
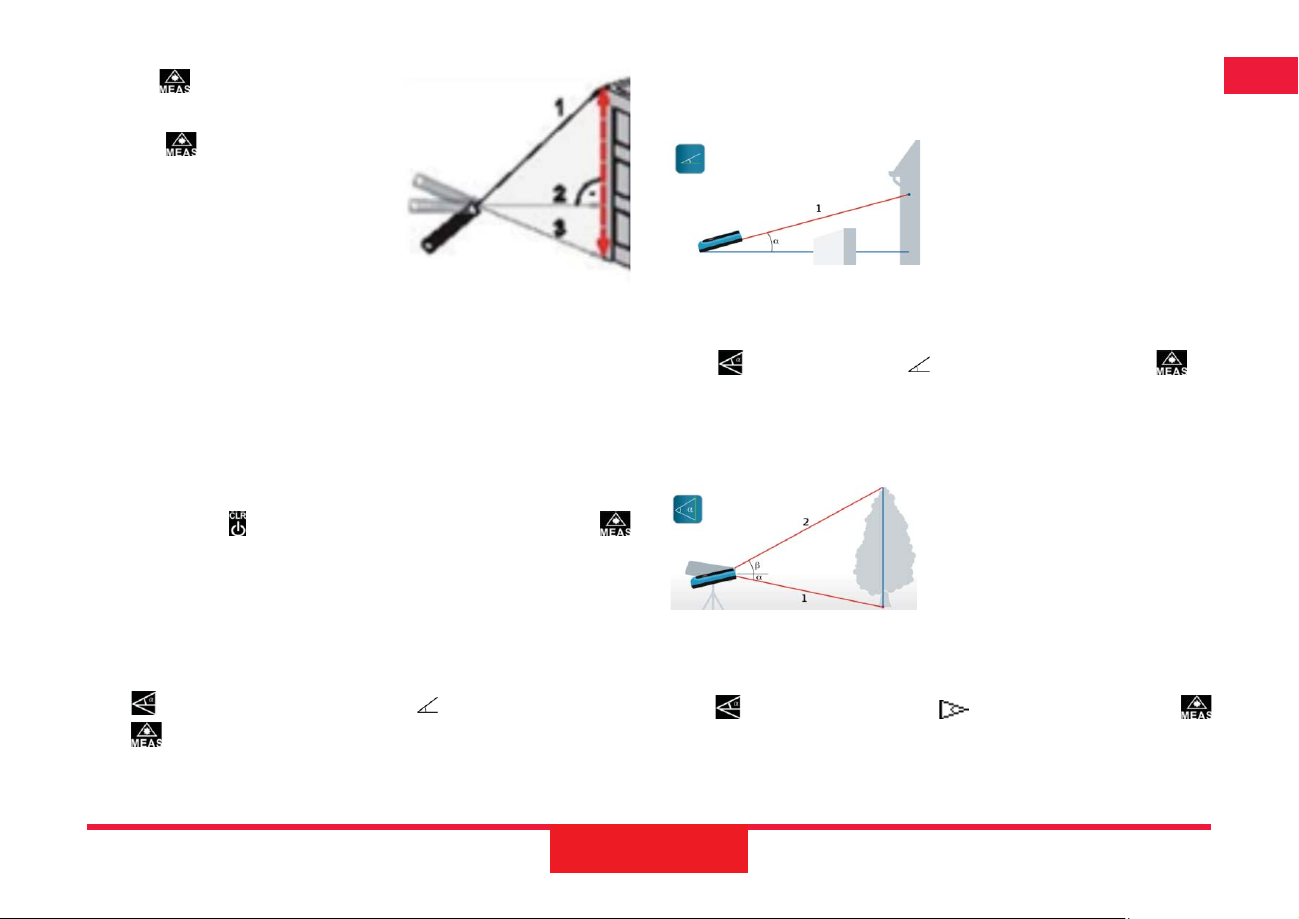
Indirect Measurement: Pythagoras Two PointsView
As shown in Figure (E), if user wants to measure the height of a
building, he can use Pythagoras to calculate the height.
(1) Press three times, the symbol appears on display.
(2) Press to activate laser and aim
at the point which is to be measured.
(3) Press again to take the first
measurement, and again to take the
second measurement.
(4) The height of building (third side
value will be seen on display.
Note:
(1) The device will automatically determine the longer distance as
triangle’s hypotenuse, and shorter distance as right-angle side.
(2) When measuring right-angle side (Distance 2 in Figure E), user
should ensure laser beam is right-angled to the target line.
(3) User can press to delete any measured length and then press
to re-measure.
Figure (E)
Indirect Measurement: Pythagoras Three Points
As shown in Figure (F), there is another function to measure the height
of the building.
(1) Press four times, the symbol appears on display.