NX Smart Home NX-PTY10 User manual

NX-PTY10
10 Bulb Smart RGB Indoor/Outdoor Party Lights
USER MANUAL
ENGINEERED FOR THE NEXT GENERATION™


1
CONTENTS
1.0 WARNINGS....................................................................................... 2
2.0 INTRODUCTION .............................................................................. 2
2.1 Pre-Installation...................................................................................3
3.0 NX SMART APP SETUP.................................................................. 4
3.1 App Download...................................................................................4
3.2 App Registration................................................................................4
3.3 Home Management ........................................................................ 5
3.4 Add your NX LED Party Lights to the App ................................ 6
4.0 OPERATION ..................................................................................... 8
4.1 Light Colour Options....................................................................... 9
4.2 Smart Controller..............................................................................10
4.3 Google Assistant Integration ........................................................ 11
4.4 Amazon Alexa Integration ............................................................ 13
4.5 Automation .......................................................................................15
4.6 Additional App Functions .............................................................16
5.0 SPECIFICATIONS............................................................................16
6.0 WARRANTY TERMS & CONDITIONS...........................................17

2
1.0 WARNINGS
• Consult a licensed electrician if you are unsure of the
AC connection or do not have a power point within
connection range.
• Do not disassemble the adaptor, smart controller or
Party Light bulbs.
• There are no user serviceable parts within this kit.
• Do not stare directly at the NX-PTY10 Smart LED Party Lights.
2.0 INTRODUCTION
Thank you for purchasing the NX-PTY10 Smart RGB Party Lights.
These lights can be controlled directly by the smart controller,
via our free smartphone app and by voice using Amazon Alexa
or Google Assistant.

3
2.1 PREINSTALLATION
1. This system works with 2.4GHz WiFi networks only.
Depending on your router model, you may need to disable
5GHz networks while connecting the NX Smart RGB Party
Lights to your WiFi network.
2. Locate the smart controller and connect the cable from this to
the 240V adaptor by inserting the cable into the adaptor and
tightening the locking nut.
3. Please ensure the installation location is within range of your
router. One way to test this is to connect and pair the Party
Lights with the NX Smart App at a location close to the WiFi
router. Then once paired, you can test dierent installation
locations for WiFi range.
PLEASE NOTE:
• it may take 1-2 minutes for the lights to re-connect with the
WiFi network once you have relocated them.
4. To mount the Party Lights, simply hang them using the inbuilt
clips at the top of each light.

4
3.0 NX SMART APP SETUP
3.1 APP DOWNLOAD
Download the NX Smart app from the Apple or Google Play
stores by searching 'NX Smart' or scan the QR code below.
3.2 APP REGISTRATION
Select ‘Sign Up.’ Read and agree to the privacy policy then enter
your email address. Select ‘Get Registration Code’ and you will
receive an email containing your registration code. Please enter
it into the NX Smart App and set your password.
Quick Scan QR Code
for NX Smart App.

5
You will be asked to authorise access to several services
including ‘Bluetooth’, ‘Notifications’ and ‘Location Services’.
These functions enhance the operation of the app.
3.3 HOME MANAGEMENT
To enable extra NX Smart RGB Party Lights control options, like
adding other users and categorising your lights into dierent
areas, follow the steps below (you can also set up Home
Management later).
CONFIGURATION STEPS:
1. Select ‘Me’ menu at the bottom of the screen.
2. Select ‘Home Management’. Then select ‘My Home’ to
configure your default home setting.
3. Add a home name and set ‘location’ (optional). After this step,
you can add and name additional areas (the app refers to this
as a room). For example ‘side garden.’ Always select ‘save’
when you’ve finished making changes.

6
3.4 ADD YOUR NX LED PARTY LIGHTS TO THE APP
1. Ensure your smartphone is connected to your 2.4GHz WiFi
network (this is a specific home network, if you are unsure of
the dierence please read the quick explainer below).
QUICK EXPLAINER:
• Modern home routers typically provide two WiFi networks
(5GHz and 2.4GHz). These separate networks won’t always
be named clearly, especially if you have re-named your
home WiFi network.
• For your Party Lights to work, you will need to pair them to
the 2.4GHz WiFi network, which has a greater range and a
stronger and more reliable signal. If you are unsure which
of your WiFi networks is 2.4GHz, please clarify with your
internet provider.
2. Power up the Party Lights. Within 3 seconds, they should start
flashing red. If they do not flash, press and hold the reset/
control button on the smart controller for 5 seconds until they
start flashing.
Reset/Control
Button

7
3. To pair the Party Lights, select ‘Add Device’ (or ‘+’ if you
already have devices added).
4. Select ‘Party Lights.’
5. On the next screen, your WiFi network name will be displayed.
If your 2.4HGz WiFi network name is not displayed, please
leave the app, connect your Smartphone to the 2.4GHz
network then return to the app and enter the WiFi password
and select confirm. You can also enter the network name
manually if it is not displayed. Please refer to our explainer
on page 6 if this is not clear. If you still cannot find your
2.4GHz WiFi, please contact your internet provider.

8
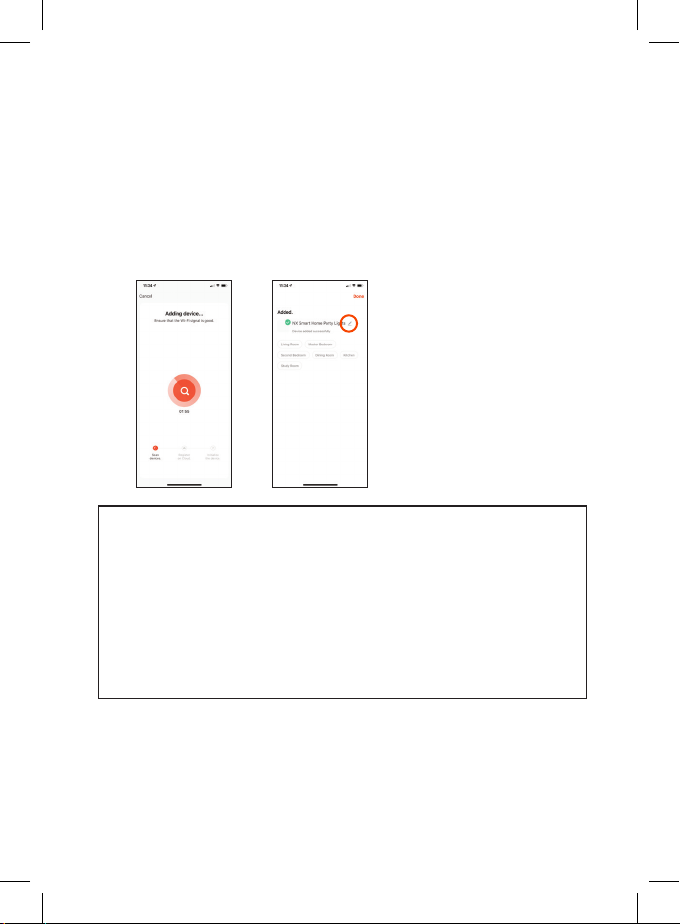
6. The pairing process will then begin. When completed a
confirmation screen will be displayed. At this stage you can
rename the NX Smart RGB Party Lights on the NX Smart App
if you choose to by selecting the pen icon (circled). This name
will trigger Amazon Alexa and Google Assistant if you use
them. You can then allocate the lights to a specified living
area if you have set up Home Management to easily control
multiple devices and/or create smart automations.
PLEASE NOTE
• If you plan to move the Party Lights to a dierent WiFi
network, please remove them from the NX Smart App first
turning them on and then by pressing and holding the
device icon on the home screen. Then once selected, select
‘Remove Device’ from the bottom of the screen.
• When your phone is connected to the new WiFi network,
please re-pair the Party Lights.
4.0 OPERATION
There are five operation modes available for the NX Smart RGB
Party Lights that can be selected at the top of the screen.
The on/o switch for the lights and is situated at the bottom
centre of the operation mode screen

9
4.1 LIGHT COLOUR OPTIONS
1. White: Slide your finger around the wheel to select your
desired shade of white or select one of the pre-set shades.
Brightness can be adjusted with the slider control below.
2. Colour: Slide your finger around the colour wheel to select
your desired colour or select one of the pre-set colours.
Brightness is adjusted by the slider. There is also a contrast
slider, that when adjusted to 50% and lower, allows you to
select pastel colours.
3. Static: There are twelve fixed pre-set static light scenes
available for selection. The scenes include: Candle, Santa
Claus, Romantic, Green Rainbow, Blue Purple Strip, Fire Eye,
Gold Ring, Fired Blue, Halloween, Super Man and Dazzling.
The brightness can be adjusted for each of these settings with
the slider.
4. Pre-set: There are twelve multifunction modes which provide
dazzling flash and chase lighting sequences. These are:
Colour Spectrum, Rainbow, Cylon, Confetti, Color Swing,
Light Show, Fire, Christmas Candy, Santa Claus, Halloween,
Dazzling and Party. Brightness and speed can be adjusted for
each of these settings with the sliders.

10
5. Music Mode: In this mode, the Party Lights will flash to music
that is within ‘earshot’ of the smart controller. There are six
dierent eects available that can be triggered by music.
They are: Shooting Rainbow, Shooting Star, Falling Star, Sky
Rainbow, Star Rainbow and Sky Star. You can use the slider
control to adjust the music sensitivity.
4.2 SMART CONTROLLER
If a smartphone is unavailable, you can use the button on the
NX Party Light’s smart controller to turn on the Party Lights.
Then with each button press, the lights will cycle through all
twelve Static modes, twelve Pre-set modes and six Music Modes.
Reset/Control
Button

11
4.3 GOOGLE ASSISTANT INTEGRATION
1. The NX Smart app features Verification Code linking for quick
and easy integration with Google Assistant. Simply select ‘Me’
from the NX Smart Home screen, select ‘Google Assistant’,
select ‘Get’ to load your Verification Code, then select ‘Copy’.
2. Open the Google Home app, select ‘+,’ then select ‘Set up
device’ on the next menu, then ‘Works with Google’ on the
following menu. Then tap the search icon at the top right
corner of the screen and search for ‘NX Smart’ and select it.

12
3. Finally, paste the Verification Code then select ‘Authorise’ on
the next screen
Google Assistant will find your device(s) then select the ones
you want to link. Confirm the home location for the device(s) and
select the room where the device(s) are located.
Now you can control the NX Smart RGB Party Lights with Google
Assistant. Just start with ‘hey Google’ to use your voice to
control your NX LED Party Lights.
Some example commands follow - or try your own variations!
Remember whatever you named the NX Smart LED Party Lights
as in the NX Smart App will also be their Google Assistant name.
• Ok Google, turn on Party Lights!
• Ok Google, turn o Party Lights!
• Ok Google, set Party Lights brightness to 20%.
• Ok Google, set Party Lights to blue.

13
4.4 AMAZON ALEXA INTEGRATION
1. The NX Smart app features Verification Code linking for quick
and easy integration with Amazon Alexa. Simply select ‘Me’
from the NX Smart Home screen, select ‘Alexa’, select ‘Get’ to
load your Verification Code, then select ‘Copy’.
2. Open your Amazon Alexa app and from the home menu,
select ‘More.’ Then select ‘Skills & Games’ then using the
search tool at the top right corner of the screen, enter 'NX
Smart' to search for the NX Smart App.

14
After you select 'NX Smart', select ‘Enable to Use’ on the next
screen.
3. Paste the Verification Code then select ‘Authorise’ on the next
screen. Once your NX Smart account is linked to Alexa, select
‘CLOSE’ on the following page then ‘DISCOVER DEVICES.’
Some example commands follow - or try your own variations!
Remember what you named NX Smart LED Party Lights in the
NX App, will be their Alexa name.
• Alexa, turn on Party Lights!
• Alexa, turn o Party Lights!
• Alexa, make the Party Light’s brightness 20%.
• Alexa, make the Party Light’s blue.

15
4.5 AUTOMATION
There are various ways you can enhance your smart product
experience. Automation lets you control your smart products
based on other conditions such as time, temperature or based
on the operation of another smart device.
To activate Automation, follow the steps below:
From the home screen, perform the following actions:
1. Select ‘Smart.’
2. To add an Automation routine, select ‘+’ (circled at the top of
the screen).
3. Select an Automation action (in this example we will select
‘When weather changes’).
4. You can select a specific weather condition, so we will select
‘Temperature.’
5. Select the trigger temperature then ‘Next.’
6. Select the action to be performed, we will select ‘run the
device.’
7. Select the device you want to control

16
8. Select the device operation. In this example we will select
‘Switch’ then ‘ON’ to turn on the lights.
9. Select ‘Save’ and select ‘Next.’
You are finally presented with a summary screen of the
Automation.
To finish, select ‘Save.’
4.6 ADDITIONAL APP FUNCTIONS
Additional app functions are described in the ‘FAQ & Feedback’
section in the ‘Me’ menu in the app.
5.0 SPECIFICATIONS
Model: NX-PTY10
WiFi: 2.4GHz Only, IEEE802.11b/g/n
Waterproof: Light IP65, Adaptor IP44
App Requirements: IOS 10.0 or Android 5 and above.
Operating Voltage: 12VDC 2A

17
6.0 WARRANTY TERMS & CONDITIONS
Our goods come with guarantees that cannot be excluded under
the Australian Consumer Law. You are entitled to a replacement
or refund for a major failure and for compensation for any other
reasonably foreseeable loss or damage. You are also entitled
to have the goods repaired or replaced if the goods fail to be of
acceptable quality and the failure does not amount to a major
failure.
This warranty is provided in addition to your rights under the
Australian Consumer Law. Directed Electronics Australia Pty
Ltd (Directed Electronics) warrants that this product is free from
defects in material and workmanship for a period of 12 months
from the date of purchase or for the period stated on the
packaging. This warranty is only valid where you have used the
product in accordance with any recommendations or instructions
provided by Directed Electronics.
This warranty excludes defects resulting from alterations of the
product, accident, misuse, abuse or neglect. In order to claim the
warranty, you must return the product to the retailer from which
it was purchased or if that retailer is part of a National network, a
store within that chain, along with satisfactory proof of purchase.
The retailer will then return the goods to Directed Electronics.
Directed Electronics will repair, replace or refurbish the product
at its discretion. The retailer will contact you when the product is
ready for collection. All costs involved in claiming this warranty,
including the cost of the retailer sending the product to Directed
Electronics, will be borne by you.
Email: [email protected]

18
INDEMNITY
You agree to defend, indemnify and hold harmless NX and its
subsidiaries and aliates from and against any and all claims,
proceedings, injuries, liabilities, losses, costs and expenses
(including reasonable legal fees), including but not limited
to, claims alleging negligence, invasion of privacy, copyright
infringement and/or trademark infringement against NX and
its subsidiaries and aliates or the NX services, relating to
or arising out of your breach of any provision of these terms,
your misuse of the NX or NX services, or your unauthorized
modification or alteration of products or software.
WARRANTY AND WARRANTY DISCLAIMER
NX has a limited warranty on whereby NX warrants to you and
only to you that the NX products will be free from defects in
materials and workmanship for one (1) year from the date of your
purchase of the on NX products (unless a longer warranty period
is required by law).
The specifics of this NX limited warranty are at
https://www.nx-tech.com.au/warranty
To the extent possible under governing law, other than the
above product warranty for the NX products you understand
and agree that the NX services are provided on an "as is" and
"as available" basis. NX makes no warranty that the NX services
will meet your requirements or that use of the NX services will
be uninterrupted, timely, secure or error-free nor does NX make
any warranty as to the accuracy or reliability of any information
obtained through the NX services (including third party content),
that any defects in the NX services will be corrected or that the
NX products or NX services will be compatible with any other
specific hardware or service. Further, NX does not warrant that
the NX services or the NX servers that provide you with data and
content are free of viruses or other harmful components.
Table of contents
Other NX Lighting Equipment manuals