manuals.online logo
Brands
  1. Home
  2. •
  3. Brands
  4. •
  5. Oasis
  6. •
  7. Water Dispenser
  8. •
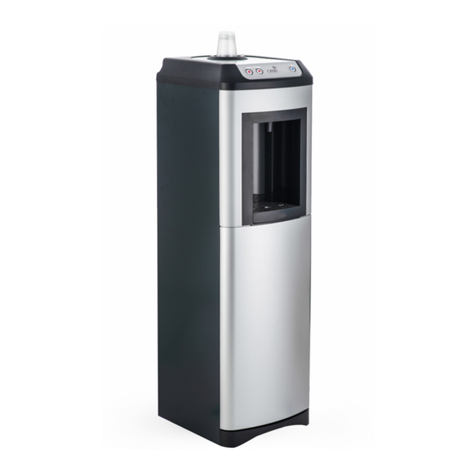
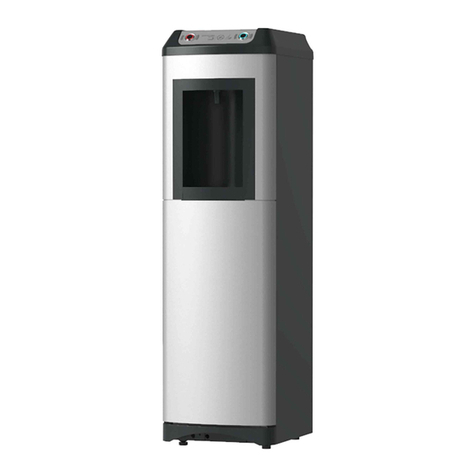
  9. Oasis Kalix Service manual

Oasis Kalix Service manual

Kalix Sanitisation Procedure.
TECHNICAL
BULLETIN
OAS0033A
181218
OAS0033A
1
Ensure use of personal protective equipment. Please read and comply with all safety and
handling instructions as recommended by sanitizer manufacturer.
Required materials:
•Sanitizer/Disinfectant based on 5% Peracetic Acid
•Mild dishwashing soap
•Small bristle brush
•Large bottle/bristle brush
•Philips head screw driver
•¼ Inch hexagonal head, screw driver
•Sellotape
•Empty sanitizing filter unit.
•Replacement filter media
•Replacement blue tubing [4000mm], knife to cut lengths.
•Cable ties [x 4]
•Container for emptying contaminated cooler, capacity of at least 2 liters.
•Small sink or bucket to hold at least 3 liters of water.
1. Disconnect cooler from Mains Water & Electrical supply.
•Remove and replace inlet tubing with similar length.
2. Expose filter system - removing front door panel from unit.
•Lift out and remove the drip tray. (Diagram 3.1)
•Depress the clip visible through the slot in the alcove and swivel the door forward. (Diagram
3.2)
Diagram 3.1
Kalix Sanitisation Procedure.
TECHNICAL
BULLETIN
OAS0033A
181218
OAS0033A
2
Diagram 3.2
•Remove the door from the cooler
•The inlet pipe and filter system, are now visible in the filter compartment.
3. Expose Tee-piece by removing top of cooler.
•Remove the top from the unit –remove the two screws at the rear of the top, and lift off the lid
assembly
Diagram 4.1 Diagram 4.2
4. Expose bulk head fitting by removing left side panel.
•Remove the three screws as shown in (Diagram 5.1.)
•Raise the panel vertically by about 25mm so that it clears the moulded base and the key slot,
and then lift the panel away from the cooler.
Kalix Sanitisation Procedure.
TECHNICAL
BULLETIN
OAS0033A
181218
OAS0033A
3
Diagram 5.1 Diagram 5.2
5. Remove drain plug and Empty Cold tank.
•Looking down on the unit, (Diagram 6.1) disconnect the cold water inlet as shown.
Diagram 6.1
•Open the drain valve at the rear of the unit. The drain is located 280mm from the floor –
ensure that you place a container under the valve prior to opening it. The container must
have a minimum capacity of 2 liters.
•Re-attach inlet tube and drain valve, once cooling tank is empty.
6. By-pass any filter system that is installed in the cooler.
•Disconnect & Dispose of the blue tube from the bulk head fitting at rear of the cooler, to the
inlet side of filter system, and from the outlet side of the filter to the Tee connection located on
the shelf.
Kalix Sanitisation Procedure.
TECHNICAL
BULLETIN
OAS0033A
181218
OAS0033A
4
•Install 4 ft (1300mm) blue tube between the bulk head fitting at the rear of the cooler, and the
Tee piece on the shelf.
•Use shortest distance
7. Install sanitization cartridge.
•Position sanitization filter unit between mains water supply and the bulkhead fitting on cooler
•Insert replacement mains tubing into inlet on sanitization filter and 200mm extra length of blue
tubing between outlet on sanitization filter and bulkhead fitting on cooler.
•Remove sanitization filter cartridge from filter head.
•Add 80 ml of concentrate of 5% Peracetic acid to sanitization filter cartridge.
•Replace sanitization filter cartridge. Ensure sanitization filter is standing upright to ensure
accurate mixing of sanitizer.
•Turn on mains water supply.
•Reconnect cooler to electrical supply. [CAUTION: live wires exposed]
Diagram 9.1
8. Fill cold side of cooler with sanitization solution.
•Dispense water from cold side only, until cold tank is completely filled with sanitization
solution, ensure all air is removed from system.
•Once all air is removed, dispense approx 300ml of water from cold side only.
•Turn off mains water supply on cooler.
9. Fill cook side of cooler with sanitization solution
•Carefully remove sanitization filter cartridge.
•Pour off excess water in the sanitization cartridge.
•Add 16 ml of the 5% Peracetic Acid Sanitizer to the filter cartridge.
•Carefully replace sanitization filter cartridge to filter head. Ensure sanitization filter is standing
upright to ensure accurate mixing of sanitizer.
•With mains water supply still off, place selotape over cook and cold buttons to keep them
depressed. Use tissue to protect buttons and ensure buttons are fully depressed
•Using shut off valve. Dispense 200ml (maximum) from cooler.
•Leave cooler to stand with cleaning solution for approximately 30 minutes.
•Do not remove parts until 30 minutes have elapsed.
•Remove selotape from pushbuttons after 30 minutes are finished.
•Turn on mains water supply.
•First dispense water from the cold side of the cooler for 5 minutes, and then dispense water
from the cook side of the cooler for 30 seconds. This will eliminate sanitizer from the unit
before disassembling the water outlet and blue tubing.
Kalix Sanitisation Procedure.
TECHNICAL
BULLETIN
OAS0033A
181218
OAS0033A
5
•Disconnect the cooler from mains water and electrical supply. Flush the cold tank and drain
tube by following [STEP 6].
Sanitization Instructions –Additional Parts:
10. Sanitizing solution
•Prepare a 2000 ppm Peracetic acid solution by mixing 40ml of 5% Peracetic acid per liter of
room temperature water.
11. Additional Parts Sanitization
Diagram 12.1 Diagram 12.2
•Unscrew spout from water outlet. (Diagram 12.1)
•Remove blue tubing between water outlet and solenoids on cook and cold sides. (Diagram
12.2)
•Remove water outlet from unit.
•Undo cable ties holding solenoids and Tee-piece in position. Dispose of the blue tubing
connecting the solenoids and Tee-piece
•Disconnect the 4 ft blue tubing from the Tee-piece and bulk head fitting. Retain tee-piece for
sanitization.
•Disconnect sanitizing cartridge from unit. Remove bulk head fitting from the condenser on
unit and retain for sanitization.
•Remove/Dispose blue tube between cooling tank and solenoids.
Kalix Sanitisation Procedure.
TECHNICAL
BULLETIN
OAS0033A
181218
OAS0033A
6
•Separate “John Guest” ¼ Inch reducers from water outlet.
•Wash the components (spout, water outlet, ¼ Inch reducers, Tee-piece, and bulk head fitting)
with mild soap and water. Use a small bristle brush to clean all the interior components of
every piece, including the check valves in the water outlet. Rinse all parts thoroughly with
clean water.
•Place spout, water outlet, ¼ Inch reducers, Tee-piece, and bulk head fitting in sanitization
solution. Ensure that the check valves remain open while parts are being sanitized. [Use
cable ties, rinse thoroughly after use].
•Ensure components are completely submerged in solution.
•Leave to stand in sanitization solution for at least 15 minutes.
Diagram 12.3 Diagram 12.4
•Rotate filter clockwise and pull downward to remove filter from unit
•Pour off contaminated water from filter.
•Loosen both screws, indicated in (Diagram 12.4), and remove filter head from unit.
Kalix Sanitisation Procedure.
TECHNICAL
BULLETIN
OAS0033A
181218
OAS0033A
7
Diagram 12.5
•Unscrew filter cap from filter housing.
•Remove insert and filter media.
•Separate filter media from insert and dispose of filter media.
•Wash all remaining parts with mild soap and water using both the small and large bristle
brush. Rinse parts with clean water.
Diagram 12.6
•Separate mounting bracket from filter head.
•Wash in mild soap and water using the small bristle brush to clean the interior water contact
surfaces.
•Assemble filter head, cap, and insert as indicated in (Diagram 12.6)
•Ensure insert is held in position, then place all filter parts in sanitization solution, and leave for
15 minutes. (This should keep check valve in filter head open for total sanitization)
Kalix Sanitisation Procedure.
TECHNICAL
BULLETIN
OAS0033A
181218
OAS0033A
8
•Disassemble parts and remove o-rings from insert and cap.
•Place all filter parts back in sanitization solution for a further 10 minutes.
•Remove all parts from sanitization solution, and rinse thoroughly under a tap.
12. Re-install additional parts
Diagram 13.1 Diagram 13.2
•Using replacement filter media push insert into position.
•Re-assemble filter as shown in (Diagram 13.1).
•Re-attach mounting bracket to filter head.(Diagram 13.2)
Diagram 13.3 Diagram 13.4
Kalix Sanitisation Procedure.
TECHNICAL
BULLETIN
OAS0033A
181218
OAS0033A
9
•Position filter head and mounting bracket over screws and slot into place. (Diagram 13.3)
•Re-Tighten screws.
•Push filter into filter head and lock into position. (Diagram 13.4)
Diagram 13.5 Diagram13.6
•Take water-outlet and ¼ Inch reducers from sanitization solution and rinse under flowing tap.
•Rebuild water-outlet assembly with ¼ Inch reducers, and place in original position.
•Attach spout to water-outlet, and tighten into position. (Diagram 13.6)
•Re-attach new tubing to Water outlet on cook and cold sides.
•Reassemble Tee-piece with solenoids with replacement tubing; and reposition solenoids with
substitute cable ties.
•Affix bulk head fitting.
•Install all replacement blue tubing and connect the filtration system, back in line. Ensure tight
connections
•Connect from bulk head fitting to inlet of filter head, and outlet of filter head to Tee-connection
located on shelf.
13. Reassemble unit
Kalix Sanitisation Procedure.
TECHNICAL
BULLETIN
OAS0033A
181218
OAS0033A
10
Diagram 14.1 Diagram 14.2
•Replace side panel onto the cooler. Position the key slot in panel on the screw in the front
fascia, and slide panel downward over locater in moulded base
•Affix 3 screws in position illustrate in (Diagram 14.2).
Diagram 14.3 Diagram 14.4
•Reposition top of Kalix as per (Diagram 14.3)
•Slide top over push buttons, then secure in position via two screws at the back of the cooler.
•Ensure cup dispenser is firmly in position before securing screws.
•Return filter compartment door to its exact position, then replace drip tray to its place.
14. Finally the new filtration system needs to be flushed out of the cooler.
•Turn on mains water supply and connect electrical supply to the cooler.
•First dispense water from the cold side of the cooler for 2 minutes.
•Then dispense water from the cook side of the cooler for 60 seconds.

Other Oasis Water Dispenser manuals

Oasis P8M User manual

Oasis

Oasis P8M User manual

Oasis B1RRK Manual

Oasis

Oasis B1RRK Manual

Oasis POU_1RREC Series Installation and maintenance instructions

Oasis

Oasis POU_1RREC Series Installation and maintenance instructions

Oasis POU1AQ Series User manual

Oasis

Oasis POU1AQ Series User manual

Oasis Quasar PWEBQ User manual

Oasis

Oasis Quasar PWEBQ User manual

Oasis Aquabar 2 User manual

Oasis

Oasis Aquabar 2 User manual

Oasis POU2LRHK POU2LRHK User manual

Oasis

Oasis POU2LRHK POU2LRHK User manual

Oasis PACSL User manual

Oasis

Oasis PACSL User manual

Oasis MAXXFILL FLEX User manual

Oasis

Oasis MAXXFILL FLEX User manual

Oasis PCPEBQ User manual

Oasis

Oasis PCPEBQ User manual

Oasis MAXXFILL PULSE User manual

Oasis

Oasis MAXXFILL PULSE User manual

Oasis BPA1SK Technical manual

Oasis

Oasis BPA1SK Technical manual

Oasis P1PV Series Installation and maintenance instructions

Oasis

Oasis P1PV Series Installation and maintenance instructions

Oasis 506336C User manual

Oasis

Oasis 506336C User manual

Oasis PSWSA1SK User manual

Oasis

Oasis PSWSA1SK User manual

Oasis 504818C User manual

Oasis

Oasis 504818C User manual

Oasis Mirage User manual

Oasis

Oasis Mirage User manual

Oasis 504819C User manual

Oasis

Oasis 504819C User manual

Oasis POU1ACTHSK Manual

Oasis

Oasis POU1ACTHSK Manual

Oasis PM User manual

Oasis

Oasis PM User manual

Oasis PCPD10EBQ User manual

Oasis

Oasis PCPD10EBQ User manual

Oasis PG8ACSL User manual

Oasis

Oasis PG8ACSL User manual

Oasis VERSAFILLER  P EBF Series User manual

Oasis

Oasis VERSAFILLER P EBF Series User manual

Oasis Waterways Estetica SAET310BLES User manual

Oasis

Oasis Waterways Estetica SAET310BLES User manual

Popular Water Dispenser manuals by other brands

Whirlpool 8LIECH-SCSSFP5W user manual

Whirlpool

Whirlpool 8LIECH-SCSSFP5W user manual

Scotsman Aqua Patrol Specification sheet

Scotsman

Scotsman Aqua Patrol Specification sheet

Hamilton Beach SA-HB-40-DB-CERT owner's manual

Hamilton Beach

Hamilton Beach SA-HB-40-DB-CERT owner's manual

Whirlpool HD1000XSW8 Installation Instructions and Use & Care Guide

Whirlpool

Whirlpool HD1000XSW8 Installation Instructions and Use & Care Guide

WaterLogic WLH2 Classe quick start guide

WaterLogic

WaterLogic WLH2 Classe quick start guide

Spectra Watermakers Z-Ion Catalina 300 Mk II installation instructions

Spectra Watermakers

Spectra Watermakers Z-Ion Catalina 300 Mk II installation instructions

3M AQUA-PURE IL-IM-01 Installation & operating instructions

3M

3M AQUA-PURE IL-IM-01 Installation & operating instructions

Ecosoft FU1013CABDVUP manual

Ecosoft

Ecosoft FU1013CABDVUP manual

Elkay EZTL EZSTL8 1D Series Installation, care & use manual

Elkay

Elkay EZTL EZSTL8 1D Series Installation, care & use manual

Zip HydroChill HCF090 Installation instructions & user manual

Zip

Zip HydroChill HCF090 Installation instructions & user manual

Whirlpool 8171413 installation instructions

Whirlpool

Whirlpool 8171413 installation instructions

Kenmore SOFTENERS-275-280 owner's manual

Kenmore

Kenmore SOFTENERS-275-280 owner's manual

Aqua Systems SmartChoice Installation, operation and maintenance manual

Aqua Systems

Aqua Systems SmartChoice Installation, operation and maintenance manual

Quooker Scale Control Plus installation guide

Quooker

Quooker Scale Control Plus installation guide

GUTHRIE & FREY GF24 Installation, operation and maintenance manual

GUTHRIE & FREY

GUTHRIE & FREY GF24 Installation, operation and maintenance manual

Elkay EFW16 2HJO Series Installation, care & use manual

Elkay

Elkay EFW16 2HJO Series Installation, care & use manual

Omnifilter BF9C installation instructions

Omnifilter

Omnifilter BF9C installation instructions

RAMTONS RM/558 instruction manual

RAMTONS

RAMTONS RM/558 instruction manual

manuals.online logo
manuals.online logoBrands
  • About & Mission
  • Contact us
  • Privacy Policy
  • Terms and Conditions

Copyright 2025 Manuals.Online. All Rights Reserved.