manuals.online logo
Brands
  1. Home
  2. •
  3. Brands
  4. •
  5. Oasis
  6. •
  7. Water Dispenser
  8. •
  9. Oasis BPA1SK Technical manual

Oasis BPA1SK Technical manual

OASIS
®
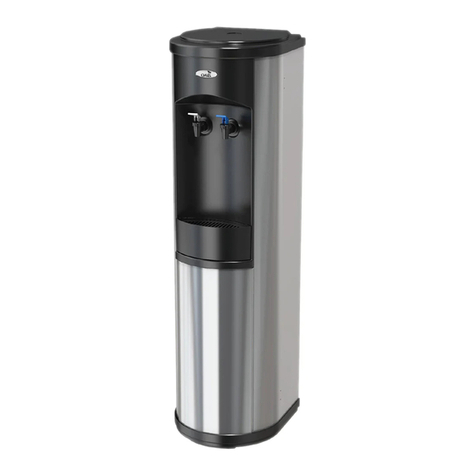
WATER COOLER MODELS
POUE1SK, POUE1SHS, POUD1SK, POUD1SHS INSTRUCTIONS
A. INSPECTION
Inspect the carton and water cooler for evidence of rough handling and concealed damage. Damage claims should be filed with the carrier.
B. MAINTENANCE
1. Inspect the condenser for dirt and lint every three months. If cleaning is required, disconnect the power supply cord, then clean the condenser with a small
stiff non-wire brush. Observance of this procedure will ensure adequate air circulation through the condenser for efficient and economical operation.
2. A cone shaped strainer can be found in the tube leading into the mechanical float valve on the reservoir cap. It can be removed and flushed clean. Be sure to
replace it in the tube once cleaned.
C. OVERLOAD PROTECTION
The compressor motor is equipped with an automatic reset protector, which will disconnect the motor from the line in case of an overload.
D. LUBRICATION
This unit is equipped with a hermetically sealed compressor, which does not require any additional lubrication.
E. HOT TANK THERMOSTATS
ON HOT MODELS, THE HOT TANK THERMOSTATS ARE NOT DESIGNED TO OPERATE WET. AN ELECTRICAL FAULT MAY OCCUR IF THE
THERMOSTATS ARE WETTED.
1. Do not steam or wet clean in the thermostat area.
2. All minor water spills must be wiped up immediately after installing or removing the mechanical float lid assembly onto the cooler.
3. Where major water spills or leaks have occurred (internal components have gotten wet), do not operate the hot tank until it is assured that the thermostats
have had a chance to dry out (a 48 hour period is sufficient) or that the thermostat(s) have been replaced.
F. TO PUT WATER COOLER INTO SERVICE
1. The water cooler should be located a minimum of 2" (51mm) from the wall to assure adequate condenser air circulation.
2. If filter(s) are to be added, follow filter manufacturer’s recommended instructions.
3. Connect blue tube to cold water supply line at the back of the cooler.
4. WARNING: A pressure regulator, such as a Slow Flow regulator, must be installed in front of the unit’s water inlet if the water pressure
(including any possible pressure spikes) could exceed 100psig (690kpg).
5. Turn on water supply to cooler.
6. Check the available power supply against the water cooler data plate to assure correct electrical service. Plug power supply cord into receptacle.
7. CAUTION: On models with a hot tank, the hot tank switch must be in the “OFF” position. Switch is mounted at the rear of the cooler on the
condenser.
8. After the reservoir is full, check all connections for leaks.
9. Open each faucet until water flows freely.
10. On models with a hot tank, turn on the hot tank by depressing the switch toward the “RESET” position.
11. CAUTION: Failure to fill hot tank with water before turning on the hot tank can cause physical damage to the unit.
12. CAUTION: WATER FROM HOT FAUCET CAN SCALD.
G. SAFETY FLOAT
The cooler is equipped with a safety float to prevent overfilling in case the fill float fails. If the fill float should fail, the safety float will be activated as the water
level rises. When the safety float is activated, water flow to the reservoir will be shut off. Press the blue reset button about half way down on the reservoir cap
until you hear the water flow restart, then call your service representative. CAUTION: A hard impact or jarring of the unit while it is filling may trip the
safety float.
H. TO DISCONTINUE USE OF WATER COOLER
1. On models with a hot tank, place hot tank switch in the “OFF” position. Draw water from hot faucet until water is cool.
2. Disconnect power supply cord.
3. Shut off water supply to cooler.
4. Drain reservoir through cold faucet.
5. On models with a hot tank, drain tank by placing a container under black drain valve located on the condenser. Turn drain valve counter clockwise to open,
and catch water in container. OR, for convenience, insert one end of a 3/8” OD tube into the opening of the drain valve and the other into a container and
drain. Close drain valve when the tank is empty.
6. ALWAYS DRAIN ALL WATER WHEN FREEZING TEMPERATURES ARE ANTICIPATED OR BEFORE SHIPPING THE WATER COOLER.
J. SANITIZING INSTRUCTIONS
If sanitizing is required, a solution can be made by adding ½ teaspoonful of household bleach to one (1) gallon of water or 2 ml of household bleach to 3 L of
water. DO NOT use a stronger sanitizing solution. Wash the cooling tank and baffle in the solution. Rinse immediately. DO NOT allow sanitizing solution to
remain in the cooling tank more than 5 minutes. On hot models, DO NOT allow sanitizing solution to enter hot tank; plug inlet to hot tank. Dispense solution
through cold faucet and cook faucet if so equipped. Rinse through faucet(s) with clean water. Remove plug from hot tank water inlet. Drain hot tank and flush
with clean water.
K. ALTERNATE FAUCETS
A safer faucet that deters accidental dispensing of water by toddlers is available. This new faucet is simple and easy to use with one hand yet it adds a new
measure of protection to your water cooler. See your dealer for details. WARNING
The warranty for this machine is automatically void if any alteration, modification, or combination with any other machine or device is deemed to be the source of any
claim. The Underwriters’ Laboratory Listing and CSA’s Certification may be void as the result of any alteration or modification. The manufacturer accepts no liability
resulting from any alteration, modification, or combination with any other machine or device. The manufacturer is not responsible for damage caused by the plumbing
connection or improper installation.
EXCEPT AS SET FORTH HEREIN, THE MANUFACTURER MAKES NO OTHER WARRANTY, GUARANTEE OR AGREEMENT EXPRESSED, IMPLIED OR
STATUTORY, INCLUDING ANY IMPLIED WARRANTY OR MERCHANTIABILITY OR FITNESS FOR A PARTICULAR PURPOSE.
222 East Campus View Blvd. • Columbus, OH 43235 U.S.A.
1-800-950-3226
www.oasiscoolers.com
is a trademark of Oasis International © 2009 Oasis International
OASIS
®
is a registered trademark of Oasis International 030099-229 Rev C
WATER COOLER MODELS
BPA1SK, BPA1SHS, BPI1SK, BPI1SHS,
BPD1SK, BPD1SHS, BPO1SK, BPO1SHS
INSTRUCTIONS
1. INSPECTION
Inspect the carton and water cooler for evidence of rough handling and concealed damage. Damage claims should be filed with the carrier.
2. MAINTENANCE
Periodically remove dirt and lint from the black wire and tube condenser on the back of the cooler. Disconnect the power supply cord, then clean with
the small brush attachment of a vacuum cleaner. Observance of this procedure will insure adequate air circulation so operation is efficient and
economical.
3. OVERLOAD PROTECTION
The compressor motor is equipped with an automatic reset protector which will disconnect the motor from the line in case of an overload.
4. HOT TANK THERMOSTATS
ON HOT MODELS, THE HOT TANK THERMOSTATS ARE NOT DESIGNED TO OPERATE WET. AN
ELECTRICAL FAULT MAY OCCUR IF THE THERMOSTATS ARE WETTED.
a) Do not steam or wet clean in the thermostat area.
b) All minor water spills must be wiped up immediately after loading or unloading bottle onto or from the cooler.
c) Where major water spills or leaks have occurred, (internal components have gotten wet) do not operate the hot
tank until it is assured that the thermostats have had a chance to dry out (a 48 hour period is sufficient) or that the
thermostat(s) have been replaced.
5. LUBRICATION
This unit is equipped with a hermetically sealed compressor and requires no additional lubrication.
6. TO PUT WATER COOLER INTO SERVICE
a) Cold & Cook Models
1) Invert water bottle on top of cooler.
2) Draw water from faucet(s). Allow about 30 minutes for water to chill after cooler is plugged in.
b) Hot Models
1) Invert water bottle on top of cooler.
2) Open hot faucet until water flows freely.
3) Place the hot tank heater switch in the "ON" (reset) position.
CAUTION: ON MODELS WITH HOT TANK, FAILURE TO FILL HOT TANK WITH WATER BEFORE TURNING ON HOT TANK
HEATER SWITCH, CAN CAUSE PHYSICAL DAMAGE TO THE UNIT.
c) Check the available power supply against the water cooler data plate to assure correct electrical service. Plug power supply cord into
receptacle.
d) Allow cooler to operate about 30 minutes for chilled and hot water dispensing.
CAUTION: WATER FROM HOT FAUCET CAN SCALD.
e) DO NOT operate the hot tank with either of the baffle parts removed from the cold tank; water from the inverted water bottle may overflow
onto the floor. Also, electrical consumption will increase.
f) ALTERNATE FAUCETS: A safer faucet that deters accidental dispensing of water by toddlers is available. This new faucet is simple and
easy to use with one hand, yet it adds a new measure of protection to your water cooler. See your dealer for details.
7. TO DISCONTINUE USE OF WATER COOLER
a) Disconnect power supply cord.
b) Remove water bottle from cooler.
c) Open faucet(s) to drain water.
d) Hot Models: Place the hot water heater in the "OFF" position ("O" on rocker is depressed). Draw water from the hot faucet until the water is
cool. The drain tube has a black valve located on the condenser, place a container under the drain. For convenience, insert a 4” (102mm)
length of 3/8”O.D. plastic tube into the opening at the end of the black valve and turn the petcock or simply turn the valve’s petcock without
the tube in order to open the drain. Turn the drain valve to a closed position when tank is empty. Some models have a white cap that is
removed to drain the tank.
e) ALWAYS DRAIN ALL WATER WHEN FREEZING TEMPERATURES ARE ANTICIPATED AND BEFORE SHIPPING THE WATER
COOLER.
8. SANITIZING INSTRUCTIONS
If sanitizing is required, a solution can be made by adding 1/2 teaspoonful of household bleach to one (1) gallon of water or 2 ml of household bleach
to 3 L of water. DO NOT use a stronger sanitizing solution. Wash the cooling tank and baffle in the solution. Rinse immediately. DO NOT allow
sanitizing solution to remain in the cooling tank more than 5 minutes. On hot models, DO NOT allow sanitizing solution to enter hot tank; plug inlet
to hot tank. Dispense solution through cold faucet and cook faucet if so equipped. Rinse through faucet(s) with clean water. Remove plug from hot
tank water inlet. Drain hot tank and flush with clean water. WARNING
The warranty and the Underwriters' Laboratories listing for this machine are automatically voided if this machine is altered, modified, or combined with any
other machine or device. Alteration or modification of this machine may cause serious flooding and/or hazardous electrical shock or fire.
EXCEPT AS SET FORTH HEREIN, THE MANUFACTURER MAKES NO OTHER WARRANTY, GUARANTEE OR AGREEMENT EXPRESSED,
IMPLIED OR STATUTORY, INCLUDING ANY IMPLIED WARRANTY OR MERCHANTABILITY OR FITNESS FOR A PARTICULAR PURPOSE.
Enfriadores de Agua Modelos
BPA1SK, BPA1SHS, BPI1SK, BPI1SHS,
BPD1SK, BPD1SHS, BPO1SK, BPO1SHS
Instrucciones
1. Inspección
Revise el cartón y el enfriador buscando evidencia de maltrato en el transporte y/o
daño oculto. Reclamos por daños deberá hacerse al transportista.
2. Mantenimiento
Periódicamente quite polvo y pelusa del cable negro y del tubo condensador en la
parte posterior del enfriador. Desconecte el tomacorriente, y luego limpie con un
cepillo o accesorio de una aspiradora. Observar este procedimiento asegurará una
adecuada circulación de aire para que la operación sea eficiente y económica.
3. Protección contra sobre carga
El moto-compresor está equipado con un protector térmico de reinicio automático el
cual desconectará el moto-compresor de la línea en caso de una sobre carga.
4. Termostatos del tanque caliente
EN MODELOS CON VALVULA CALIENTE, LOS TERMOSTATOS DEL TANQUE
CALIENTE NO ESTÁN DISEÑADOS PARA OPERAR MOJADOS. UNA FALLA
ELÉCTRICA PUEDE OCURRIR SI LOS TERMOSTATOS SON MOJADOS.
5. Lubricación
Esta unidad está equipada con un moto-compresor herméticamente sellado y no
requiere de lubricación adicional.
6. Para poner a funcionar el enfriador
a) Modelos Fría y Temperatura Ambiente
1) Coloque el botellón de agua invertido en la parte superior del enfriador.
2) Saque agua de las válvulas.
3) Conecte el tomacorriente del enfriador en el enchufe.
4) Espere 30 minutos para que el agua se enfríe una vez que el enfriador
sea conectado.
b) Modelos Caliente y Fría
1) Coloque el botellón de agua invertido en la parte superior del enfriador
2) Abra la válvula de agua caliente hasta que fluya libremente.
3) Coloque el interruptor del calentador del tanque caliente en posición “ON”
(Reset).
4) Conecte el tomacorriente del enfriador en el enchufe.
PRECAUCIÓN: EN MODELOS CON TANQUE CALIENTE, EL NO PONER
AGUA EN EL TANQUE CALIENTE ANTES DE ENCENDER EL
INTERRUPTOR DEL CALENTADOR DEL TANQUE CALIENTE, PUEDE
CAUSAR DAÑO FÍSICO A LA UNIDAD.
c) Revise el suministro de voltaje en su localidad contra lo estipulado en la placa de
datos del enfriador para asegurar servicio eléctrico correcto.
d) Permita al enfriador operar 30 minutos antes de tomar agua caliente o fría.
Precaución: Agua de la válvula caliente puede escaldar.
e) No opere el tanque caliente con cualquiera de los deflectores removidos del
tanque frío; agua del botellón invertido puede tirarse al suelo. También, el
consumo eléctrico aumentara.
f) Válvulas Alternas: Una válvula que evita la toma accidental de agua por niños se
encuentra disponible. Esta nueva válvula es simple y fácil de operar con una
mano, pero le da una medida de protección a su enfriador. Vea a su distribuidor
para mas detalles.
7. Para discontinuar el uso del enfriador de agua.
a) Desconecte el tomacorriente.
b) Quite el botellón del enfriador.
c) Abra la(s) válvula(s) para drenar el agua.
d) Modelos con válvula Caliente: Ponga el calentador de agua caliente en posición
“OFF” (Se aplana la “O” en la palanca). Drene agua de la válvula caliente hasta
que el agua este fresca. El tubo de dren tiene una válvula negra localizada en el
condensador, coloque un contenedor debajo del dren. Para su conveniencia,
inserte un pedazo de tubo de plástico de 4 pulgadas de longitud con un diámetro
exterior de 3/8 de pulgada en la apertura del final de la válvula negra y de vuelta
al grifo o simplemente de vuelta al grifo sin el tubo para abrir el dren. De vuelta
a la válvula del dren a la posición de cerrado cuando el tanque esté vacío.
Algunos modelos tienen una tapa blanca que se retira para drenar el tanque.
e) SIEMPRE DRENE TODA EL AGUA CUANDO SE ANTICIPAN
TEMPERATURAS AMBIENTE DE CONGELACIÓN O ANTES DE EMBARCAR
EL ENFRIADOR.
8. Instrucciones de Higiene
Si se requiere higienizar, una solución puede hacerse al agregar media cucharada
de blanqueador a 3 litros de agua. NO UTILIZE una solución higienizada mas
fuerte. Lave el enfriador y deflector en la solución. NO PERMITA que la solución
higienizada se quede en el tanque de enfriamiento mas de 5 minutos. En modelos
calientes, NO PERMITA que la solución higienizada entre al tanque caliente;
conecte la entrada al tanque caliente. Pase la solución a través de la válvula fría y
la válvula ambiente si así está equipada. Enjuague la(s) válvula(s) con agua
caliente. Quite el tapón de la entrada del tanque de agua caliente. Drene el tanque
caliente y enjuague con agua limpia.
Aviso
La garantia y el enlistado ante Underwriters Laboratories para este aparato son
completamente anulados si este aparato es alterado, modificado o combinado con
algun otro aparato o artefacto. Alteracion o modificacion de este aparato puede
causar inundacion seria y/o descarga electrica o fuego.
Ademas de lo aqui senalado, el fabricante no ofrece ninguna otra garantia, o
acuerdo expreso, denotado o estatutario, incluyendo cualquier garantia denotada o
negociabilidad o aptitud para cualquier proposito.
222 East Campus View Blvd. • Columbus, OH 43235 U.S.A.
1-800-950-3226
www.oasiscoolers.com
is a trademark of Oasis International © 2009 Oasis International
030099-222 Rev E

This manual suits for next models

7

Other Oasis Water Dispenser manuals

Oasis PCPD10EBQ User manual

Oasis

Oasis PCPD10EBQ User manual

Oasis 115V POU1CCT User manual

Oasis

Oasis 115V POU1CCT User manual

Oasis PG8ACSL User manual

Oasis

Oasis PG8ACSL User manual

Oasis PCPEBF User manual

Oasis

Oasis PCPEBF User manual

Oasis PM User manual

Oasis

Oasis PM User manual

Oasis Osmosis Home User manual

Oasis

Oasis Osmosis Home User manual

Oasis PCPEBQ User manual

Oasis

Oasis PCPEBQ User manual

Oasis PACSL User manual

Oasis

Oasis PACSL User manual

Oasis VERSACOOLERII PAC User manual
Oasis

Oasis VERSACOOLERII PAC User manual

Oasis P1PVCDKY Installation and maintenance instructions

Oasis

Oasis P1PVCDKY Installation and maintenance instructions

Oasis POU_1RREC Series Installation and maintenance instructions

Oasis

Oasis POU_1RREC Series Installation and maintenance instructions

Oasis 504818C User manual

Oasis

Oasis 504818C User manual

Oasis KALIX CONTACTLESS P1CPVCDKY User manual

Oasis

Oasis KALIX CONTACTLESS P1CPVCDKY User manual

Oasis Aquabar 2 User manual

Oasis

Oasis Aquabar 2 User manual

Oasis VERSAFILLER  P EBF Series User manual

Oasis

Oasis VERSAFILLER P EBF Series User manual

Oasis BAEB1SHSK User manual

Oasis

Oasis BAEB1SHSK User manual

Oasis MAXXFILL FLEX User manual

Oasis

Oasis MAXXFILL FLEX User manual

Oasis MAXXFILL PULSE User manual

Oasis

Oasis MAXXFILL PULSE User manual

Oasis POU Instruction sheet

Oasis

Oasis POU Instruction sheet

Oasis POU2LRHK POU2LRHK User manual

Oasis

Oasis POU2LRHK POU2LRHK User manual

Oasis 032725-005 Installation and maintenance instructions

Oasis

Oasis 032725-005 Installation and maintenance instructions

Oasis 504819C User manual

Oasis

Oasis 504819C User manual

Oasis B1RRK Manual

Oasis

Oasis B1RRK Manual

Oasis P1PV Series Installation and maintenance instructions

Oasis

Oasis P1PV Series Installation and maintenance instructions

Popular Water Dispenser manuals by other brands

WaterLogic WL2FLT Troubleshooting

WaterLogic

WaterLogic WL2FLT Troubleshooting

Zerica REFRESH P HPDC Installation and operation manual

Zerica

Zerica REFRESH P HPDC Installation and operation manual

Hague MAXIMIZER 7180 Owner's manual and installation guide

Hague

Hague MAXIMIZER 7180 Owner's manual and installation guide

Scarlett SC-1222 instruction manual

Scarlett

Scarlett SC-1222 instruction manual

Breville HotCup VKJ367 user manual

Breville

Breville HotCup VKJ367 user manual

Comet XRC-3023-WW manual

Comet

Comet XRC-3023-WW manual

Pentair METEOR U78-767P owner's manual

Pentair

Pentair METEOR U78-767P owner's manual

Alkamedi AMS2100 Operation manual

Alkamedi

Alkamedi AMS2100 Operation manual

vitapur VWD866W-4 Use & care guide

vitapur

vitapur VWD866W-4 Use & care guide

Culligan IC-100 use and care manual

Culligan

Culligan IC-100 use and care manual

Culligan MEDALLIST SERIES owner's guide

Culligan

Culligan MEDALLIST SERIES owner's guide

Grunbeck SODA JET III Premium Operation manual

Grunbeck

Grunbeck SODA JET III Premium Operation manual

Culligan Premium Aqua-Cleer RO Installation and operation instructions

Culligan

Culligan Premium Aqua-Cleer RO Installation and operation instructions

Lacor 69298 Instructions for use and maintenance

Lacor

Lacor 69298 Instructions for use and maintenance

PURE 500 Series owner's manual

PURE

PURE 500 Series owner's manual

DS Services of America 200K Series How to Clean

DS Services of America

DS Services of America 200K Series How to Clean

Halsey Taylor Double Bubbler LF SCWT14CB Series owner's manual

Halsey Taylor

Halsey Taylor Double Bubbler LF SCWT14CB Series owner's manual

Elkay EBFATLDD A Series Installation, care & use manual

Elkay

Elkay EBFATLDD A Series Installation, care & use manual

manuals.online logo
manuals.online logoBrands
  • About & Mission
  • Contact us
  • Privacy Policy
  • Terms and Conditions

Copyright 2025 Manuals.Online. All Rights Reserved.