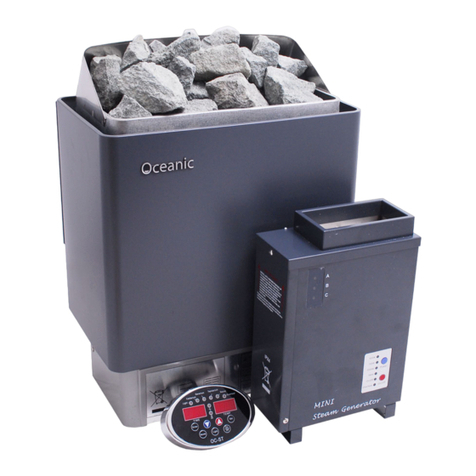
Oceanic OSX User manual

Sauna & Steam
OSX Sauna Controller
Instructions
Oceanic Ltd, Pountney Street, Wolverhampton, WV2 4HX

Oceanic Saunas 01902 450 550 sales@oceanic-saunas.co.uk www.oceanic-saunas.co.uk 2
Contents
1. Introduction . . . . . . . . . . . . . . . . . . . . . . . . . . . . . . . . . . . . . . . . . . . . . 3
2. Installation Overview. . . . . . . . . . . . . . . . . . . . . . . . . . . . . . . . . . . . . . . . 3
3. Parameters . . . . . . . . . . . . . . . . . . . . . . . . . . . . . . . . . . . . . . . . . . . . . .4
4. OSX Touch Screen Installation . . . . . . . . . . . . . . . . . . . . . . . . . . . . . . . . . . 4
5. Touch Screen Operation . . . . . . . . . . . . . . . . . . . . . . . . . . . . . . . . . . . . . . 5
5.1. Screen 0. Screen O . . . . . . . . . . . . . . . . . . . . . . . . . . . . . . . . . . . . . . . . 5
5.2. Screen 1. Home screen . . . . . . . . . . . . . . . . . . . . . . . . . . . . . . . . . . . . . . 6
5.3. Screen 2. Wait mode. . . . . . . . . . . . . . . . . . . . . . . . . . . . . . . . . . . . . . . . 7
5.4. Screen 3. Heating mode. . . . . . . . . . . . . . . . . . . . . . . . . . . . . . . . . . . . . . 8
5.5. Screen 4. Overheat . . . . . . . . . . . . . . . . . . . . . . . . . . . . . . . . . . . . . . . . 9
5.6. Screen 5. Settings . . . . . . . . . . . . . . . . . . . . . . . . . . . . . . . . . . . . . . . . 10
5.7. Screen 6 Lighting Settings Screen . . . . . . . . . . . . . . . . . . . . . . . . . . . . . . 11
5.8. Screen 7. PIN Screen . . . . . . . . . . . . . . . . . . . . . . . . . . . . . . . . . . . . . 12
5.9. Screen 8. Lock Settings Screen . . . . . . . . . . . . . . . . . . . . . . . . . . . . . . . 12

Oceanic Saunas 01902 450 550 sales@oceanic-saunas.co.uk www.oceanic-saunas.co.uk 3
1. Introduction
Thank you for choosing to buy our Oceanic OSX Sauna Heater Controller , please take the time to read
these instructions before you begin as they contain important information about the installation and
operation of the control system.
These instructions are a supplement to the sauna heater installation manual that will have been
supplied with the heater you have purchased. Follow the installation of the heater as per the
installation document simply replacing the keypad for the OSX Touch Screen Keypad.
2. Installation Overview
Typical Installation Schematic
Note:
• Sauna heater shown is an example. Heater type and wiring to heater may dier, please refer to sauna
heater installation manual.
• OSX Keypad must be installed outside the sauna cabin
OSX Touch
Screen Keypad
Temperature
Sensor
Inside Sauna Cabin
Sauna Heater
(refer to manual)
Mains Power
240 1N~ / 400V 3N~
Contol Box
5 core heat proof silicon cable
low voltage 4 core cable
Low voltage cable 5V DC

Oceanic Saunas 01902 450 550 sales@oceanic-saunas.co.uk www.oceanic-saunas.co.uk 4
3. Parameters
Model Input Output Size (mm)
1N~ 3N~ 1N~ 3N~ L H D
OCX Keypad Voltage:DC5V 150 218 25
218
115
5mm
25mm
35mm
4. OSX Touch Screen Installation
We recommend installing the keypad either on the
front of the sauna cabin itself or a nearby wall. Note
that the cable is routed out of the back of the keypad.
To surface mount the keypad:
• Remove the backbox from the keypad, carefully use
a at head screw driver if necessary.
• Use a 3mm drill to drill out the 4No xing holes
from the inside of the backbx.
• Oer up the backbox to the wall as a suitable user
height (typically 150-165cm from the oor).
• Use a spirit level to ensure it is vertical.
• Mark the location of the 30mm centre hole and 4No
xing points.
• Drill 30mm hole for the cable and pre drill the four
holes using a 3mm drill bit.
• Fit backbox to the front of the sauna (or wall) using
30mm screws.
• Connect cable and push keypad in to the backbox.
30mm

Oceanic Saunas 01902 450 550 sales@oceanic-saunas.co.uk www.oceanic-saunas.co.uk 5
Back-box dimensions Suggested cut out dimensions
To Recess the keypad into a wall:
• Measure cut out 145mm x 212mm
• Use back box to mark out xing centres and central cut out for cable gland
• Fix back box into the cut out area using 4No screws
• Connect cable to extension cable
• Fit keypad into back-box housing
• To remove back box use a at head screwdriver at the tabs along the long edges of the back-box to lift
the keypad away from the casing.

Oceanic Saunas 01902 450 550 sales@oceanic-saunas.co.uk www.oceanic-saunas.co.uk 6
5. Touch Screen Operation
5.1. Screen 0. Screen O
Power On / O button
Activates heater (previous settings
stored)
Changes white once pressed to show
power is on
Secondary Light button
Activates second lighting circuit
Light button
Switches main light on
Changes white once pressed to show
that the light is on
Settings button
Enter settings page Oceanic
•
Housing
Protective housing for mounting
the keypad and shielding the cable
entry etc.
Touch Screen
Touch sensitive screen for
controlling the sauna heater. Touch
anywhere on the screen to activate.

Oceanic Saunas 01902 450 550 sales@oceanic-saunas.co.uk www.oceanic-saunas.co.uk 7
Oceanic
25 oC
70 oC
01:30
Waiting for touch to activate. Screen will
Wait Mode Icon
Time remaining in wait mode
Will automatically switch to
heat mode when time reaches
zero
Current temperature inside
sauna
Target temperature
Power On
Press to switch Power O and
return to Screen 1
Oceanic
69 oC
70 oC
00:59
automatically switch o 2 minutes after the heater has
turned if screen has not been touched.
Heating Icon
Shows sauna is in heating mode
Time remaining until heater switches o

Oceanic Saunas 01902 450 550 sales@oceanic-saunas.co.uk www.oceanic-saunas.co.uk 8
Oceanic
Overheat
5.2. Screen 1. Home screen
Appears after initial touch. Return to this screen after
Overheat Icon
Sauna has overheated and the
temperature sensor must be
reset.
To reset the overheat switch remove the casing
from the temperature sensor using a at head
screwdriver. Then push down the black cap on
top of the overheat button.
Plastic Cover Plastic Cover
Temperature Sensor
Bracket Overheat
Button
Reset Button

Oceanic Saunas 01902 450 550 sales@oceanic-saunas.co.uk www.oceanic-saunas.co.uk 9
Oceanic
Temperature 85oC
Wait Time 06:30
Heat Time 00:20
oC
OK
O button is pressed during operation.
oC Button
Change between Celsius and
Fahrenheit
Screen Brightness
Change screen brightness
Information
Select to see instructions for
use, change language etc
Mode Button
Press to change between Heat and Wait
mode. (heat mode shown) Cancel Button
Cancel changes and return to
previous screen
OK Button
Conrm changes and return to
previous screen. Settings will be
saved even if screen is turned o.
Lighting Settings
Press to enter lighting settings
Control Lock
Press to lock controls via PIN.
Enter PIN screen
Heat time
Use slider to set the amount of time
the heater will remain on for. Slide to
right to increase time.
Wait time
Use slide to set the amount of time
to wait until the heater switches on if
in wait mode.
Temperature
Use slider to set the target
temperature inside the sauna
i

Oceanic Saunas 01902 450 550 sales@oceanic-saunas.co.uk www.oceanic-saunas.co.uk 10
Oceanic
Brightness
Waiting 0%
Brightness
Waiting 25%
Brightness
Heating 50%
Brightness
Heating 75%
OK
5.3. Screen 2. Wait mode
Brightness Heating Light I
Use slider to set the brightness of
the primary lighting circuit when the
heater is on.
Brightness Heating Light II
Use slider to set the brightness of
the second lighting circuit inside the
sauna when the heater is on.
Brightness Waiting Light I
Use slider to set the brightness of the
primary lighting circuit circuit when
in Wait Mode.
Brightness Waiting Light II
Use slider to set the brightness of
the primary lighting circuit inside the
sauna when in Wait Mode.

Oceanic Saunas 01902 450 550 sales@oceanic-saunas.co.uk www.oceanic-saunas.co.uk 11
Oceanic
OK
Enter PIN
1
4
7
2
5
8
0
3
6
9
X
5.4. Screen 3. Heating mode.
Number Pad
User must input 4 digit PIN using the number pad,
in the correct order and press OK to access the lock
settings screen.
Oceanic
OK
Lock Settings
Unlock Settings
5.5. Screen 4. Overheat
Lock Settings
Locks the settings. Future user will not be able to
adjust any settings unless PIN is entered and set-
tings unlocked. Only Power On/O and Lighting
can be operated if settings are locked.
Unlock Settings (selected)
Unlocks the settings to allow adjustments to be
made.
Table of contents
Other Oceanic Controllers manuals