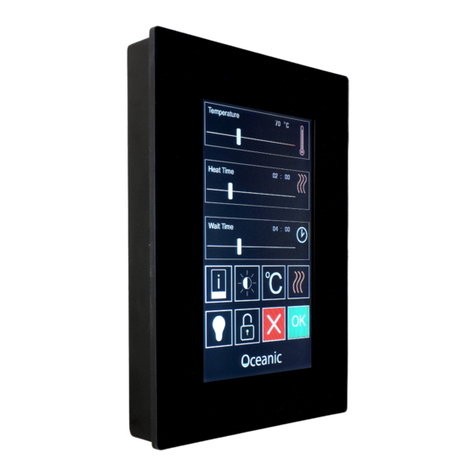
Oceanic Stauna Controller User instructions

PRODUCT IMAGE
Oceanic Ltd, Pountney Street, Wolverhampton, WV2 4HX
Sauna & Steam
STAUNA CONTROLLER
Assembly and operating manual

Sauna & Steam
Oceanic Saunas 01902 450 550 sales@oceanic-saunas.co.uk www.oceanic-saunas.co.uk 2
Stauna Manual
Table of contents
1. Introduction . . . . . . . . . . . . . . . . . . . . . . . . . . . . . . . . . . . . . . . . . . . . . 3
2. Important Notes . . . . . . . . . . . . . . . . . . . . . . . . . . . . . . . . . . . . . . . . . . . 3
3. Safety Precautions . . . . . . . . . . . . . . . . . . . . . . . . . . . . . . . . . . . . . . . . .3
4. General Setup Overview . . . . . . . . . . . . . . . . . . . . . . . . . . . . . . . . . . . . . . 5
5. Installing the Sauna Heater . . . . . . . . . . . . . . . . . . . . . . . . . . . . . . . . . . . . 6
5.1. Sauna Heater Unit Parameters . . . . . . . . . . . . . . . . . . . . . . . . . . . . . . . . 6
5.2. Sauna Heater Parts Description. . . . . . . . . . . . . . . . . . . . . . . . . . . . . . . . 7
5.3. Sauna Heater Circuit Diagram. . . . . . . . . . . . . . . . . . . . . . . . . . . . . . . . . 7
5.4. Sauna Heater Installation . . . . . . . . . . . . . . . . . . . . . . . . . . . . . . . . . . . 7
5.5. Minimum Clearances . . . . . . . . . . . . . . . . . . . . . . . . . . . . . . . . . . . . . . 8
6. Temperature Sensor . . . . . . . . . . . . . . . . . . . . . . . . . . . . . . . . . . . . . . . .8
7. Mini Steam Generator . . . . . . . . . . . . . . . . . . . . . . . . . . . . . . . . . . . . . . .9
7.1. Safety Precautions . . . . . . . . . . . . . . . . . . . . . . . . . . . . . . . . . . . . . . . . 9
7.2. Parameters. . . . . . . . . . . . . . . . . . . . . . . . . . . . . . . . . . . . . . . . . . . . . 9
7.3. Mini Steam Generator Circuit Diagram . . . . . . . . . . . . . . . . . . . . . . . . . . . 9
7.4. Parts Description . . . . . . . . . . . . . . . . . . . . . . . . . . . . . . . . . . . . . . . . 10
7.5. Installation. . . . . . . . . . . . . . . . . . . . . . . . . . . . . . . . . . . . . . . . . . . . 10
7.6. Minimum clearance diagram . . . . . . . . . . . . . . . . . . . . . . . . . . . . . . . . 11
7.7. Mini Steam Generator Water Filling Details . . . . . . . . . . . . . . . . . . . . . . . 11
8. Stauna Control Box . . . . . . . . . . . . . . . . . . . . . . . . . . . . . . . . . . . . . . . . 12
8.1. Stauna Control Box Parts Description . . . . . . . . . . . . . . . . . . . . . . . . . . . 12
8.2. Stauna Control Parameters . . . . . . . . . . . . . . . . . . . . . . . . . . . . . . . . . 12
8.3. Stauna Control Circuit Diagram . . . . . . . . . . . . . . . . . . . . . . . . . . . . . . 13
8.4. Stauna control box circuit diagram . . . . . . . . . . . . . . . . . . . . . . . . . . . . 14
8.5. Operation . . . . . . . . . . . . . . . . . . . . . . . . . . . . . . . . . . . . . . . . . . . . 15
8.6. Recommended bathing times . . . . . . . . . . . . . . . . . . . . . . . . . . . . . . . 15
9. Guarantee . . . . . . . . . . . . . . . . . . . . . . . . . . . . . . . . . . . . . . . . . . . . . . 15

Sauna & Steam
Oceanic Saunas 01902 450 550 sales@oceanic-saunas.co.uk www.oceanic-saunas.co.uk 3
Stauna Manual
1. Introduction
Thank you for choosing to buy our Oceanic Stauna Controller please take the time to read these
instructions before you begin as they contain important information about the installation and
maintenance requirements.
2. Important Notes
• Read the manual before installation and operation.
• This Equipment must be installed by a competent person.
• This equipment must be connected to an all pole isolator
• Disconnect the power supply before exposing electrical connections.
3. Safety Precautions
• Elderly persons, pregnant women, or these suering heart disease, high blood pressure,
diabetes or not in good health are advised to seek medical opinion before using a steam room.
• Do not smoke in the steam room.
• Avoid using the steam room immediately after strenuous exercise.
• Do not use the steam room when under the inuence of alcohol.
• Leave the steam room at once if you feel sleepy, sick or uncomfortable.
• Ensure there is good ventilation for the steam room.
• We do not recommend that children under 16 use this product.
• Commercial operators should post a notice of these precautions in a prominent position.
• This appliance is not intended for use by persons (including children) with reduced physical,
sensory or mental capabilities or lack of experience and knowledge unless supervised by a
person responsible for their safety.
• Always follow the user times set out in these instructions.
Steam emitted from the steam generator will be scalding hot; ensure the generator is
located in the correct position away from where users will sit and/or provide adequate
guarding, post a notice to caution users.
The Oceanic Stauna Controller is designed to combine the use of the Oceanic wall mounted Sauna
Heater and Mini Steam Generator to create a variety of humidity/temperature environments,
these environments can be seen described on the next page in the chart and illustration.
The controller achieves these dierent humidity/temperature environments by changing the
amount of power supplied to the Sauna Heater or Steam Generator.
Both are controlled to vary the level of:
Temperature (minimum to maximum) and,
Humidity (Percentage of time the steam generator is working)
Note: The higher the steam output the lower the maximum temperature you are able to set. The
reason for this being that the more water-moisture-humidity in the air, the more contact the heat

Sauna & Steam
Oceanic Saunas 01902 450 550 sales@oceanic-saunas.co.uk www.oceanic-saunas.co.uk 4
Stauna Manual
Tepidarium
Saunarium
Caldarium
Sauna
Low Heat - High Steam
Max Temp 48oC - 50-60% humidity
Medium Heat - Medium Steam
Max Temp 56oC - 40-50% humidity
High Heat - Low Steam
Max Temp 65oC - 30-40% humidity
Very High Heat - No Steam
Max Temp 100OC

Sauna & Steam
Oceanic Saunas 01902 450 550 sales@oceanic-saunas.co.uk www.oceanic-saunas.co.uk 5
Stauna Manual
has to your skin. For example a Sauna can be used at 100oC as the humidity is only approximately
5%, in a Steam room where you have 100% humidity it is uncomfortable to increase the
temperature past 45oC. Our illustration on the next page should help you to understand the
modes.
4.5kW Stauna
Mode Heater
Power (kW)
Mini Steam
Power (kW)
Max Temp
(oC)
Total Power
(kW)
Steamer
Operation (%)
Sauna 4.5 0 100 4.5 0
Tepidarium 3 1 65 4.5 80
Sanarium 3 1 56 4.5 90
Caldarium 3 1 48 4.5 100
6kW Stauna
Mode Heater
Power (kW)
Mini Steam
Power (kW)
Max Temp
(oC)
Total Power
(kW)
Steamer
Operation (%)
Sauna 6 0 100 6 0
Tepidarium 4 1 65 5 80
Sanarium 4 1 56 5 90
Caldarium 4 1 48 5 100
4. General Setup Overview
According to the valid regulations, the electrical connection of the steam generator and the
control box has to be carried out by an authorised electrician. In case of a warranty claim, you are
kindly requested to present a copy of the invoice from the electrician.
Fig. 1
Control box
OC - ST
Light
Caldarium
Saunarium Tepidarium
Sauna
Overheat
ENTER
OC-ST
TIME TEMP
MODE LIGHT
SET
ON
OFF
Mains in 230v 1N or 400v 3N
3 Core silicone 0.75 or 1mm
Lighting circuit - 240v
Switched from button on Keypad
Temperature Sensor
4 core 12v cable
(4m Supplied)
3 core 1mm Silicone cable (Not Supplied)
Inside Sauna Any power cable that enters
the sauna must be rated to
150oC (BSEN 6141)
The 12v signal cable must not
enter the sauna over 500mm
from the oor.
Neither the control box or
keypad can be installed inside
the sauna cabin.
Key
Blue - 12 volts
Black - 240 volts
Mini Steam Generator
Sauna Heater
6 Core 12v Control Cable
(4m Supplied)
4 Core 12v Signal Cable (2m Supplied)
5 core silicone
[4kw 2.5mm]
[6kw 4mm]
Cable
(Not Supplied)

Sauna & Steam
Oceanic Saunas 01902 450 550 sales@oceanic-saunas.co.uk www.oceanic-saunas.co.uk 6
Stauna Manual
Important Notice: Please pay close attention to the drawing Fig. 1 below. The mains power
is solely supplied to the OC-ST control and is diverted from here to the heater and steam
generator . You must not wire directly from the mains to either the sauna heater or mini
steam generator.
5. Installing the Sauna Heater
i. Conrm the model you have selected is suitable for your sauna room, please refer to the table
below.
ii. Ensure the power supply is suitable for the sauna heater, refer to the table below.
iii. The installation position must comply with the minimum distance in the table below and in
the diagrams on the following pages.
iv. The minimum height of your sauna room must be 1900mm, please refer g 3c
v. Do not install the sauna heater on the oor or in a cabinet
vi. Do not cover the sauna heater back with asbestos cement or similar material
vii. The wires which enter the sauna room must be rated to150oC- type 60245 IEC 66 HO7RN-F
(BSEN 6141) please refer to table below. (The signal cable between control box and mini steam
generator does not need to be changed to the silicone cable as long as it does not enter the
cabin higher than 500mm from the oor.)
viii.Do not install two or more sauna heaters in one sauna room.
ix. The sauna heater becomes very hot when operating and must be guarded to protect incase of
accidental contact, please see the sizes in g 3d and also refer to charts below.
x. The upper supporting screws must be xed tightly, there is a 3mm gap between the screw
head and wall (refer g 3a, g 3b), additional retaining screws should be inserted into the
round holes to prevent the heater being lifted.
xi. Temperature sensors should be installed in sauna room but not directly above sauna heater,
the height must be a minimum of 1800mm from oor. The horizontal distance to sauna heater
must exceed 500mm.
xii. Wash the rocks thoroughly before lling the basket. Discard any with veins running through or
any rocks smaller than 50x50mm.
xiii. Fill the rocks loosely around the elements, try to use the larger rocks between the elements
and use the smaller ones for the top.
xiv. To prolong the life of your sauna you can use a heat proof board behind and above the heater
to prevent charring, for commercial cases this should be more seriously considered.
Model Sauna Room Clearance Distances (mm) Current (A) Fuse (A)
Volume (m3) Min
height
Distance to shelf
over 500mm
Ceiling Floor 230V
1N~
400V
3N~
230v
1N~
400V
3N~
Min Max
OCS45 4 6 1900 80 1100 180 19.5 6.5 25 10
OCS60 5 8 1900 150 1100 180 27 9 32 16
5.1. Sauna Heater Unit Parameters
Sauna Heater Dimensions 410 x 280 x H570mm

Sauna & Steam
Oceanic Saunas 01902 450 550 sales@oceanic-saunas.co.uk www.oceanic-saunas.co.uk 7
Stauna Manual
No. Parts
1 Inner shell
2 Stone bracket
3 Shell
4 Heat element
5 Fix bracket
6 Cover Panel
7 Terminal
OC45~OC60 Circuit diagram
5.2. Sauna Heater Parts Description
370 B
3mm gap between
screw head and wall
Supporting Screw
6mm x 40mm
(4pcs)
3.5
150
600
5.3. Sauna Heater Circuit Diagram
Fig. 3b
Fig. 3a
5.4. Sauna Heater Installation
Note: Securing screws must be xed through the top holes of the xing
brackets and prevent the heater being lifted o

Sauna & Steam
Oceanic Saunas 01902 450 550 sales@oceanic-saunas.co.uk www.oceanic-saunas.co.uk 8
Stauna Manual
Min 1900
C D
50 20
Min 180
Min 1100
A
All sizes in mm
Model Minimum Distance (mm)
A B C D
OCS45 80 100 280 100
OCS60 100 120 280 150
Fig. 3c Fig. 3d
Min
1800
Temperature Sensor
Min
500
Fig. 4
5.5. Minimum Clearances
6. Temperature Sensor
i. Install the temperature sensor as in the Fig. 4
ii. Open the cover with a screwdriver as in Fig. 5
iii. Fix the bottom of the temperature sensor on to wall with
screw
iv. Replace the cover.
Fig. 5

Sauna & Steam
Oceanic Saunas 01902 450 550 sales@oceanic-saunas.co.uk www.oceanic-saunas.co.uk 9
Stauna Manual
7. Mini Steam Generator
7.1. Safety Precautions
i. The equipment must be installed vertically
ii. Stop pouring water into the boiler when the high level LED light (A) turns on. Don’t let the
water reach the holes in the top cover. You can release water using the valve at the bottom.
iii. If overheat indicator LED light turns on, cut o the power supply and do not do not turn
back on until the problem has been resolved. If in doubt please contact our technical team.
7.3. Mini Steam Generator Circuit Diagram
Model Power (KW) Voltage
(V)
Current
(A)
Dimensions
LxWxH (mm)
Class 1 Class 2 Class 3 Class 1 Class 2 Class 3
OC-Mini-1 500 750 1000 210-240 2.1-2.3 3.2-3.6 4.2-4.8 220 x 100 x 340
7.2. Parameters

Sauna & Steam
Oceanic Saunas 01902 450 550 sales@oceanic-saunas.co.uk www.oceanic-saunas.co.uk 10
Stauna Manual
7.4. Parts Description
No Description
1 Back cover
2 Circuit board
3 Side cover
4 Terminal
5 Power entry
6 Heat element
7 Overheat switch
8 Water level indicator LED
9 Control panel
10 SUS tank
11 Water level probe
12 Steam outlet and water inlet
13 Shell
14 Heat preservation cotton
1 2 3 4 5 6 7 8 9
1011
12
13
14
7.5. Installation
i. Position the steam generator adjacent to the sauna heater on the wall of the cabin as shown in
the diagram on the next page.
ii. Fix to cabin wall using 40mm Screws and the locating xing points on the back of the generator.
iii. Securing screws must be xed through a whole in the brackets at the bottom rear to prevent
the unit being lifted o.
iv. Connect the steam generator to the stauna control box (see pages 4, 9, 13)
Fixing points
for 40mm screw

Sauna & Steam
Oceanic Saunas 01902 450 550 sales@oceanic-saunas.co.uk www.oceanic-saunas.co.uk 11
Stauna Manual
7.6. Minimum clearance diagram
Min 180Sauna Heater
Steam Generator
Min 300
Min 1100
AA - Tank Full
B - Tank half full
C - Tank near empty - rell before use
Ignore the controls on front of this unit,
OC-ST stauna controller will override
these functions.
B
C
7.7. Mini Steam Generator Water Filling Details

Sauna & Steam
Oceanic Saunas 01902 450 550 sales@oceanic-saunas.co.uk www.oceanic-saunas.co.uk 12
Stauna Manual
8. Stauna Control Box
8.1. Stauna Control Box Parts Description
Model Working Time
(m)
Temperature
(OC)
Dimension
L x W x H (mm)
Remarks
OC-ST 15-240 30 - 60 oC 150 x 92 x 22 When the time window displays
”Long” the generator will operate
continuously until it is switched o.
8.2. Stauna Control Parameters
1 Wire anchorage
2 Terminal block
3 To Sauna Heater
4 To sauna heater wire anchorage
5 Control cable anchorage
6 To mini steam generator
7 For spare usage
8 Lamp

Sauna & Steam
Oceanic Saunas 01902 450 550 sales@oceanic-saunas.co.uk www.oceanic-saunas.co.uk 13
Stauna Manual
8.3. Stauna Control Circuit Diagram
This diagram can be found on the back of the control panel’s cover.

Sauna & Steam
Oceanic Saunas 01902 450 550 sales@oceanic-saunas.co.uk www.oceanic-saunas.co.uk 14
Stauna Manual
8.4. Stauna control box circuit diagram
No Part Description
1 On/o Push to turn the equipment on or o
2 Light Push to turn on the light in the room.
3 MODE Push to change mode
4 Set Preset time and temperature - (you must press enter to save settings)
5 /\ Increase button
6 \/ Decrease button
7 ℃/℃ ºC/F / ENTER Change from centigrade to Fahrenheit / Enter to save settings
8 Time display window Display the work time of the steam generator
9 Temp display window Display the detected temperature of steam room
10 Light Indicator LED for the light in steam room
11 Caldarium Indicated the Caldarium setting has been selected
12 Saunarium Indicated the Saunarium setting has been selected
13 Tepidarium Indicated the Tepidarium setting has been selected
14 Sauna Indicated the Sauna setting has been selected
15 Overheat Indicator LED for overheat - turn machine o and wait for 1 hour before
switching back on, if problem persists contact the seller.
16 L7 Indicates the detected temperature is lower than the preset temperature and
sauna heater is heating.
17 L8 Indicates the detected temperature is higher than the preset temperature and
the sauna heater is idling.
Light
Caldarium
Saunarium Tepidarium
Sauna
Overheat
ENTER
OC-ST
TIME TEMP
MODE LIGHT
SET
1
2
3
47
56
17
8 9
16
15
14
1312
11
10
ON
OFF

Sauna & Steam
Oceanic Saunas 01902 450 550 sales@oceanic-saunas.co.uk www.oceanic-saunas.co.uk 15
Stauna Manual
8.5. Operation
i. The buttons on the front of the mini steam generator should be ignored as the stauna control
will power the generator when it is necessary.
ii. Push On/O to switch on the system.
iii. The Stauna Controller has 4 dierent heat settings which can be selected by pushing the
‘MODE’ button, an LED will indicate which mode (“atmosphere”) you have chosen. Each press
moves the LED one position from left to right. These “atmospheres” are explained on pages 4
and 5)
iv. Within each Atmosphere you are able to set temperature within the specied range. Once in
the correct Mode Push ‘SET’until the numbers in the temperature window are ashing. Use
the Up and Down arrow buttons to select the required temperature. Once correct press Enter
to conrm the temperature.
v. The length of time for which the session will last can be set by pushing the Set button until the
numbers in the time window are ashing. Change the value with the Up and Down buttons.
Push Enter to conrm selection.
vi. Before using the room ll the mini steam generator until the A light illuminates and then stop.
If you overll, drain away some of the water before operating the controller as water will boil
and spit out of the top which can be dangerous. There is a valve at the bottom of the unit
which can be opened to drain the unit. Place a container beneath the valve before opening.
The C light indicates the water is too low and should be relled.
vii. If you intend to use Aromas only use Oceanic Steam Aroma – any other aromas could
invalidate your warranty. Ensure the Aroma is diluted correctly and then add to the steam
generator as above. Never use the aroma without diluting.
viii.Make sure to drain down the mini steam generator at the end of your bathing session.
8.6. Recommended bathing times
We recommend all users start with a maximum test period of 10 minutes to observe for any adverse
reaction.
A bathing session then comprises 2 or maximum 3 turns of up to 20 minutes with 20 minutes spent
relaxing between turns. It is also advisable to spend a further hour relaxing after your bathing session to
allow yourself to acclimatise. We advise no more than 2 bathing sessions in a 7 day period.
We also suggest caution with physical activity and driving immediately after bathing.
9. Guarantee
All generators and heaters are guaranteed for 12 months for domestic and commercial use from
the date of purchase. This guarantee excludes consumable items such as the electrical elements
and failures resulting from misuse or abuse such as a failure to descale.
If you encounter any diculty with this assembly procedure or think we could have explained
anything more clearly we would welcome your comments, please call T: 01902 655425 or T: 01902
871127 technical help line.
This manual suits for next models
1
Table of contents
Other Oceanic Controllers manuals