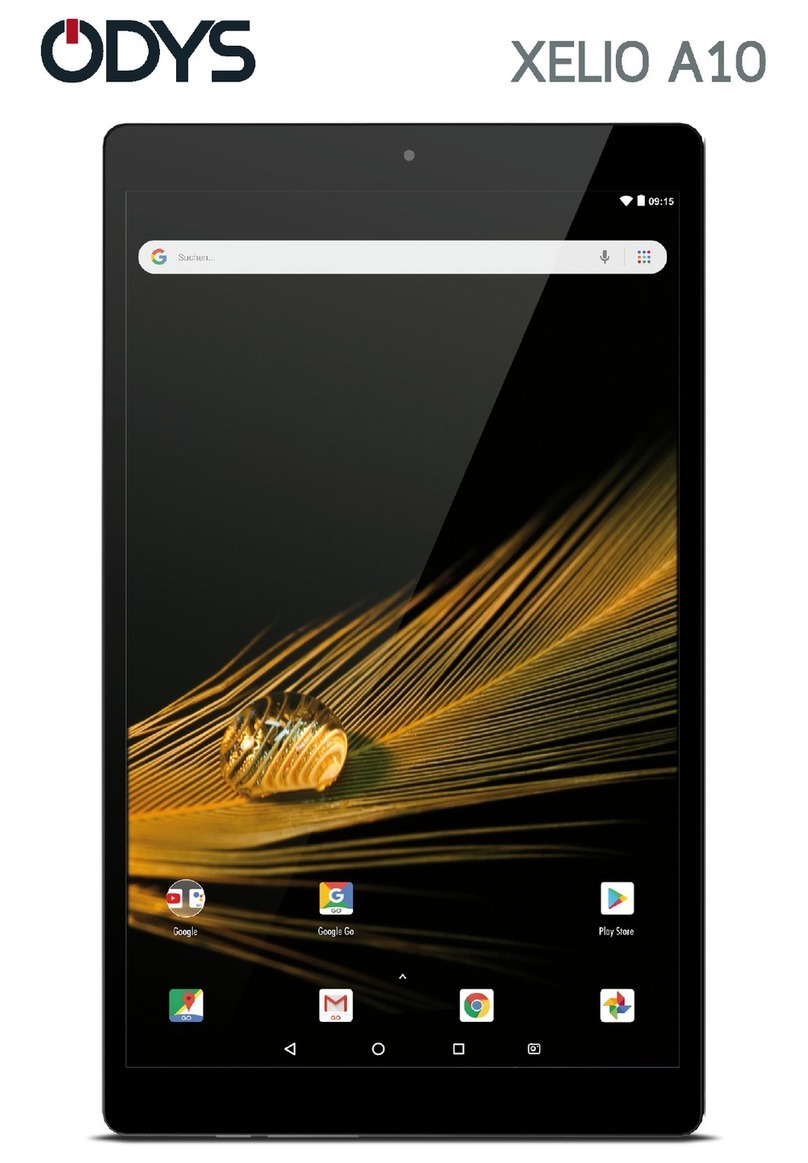
Odys Xelio User manual

EN
1
Safety Precautions
zDo not subject the device to severe impact or drop it from heights.
zDo not use the device in extreme hot or cold, dusty or damp conditions. Do not
expose it to direct sunlight.
zAvoid using the device near strong magnetic fields.
zKeep the device away from water and other liquids. In the event that water or
other liquids enter the device, power off the product immediately and clean the
device.
zDo not use chemicals to clean the device in order to avoid corrosion. Clean it
withadrycloth.
zWe are not responsible for damaged or lost data caused by malfunction, misuse,
and modification of the device or battery replacement.
zDo not attempt to disassemble, repair or modify the product. This will invalidate
the warranty.
zIf the device will not be used for an extended period of time, please charge the
battery at least once per month to maintain battery life.
zCharge the battery if:
a) the battery level icon displays (battery empty);
b) the device powers off automatically when restarted;
c) there is no response when pressing/tapping on keys/buttons with
keys/buttons unlocked and battery fully charged.
zDo not interrupt the connection when the device is being formatted or files are
transferred. Otherwise, data may be corrupted or lost.
zIf the device is used as a portable HD player, please use only per the instructions.
Otherwise, permanent data loss could occur.
zPlease use and install data using the attachments/accessories provided and only
according to the manufacturer’s instruction.
zPlease refer to the information on the bottom of the device for electrical and
safety information before installing data or operating the device.
zToreducetheriskoffireandelectricshock,donotexposethisdevicetorainor
moisture. The device should not be exposed to dripping or splashing water.
Never place objects filled with liquids, such as vases, on the device.
zThere is danger of explosion if the battery is replaced incorrectly. Replace only
with the same or equivalent type.
zThe battery (or batteries or battery pack) should not be exposed to excessive
heat such as sunlight, fire or the like.
zPlease follow responsible procedures for battery disposal.
EN
zIf the power adaptor is disconnected from the device, the device will remain
operable as long as the battery has sufficient charge.
zThe power adaptor is a CLASS II apparatus with double insulation, and no
external ground is provided.
zSafety symbol explanation:
- The lightning flash with arrowhead symbol within an equilateral triangle is
intended to alert the user to the presence of non-insulated “dangerous
voltage” within the product’s enclosure that may be of sufficient magnitude
to constitute a risk of electric shock.
- To reduce the risk of electric shock, do not remove the cover (or back) as
there are no user-serviceable parts inside. Refer servicing to qualified
personnel.
- The exclamation point within an equilateral triangle is intended to alert the
user to the presence of important operating and maintenance instructions in
the literature accompanying the device.
zDo not install this equipment in a confined space such as a bookcase or similar
unit. The ventilation should not be impeded by covering the ventilation openings
with items such as newspapers, tablecloths, curtains etc.
zNo naked flame sources, such as lighted candles, should be placed on the
apparatus.
zUse the apparatus in moderate climates.
zDo not disconnect the USB cable between device and PC during data
transmission or formatting. Only remove it safely from the operating system.
Otherwise, data may be corrupted or lost and malfunctions may occur.
Disposal
Do not dispose of a defective device (built-in rechargeable battery) with the household waste. To
dispose of your used device, please use the return and collection systems available in your area
or contact the retailer where the product was purchased. They can take this product for safe
environmental recycling.
Do not replace the rechargeable battery yourself. Please contact our customer service.

EN
3
Listening Cautions
Hearing Safety
Listen at a moderate volume: Using headphones at a high volume can impair your
hearing. This product can produce sounds in decibel ranges that may cause hearing
loss for a normal person, even for exposure less than a minute. The higher decibel
ranges are offered for those that may have already experienced some hearing loss.
Sound can be deceiving. over time your hearing ‘comfort level’ adapts to higher
volumes of sound. So after prolonged listening, what sounds ‘normal’ can actually be
loud and harmful to your hearing. To guard against this, set your volume to a safe level
before your hearing adapts and leave it there. To establish a safe volume level: Set your
volume control at a low setting. Slowly increase the sound until you can hear it
comfortably and clearly, without distortion. Listen for reasonable periods of time:
prolonged exposure to sound, even at normally ‘safe’ levels, can also cause hearing
loss. Be sure to use your equipment reasonably and take appropriate breaks. Be sure
to observe the following guidelines when using your headphones. Listen at reasonable
volumes for reasonable periods of time. Be careful not to adjust the volume as your
hearing adapts. Do not turn up the volume so high that you can’t hear what’s around
you. You should use caution or temporarily discontinue use in potentially hazardous
situations. Do not use headphones while operating a motorized vehicle, cycling,
skateboarding, etc.; it may create a traffic hazard and is illegal in many areas.
SUPPORT
http://www.odys.de [email protected]
See our website for the latest information on this device, on other products by our company and on
our company itself. Any firmware updates for this device are also made available on our website. If
you have questions or problems, please read the FAQs on our website or contact our customer
support service.
Intended Use
This device is intended to playback music and videos in popular formats, display of photos and Internet
access with the integrated Wi-Fi function. This is the only intended use of the device.
Please observe all information in this user manual, in particular the safety precautions. Any other use will be
seen as unintended use and can cause damage and personal injury. Furthermore, your warranty will be
void. The manufacturer accepts no responsibility for damages due to unintended use.
This manual may not reflect your actual device’s operation. All information is
subject to change without prior notice. Please follow your actual device’s
operational procedures.

EN
Contents
Safety Precautions..........................................................................................................1
Listening Cautions...........................................................................................................
3
Intended Use....................................................................................................................
3
Features............................................................................................................................
5
Accessories......................................................................................................................5
Buttons and Ports............................................................................................................
6
Charge Battery.................................................................................................................
7
Install Memory Card........................................................................................................
7
Transfer Files...................................................................................................................8
On/Off................................................................................................................................8
Screen Lock......................................................................................................................
8
Home Screen...................................................................................................................9
Touch Screen.................................................................................................................11
Internet Access - WI-FI.................................................................................................
12
Internet Access - UMTS...............................................................................................14
Virtual Keyboard............................................................................................................18
Web Browser..................................................................................................................
19
Sending/Receiving E-Mails......................................................................................... 21
Read E-Books................................................................................................................
24
Music Playback..............................................................................................................
31
Video / Photo Playback................................................................................................33
ES Explorer....................................................................................................................36
Manage Third Party Apps............................................................................................39
HDMI Output..................................................................................................................40
System Settings.............................................................................................................
41
Troubleshooting.............................................................................................................
43
Specifications.................................................................................................................
45
Warranty conditions......................................................................................................47

EN
5
Features
Wi-Fi Network
With the built-in Wi-Fi technology, this device can provide easy Internet access.
7.0” Touch Screen
Tip or wipe with your finger on the screen, the screen responds instantly.
Third Party Application Support
With the built-in Android TM OS, you can install a large number of third party apps on
this device.
Built-In G-Sensor
The screen changes to landscape or portrait automatically when the device is rotated.
Entertainment
You can enjoy music, movies, photos and e-books with the device.
Accessories
zUSB cable zQuick Guide
zAC adaptor

EN
Buttons and Ports
1. Camera Camera fo
r
capturing photos and video clips.
2.
V
olume - Press to decrease volume.
3.
V
olume + Press to increase volume.
4. Powe
r
On/Of
f
button Press and hold to turn the unit on or off; briefly press to lock or unlock
the screen.
5. Return button Return to previous page or close virtual keyboard.
6. Home button Press to return to Home screen.
7. Menu button Press to display option menu.
Note: Within the app the options are displayed. To display the Android
system options only press the menu button from the Home screen.
8. Earphones
j
ack
Connect stereo earphones here.
Note: The speakers are automatically muted.
9. microSD card Insert microSD and microSDHC cards here.
10. Mini HDMI port Connect TV set or other display device here.
Note: Sound output via HDMI must first be enabled in Android system
settings.
11. Reset pin hole Reset the device in case of malfunction (use a paper clip or similar and
carefully press the button in the pin hole.
12. USB 2.0 high
speed port/
USB host
Connection for data transmission from/to PC (e.g. music, photos,
videos) or connection of USB storage media and USB devices such as
mouse or keyboard.
13. DC-IN port Connect powe
r
adapto
r
fo
r
charging the built-in rechargeable battery here.
1234
5
6
7
8
9
10
11
12
13

EN
7
Charge Battery
The device has a built-in rechargeable battery. No battery installation is required. Just
charge the device when it low battery capacity is indicated.
To charge the battery, connect the device to any standard wall outlet via the DC-IN port
using the power adaptor. It takes about 5 hours to fully charge the battery.
Please note:
a. You can operate the device even when it is being charged. But for extended battery life, it is
suggested NOT to use the device when it is charging.
b. It is recommended to charge the battery before you use the device for the first time.
c. For maximum performance, lithium-ion batteries need to be used often. If you do not use the
device often, be sure to recharge the battery at least once per month.
Install Memory Card
This device can read files directly from memory card.
To use a memory card, find the card slot at the bottom of the device and insert the memory
card in the correct orientation. To access the files stored in the memory card, enter Explorer
mode by tapping the explorer icon and select the “EXTSD” directory.
•Ensure that the microSD card is in correct orientation; the contacts must be on top, as
illustrated. Card and card reader can be damaged if the microSD card is inserted the
wrong way.
•Press the microSD card into the slot until it clicks into place.
•To remove the microSD card first slightly press to release it from the slot.
Please note: We recommend only using microSD or SDHC cards up to 32GB capacity.
•
After inserting or removing a microSD card it can take several seconds before the
contents are updated.
•
Do not insert or remove the microSD card during operation; this can cause the device to
freeze.
•
Do not remove the microSD card while contents are played; this can cause the device to
freeze.

EN
Transfer Files
Before reading or playing files, you need to transfer media files from a computer to the
device.
(1) Connect the device via the supplied USB cable to a computer.
(
2
)
Once the connection is done two removable disks will be displayed on your computer.
One stands for the internal memory of the device, the other one for the memory card.
You can now transfer files from or to these disks.
(3) Select “Remove USB mass storage device” and tap on “Disconnect” to safely remove
the device from the computer.
(4) Safely remove the device from PC.
a) Click on the icon at the bottom right of your desktop.
b) Click on the small window showing “Safely remove USB mass storage device –
drive (X)”.
c) Disconnect the device safely from the PC.
Please note: The pre-installed applications and Android OS occupy a considerable part of
capacity – more than 1GB; it is normal that you see a huge difference between available
memory space and total capacity.
On/Off
To switch the device on, press and hold the On/Off button until the Home screen appears. It
may take a few minutes to start up the system, please wait before you proceed.
To switch the device off, press and hold the On/Off button until the option “Switch Off” is
displayed, then tap on “Switch Off” and “OK”.
Tip: For the sake of power saving, this device may sleep with the screen display locked
when there is no touch action for a while. Briefly press the On/Off button to wake it up.
Screen Lock
The screen automatically turns off and is locked after the preset time period. Briefly press On/Off to turn the
device on again.
To unlock drag the lock icon to the edge.

EN
9
Home Screen
a. Google search b. Voice‐controlled Google search.
c. Apps Tap on this icon to display all apps installed on the device.
- Tap and hold to copy apps to the Home screen.
- Tap and drag the icon to the cross at the top to remove apps from the
Home screen.
d. App center Select and install new apps.
e. Aldiko Read and archive e‐books in ePub or PDF format.
f. Browser Access Websites.
g. Email Open email app.
h. Gallery View images and playback videos.
i. System settings Access system settings.
j. Return button Return to previous page or hide virtual keyboard.
k. Home button Return to Home screen.
l. Current app Display all apps currently running in the background.
m. Menu button Display options menu.
Note: Within the app the options are displayed. To display the Android system options
only press the menu button from the Home screen.
Caution! In some apps the menu button is displayed in the top right corner!
n. System messages In this area system messages are displayed.
o. Time Time display at the current location.
p. Wi‐Fi Display during enabled Wi‐Fi connection.
q. GSM Signal strength display when using UMTS Internet stick.
r. Battery level
s. System tasks Displays active system apps such as alarm function.
defghi
ab c
j
klm n opq
r

EN
Display All Apps
The device supports most popular third party apps. Many useful apps are pre-installed,
such as music player, video player, image viewer, alarm clock, calculator, etc. You
can manually install further apps on the device.
Tapontheappicontodisplayallinstalledapps.
See illustration below.

EN
11
Touch Screen
This device is equipped with a touch screen. Observe the following use instructions.
Tip: For correct input tap the screen with your fingernail or a soft stylus (not supplied).
Main Activities On The Touch Screen
yIn most apps you can return one step by tapping the Return icon (bottom
right).
yTap on the Home icon (top right) from anywhere in the app to return to the
Home screen.
Further Activities On The Touch Screen
yDuring video or music playback tap on the progress
bar to playback any designated section of the file.
You can drag the cursor of the progress bar to any
other elapsed time point of the video or music file.
yIn different browsers (File, Music, Video, Photo,
etc.), scroll the file list up and down with your finger.
yIn the web browser scroll by tapping on the page
and dragging it up or down (be careful not to touch
any link).
yTap on the link to open the page.
Please note: Do NOT use a pen or pencil and no sharp objects to tap on the screen! This
will cause damage. Do NOT place any heavy or sharp objects on the screen. Only clean the
screen carefully with a soft cloth. Do NOT use any cleaning agents.

EN
Internet Access - WI-FI
Your tablet is equipped with integrated Wi-Fi technology and can connect to the
Internet via a Wi-Fi network.
For Wi-Fi access you need to configure a Wi-Fi network first. Whenever within
the coverage of a Wi-Fi network, the device will attempt to make a connection.
Please note: For creating a Wi-Fi connection you need to know the encryption key of the
desired network.
You must be entitled to access the network and no other network settings, such as MAC
address filter, refuse access.
Your device’s MAC address find here: Settings – About – Status.
Configure Wi-Fi Connection
(1) In the Home screen tap on the
settings icon.
(2) To enable the Wi-Fi function tap on
“Wi-Fi” and slide the toggle switch to the
right.
“Wi-Fi On” is displayed.
(3) Your device automatically scans for
and displays available Wi-Fi networks.
The list of available networks displays
wireless networks within the range of
the device.

EN
13
Please note:
a) The available network list is constantly refreshed automatically.
b) With enabled Wi-Fi the device will connect automatically to your configured
networks when they are within range.
c) If the device detects a network that has never been configured, it will
display a no tification icon.
(4) Tap on the network with which to connect and enter the required network
information (password), then tap on “Connect”. Your device tries to establish a
connection with this Wi-Fi hotspot with the entered network parameters. If the
connection is successful “Connected to XXX” will be displayed below the Wi-Fi
setting.
Advanced Connection
Press the menu button and then “Advanced” in the top right corner to
access further network parameters (“Regulatory domain”, “IP address”, etc.).
Further parameters are displayed. Obtain the required information from your
network administrator.
Launch Web Browser
Tap on the app icon in the app screen, then tap on the browser icon to
launch the web browser.
The web browser will open and you can browse the Internet if you are already
connected to a network.
Please note: Not all wireless networks offer access to the Internet. Some Wi-Fi
net works only link several computers together, without any Internet
connection.

EN
Internet Access - UMTS
For mobile Internet access you can use common UMTS Internet sticks with your
tablet.
Please note:
-Unfortunately, not all UMTS (3G) dongles can be used with this device. You find a list
of all supported dongles in the menu: Settings – Wireless & Network – More… - 3G
Support Information.
Please only use one of the listed dongles! Currently these are:
Huawei E220, E261, E153, E272, EC122, EC150, EC189, EC167, EC1261,
E173u, E1820, E1750, E1782, E160E, EC156, EC1270, E182E, E353,
ZTE MF637U, AC2766, AC2736, AC2746, MF633BP-1 and AC580.
- This function is a special feature, which can only be used with additional
accessories, which are not supplied with the device.
- For Internet connection you need a SIM card plus the respective Internet
connection tariff.
Caution!
If your SIM card is PIN-protected it must be disabled before use. You can use
any common mobile phone. Find the respective menu item in the security
settings of your mobile phone.
Configure 3G Internet Connection
1.Use the USB adaptor cable to connect the dongle to the device.
2.Turn the device on.
After the device is turned on, press the On/Off button until the menu is
displayed and press the OK button to confirm.

EN
15
3.In the Home screen tap on the
settings icon.
4.Open the page with installed
apps
Settings –
Wireless & Network –
More…–
Mobile Networks.
5.Enable the item “Data Enabled”
if it is not yet ticked.
6.Select item “Access Points” to
add an Internet access point.

EN
7.Press the menu button and
select “New APN”.
Note: The list stays empty if no
APN is entered or the connected
dongle was not detected.
8.Enter the access data obtained
from your mobile service
provider.
Contact your mobile service
provider to obtain all required
access data, if necessary.
9.Press the menu button and
select “Save” to save the
settings.
10. The list of set APNs is displayed. After setup generally only one value is
listed.
11. Ensure that the item on the right of your entered APN is green; otherwise
taponittoactivate.
12. Exit the settings and access a website with the browsers.
13. Observe the dongle status LED. It generally (depending on model) turns
blue after successful connection. The LED flashes blue if the connection to
the provider is established, but no data are transmitted yet.

EN
17
Caution!
A dongle must be connected to add an access point!
Observe the 3G icon on the status bar. The connection is available if it is
displayed.
Re-connect the dongle with the device if it is not displayed.
The letters at the connection icon show the current connection speed.
H = HSDPA (highest speed)
3G = UMTS
E=EDGE
G = GPRS (lowest speed)
Contact our customer support at support@axdia.de if you require help.

EN
Virtual Keyboard
Tapping on any text input field opens the virtual keyboard. Enter a website address or any
required text with the virtual keyboard.
View
a. Shift lock
b. Back space
c. Toggle between
numbers/letters
d. Space bar
e. Enter
f. Android keyboard
settings
Select Input Method
g. Open the Android keyboard settings and select the input method if more than one
input method is installed.
Please note: The keyboard layout changes according to OSD language settings.
a
b
cd
e
f

EN
19
Web Browser
yScroll the screen up and down by tapping on the page and dragging it up or down
(be careful not to tap on a link).
yToopenalink,simplytaponit.
yYou can open several web pages at the same time, then tap on one to display in
full screen mode.
yTap on the Return icon to return to the previous page.
yTap on the Menu icon to display the available menu items.
yTap the on Home icon to return to the Home screen.
yDepending on the location in the web browser, tap and hold a menu item to display
further options.
yFor filling out a text field, tap on the field and enter the text with the virtual
keyboard.
yBriefly tap twice on the page, tap on the respective icon or touch the display with
two fingers and pinch it between thumb and pointer finger to zoom in/out.

EN
Menu Items Web Browser
Press the menu button to display menu items.
Refresh Refresh the current web page after it was loaded.
Forward Open next page, if available.
New Tab Open new tab.
New Incognito Tab Pages accessed via incognito tab are not displayed in browser
history and no cookies are saved.
Share Page Link Send the current website via email to friends.
Search Search in the current website.
Desktop Version Websites are displayed similar to computer, if function is
enabled.
Save For Offline
Reading
Saves current website for later offline use on the device.
Note: Included functions or links may not work offline.
Page Info Information about the current page.
Settings Further browser settings:
General Set home page and automatic text
completion.
Privacy &
Security
Form data, cache, cookies and history
management.
Operating Aid Font size and contrast settings.
Advanced Advanced browser settings.
Bandwidth
Management
Transmission data settings.
Labs Experimental functions.
Debug Detailed view setting.
Table of contents
Other Odys Tablet manuals