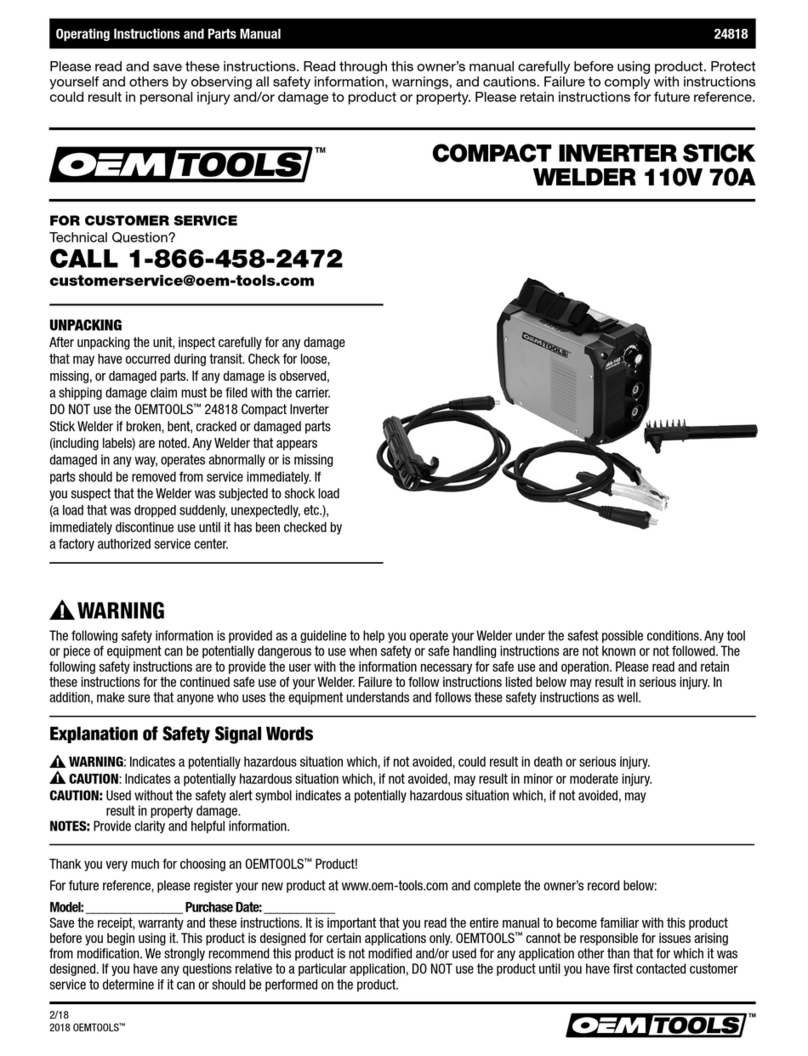
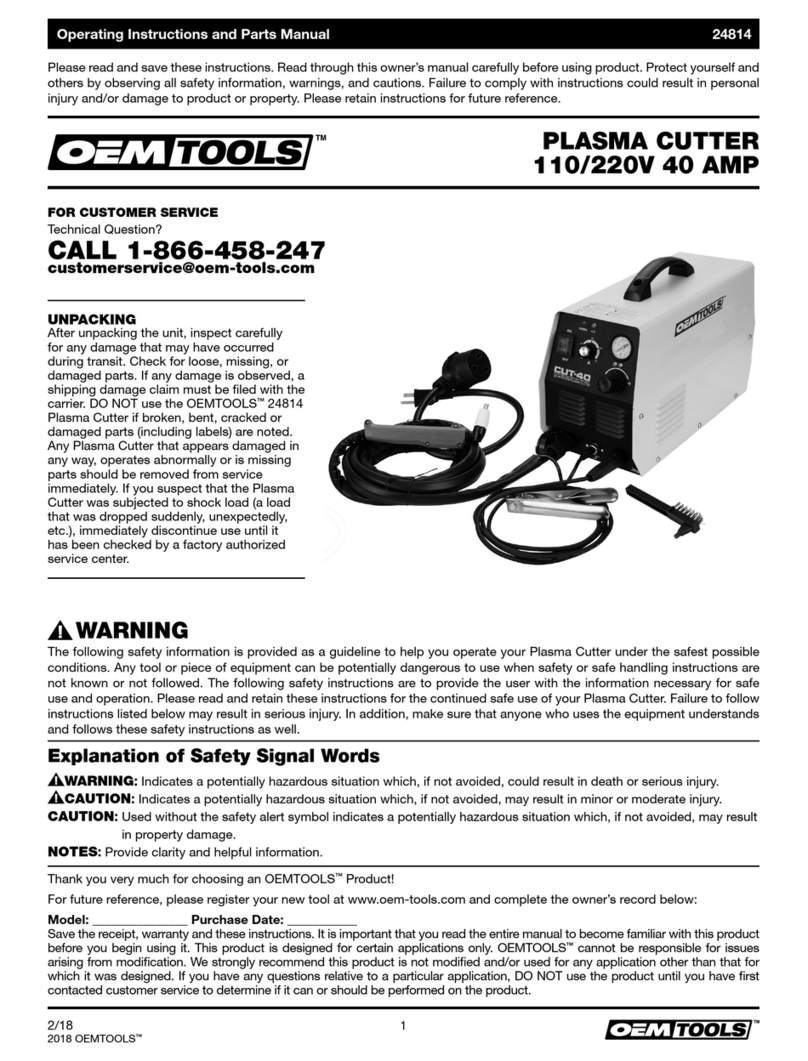
OEM Tools 24819 Service manual

UNPACKING
After unpacking the unit, inspect carefully for any damage that
may have occurred during transit. Check for loose, missing,
or damaged parts. If any damage is observed, a shipping
damage claim must be filed with the carrier. DO NOT use the
OEMTOOLS™24819 120V Spot Welder if broken, bent, cracked
or damaged parts (including labels) are noted. Any Spot Welder
that appears damaged in any way, operates abnormally or is
missing parts should be removed from service immediately. If
you suspect that the Spot Welder was subjected to shock load
(a load that was dropped suddenly, unexpectedly, etc.),
immediately discontinue use until it has been checked by a
factory authorized service center.
Operating Instructions and Parts Manual 24819
120V SPOT WELDER
2/18
2018 OEMTOOLS™
Thank you very much for choosing an OEMTOOLS™Product!
For future reference, please register your new product at www.oem-tools.com and complete the owner’s record below:
Model: _______________ Purchase Date: ___________
Save the receipt, warranty and these instructions. It is important that you read the entire manual to become familiar with this product
before you begin using it. This product is designed for certain applications only. OEMTOOLS™cannot be responsible for issues arising
from modification. We strongly recommend this product is not modified and/or used for any application other than that for which it was
designed. If you have any questions relative to a particular application, DO NOT use the product until you have first contacted customer
service to determine if it can or should be performed on the product.
The following safety information is provided as a guideline to help you operate your Spot Welder under the safest possible conditions. Any
tool or piece of equipment can be potentially dangerous to use when safety or safe handling instructions are not known or not followed.
The following safety instructions are to provide the user with the information necessary for safe use and operation. Please read and retain
these instructions for the continued safe use of your Spot Welder. Failure to follow instructions listed below may result in serious injury. In
addition, make sure that anyone who uses the equipment understands and follows these safety instructions as well.
WARNING
WARNING: Indicates a potentially hazardous situation which, if not avoided, could result in death or serious injury.
CAUTION: Indicates a potentially hazardous situation which, if not avoided, may result in minor or moderate injury.
CAUTION: Used without the safety alert symbol indicates a potentially hazardous situation which, if not avoided, may
result in property damage.
NOTES: Provide clarity and helpful information.
Explanation of Safety Signal Words
Please read and save these instructions. Read through this owner’s manual carefully before using product. Protect
yourself and others by observing all safety information, warnings, and cautions. Failure to comply with instructions
could result in personal injury and/or damage to product or property. Please retain instructions for future reference.
FOR CUSTOMER SERVICE
Technical Question?
CALL 1-866-458-2472

2
Operating Instructions and Parts Manual 24819
2/18
2018 OEMTOOLS™
120V SPOT WELDER
IMPORTANT INSTRUCTIONS
AND SAFETY RULES
1. Know your product. Read this manual carefully. Learn
the product’s applications and limitations, as well as
potential hazards specific to it.
2. Keep work area clean and well lit. Cluttered or dark
work areas invite accidents.
3. Keep children away. All children should be kept away
from the work area. Never let a child handle tools or
equipment without strict adult supervision.
4. DO NOT operate this product if under the influence of
alcohol or drugs. Read warning labels on prescriptions
to determine if your judgment or reflexes are impaired
while taking drugs. If there is any doubt, DO NOT
attempt to operate.
5. Use safety equipment. Eye protection should be worn at all
times when operating this tool. Use ANSI approved safety
glasses. Everyday eyeglasses are NOT safety glasses.
Dust mask, non-skid safety shoes, hard hat or hearing
protection should be used in appropriate conditions.
6. Wear proper apparel. Loose clothing, gloves, neck-ties,
rings, bracelets or other jewelry may present a potential
hazard when operating this product. Keep all apparel
clear of the product.
7. DO NOT overreach. Keep proper footing and balance at
all times when operating this product.
8. Check for damage. Check equipment regularly. If part of
the product is damaged, it should be carefully inspected
to make sure that it can perform its intended function
correctly. If in doubt, discontinue use of product.
9. Keep away from flammables. DO NOT attempt to
operate this product near flammable materials or
combustibles. Failure to comply may cause serious
injury or death.
10. Store this product out of the reach of children and
untrained persons. This product may be dangerous in
the hands of untrained users.
11. Keep this product dry and clean.
12. Use only accessories that are recommended by the
manufacturer for your model. Accessories that may be
suitable for one product may become hazardous when
used on another product.
13. Service must be performed only by qualified repair
personnel. Service or maintenance performed by
unqualified personnel could result in a risk of injury.
14. When servicing a product, use only identical replacement
parts. Use of unauthorized parts or failure to follow
maintenance instructions may create a risk of injury.
15. Maintain a safe working environment. Keep the work
area well lit. Make sure there is adequate surrounding
workspace. Keep the work area free of obstructions,
grease, oil, trash, and other debris. Do not use this
product in a damp or wet location.
16. Maintain labels and nameplates on this product. These
carry important information. If unreadable or missing,
contact OEMTOOLS™for a replacement.
17. Keep this product dry, clean, and free from brake fluid,
oil, and grease.
18. Avoid accidental fire. DO NOT smoke near this product.
19. The warnings, precautions, and instructions discussed
in this manual cannot cover all possible conditions
and situations that may occur. The operator must
understand that common sense and caution are factors
which cannot be built into this product, but must be
supplied by the operator.
20. We believe the information contained herein to be
reliable. However, general technical information is given
by us without charge and the user shall employ such
information at their own discretion and risk. We assume
no responsibility for results or damages incurred from
the use of such information in whole or in part.
21. The manufacturer declines any and all responsibility for
property damage or injury if said damage is the result of
unskillful handling by the operator or of failure to observe
the basic safety rules set forth in the instruction manual.
22. The procedures documented in this manual are to serve
as guidelines for the use of this equipment.
23. The use of this equipment is simple and straightforward
if you follow the instructions. When operating this
equipment, use common sense, and only use this
equipment for its intended purpose.
PRODUCT DESCRIPTION
The OEMTOOLS™24819 120V Spot Welder efficiently spot
welds uncoated mild, galvanized or stainless steel.
PRODUCT SPECIFICATIONS
Process Spot Welding
Input Voltage 120V AC
Input Current 13.5A
Output Current Range 1.5 kVA @ 50% Duty Cycle
Rated Duty Cycle 50% @ 1.5 kVA based on 10
second period (welds 5 seconds
out of a 10 second time interval)
Applicable Materials Uncoated mild, galvanized, or
stainless steel
Capacity Mild Steel –
combined thickness 1/8"
Galvanized Steel –
2 pieces of 20 gauge (0.039")
CONTENTS
(1) Spot Welder, (2) Replacement Electrode Tips and
(1) Instruction Manual

3
Operating Instructions and Parts Manual 24819
2/18
2018 OEMTOOLS™
120V SPOT WELDER
GENERAL WELDING SAFETY AND INSTRUCTIONS
Thoroughly read and understand the provided product
manual before attempting to use this product.
WARNING:ARC WELDING CAN BE DANGEROUS.
1. DO NOT allow untrained persons or children to
operate. Ensure people in the surrounding area
understand the dangers and precautions associated
with welding prior to use.
2. CONSULT WITH A PHYSICIAN PRIOR TO OPERATION
IF YOU HAVE A PACEMAKER. Arc welders create an
Electromagnetic Field (EMF) which can interfere
with pacemakers.
3. DO NOT attempt to perform repairs on this product.
WARNING: ARC RAYS CAN BURN SKIN AND CAUSE
EYE DAMAGE.
1. Signs should be posted within the welding workspace
stating hazards and precautions associated with arc
welding rays and related protection.
2. The operator and nearby personnel located in the
welding workspace should wear protective shields
conforming to ANSI standards, with the proper filter
and cover plates to protect eyes from sparks and arc
welding rays.
3. The operator and nearby personnel located in the
welding workspace should wear protective clothing
made with flame-resistant material to protect skin from
sparks, metal and arc rays.
WARNING:ARC WELDING CAUSES ELECTROMAGNETIC
FIELDS. THESE FIELDS ARE DANGEROUS AND CAN CAUSE
SERIOUS INJURY OR DEATH IF PRECAUTIONS ARE NOT
FOLLOWED.
1. Welding current creates an Electromagnetic Field (EMF)
around the welding machine, leads and cords. EM fields
interfere with some pacemakers (as previously stated),
and prolonged exposure to EM fields may have other
health effects that are undetermined. Before operating
this product, the operator and personnel located
within the welding workspace should understand that
there are health risks (determined and undetermined)
associated with arc welding and EM fields.
2. MINIMIZE EXPOSURE TO EM FIELDS BY EMPLOYING
THE FOLLOWING PRECAUTIONS:
a. DO NOT place your body between the electrode
and the work cables.
b. DO NOT coil or wrap the electrode leads around
any part of the body.
c. DO NOT separate work cables and electrode.
Route and secure the cables together.
d. DO NOT work/weld directly beside the power
source.
WARNING:WELDING SPARKS CAN CAUSE FIRE AND
EXPLOSION, WHICH CAN LEAD TO INJURY, DEATH AND
PROPERTY DAMAGE. ALWAYS HAVE A FIRE EXTINGUISHER
WITHIN THE WELDING AREA AND IMPLEMENT A FIRE
ESCAPE PLAN.
1. Remove all flammable items and potential fire hazards
from the welding workspace. If there are fire hazards
that cannot be removed, they should be covered with a
fire-resistant cover.
2. DO NOT operate near hydraulic, fuel or natural gas lines.
3. DO NOT weld near flammable gases, residue or
greases. Take proper steps to ventilate and clean
workspace prior to use.
4. DO NOT weld near compressed gases. DO NOT heat,
cut or weld tanks, drums or other containers that may
have stored flammable gases or liquids. While these
tanks may be “empty”, residue will remain that could
lead to fire or explosion.
5. Welding sparks, spatter and hot debris are produced
by the welding arc. It is imperative that the operator
and personnel located within the welding workspace
wear oil-free, flame-resistant clothing. Clothing should
provide full coverage: heavy leather gloves, long-sleeve
shirt, full length pants (no cuff), high protective leather
boots and a welding cap that covers all hair. Clothing
should be well fitted; loose fitting clothing may create a
fire hazard. When welding in confined spaces, flame-
resistant earplugs or earmuffs should be worn.
6. DO NOT connect the work cable to building framework.
Connect the Ground Clamp to work as close to the weld
as possible.
7. All cylinders should be securely stored in an upright
position away from welding workspace. Arc welding can
project sparks and debris that may strike cylinders. DO
NOT allow the electrode, electrode wheel, welding gun or
ground to contact a cylinder. Prior to welding, ensure the
valves on all cylinders in the vicinity are closed.
8. ALWAYS check the workpiece and surrounding work
area for smoke, flame, sparks or evidence of fire.
WARNING:ELECTRIC SHOCK CAN KILL. DO NOT TOUCH
ELECTRODE, WORK OR GROUND WHILE THE WELDER IS ON.
1. DO NOT wear wet clothing or wet gloves.
2. DO NOT touch electrode or work with bare skin while
the Welder is plugged into a power source.
3. DO NOT place the Electrode in water.
4. DO NOT allow components of (2) welding machines to
come into contact while either Welder is ON.
5. DO NOT attempt to use if the welder’s plug and
grounding prong has been altered or damaged.
6. DO NOT force plug into socket. If the plug does not fit
correctly, an appropriate outlet must be installed by a
qualified electrician and grounded in accordance with
the US National Electrical Code, state and local codes.

4
Operating Instructions and Parts Manual 24819
2/18
2018 OEMTOOLS™
120V SPOT WELDER
7. ALWAYS connect to a grounded, GFCI-protected power
supply.
8. ALWAYS insulate yourself from the workpiece and
ground. Non-flammable, dry insulating material is
recommended.
9. Ensure that all welding equipment is well maintained
and in safe operating condition prior to each use.
10. Ensure no part of the electrode circuit is in contact with
the work or ground.
11. Install and ground equipment in accordance with the
US National Electrical Code, local codes and according
to this instruction/installation manual.
12. If there is any reason to doubt whether an outlet is
properly grounded, contact a qualified electrician
prior to use.
WARNING:ARC WELDING MAY PRODUCE FUMES AND
GASES THAT ARE HAZARDOUS TO THE HEALTH OF THE
OPERATOR AND PERSONNEL LOCATED WITHIN THE WELDING
WORKSPACE. EXPOSURE TO THESE FUMES CAN INCREASE
THE RISK OF DEVELOPING CANCER, HEART DISEASE, EARLY
ONSET PARKINSON’S DISEASE AND VARIOUS REPRODUCTIVE,
RESPIRATORY AND DIGESTIVE DISEASES.
1. DO NOT place your head near the welding arc;
avoid breathing fumes while welding. Ensure proper
ventilation.
2. Welding hard-facing, galvanized, stainless and other plated
steels or metals produces highly toxic fumes. Always read
the MSDS for the product, metal or work prior to welding.
Exhaust, mechanical ventilation and a respirator may be
required for minimal exposure to these fumes.
a. Wear NIOSH approved respirator when working/
welding with materials that produce dust or
particulate matter.
3. Cylinders and containers that may have held harmful
gases should be properly vented prior to welding.
Failure to ventilate these containers will produce toxic
gases that are harmful to the operator and all personnel
located within the workspace.
4. DO NOT weld near chlorinated hydrocarbons from
degreasing, cleaning or spraying operations.
5. Read and understand the product instructions and
MSDS sheet for any consumables or products used in
conjunction with this product. There are risks outside
of the operation of this Welder that can cause unsafe
working conditions.
SPECIFIC SAFETY INSTRUCTIONS
1. THIS IS NOT A GAS WELDER.
2. DO NOT connect to power while assembling, adjusting
Electrode Tip alignment or performing maintenance on
this unit.
3. DO NOT attempt to use this Welder if the unit fails to
switch ON or OFF.
4. ALWAYS ensure the Power is in the OFF position prior to
plugging the unit into a power source.
5. ALL INSTALLATION AND REPAIR OF THIS EQUIPMENT
SHOULD BE PERFORMED BY A QUALIFIED TECHNICIAN IN
ACCORDANCE WITH FEDERAL, STATE AND LOCAL CODES.
PREPARING TO USE YOUR SPOT WELDER
WARNING:Read all warnings and safety instructions prior
to installing this product.
1. Unpack all items from the box and reference the parts
list to ensure all parts are present before continuing
installation.
2. Place the Welder onto a clean, protected surface that
can support the weight of the Welder. Ensure the Welder
is placed at a distance that will not over-extend the
cord or place tension on the plug.
3. The Welder must be plugged into a properly grounded
120V AC outlet. While not recommended, if an extension
cord is used, it must meet the following AWG (American
Wire Gauge) requirements:
a. Less than 30' – 10 AWG
b. 30' to 50' – 8 AWG
c. 50' to 70' – 6 AWG
NOTE: As the distance from the power supply increases, a
heavier gauge extension cord must be used (lower AWG =
heavier gauge). If the above AWG requirements are not met
at the given distances, product malfunction or failure may
occur.
TONG AND ELECTRODE TIP ALIGNMENT
WARNING:Turn the Welder OFF and disconnect from
power prior to adjusting Electrode alignment.
NOTE: For a proper weld, the Electrode Tip on the Upper
Tong should be centered with the Electrode Tip on the Lower
Tong when contacting workpiece.
1. To adjust the Upper Tong:
a. Loosen the (4) Adjustment Screws located on
the top of the Upper Tong Holder.
b. Slowly push or pull the Upper Tong to the
desired length.
2. To adjust the Lower Tong:
a. Loosen the (4) Adjustment Screws located on
the base of the Spot Welder.
b. Slowly push or pull the Lower Tong to the
desired length.
3. Once proper alignment is met, re-tighten screws
(step 1 and 2).
NOTE: Ensure the Tongs are not angled; the Tongs should be
vertically centered.

5
Operating Instructions and Parts Manual 24819
2/18
2018 OEMTOOLS™
120V SPOT WELDER
ADJUSTING TONG PRESSURE
WARNING:Turn the Welder OFF and disconnect from
power prior to adjusting Tong Pressure.
NOTE: Use a clamp or vise to hold workpieces together.
Excessive pressure can damage Electrode Tips.
Problem Indications Solution
Tong
Pressure is
Too Weak
• Workpieces are loose
between Electrode
Tips when the Tongs
are closed
• No weld formed
Loosen the Front Jam
Nut, when the desired
pressure is reached,
tighten the Rear Jam
Nut to meet the Upper
Tong Holder
Tong
Pressure is
Too Strong
• Weld will dimple/
concave
• Molten material
pushes out from weld
point
Loosen the Rear Jam
Nut, when the desired
pressure is reached,
tighten the Front Jam
Nut to meet the Upper
Tong Holder
WELDER OPERATING INSTRUCTIONS
WARNING:DO NOT touch the Upper or Lower Tongs
while operating.
NOTE: These instructions describe very basic welding processes
as they apply to the operation of this Welder. There are many
different types of welding machines, welds and welding
procedures that cannot be described in detail by this instruction
manual. Proficiency in welding requires practice, education
and testing. DO NOT rely solely on this product manual for
instructions on proper welding technique. By using this product,
the operator understands that OEMTOOLS™ cannot be held
responsible for property damage caused by operator negligence,
ignorance or general welding mistakes.
1. Thoroughly read and understand warnings and Welder
installation instructions.
2. Inspect the Spot Welder for any broken parts, loose
hardware, visibly damaged wiring or other condition
that may affect the Spot Welder’s performance.
3. BEFORE PLUGGING IN THE WELDER, lower the
Operating Lever to contact the workpieces between the
Upper and Lower Tong to ensure there are no gaps or
misalignments.
4. Properly dress Electrode Tips and align Upper and
Lower Tongs.
5. Inspect the workpieces for any coating, paint, greases,
oils, residue or dusts that could affect the weld or
safety of the operator.
6. Plug the Spot Welder into a grounded 120V AC outlet.
PRESS and HOLD the Power Switch to the side.
Lower the Operating Lever, to initiate contact with the
workpiece and create spot weld.
NOTE: Weld time is based on the workpiece material and
thickness. The operator’s experience and knowledge of spot
welding and welding processes can factor into the quality of
the weld.
7. Raise the Operating Level after each weld to terminate
contact between the Electrode Tips and workpiece.
8. RELEASE the Power Switch.
9. Unplug the Spot Welder from the power source.
DRESSING ELECTRODE TIPS
WARNING:Allow Electrode Tips and workpiece to cool prior
to handling.
WARNING:Turn the Welder OFF and disconnect from power
prior to performing maintenance on the Electrode Tips.
1. Prior to each use, inspect Electrode Tips for
deformation.
2. Use a file or specialized tip dresser to restore the
diameter (3/16" or 4.75 mm) and approximate face
angle to the specifications of a new Electrode Tip.
NOTE: File and tip dresser are not included with this product.
3. Replace used electrode tips that cannot be dressed.
Deformed Electrode Tips cannot make proper contact,
leading to weak/faulty welds.
d = 3/16" (4.75 mm) diameter
REPLACING ELECTRODE TIPS
WARNING:Turn the Welder OFF and disconnect from
power prior to replacing Electrode Tips.
1. Remove used Electrode Tips from Upper and
Lower Tongs.
2. Screw the new Electrode Tips into the Upper and
Lower Tongs
DUTY CYCLE
To avoid damage and personal injury, DO NOT weld for
longer than the prescribed Duty Cycle Time. This Welder has
a 50% Duty Cycle Time at 1.5kVA based on a 10 second
time period. This indicates that this Welder can weld for
5 seconds out of every 10 second time period. Failure to
comply may lead to product failure.

6
Operating Instructions and Parts Manual 24819
2/18
2018 OEMTOOLS™
120V SPOT WELDER
MAINTENANCE
WARNING:Unplug the Spot Welder prior to performing
maintenance.
WARNING:DO NOT disassemble. There are no
serviceable parts within the Spot Welder casing.
1. After each use, wipe external surfaces with a dry,
clean cloth.
2. Inspect Electrode Tips for deformation and build-up.
Dress accordingly (Refer to directions on page 4-5.)
3. Inspect the Power Cord for any damage.
4. Any maintenance outside of the basic instructions/
adjustments described in this manual should be
performed by a qualified professional.
STORAGE
WARNING:Always unplug before placing into storage.
1. Store the Welder in an upright position and in a clean, dry
area. DO NOT store near flammable items or open flames.
DISPOSAL
1. At the end of the useful life of the OEMTOOLS™120V
Spot Welder, dispose of the components in accordance
with all federal, state and local regulations.
TROUBLESHOOTING
Problem Possible Cause Possible Solution
Weak weld or
extended contact
needed to
create weld
Coating on workpieces Sand workpieces, remove coatings
Tongs have deformed or acquired build-up Dress or replace tips
Material is too thick Workpieces (combined) cannot exceed welding capacity,
see specifications (page 2)
Poor contact See page 5 for pressure adjustment instructions
Burning holes
through
workpiece(s)
Tongs are misaligned causing irregular heating See page 5 for realignment instructions
Weld time is too long Shorten contact period
Electrode tips deformed or acquired build-up Dress or replace tips
Molten material
pushed
out from
weld point
Tong pressure too strong See page 5 for pressure adjustment instructions
Welding time is too long Shorten contact period
Tongs not aligned correctly causing irregular heating See page 5 for realignment instructions
Tips arcing on material
Tong pressure too weak See page 5 for pressure adjustment instructions
Tips are misaligned See page 5 for realignment instructions
Electrode tips deformed or acquired build-up Dress or replace tips
Electrode Tips overheating
Tong pressure too weak See page 5 for pressure adjustment instructions
Weld time too long Shorten contact period
Material is too thick Workpieces (combined) cannot exceed welding capacity,
see specifications (page 2)
Welder does not operate when
the operating lever is lowered
Check input connection Connect to a 120V AC outlet
Check supply fuse Turn on/replace fuse

7
Operating Instructions and Parts Manual 24819
2/18
2018 OEMTOOLS™
120V SPOT WELDER
Figure Description Quantity
ASpot Welder 1
B Fixed Handle 1
C Operating Lever 1
D Support Handle 1
E Rear Jam Nut 1
FUpper Tong Holder 1
G Front Jam Nut 1
H Pressure Screw 1
IUpper Tong Adjustment Screws* 4
JPower Switch 1
KUpper Tong 1
LLower Tong 1
MElectrode Tips 4
NLower Tong Adjustment Screws* 4
O Power Cord 1
PRODUCT LAYOUT
PARTS DESCRIPTION
*Not Shown
M
L
KHG F
D
E
C
JB
A
O

8
Operating Instructions and Parts Manual 24819
2/18
2018 OEMTOOLS™
120V SPOT WELDER
CONTACT US
3580 E. Raines Road, Suite 3, Memphis, TN 38118
(1-866-458-2472)
email: [email protected]
OEMTOOLS™ONE YEAR WARRANTY
For up to one year from the date of purchase of this OEMTOOLS™product, if you find any defect in material or workmanship
(through normal usage), return it to the place of purchase or to OEMTOOLS™for repair or replacement at our discretion. In
order to obtain this service, send the product and proof of purchase (transportation pre-paid) to:
OEMTOOLS™Q.A. Dept, 3580 E. Raines Road #3, Memphis, TN 38118.
We will not be responsible for lost or damaged goods during transportation; please insure your package. If our inspection
verifies the defect, we will either repair or replace the product, or we may elect to refund the purchase price if we cannot
readily and quickly provide you with a replacement. We will return repaired products at our expense, but if we determine
there is no defect, or that the defect resulted from causes not within the scope of our warranty, then you must bear the cost
of returning the product.
OEMTOOLS™does not provide warranty for products labeled other than OEM®or OEMTOOLS™. OEMTOOLS™will not
provide any warranty for products subjected to abnormal use. Abnormal use includes (but is not limited to) abuse, accident,
alteration, neglect, and unauthorized or unreasonable use or repairs. This warranty does not cover bits, blades, files,
batteries, or calibration. We recommend that you maintain your tools and sharpen or replace blades, bits, files, and batteries
as necessary. OEMTOOLS™reserves the right to make any changes in construction or design at any time without any
obligation in incorporating such changes to tools or equipment previously sold. OEMTOOLS™makes every effort to ensure
that its products meet high quality and durability standards, and warrants to the original purchaser that this product is
free from defects in materials and workmanship for the period of one year from the date of purchase. This warranty does
not apply to damage due directly or indirectly to misuse, abuse, negligence or accidents, repairs or alterations outside our
facilities, criminal activity, improper installation, normal wear and tear or to lack of maintenance.
We shall in no event be liable for death, injuries to persons or property, or for incidental, contingent, special or consequential
damages arising from the use of our product. Some states do not allow the exclusion or limitation of incidental or
consequential damages, so the above limitation of exclusion may not apply to you. THIS WARRANTY IS EXPRESSLY IN LIEU
OF ALL OTHER WARRANTIES, EXPRESS OR IMPLIED, INCLUDING THE WARRANTIES OF MERCHANTABILITY AND FITNESS.
This warranty gives you specific legal rights, and you may also have other rights, which vary from state to state.
Don’t forget to register your new OEMTOOLS™product at www.oem-tools.com.
Table of contents
Other OEM Tools Welding System manuals
Popular Welding System manuals by other brands

ESAB
ESAB Caddy 150 instruction manual

Kemppi
Kemppi MasterTig 2200 Operation instructions

Lincoln Electric
Lincoln Electric POWER MIG 210 MP Operator's manual

Red-D-Arc Welderentals
Red-D-Arc Welderentals EX300 230/460 Technical manual

GYS
GYS PROTIG 231 DC FV manual

Jefferson
Jefferson JEFMIG151-A user manual

Truper
Truper SOT-250AL instruction manual

Tokentools
Tokentools multi 164 instruction manual

Air Liquide
Air Liquide CITIG 1500 DC Safety instruction for use and maintenance

WELDCO
WELDCO WDC0821 Operator's manual

Praxair
Praxair MICROTIG AC/DC 202 PULSE user guide

tresnar
tresnar 4614 MMA-145 instruction manual