OGHom HL6 User manual

Important Warm Attention for this Steamer
1. Safety Steamer and Automatically Shut down Design
For your safety, this steamer will shut down automatically if the
steamer gets too hot, or the water runs out. So please don’t worry
about Safety. We care for you.
2. In order to extend the life of steamer, please ensure that
there's enough water when using it.
We recommend turning it off after water runs out to avoid burning it
without water.
3. To reduce the risk of contact with hot water emitting from steam
vents, check appliance before each use by holding it away from
body and operating steam button.
Warm Tips to Keep Steamer Clean & Free of Dirt after Period Usage
1. Use clean water and vinegar solution or citric acid or lemon juice.
2. Pour the solution inside the steamer and boil it for 3-5 minutes,
then pour off the water.

3. Finally pour clean water and boil for another 2-3 minutes. All unwanted
dirt or precipitant will be removed and extend life.
Please read these instructions for use and have a good look at the illustration
before using the appliance
Safety Instructions
When using electrical appliances, basic safety precautions should always be followed.
⚫Do not place the product too close to any heat emitting appliances or in direct sunlight.
⚫Check that the voltage indicated on the data plate corresponds with that of the local
network before connecting the appliance to the mains power supply.
⚫Do not leave the appliance unattended whilst connected to the mains power supply.
⚫Do not immerse the appliance in water or any other liquids.
⚫It is imperative to unplug the appliance from the mains power supply after it has been
used, before it is cleaned and whilst being repaired.
⚫Close supervision is required when using this product near children.
⚫Never leave the appliance within reach of children.
⚫Repairs to electrical appliances should only be performed by a qualified electrician.
Improper repairs may place the user at serious risk.
⚫This appliance is intended for household use only and should not be used for industrial
purposes.
⚫Do not operate this appliance with a damaged plug or cord, after a malfunction, or after
being dropped damaged in any way.
⚫Do not use this appliance for anything other than is intended use.
⚫Steam produced by this unit is hot and pressurised. Care must be taken to avoid burns or
other injuries.
⚫Do not shake the appliance whist in use to avoid hot water splashing out.
⚫Always ensure the unit has cooled thoroughly before re-filling with water, cleaning or
storing.
⚫Always disconnect the appliance from the mains power supply when filling or emptying of
water. Ensure the water tank is emptied after each use before storing
⚫Do not add chemicals or detergents to the water tank as they will damage the unit
⚫The nozzle and accessories become hot during use. Do not touch the nozzle or attempt
to change the accessories whilst the appliance is in use.
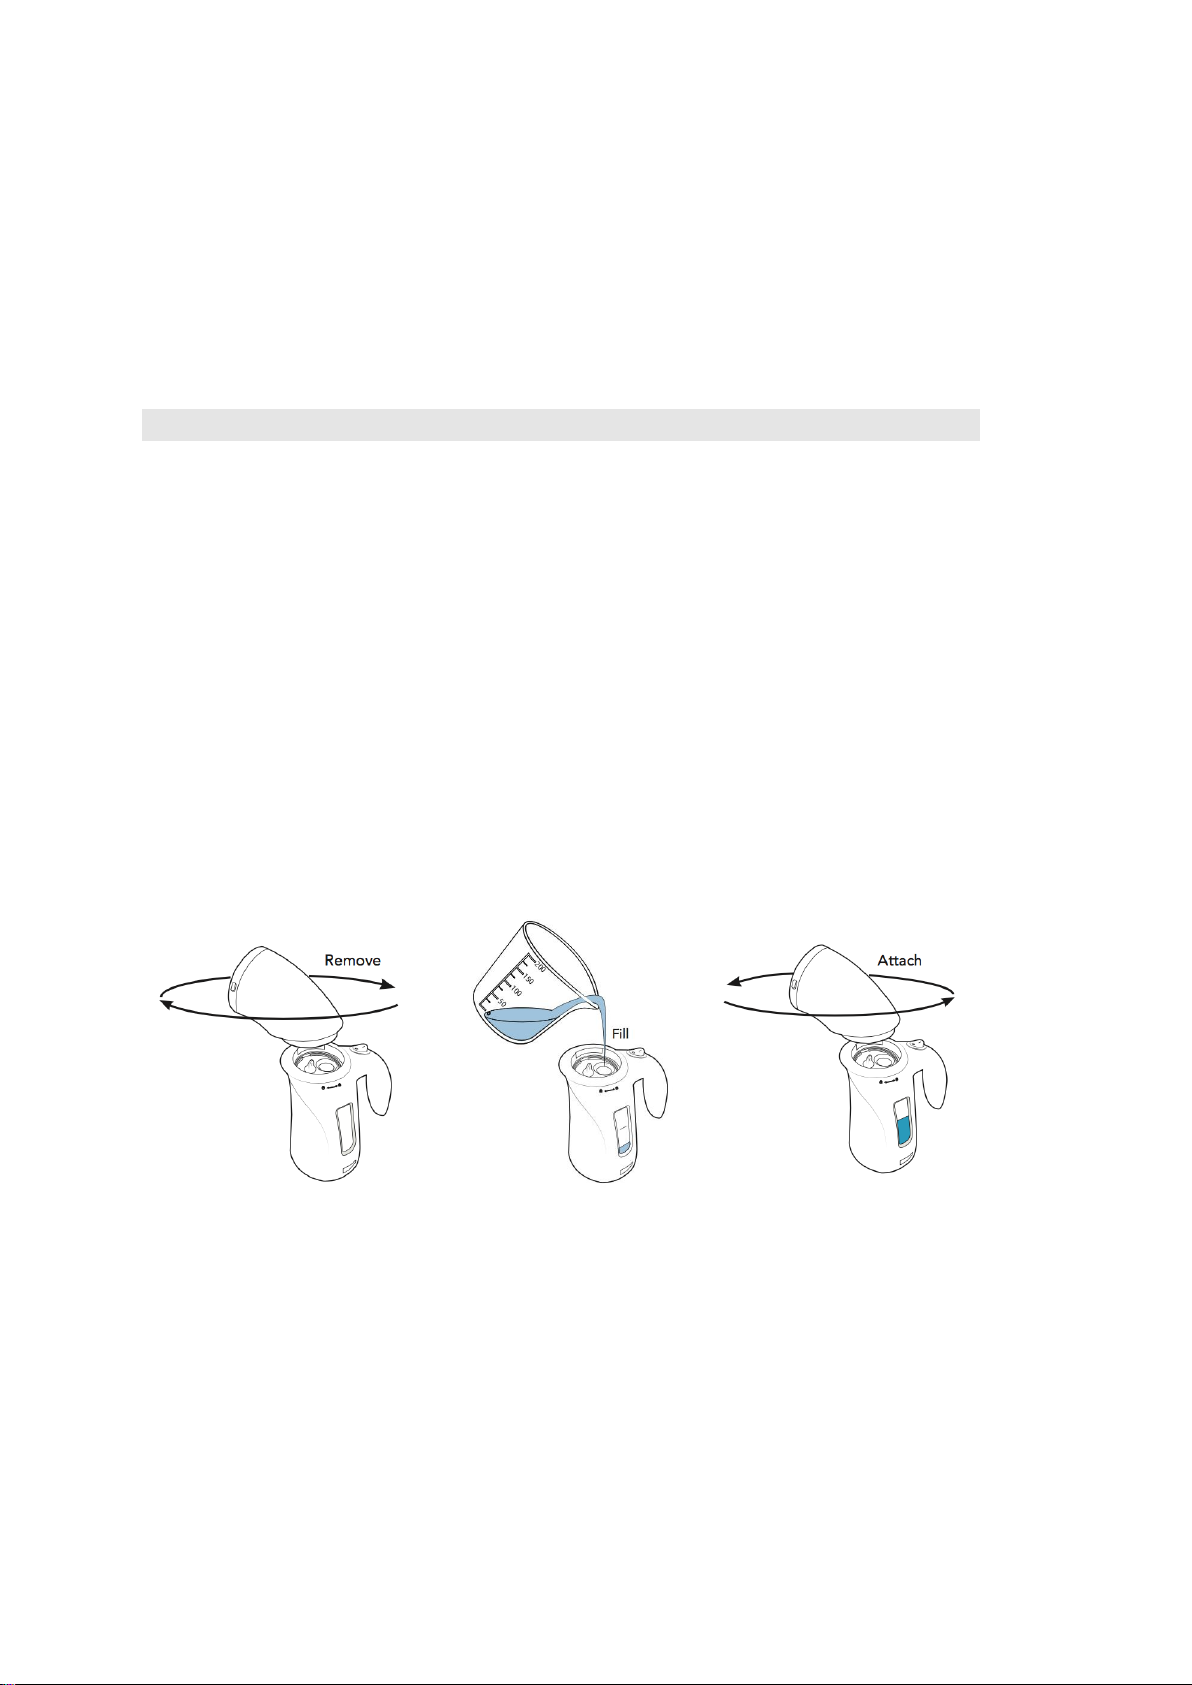
⚫Always hold the unit upright and do not fill past the Max mark to avoid burns from
splashing water.
⚫Use the unit with extreme caution with a tilted angle not more than 35°in any direct to

avoid excess water spilling from the steam head.
⚫Always hold the unit away from the body and do not aim at people or animals.
⚫Do not operate the appliance if the steam opening is blocked.
⚫Always drain the remaining water from the appliance after each use to avoid the mineral
build-up in the heating plate.
DESCRIPTION OF PARTS
1.
Power Cord
2.
Handle
3.
On/Off Switch
4.
Steam Brush
5.
Water Tank
Accessory Assembly
⚫This appliance is supplied with one accessorie

Fabric Brush - Smoothes wrinkles and creases from fabrics
Follow the steps below to attach the accessories to the steam nozzle
⚫Ensure the unit is turned Off and no steam emits from the nozzle.
⚫Choose the required attachment and slide onto the steam nozzle.
⚫Ensure the holes on the steam nozzle are aligned with the open slots on the accessories
so that steam does not get blocked.
⚫CAUTION: To avoid burns do not attach accessories to the nozzle whilst steam is
emitting.
INSTRUCTIONS FOR USE
Filling the Water Tank
WARNING! Ensure the Garment Steamer is unplugged and cooled before re-filling the tank.
⚫Ensure the Garment Steamer is unplugged and cooled before re-filling the tank.
⚫Ensure you place the Garment Steamer on a flat stable surface, holding the Handle, twist
the nozzle section of the Steamer clockwise to release.
⚫Fill the Garment Steamer using water, distilled or de- minerlised water.
⚫Fill the Water Tank up to the MAX mark, do not over fill the tank.
⚫Replace the Nozzle and twist to secure into place.
CAUTION:
⚫Each use, save rubber stopper and do not throw away.
⚫After each use,always allow then unit to cool for 14-18 minutes before adding cold water;
cold water added to a hot boiler may cause hot water and steam to shoot from the fill
hole.
⚫Extreme caution is required when pouring water into the water tank.
⚫Never fill water past the Max fill line.
NOTE:

⚫Use of distilled or de-mineralised water is recommended to prolong the life of the
steamer.
⚫Use water only; do not use detergents or other chemical substances.
⚫Mis-use will lead to an invalid guarantee.
Steaming Linens and Fabrics
⚫Ensure the water tank has been filled and that the desired accessory is connected and
then follow the steps below
⚫Plug the unit into the mains power supply and switch On if switchable.
⚫Switch the unit On to indicate the appliance is on.
⚫Steam will emit from the nozzle after approximately 130 seconds.
⚫Direct the steam nozzle with either one of the accessories towards the material you wish
to steam.
⚫Keep the flow of steam focused on the material being steamed.
⚫Using a slight back and forth motion over the area you are steaming will further enhance
the process.
⚫CAUTION: Always be sure that the Steam Nozzle and any other attachments are pointed
in a safe direction away from the user, other people and animals when steam is being
emitted.
Steaming Garments
⚫Place the garment on a clean rust-free hanger.
⚫Direct the steam nozzle towards the bottom of
the garment.
⚫Steam will rise on both the inside and outside of
⚫the fabric removing the wrinkles and creases.Slowly
slide the steam nozzle
⚫upwards from the bottom to the top of the garment.
⚫Direct the steam nozzle away from the garment and smooth the fabric with your free hand
⚫Repeat as necessary until the garment is crease-free.
Storage
⚫Unplug the power cord from the mains power supply.
⚫Allow the unit to cool thoroughly (at least 60 minutes).
⚫Remove all attachments from the unit.
⚫Drain the remaining water from the water tank to minimise potential mineral build-up.
Loosely replace the water tank cap but do not tighten as it may be difficult to unscrew for

future use.
⚫Store all accessories with the unit in a dry, cool location.
REMOVING MINERAL BUILD-UP
⚫Different water sources contain minerals and the sediment may cause mineral build-up in
the steamer and affect the free flow of steam.
⚫NOTE: The best way to avoid mineral build-up is to use distilled or de-mineralised water.
If you are unable to do this it is recommended to use the mineral build-up removal
procedure.
⚫Unplug the unit and allow to cool completely (at least 60 minutes). Remove all
accessories from the unit.
⚫Remove the water tank cap and drain any remaining water from the water tank.
⚫Slowly pour the mixture into the water tank.
⚫Allow the unit to stand for 1-2 hours.
⚫Drain the solution from the water tank.
⚫If the mineral build-up still remains in the unit, repeat the above steps until all build-up is
removed.
⚫Rinse the water tank with fresh water, drain and repeat until the vinegar odour is
eradicated.
⚫Replace the water tank cap.
SPECIFICATION
⚫Unit Weight (Bare): 0.568kg.
⚫Water Tank Capacity: 240ml.
⚫Steam Output Time: 130 seconds.
⚫Steam Duration: 14-18 minutes.
⚫Voltage: 110-120V, 50/60Hz.
⚫Wattage: 700W
TROUBLESHOOTING
Problem
Possible Reasons
Solution
Unit fails to heat.
Unit is not plugged in.
Plug into mains power supply.
Switch is not activated.
Press the On/Off switch.
Unit heats up but
fails to steam.
Water tank is empty.
Refill the water tank according.
Mineral build-up in unit.
Follow the removing mineral
build-up guide.
Thermo-fuse breakdown.
Take to a certified service centre.

Steam output is
intermittent.
Mineral build-up in unit.
It is normal for the unit to stop
steaming periodically for a few
seconds,If the steam remains off
for longer periods ,follow the
removing mineral build-up guide.
Made in China
Table of contents
Popular Steam Cleaner manuals by other brands

Bissell
Bissell EasySweep 15D1 Series user guide

Rowenta
Rowenta Tweeny Nano DV90 Series manual

Brentwood Appliances
Brentwood Appliances STM-4000BK Operating and safety instructions

Sunbeam
Sunbeam SB20 operating instructions

XIAO TIAN
XIAO TIAN Light 'n' Easy manual

Reliable
Reliable PRONTO 100CH instruction manual