OHAUS VALOR 5000 H Series User manual


This product conforms to the EMC Directive 2004/108/EC and the
Low Voltage Directive 2006/95/EC. The complete Declaration of
Conformity is available from Ohaus Corporation
Este producto se conforma con el EMC 2004/108/EC directivo y la
baja tensión 2006/95/EC directivo. El declaración completo de la
conformidad está disponible de Ohaus Corporation.
Ce produit se conforme à l’EMC 2004/108/EC directif et la basse
tension 2006/95/EC directif. La déclaration complète de la
conformité est fournie par Ohaus Corporation.

Important notice for verified weighing instruments
Weighing Instruments verified at the place of manufacture bear one of the preceding mark on the packing label and
the green ‘M’ (metrology) sticker on the descriptive plate. They may be put into service immediately.
Weighing Instruments to be verified in two stages have no green ‘M’ (metrology) on the descriptive plate and bear
one of the preceding identification mark on the packing label. The second stage of the initial verification must be
carried out by the approved service organization of the authorized representative within the EC or by the national
weight & measures (W+M) authorities.
The first stage of the initial verification has been carried out at the manufacturers work. It comprises all tests according to the adopted
European standard EN 45501:1992, paragraph 8.2.2.
If national regulations limit the validity period of the verification, the user of the weighing instrument must strictly observe the re-verification
period and inform the respective W+M authorities.
Notificación importante para instrumentos de pesaje verificados
Los instrumentos de pesaje verificados en el sitio de fabricación llevan una de las marcas precedentes en el rótulo
del empaque y la etiqueta de la ‘M’ verde (metrología) en la placa descriptiva. Estos instrumentos se pueden poner
en funcionamiento inmediatamente.
Los instrumentos de pesaje a ser verificados en dos etapas no tienen ninguna ‘M’ verde (metrología) en la placa
descriptiva, y presentan una de las marcas de identificación precedentes sobre el rótulo del empaque. La segunda
etapa de la verificación inicial debe ser llevada a cabo por la organización de servicio aprobada del representante
autorizado dentro de la CE o por las autoridades nacionales de pesos y medidas.
La primera etapa de la verificación inicial ha sido llevada a cabo en el sitio de fabricación. Ésta comprende todas las pruebas estipuladas
por el estándar europeo adoptado: EN 45501:1992, párrafo 8.2.2.
Si las normas nacionales limitan el periodo de validez de la verificación, el usuario del instrumento de pesaje debe seguir estrictamente el
periodo de re-verificación e informar a las correspondientes autoridades de pesos y medidas.
Avis important pour les instruments de pesage vérifiés
Les instruments de pesage vérifiés sur le site de fabrication portent l’une des marques précédentes sur l’étiquette de
l’emballage avec un autocollant M (pour Métrologie) en vert sur la plaque descriptive. Ces instruments peuvent être
immédiatement mis en service.
Les instruments de pesage à vérifier en deux étapes ne portent pas d’autocollant M (pour Métrologie) en vert sur la
plaque descriptive et portent l’une des marques d’identification précédentes sur l’étiquette de l’emballage. La
deuxième étape de la vérification initiale doit être exécutée par l’organisation de service homologuée du représentant
agréé au sein de la CE ou par les autorités nationales de poids et mesures.
La première étape de la vérification initiale a été exécutée sur le site du fabricant. Elle se compose des tests requis par la norme européenne
EN45501:1992, paragraphe 8.2.2.
Si des règlements nationaux limitent la durée de validité de la vérification, il incombe à l’utilisateur dudit instrument de pesage de respecter
strictement la période de re-vérification et d’informer les autorités de poids et mesures respectives.

Disposal
In conformance with the European Directive 2002/96 EC on Waste Electrical and Electronic Equipment (WEEE) this device
may not be disposed of in domestic waste. This also applies to countries outside the EU, per their specific requirements.
Please dispose of this product in accordance with local regulations at the collecting point specified for electrical and electronic
equipment.
If you have any questions, please contact the responsible authority or the distributor from which you purchased this device.
Should this device be passed on to other parties (for private or professional use), the content of this regulation must also be
related.
Thank you for your contribution to environmental protection.
Eliminación de residuos
De conformidad con las exigencias de la directiva europea 2002/96 CE sobre residuos de aparatos eléctricos y
electrónicos (RAEE), este equipo no puede eliminarse como basura doméstica. Esta prohibición es asimismo válida para
los países que no pertenecen a la UE cuyas normativas nacionales en vigor así lo reflejan.
Elimine este producto, según las disposiciones locales, mediante el sistema de recogida selectiva de aparatos eléctricos y
electrónicos.
Si tiene alguna pregunta al respecto, diríjase a las autoridades responsables o al distribuidor que le proporcionó el equipo.
Si transfiere este equipo (por ejemplo, para la continuación de su uso con fines privados, comerciales o industriales),
deberá transferir con él esta disposición.
Muchas gracias por su contribución a la conservación medioambiental.
Elimination
En conformité avec les exigences de la directive européenne 2002/96 CE relative aux déchets d'équipements électriques et
électroniques (DEEE), cet appareil ne doit pas être éliminé avec les déchets ménagers. Logiquement, ceci est aussi valable
pour les pays en dehors de l'UE conformément aux règlementations nationales en vigueur.
Veuillez éliminer cet appareil conformément aux prescriptions locales dans un conteneur séparé pour appareils électriques et
électroniques.
Pour toute question, adressez-vous aux autorités compétentes ou au revendeur chez qui vous avez acheté cet appareil.
En cas de remise de cet appareil (p. ex. pour une utilisation privée ou artisanale/industrielle), cette prescription doit être
transmise en substance.
Merci pour votre contribution à la protection de l'environnement.

FCC Note
This equipment has been tested and found to comply with the limits for a Class B digital device, pursuant to Part 15 of the FCC Rules.
These limits are designed to provide reasonable protection against harmful interference in a residential installation. This equipment
generates, uses and can radiate radio frequency energy and, if not installed and used in accordance with the instructions, may cause
harmful interference to radio communications. However, there is no guarantee that interference will not occur in a particular installation.
If this equipment does cause harmful interference to radio or television reception, which can be determined by turning the equipment off
and on, the user is encouraged to try to correct the interference by one or more of the following measures:
• Reorient or relocate the receiving antenna.
• Increase the separation between the equipment and receiver.
• Connect the equipment into an outlet on a circuit different from that to which the receiver is connected.
• Consult the dealer or an experienced radio/TV technician for help.
Industry Canada Note
This Class B digital apparatus complies with the Canadian ICES-003.
Cet appareil numérique de la classe B est conforme à la norme NMB-003 du Canada.
ISO 9001 Registration
In 1994, Ohaus Corporation, USA, was awarded a certificate of registration to ISO 9001 by Bureau Veritus Quality International (BVQI),
confirming that the Ohaus quality management system is compliant with the ISO 9001 standard’s requirements. On May 15, 2003,
Ohaus Corporation, USA, was re-registered to the ISO 9001:2000 standard.
Registro ISO 9001
En 1994, Bureau Veritus Quality International (BVQI) le otorgó a Ohaus Corporation, EE.UU., un certificado de registro ISO 9001 el cual
confirma que el sistema administrativo de calidad de Ohaus cumple con los requerimientos del estándar ISO 9001. En mayo 15 del
2003, Ohaus Corporation, EE.UU., fue registrada nuevamente al estándar ISO 9001:2000.
Enregistrement ISO 9001
En 1994, le Bureau Veritus Quality International (BVQI) a octroyé la certification d’enregistrement ISO 9001 à Ohaus Corporation, États-
Unis d’Amérique, confirmant que le système de gestion de la qualité Ohaus était conforme aux conditions normalisées de l’ISO 9001. Le
15 mai 2003, Ohaus Corporation, États-Unis d’Amérique, a été ré-enregistrée à la norme ISO 9001:2000.
Standard
Estándar
Normes
Marking
Marcado
Marquage
R
C
U
S
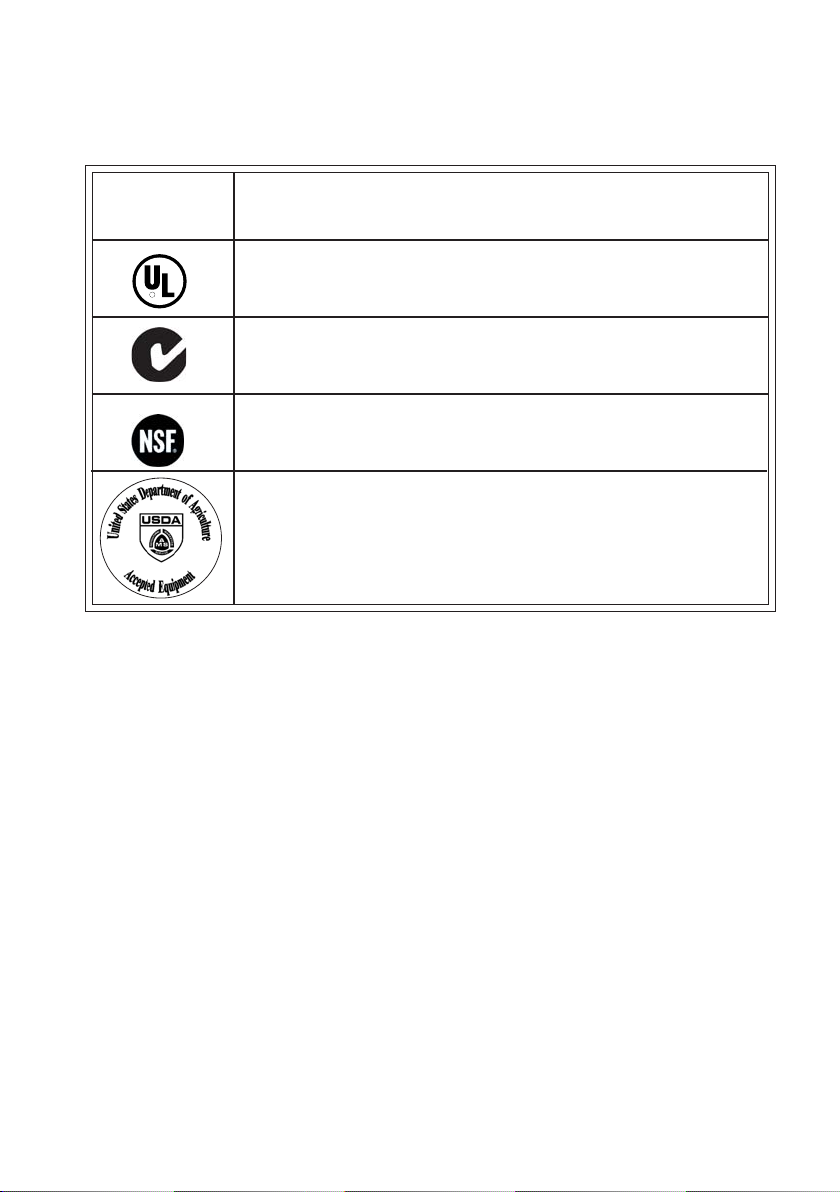
Compliance to the following standards is indicated by the corresponding marking on the product.
El cumplimiento con los siguientes estándares se indica mediante el correspondiente marcado sobre el
producto.
La conformité aux normes suivantes est indiquée par le marquage correspondant sur le produit.
UL60950-1 : 2003
AS/NZS4251.1, AS/NZS4252.1
NSF / ANSI 169
NSF/ANSI /3-A 14159-1

EN-1 Valor 5000 Series
TABLE OF CONTENTS
1 INTRODUCTION ................................................................................................................... EN-3
1.1Product Description ........................................................................................................ .EN-3
1.2General Features ............................................................................................................. EN-3
1.3Safety Precautions .......................................................................................................... EN-4
2 INSTALLATION ....................................................................................................................EN-5
2.1Unpacking ....................................................................................................................EN-5
2.2Installing Components ..................................................................................................... EN-5
2.3Selecting the Location ..................................................................................................... EN-5
2.4Connecting Power ........................................................................................................... EN-5
2.4.1 AC Power ............................................................................................................ EN-5
2.4.2 Battery Power ...................................................................................................... EN-6
2.5Initial Calibration ............................................................................................................ EN-6
3 OPERATION ................................................................................................................... EN-7
3.1Overview of Parts and Controls ........................................................................................ EN-7
3.2Control Functions ............................................................................................................ EN-9
3.3Basic Operation .............................................................................................................. EN-9
3.3.1 Turning On .......................................................................................................... EN-9
3.3.2 Turning Off .......................................................................................................... EN-9
3.3.3 Zeroing ............................................................................................................... EN-9
3.3.4 Taring ................................................................................................................. EN-9
3.3.5 Displaying Gross and Tare Values ...................................................................... EN-10
3.3.6 Changing Unit of Measure .................................................................................. EN-10
3.4Menu ..................................................................................................................EN-10
3.4.1 Menu Structure .................................................................................................. EN-10
3.4.2 Menu Navigation ............................................................................................... EN-11
3.4.3 Changing Menu Settings .................................................................................... EN-11
3.5Application Modes ........................................................................................................ EN-11
3.5.1 Weighing .......................................................................................................... EN-11
3.5.2 Checkweighing .................................................................................................. EN-11
3.6Checkweigh Target Settings ........................................................................................... EN-12
3.7Scale Settings ............................................................................................................... EN-13
3.7.1 Calibration sub-menu ............................................................................................ EN-13

Valor 5000 Series EN-2
3.7.2 Setup sub-menu ................................................................................................ EN-15
3.7.3 Readout sub-menu ............................................................................................ EN-16
3.7.4 Unit sub-menu ................................................................................................... EN-17
3.7.5 Mode sub-menu ................................................................................................ EN-18
3.7.6 Lockout sub-menu ............................................................................................. EN-19
3.8 Legal for trade Settings ................................................................................................ EN-20
3.9 Sealing the Scale ........................................................................................................ EN-20
4 MAINTENANCE ................................................................................................................. EN-21
4.1 Calibration ................................................................................................................. EN-21
4.2 Cleaning ................................................................................................................. EN-21
4.3 Troubleshooting .......................................................................................................... EN-21
4.4 Service Information...................................................................................................... EN-22
4.5 Accessories ................................................................................................................ EN-22
5 TECHNICAL DATA................................................................................................................ EN-23
5.1 Drawings ................................................................................................................. EN-23
5.2 Specifications ............................................................................................................. EN-23
Tables
Table 3-1 Parts and Controls ............................................................................................... EN-8
Table 3-2 Menu Structure .................................................................................................. EN-10
Table 3-3 Calibration Points .............................................................................................. EN-13
Table 4-1 Troubleshooting ................................................................................................ EN-21
Table 4-2 Error Codes ....................................................................................................... EN-22
Table 5-1 Specifications .................................................................................................... EN-24
Table 5-2 Specifications .................................................................................................... EN-26
Figures
Figure 2-1 Installing ............................................................................................................. EN-7
Figure 2-2 Leveling Indicator ................................................................................................ EN-7
Figure 2-3 Bottom of Scale ................................................................................................... EN-7
Figure 3-1 Parts ................................................................................................................... EN-7
Figure 3-2 Control Panel ...................................................................................................... EN-7
Figure 3-3 Display ............................................................................................................... EN-8
Figure 3-4 Security Switch Settings ..................................................................................... EN-20
Figure 5-1 Scale Dimensions .............................................................................................. EN-23

EN-3 Valor 5000 Series
1 INTRODUCTION
This manual contains installation, operation and maintenance instructions for the Valor 5000 Series
scale. Please read the manual completely before installation and operation.
1.1 Product Description
The Valor 5000 Series is an easy-to-clean and rugged compact scale engineered specifically for
hygiene-oriented environments and to enhance productivity. With its compact size and food safety
approvals, it is ideal for use in sanitary and food preparation areas such as kitchens, bakeries,
restaurants, packaging and processing facilities. Battery operation and a backlit LCD display make
for a portable scale that can be easily carried to various locations and used under a wide range of
lighting conditions. Its fast display update speed, straight forward 4-button operation and
configurable checkweighing mode make this a simple yet flexible scale for general weighing,
portioning and sorting applications. This precision weighing scale will provide years of service
when properly cared for.
1.2 General Features
• Capacity Models (V51Px, non-approved): 3kg x .5g / 6lb x 0.001lb, 6kg x 1g / 15lb x 0.002lb,
15kg x 2g / 30 lb x 0.005lb, 30kg x 5g / 60lb x 0.01lb
• Maximum Displayed Resolution (V51Px Series) 1:6000 to 7500
• Capacity Models (V51Px, approved): 3kg x 1g / 6lb x 0.002lb, 6kg x 2g / 15lb x 0.005lb, 15kg x
5g / 30 lb x 0.01lb, 30kg x 10g / 60lb x 0.02lb
• Type-approved Resolution 1:3000
• Capacity Models (V51PHx): 3kg x 0.1g / 6lb x 0.0002lb, 6kg x 0.2g / 15lb x 0.001lb, 15kg x 1g
/ 30lb x 0.001lb, 30kg x 1g / 60lb x 0.002lb
• Maximum Displayed Resolution (V51PHx Series) 1:30000
• Food Safety Certifications: NSF, USDA/AMS
• Stainless steel weighing pan: 209 x 209 mm (8.2" x 8.2")
• Backlit LCD display: 5-digit 7-segment, 19mm (.75") digit height
• Multiple weighing units: kg, g, lb, oz (decimal or fractional), lb:oz (decimal or fractional oz)
• Display update speed: within 2 seconds
• 3-color LED with configurable audible alert checkweigh indications
• 4-button control panel, including dedicated Tare button
• Built-in level indicator and adjustable slip-resistant rubber leveling feet
• Built-in rechargeable lead-acid battery: 120-hour operation on a 15-hour charge
• Battery status indicator with power-saving Auto-off function
• Gross, Net, Tare operation
• Auto-zero tracking operation
• Auto-tare operation
• Enhanced digital filtering
• Connection for accessory Foot Switch for remote tare operation

Valor 5000 Series EN-4
1.3 Safety Precautions
For safe and dependable operation of this scale, please comply with the following
safety precautions:
• Verify that the input voltage printed on the AC Adapter’s data label and the plug type matches the
local AC power supply.
• Make sure that the power cord does not pose a potential obstacle or tripping hazard.
• Use only approved accessories and peripherals.
• Operate the scale only under ambient conditions specified in these instructions.
• Disconnect the scale from the power supply when cleaning the scale.
• Do not operate the scale in hazardous or unstable environments.
• Do not immerse the scale in water or other liquids.
• Avoid directly splashing the scale with water or other liquids.
• Do not drop heavy loads on the platform.
• Service should only be performed by authorized personnel.

EN-5 Valor 5000 Series
Pan
Leveling feet x 4
Level Indicator
Load pads x 4
Foot Switch Connector
2 INSTALLATION
2.1 Unpacking
Unpack and verify that the following components have been included:
• Scale • Instruction Manual
• Weighing Pan • Warranty Card
• AC Adapter • Weights and Measures Sealing Kit
Save the packaging material. Repack the scale in the original packaging to ensure safe storage or
transport of the product.
2.2 Installing Components
Place the weighing pan securely over the four load pads on the top of the scale. If using the optional
foot switch, plug the foot switch connection into the appropriate receptacle on the underside of the
scale (refer to Figure 2-3).
2.3 Selecting the Location
Operate the scale on a firm, level surface. Avoid
locations with rapid temperature changes or
excessive dust, air currents, vibrations,
electromagnetic fields or heat.
Adjust the leveling feet so that the bubble is
centered in the circle of the level indicator.
2.4 Connecting Power
2.4.1 AC Power
Check to ensure that the voltage printed on the scale’s data label matches your local line voltage.
If this is not the case, DO NOT connect the scale to the power supply. Contact an OHAUS dealer for
assistance.
Connect the AC adapter to the wall outlet. Connect the plug into the power receptacle on the underside
of the scale.
Figure 2-3. Bottom of Scale.
Power Receptacle
Figure 2-1. Installing Scale Components.
Figure 2-2. Leveling Indicator.
NOTE: The scale should be leveled each time its location is changed.

Valor 5000 Series EN-6
Plug the AC Adapter into the receptacle marked “Power In” located on the underside of the scale
and allow it to charge. While the battery is charging, the segments in the battery symbol will
alternately light. When the battery is fully charged, the battery symbol will disappear.
2.4.2 Battery Power
The scale can be operated on the internal rechargeable battery when AC power is not available. The
scale will automatically switch to battery operation if there is a power failure or the power cord is
removed. A fully charged battery can operate the scale for up to 120 hours (with the backlight off)
independent of the AC power line.
During battery operation, the battery symbol will light to show the current discharge status of the
battery (1 segment = 25% capacity). A flashing symbol indicates that the battery requires recharging.
The scale will automatically turn off when the battery is fully discharged.
2.5 Initial Calibration
When the scale is first installed, a SPAN calibration should be performed to ensure accurate
weighing results. Before performing the SPAN calibration, be sure to have the appropriate
calibration weights. Refer to Section 3.7.1.
Before using the scale for the first time, the internal rechargeable battery
should be fully charged for up to 15 hours. The scale can be operated
during the charging process. The battery is protected against over
charging and the scale can remain connected to the AC power line.
CAUTION
BATTERY IS TO BE REPLACED ONLY BY AN AUTHORIZED OHAUS SERVICE DEALER.
RISK OF EXPLOSION CAN OCCUR IF REPLACED WITH THE WRONG TYPE OR
CONNECTED IMPROPERLY.
Dispose of the lead acid battery according to local laws and regulations.

EN-7 Valor 5000 Series
3 OPERATION
3.1 Overview of Parts and Controls
Identify parts and controls using item numbers from Table 1.
Figure 3-2. Control Panel.
Figure 3-1. Parts.
1
2
34
5
6
7
8
9
10
11
12
13
14
15
16
1718
19
20
21

Valor 5000 Series EN-8
Figure 3-3. Display.
Item Description
1 Control buttons
2 Display
3 Data Label
4 Weighing pan
5 Adjustable leveling feet
6 Connection for AC adapter
7 Connection for optional foot switch
8 Security Slide
9 Power and Zero button
10 Gross/Net/Tare and Unit button
11 Target/Menu button
12 Tare button
13 Tare indicator
14 Net indicator
15 Leveling indicator
16 Checkweigh mode indicator
17 Center of Zero indicator
18 Stable indicator
19 Yellow Under LED
TABLE 3-1. PARTS AND CONTROLS.
Item Description
20 Green Accept LED
21 Red Over LED
22 Not used
23 Minus sign
24 Not used
25 7-segment display
26 Fractional ounce symbol(P in %mode)
27 Battery charge symbol
28 Kilogram unit symbol
29 Gram unit symbol
30 Ounce unit symbol
31 Pound:Ounce unit symbol
32 Pound unit symbol
33 Tare indicator
34 Net indicator
35 Checkweigh mode indicator
36 Pound:Ounce separator
37 Center of Zero indicator
38 Stable indicator
22
23
24
29
30
28
31
3233
34
35
36
37
38
25 26 27

EN-9 Valor 5000 Series
3.2 Control Functions
Four multi-function buttons are used to operate the scale.
3.3 Basic Operation
3.3.1 Turning On
With the scale off, press the ON/ZERO
Off
button. The scale performs a display test, then displays
zero.
3.3.2 Turning Off
With the scale on, press and hold the ON/ZERO
Off
button until OFF is displayed.
3.3.3 Zeroing
Remove the load from the pan and press the ON/ZERO
Off
button to set the display to zero. The
Center of Zero indicator turns on when the measurement is within ±1/4 d of the zero setting.
3.3.4 Taring
Semi-automatic Tare (Tare Button)
To store or change the Tare value, place an empty container on the pan and press the TARE button.
The Net weight and NET indicator will be displayed.
To clear the Tare value, remove the container from the pan and press the TARE
button. The NET
indicator turns off and the gross weight will be displayed.
Button
Primary
Function
(short
press)
Secondary
Function
(long press)
ON / ZERO
• If scale is off,
turns scale on
G/N/T
Momentarily
Displays
Gross Net and
Tare values
TARGET
Initiates target
setting mode
TARE
• Sets tare
•Clears tare, if
pan is empty
Off
If scale is on, turns
scale off
Units
Changes
weighing unit
Menu
Enters
menu mode None
Target
Setting
Function
Shifts to next
digit
Accepts current
displayed value
Changes sign
(+ / -) of
displayed value
Increments
value of the
active digit
Menu
Function
Yes
Accepts current
setting and
advances to the
next menu item
Exit
• Immediately
exits menu
mode
• Aborts
calibration
in progress
No
Rejects current
setting or menu
item and
advances to the
next available
item
Back
Reverts back to
previous menu
item
• If scale is on,
sets zero

Valor 5000 Series EN-10
Automatic Tare (Refer to Section 3.7.3)
Auto-tare is a convenience feature that automatically tares the initial weight (such as an empty
container) placed on the empty pan, without having to press the TARE button. The tare value is cleared
automatically when the weight on the pan is fully removed.
Remote Tare (Foot Switch)
Taring with the optional foot switch is equivalent to pressing the Tare button.
3.3.5 Displaying Gross, Net and Tare Values
When a tare has been entered, pressing the G/N/T button successively displays the Tare (TARE
indicator turns on), the Gross, and the Net weights (NET indicator turns on). After a few seconds
the scale automatically reverts to displaying the NET weight.
3.3.6 Changing Unit of Measure
Press and hold the
Units
button until the desired unit is displayed. If one of the available units is not
displayed, enable it as described in Section 3.7.4.
3.4 Menu
3.4.1 Menu Structure
The FD Series menu structure consists of three levels: Main, Sub-menu, and Menu item. The Main
menu contains the Sub-menus and each Sub-menu contains several Menu items. Each Menu item
contains two or more settings.
TABLE 3-2. MENU STRUCTURE.
Main menu
Sub-menu
Menu item
P
Note: LFT menu item and LOCK sub menu will not appear in V51PHXX models

EN-11 Valor 5000 Series
3.4.2 Menu Navigation
Use the four buttons marked with Yes, No, Back and Exit to navigate through the menus (refer to
Section 3.2).
•Yes - Enters the displayed sub-menu or menu item and accepts the displayed setting.
•No - Skips to the next sub-menu or menu item and changes the displayed setting.
•Back - Goes back to the previous sub-menu or menu item.
•Exit - Immediately exits the Menu mode.
3.4.3 Changing Menu Settings
Enter the menu by holding down the
Menu
button until Menu is displayed. When the button is
released, the first available sub-menu is displayed.
• Navigate to the desired sub-menu using the No button.
• Enter the sub-menu using the Yes button.
• Navigate to the desired menu item using the No button.
• Enter the desired menu item using the Yes button.
• Change the setting using the No
button or accept the setting using the Yes
button.
• Continue navigation using the Yes, No and Back buttons or return to weighing using the Exit button.
3.5 Application Modes
Two application modes are available : Weigh and Checkweigh. To enable the Checkweigh mode,
Checkweigh must be turned on in the Mode menu (refer to Section 3.7.5).
3.5.1 Weighing
Determines the weight of an item in the selected unit of measure. Scale is shipped with kilograms
(kg) and pounds (lb) enabled. To enable other units of measure, they must be turned on in the
Unit menu (refer to Section 3.7.4).
3.5.2 Checkweighing
Use this mode to compare the weight of an item to Under and Over target limits. When the checkweigh
mode is enabled, the “CHECK” indicator will turn on.
To set the target limits, refer to Section 3.6 Checkweigh Target Settings.
Place the sample on the weighing pan. If the sample weight is under the target weight range, the
yellow LED will light. If the sample is within the target weight range, the green LED will light. If the
sample is over the target weight range, the red LED will light. The LED indication is complemented by
an audible alert feature (refer to Section 3.7.5).
Normal Checkweighing
Set both targets as positive values, where the lightest acceptable weight is entered as the Under target
limit and the heaviest acceptable weight is entered as the Over target limit. Items placed on the pan
will be compared to the targets.

Valor 5000 Series EN-12
Negative Checkweighing
In “Negative” checkweighing, the part of an item subsequently removed from the pan is checked
against the target limits. This method may be preferred in portioning applications.
• Set both targets as negative values, where the lightest acceptable weight is entered as the Under
target limit and the heaviest acceptable weight is entered as the Over target limit.
• Place a quantity of items on the pan.
• Tare the items.
• Remove a portion of the items from the pan.
• The amount removed will be compared to the targets.
“Zero” Checkweighing
In ”Zero” checkweighing, displayed results will show the deviation of the sample’s weight from a
reference or ideal weight. This approach may be more preferred for grading or sorting applications.
• Set the targets using a negative value (negative tolerance) for the Under limit and a positive value
(positive tolerance) for the Over limit.
• Place the reference weight on the pan.
• Tare the reference weight and remove it from the pan.
• Place the item on the pan to be checked against the reference weight.
• The display will show a negative, positive or ‘0” value if the sample is less than, more than or equal
to the reference weight, respectively.
3.6 Checkweigh Target Settings
To set the target limits, begin by pressing the TARGET button. The value of the Under target limit will
be displayed first, with the left-most digit blinking.
Note::
::
: The scale must be in checkweigh mode to be able to enter or modify target values.
• To change the Under target limit, press the No button to increment the flashing digit, the Yes
button
to shift to the next digit and the Exit button to change the sign.
• Press the TARE button to toggle the display between a positive and negative value.
• To accept the Under target limit, press the TARGET button.
• Next, the value of the Over target limit will be displayed, with the left-most digit blinking.
• Repeat the procedure above to set the Over target limit.
• When the Over target limit has been set, press the TARGET button to store the settings and begin
Checkweighing.

EN-13 Valor 5000 Series
3.7 Scale Settings
Enter the Menu mode. Proceed to a menu item and use the Yes and No buttons to view and select
available scale settings. When the desired changes have been made, press Exit to return to weighing.
Refer to Section 3.4 for more information on how to enter and navigate the menus.
3.7.1 Calibration sub-menu
Note: Calibration is not available when the scale has been set to Legal for Trade operation (LFT set to
ON in the Setup sub-menu, refer to Section 3.7.2).
Calibration Types – Calibration can be adjusted in two ways, Span and Linearity. Span calibration
uses two calibration points to adjust the sensitivity of the scale. Linearity calibration uses three
calibration points to correct for non-linear weighing results.
Calibration Weights – Before beginning calibration, make sure that the required calibration weights are
available. The model-specific calibration points are listed in the table below.
TABLE 3-3. CALIBRATION POINTS.
Notes:
1. Default calibration points are shown in bold print.
2. Calibration Units kg or lb are selected in the Setup sub-menu (Section 3.7.2.)
3. ASTM Class 4 or OIML Class F2 weights are required for calibration.
Model Calibration Unit Span Cal. points Linearity cal. points
V51P3 / V51PH3 kg 1, 2 or 3 kg 1 or 2 and 3 kg
lb 2, 5 or 6 lb 2 or 4 and 6 lb
V51P6 / V51PH6 kg 2, 5 or 6 kg 2 or 4 and 6 kg
lb 5, 10 or 15 lb 5 or 10 and 15 lb
V51P15 / V51PH15 kg 5, 10 or 15 kg 5 or 10 and 15 kg
lb 10, 20 or 30 lb 10 or 20 and 30 lb
V51P30 / V51PH30 kg 10, 20 or 30kg 10 or 20 and 30 kg
lb 10, 30 or 60lb 20 or 30 and 60 lb

Valor 5000 Series EN-14
Span Calibration Procedure
• When CAL is displayed, press Yes to enter the calibration
sub-menu.
• When Span is displayed, press Yes to begin the Span
calibration process.
• Clear the pan if prompted to do so, then press Yes..
..
.
• The display will show “--C--”, followed by the span
calibration weight value.
• If desired, press No to change to an alternate span
calibration weight value.
• Place the indicated calibration weight on the scale and
press Yes.
• The display will show “--C--”, then “done” and then
revert to weighing. Remove the calibration weight.
Note: The calibration procedure can be canceled at any
time by pressing the Exit button or turning the scale off.
Linearity Calibration Procedure
• When LIN is displayed, press Yes to begin the linearity
calibration process.
• Clear the pan if prompted to do so, then press Yes.
• The display will show “--C--”, followed by the first
calibration weight value.
• If desired, press No to change to an alternate first
calibration weight value.
• Place the indicated calibration weight on the scale
and press Yes.
• The display will show “--C--”, followed by the second
calibration weight value.
• Place the indicated calibration weight on the scale
and press Yes.
• The display will show “--C--”, then “done” and then
revert to weighing. Remove the calibration weight.
Note: The calibration procedure can be canceled at any
time by pressing the Exit button or turning the scale off.
End
• Press Yes to leave this sub-menu and go to the next.
• Press No to return to the top menu item in this sub-menu.
k
k
k
k
k
This manual suits for next models
9
Table of contents
Languages:
Other OHAUS Scale manuals

OHAUS
OHAUS GT 210 Manual

OHAUS
OHAUS EXPLORER User manual

OHAUS
OHAUS Pioneer PJX Series User manual

OHAUS
OHAUS ES6R User manual

OHAUS
OHAUS 5000 User manual

OHAUS
OHAUS Valor V71P1502T User manual

OHAUS
OHAUS Valor 1000 User manual

OHAUS
OHAUS PAJ-N Series User manual

OHAUS
OHAUS VE Series User manual

OHAUS
OHAUS 1119D User manual

OHAUS
OHAUS 7000 Series User manual

OHAUS
OHAUS Scout Pro Balance User manual

OHAUS
OHAUS TA152 User manual

OHAUS
OHAUS Ranger 3000 Series User manual

OHAUS
OHAUS Defender 3000 User manual

OHAUS
OHAUS DEFENDER SERIES User manual

OHAUS
OHAUS 2500 User manual

OHAUS
OHAUS Triple Pro TP2611 User manual

OHAUS
OHAUS Ranger User manual

OHAUS
OHAUS BW1.5US User manual