CONTENTS 5
CONTENTS
Preface................................................................................................................................................. 3
How to read this manual ............................................................................................................................................ 3
Chapter 1 LOADING PAPER
Precautions for Paper ............................................................................................................................ 8
Acceptable paper......................................................................................................................................................... 8
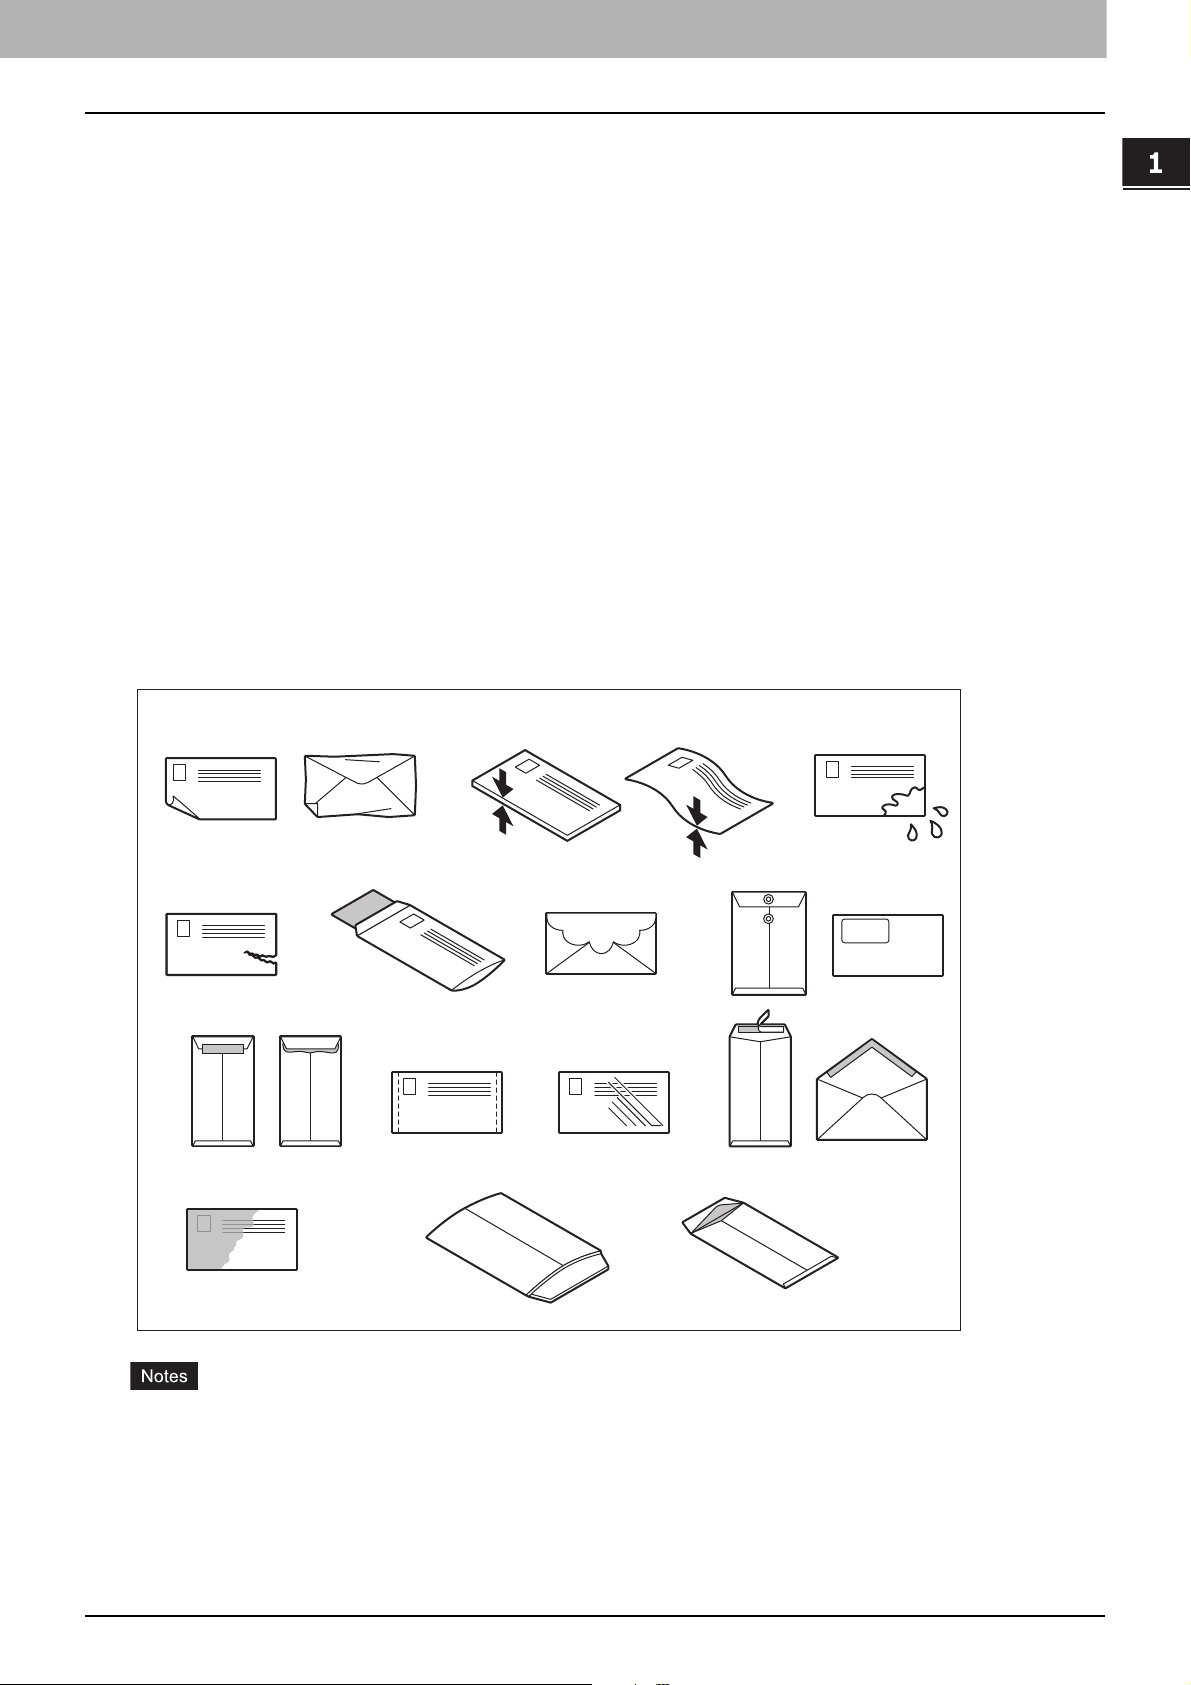
Unacceptable copy paper ........................................................................................................................................... 8
Precautions for storing copy paper .......................................................................................................................... 10
Loading Paper in Trays ........................................................................................................................ 11
Paper Feed Unit for this equipment.......................................................................................................................... 11
Envelope Drawer........................................................................................................................................................ 15
Large Capacity Feeder ............................................................................................................................................... 19
Doing Paper Settings ........................................................................................................................... 21
Setting paper size ...................................................................................................................................................... 21
Setting paper type ..................................................................................................................................................... 23
Clearing the set paper type ....................................................................................................................................... 26
Loading Paper on the MPT.................................................................................................................... 27
Standard size paper on the MPT ............................................................................................................................... 29
Envelopes on the MPT ............................................................................................................................................... 30
Tab paper on the MPT................................................................................................................................................ 32
Non-standard paper on the MPT............................................................................................................................... 33
Long custom size paper on the MPT ......................................................................................................................... 34
Chapter 2 PLACING ORIGINALS
Precautions for Originals ..................................................................................................................... 38
Acceptable originals .................................................................................................................................................. 38
Unacceptable originals.............................................................................................................................................. 39
Placing Originals ................................................................................................................................. 40
Placing originals on the original glass ...................................................................................................................... 40
Book-type originals.................................................................................................................................................... 41
Using the ADF ............................................................................................................................................................. 42
Chapter 3 OPERATING STAPLING MANUALLY
Stapling Using the Finisher .................................................................................................................. 48
INDEX .......................................................................................................................................................... 49