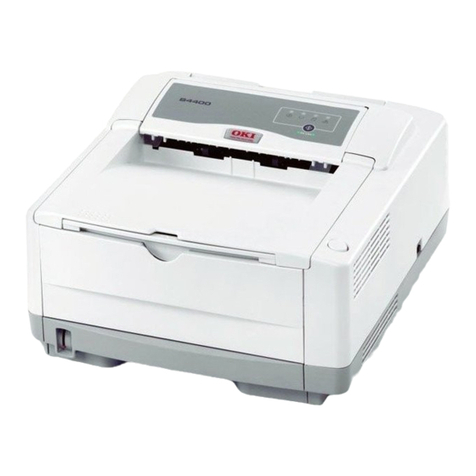
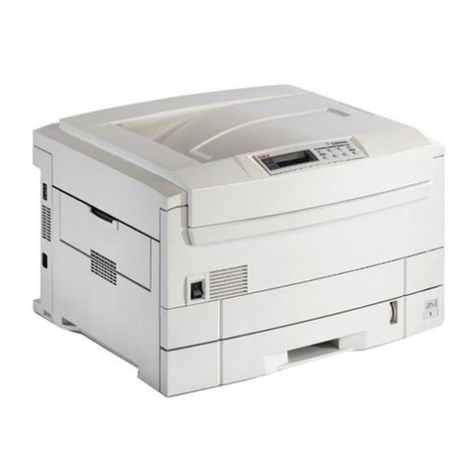
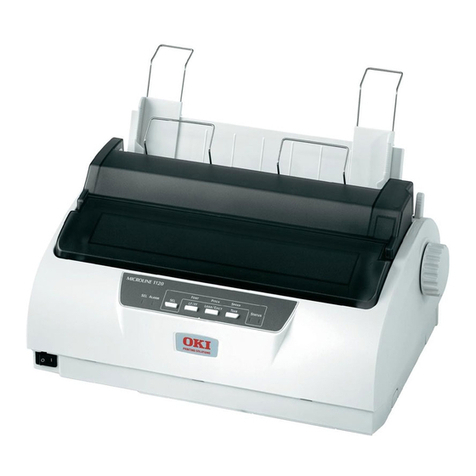
Oki B6500 Series Reference guide

Customer Support Information
Oki Data Training
Rev. 5.4
June 2009

Disclaimer
This document may not be reproduced without the written permission of Oki Data Training
Department. Every effort has been made to ensure the accuracy of the information
contained in this support guide. Oki Data is not responsible for errors beyond its control.
Copyright 2009 Oki Data All rights reserved.
Created by: Oki Data Training Department
Please address any comments on this publication to:
Mailing Oki Data Americas, Inc.
Address: Training Department
2000 Bishops Gate Boulevard
Mt. Laurel, NJ 08054-3499
Web Site: www.okidata.com
Telephone: 856-235-2600
Facsimile: 856-222-5320
Copyright Listing
OKI DATA is a registered trademark of Oki Electric Industry Company, Ltd.; marques
deposee de Oki Electric Industry Company, Ltd.; marca registrada, Oki Electric Industry
Company, Ltd.
Notice
All service documentation is supplied for informational purposes only. Oki Data service
documentation is intended for use by certified, product trained service personnel only.
Oki Data does not warrant or represent that such documentation is complete, nor does
Oki Data represent or warrant that it will notify or provide to such customer any future
changes to this documentation. Customer performed service of equipment, or modules,
components or parts of such equipment may affect the warranty offered by Oki Data with
respect to such equipment. You should consult the applicable warranty for its terms
regarding customer or third party provided service. If the customer services such
equipment, modules, components or parts thereof, the customer releases Oki Data from
any and all liability for the customer actions, and the customer agrees to indemnify,
defend and hold Oki Data harmless from any third party claims which arise directly or
indirectly from such service.

Table of Contents
General Set Up & Installation ................................................................................Page 1
Print Quality Problems
Light Print....................................................................................................Page 2
Blank Print...................................................................................................Page 2
Solid Black Page ..........................................................................................Page 3
Vertical Blank Lines.....................................................................................Page 3
Horizontal Blank Lines ................................................................................Page 4
Vertical Stripes ............................................................................................Page 4
Horizontal Stripes........................................................................................Page 5
Missing Data on Page...................................................................................Page 5
Toner Spots On Page....................................................................................Page 6
Repeating Images ........................................................................................Page 6
Gray Background .........................................................................................Page 7
Skew ............................................................................................................Page 7
Physical Paper Damage ...............................................................................Page 8
Poor / No Fusing ..........................................................................................Page 8
Marks Repeating Down the Page............................................................................Page 9
Print Cartridge Contacts.........................................................................................Page 9
Consumables Information ....................................................................................Page 10
Warranty Statement .............................................................................................Page 10
Duty Cycle.............................................................................................................Page 10
Care and Feeding of the Print Cartridge...............................................................Page 11
Replacing the Print Cartridge...............................................................................Page 12
Replacing the Fuser..............................................................................................Page 14
Resetting the Fuser Counter ................................................................................Page 16
Loading Paper In The Paper Tray .........................................................................Page 17
Printer’s Paper Routing........................................................................................Page 19
Operator Control Panel Layout.............................................................................Page 20
Oki Data Support...................................................................................................Page 21
Your Training Notes..............................................................................................Page 22


This Page Is Intentionally Blank

General Set Up & Installation
This handout provides guidelines for supporting the B6500 series of printers.
Before removing any portion of the machine or making any internal adjustments, be sure
power to the unit is OFF (It is STRONGLY recommended that the AC power cord be
removed from the wall outlet!). Suggested corrective actions should be performed in
order as listed. Most conditions can be corrected by performing routine preventative
maintenance. If printer or print quality problems occur, diagnose and correct following
the guidelines in this manual.
During operation, the unit should:
have the power cord connected.
be connected to a power source which is rated to machine specifications.
be installed on a flat, level surface.
receive good ventilation.
not be connected to an electrical circuit with other equipment or where voltages
may fluctuate.
not be installed near a direct heating or cooling source or vent.
not be exposed to high dust concentration.
not be exposed to direct sunlight
not be exposed to high temperatures, high humidity, steam or chemical fumes.
NOTE: Oki Data STRONGLY recommends against having this printer plugged into
an Uninterruptible Power Supplies (UPS) as most units cannot supply enough
current to insure the correct operation of a toner-based product.
Oki Data B6500Support Guide Page 1

Print Quality Problems
If the pages printed by the printer have an image problem, follow the appropriate steps to
correct the problem.
Light Print Entire page of data is printed very faintly –
there is a lack of contrast in the printout
Check the paper supply. Is the paper
damp?
Replace with dry, flat paper.
Is the paper out of the paper spec?
Replace the paper with specified
paper.
Check the image development process
by generating a test print and opening
the printer cover while printing.
Remove the Print Cartridge and check
the drum surface: Is there a solid
image on the drum surface? If so,
request a service call. If not, replace
the Print Cartridge.
Did replacing the Print Cartridge fix the
image?
If not, request a service call.
Blank Print The entire page is blank – there is no toner
printed on the page
Check the image development process
by generating a test print and opening
the printer cover while printing.
Remove the Print Cartridge and check
the drum surface: Is there a solid
image on the drum surface? If so,
request a service call. If not, replace
the Print Cartridge.
Did replacing the Print Cartridge
correct the problem? If not, request
a service call.
Page 2 B6500Support Guide Oki Data

Solid Black Page The entire page is printed solid black with
no data visible
Replace the Print Cartridge
Did this fix the problem? If not,
request a service call.
Vertical Blank Lines There are white stripes in the paper feed
direction
Check the paper supply. Is the paper
damp?
Replace with dry, flat paper.
Is the paper out of the paper spec?
Replace the paper with specified
paper.
Replace the Print Cartridge
Did this fix the problem? If not,
request a service call.
Oki Data B6500Support Guide Page 3

Horizontal Blank Lines There are light areas or white lines across
the printout, perpendicular to the paper
feed direction
Check the paper supply. Is the paper
damp?
Replace with dry, flat paper.
Is the paper out of the paper spec?
Replace the paper with specified
paper.
Replace the Print Cartridge
Did this fix the problem? If not,
request a service call.
Vertical Stripes There are vertical black stripes in the paper
feed direction
Replace the Print Cartridge
Did this fix the problem? If not,
request a service call.
Page 4 B6500Support Guide Oki Data

Horizontal Stripes There are horizontal black stripes across
the printout, perpendicular to the paper
feed direction
Replace the Print Cartridge
Did this fix the problem? If not,
request a service call.
Missing Data on Page Some areas of the printout are extremely
faint or completely missing
Check the paper supply. Is the paper
damp?
Replace with dry, flat paper.
Is the paper out of the paper spec?
Replace the paper with specified
paper.
Replace the Print Cartridge
Did this fix the problem? If not,
request a service call.
Oki Data B6500Support Guide Page 5

Toner Spots On Page There are random toner spots on the
printout
Replace the Print Cartridge
Did this fix the problem? If not,
request a service call.
Repeating Images There are faint, “ghost” images repeating
down the page. The image may be an image
of the previous page or part of the currently
printed page
Check the paper supply. Is the paper
damp?
Replace with dry, flat paper.
Is the paper out of the paper spec?
Replace the paper with specified
paper.
Replace the Print Cartridge
Did this fix the problem? If not,
request a service call.
Page 6 B6500Support Guide Oki Data

Gray Background There is a very noticeable gray background
uniformly applied to part or all of the page
Replace the Print Cartridge
Did this fix the problem? If not,
request a service call.
Skew The printed image is not parallel with the
sides of the paper
Make sure the printer is level: Is there
a problem with the surface the printer
is sitting on?
Are any of the printer’s feet missing?
Replace them.
Did this correct the problem?
Remove the paper cassette and paper.
Check for problems in the cassette. Is
the paper aligned correctly?
Replace the Print Cartridge
Did this fix the problem? If not,
request a service call.
Oki Data B6500Support Guide Page 7

Physical Paper Damage The paper coming out of the printer is
crumpled, folded or damaged
Remove the paper cassette and paper.
Check for problems in the cassette. Is
the paper aligned correctly? Are there
any visible problems in the paper
cassette?
Check the paper supply. Is the paper
damp?
Replace with dry, flat paper.
Is the paper out of the paper spec?
Replace the paper with specified
paper.
Replace the Print Cartridge
Did this fix the problem? If not,
request a service call.
Poor (or no) Fusing The printed image comes off the paper
when rubbed
Check the
Fuser
Assembly
to make
sure the
levers on
both
sides are
pushed
down.
Check the paper supply. Is the paper
damp?
Replace with dry, flat paper.
Is the paper out of the paper spec?
Replace the paper with specified
paper.
If the problem persists, request a
service call.
Page 8 B6500Support Guide Oki Data

Marks Repeating Down the Page
If the customer tells you that there is a mark (or void) repeating down the printed page,
measure the distance between repeating marks (or voids). Using the chart below, you
can diagnose which of the rollers is causing the problem.
Roller Part Name Repeating Interval
Drum Print Cartridge 3.71 inches
Bias Transfer Roller BTR (service call) 2.00 inches
Heat Roller Fuser Assembly (service call) 3.08 inches
Pressure Roller Fuser Assembly (service call) 3.71 inches
Print Cartridge Contacts
The Print Cartridge has several electrical contacts that should be checked when there
are output problems. The diagram below shows the contacts to check:
Bias Charge Roller
Contact
Conducts voltage required to charge the drum surface with a high
negative charge. If this contact makes poor or no contact, print
quality would range from variable density to pure black
Drum Ground
Contact
This contact is responsible for conducting the charge from
exposed areas of the drum. Poor contact or no contact would
result in output problems ranging from variable density to no data
printed on the page.
Attraction Roller
Contact
The attraction roller is responsible for charging the toner
particles. If this contact were dirty or missing, results would
range from variable density to no data being printed on the page
Bias Charge Roller
Drum Ground
Attraction Roller
Oki Data B6500Support Guide Page 9

Consumables
The standard print cartridge that ships with the B6500 is good for 6,000 pages at a 5%
print density. There are 2 replacement print cartridges available:
Standard capacity: 11,000 pages (@5% page density) P/N:52116001
High capacity: 18,000 pages (@ 5% page density) P/N: 52116002
Warranty
The standard B6500 printers have a 1 year Overnight Exchange warranty.
Duty Cycle
The maximum duty cycle is 200,000 pages per month
Page 10 B6500Support Guide Oki Data

Care and Feeding of the Print Cartridge Assembly
What follows are some general guidelines when dealing with the Oki Data Print Cartridge
assembly.
Gently remove the protective paper and plastic that is shipped around the print
cartridge assembly prior to installing it within the printer.
When removing the seal from the Print Cartridge, place the Print Cartridge on a
flat surface and pull the Seal straight out.
NOTE: Pulling the seal out diagonally may break it, rendering the drum useless.
After the seal has been pulled out, do not shake or bump the Print Cartridge.
DO NOT touch the “bluish” surface of the drum. The surface of the drum is coated
with a delicate OPC material. This surface should not be touched or wiped. Any
surface damage usually shows up as a cyclical mark and requires a print
cartridge assembly replacement to correct the problem.
Minimize exposure of the drum to ambient light. OPC drums are very light
sensitive and leaving the drum surface exposed to ambient light will decrease its
effective life cycle. We recommend no more then 2 minutes exposure to office-
level lighting. Do Not expose the drum surface to sunlight or other strong light as
this may effectively “kill” the area of the drum that’s been exposed. Cover the
drum when the printer’s cover is open or the print cartridge assembly is removed
from the printer. Ideally, place the print cartridge assembly in a black plastic bag.
If the bag is not available, cover the print cartridge assembly with several sheets
of paper.
Over exposed drums will show a density problem. As paper is being printed, you’ll
notice a lighter repeating area printed down the page about every 3.71”. If this
happens, do not use the printer for 24 hours. This provides a “healing” time for
the drum. If this doesn’t fix the problem, you will need to replace the print
cartridge assembly.
When removing the print cartridge assembly, gently set it on a smooth level
surface.
Spilled toner powder. The easiest cleanup method is to rinse your skin with cold
water. Clothing should be gently brushed off and washed in cold water. Hard
surfaces should be wiped off with a paper towel moistened with cold water.
NOTE
: Toner “sets” by a combination of heat and pressure. If you gently blow the
toner off affected areas and wipe any residue with a paper towel moistened with
cold water, toner will not set. WARNING: Do Not vacuum spilled toner with a
regular vacuum cleaner. Failure to heed this warning risks damaging the vacuum
cleaner. There are very specialized vacuum cleaners used by service personnel
to vacuum toner without risking damage to the vacuum cleaner.
Oki Data B6500Support Guide Page 11

Replacing the Print Cartridge
The Print Cartridge that ships with the printer has a page life of approximately 6,000
pages (at a 5% page density). The Standard capacity replacement print cartridge for the
B6500 will print approximately 11,000 pages at a 5% page density, while the High capacity
replacement Print Cartridge will print approximately 18,000 pages at a 5% print density.
The steps below show the procedure for replacing a Print Cartridge.
1. Turn off the power
switch on the printer
2. Remove any output
paper from the
printer and open
cover A
NOTE:Do Not touch any
parts inside the
printer!
After opening cover
A, gently remove any
dust or debris from
inside the printer
3. Grasp the Print
Cartridge by the grip
handle an pull it out
slowly
NOTE:To prevent any toner
spill, place a sheet of
paper under the
front edge of the
printer before
setting the EP
Cartridge down
Cover A
Page 12 B6500Support Guide Oki Data

4. Remove the new
Print Cartridge from
it’s box / packaging
and shake it 7 or 8
times as shown in
the drawing
NOTE:Do Not touch the
surface of the drum
as the OPC coating is
delicate an could be
easily damaged
5. Place the new Print
Cartridge on a flat
surface and pull the
seal out horizontally.
CAUTION:
Pulling the seal out
diagonally may
break it, rendering
the drum useless.
After the seal has
been pulled out, do
not shake or bump
the Print Cartridge
6. Hold the Print
Cartridge by the grip
and insert it into the
slot inside the
printer
NOTE: Insure that the EP
Cartridge is seated
completely inside
the printer
7. Close cover A
securely
8. Turn the power
switch on and print a
test page
Oki Data B6500Support Guide Page 13

Replacing the Fuser
NOTE: Prior to replacing the fuser in the B6500 we strongly suggest that you turn
the unit off and let it cool down for 5 to 10 minutes before beginning this
procedure.
1. If the duplexer is
installed, press the
button on the left
side of the
duplexer to release
it and pull down
the duplex
assembly
2. Open the rear
cover by pushing
up on the lower tab
as shown at left.
3. Push down on both
Orange tabs (Lever
Fuser, as
illustrated at left)
and slide the fuser
unit straight out of
the printer.
Page 14 B6500Support Guide Oki Data

4. To install the new
fuser, align the
electrical
connector on the
right side of the
fuser with the
mating electrical
connector in the
printer unit. Then
slide the new fuser
into the printer.
NOTE – You may pivot the
fuser back and forth
slightly if it does not slide
in easily.
5. Lock the fuser in
position by pushing
up firmly on the
two orange tabs.
Close all covers,
including the
duplexer, if
installed.
Electrical Connector
on Fuser
Electrical Connector
in Printer
The following page contains the instructions to reset the fuser counter that is
stored within B6500.
Oki Data B6500Support Guide Page 15

Resetting the Fuser Counter
After replacing the fuser, you must reset the counter within B6500.
Action Operator Panel Display
1. Power the printer on and wait for the
“Ready to Print” message on the Operator
Panel.
2. Press the “Select” and “ ” (down arrow)
buttons. The Operator Panel displays:
3. Press the “ ” (right arrow) key. The
Operator Panels displays:
4. Press the “Select” button. The Operator
Panel will display:
5. Wait until this message clears and the
Display Panel shows:
6. Press the “Select” button to return the
printer to the “Ready to Print” message.
Ready to Print
Reset Counter
Fuser U4
Fuser U4
Use SEL to Reset
Fuser U4
Clearing
Reset Counter
Fuser U4
Ready to Print
The B6500 is now ready to print again!
Page 16 B6500Support Guide Oki Data
Other manuals for B6500 Series
22
Table of contents
Other Oki Printer manuals