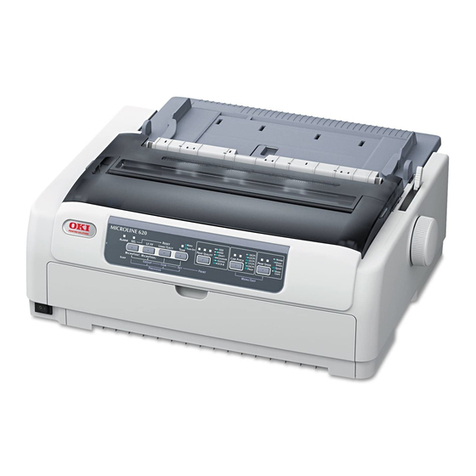
Oki ML3390 User manual

User Manual
MICROLINE
3390/3391
IBM-/EPSON-compatible
People to People Technology

I
Accessories
Roll Paper Stand (narrow version only)
Serial Interfaces Cards:
RS-232C, RS-232C / Current Loop,
RS-422A
Cut Sheet Feeder, CSF
(1-Bin, 2-Bin; narrow, wide version)
Bottom Tractor (narrow, wide version),
Tractor feet
Pull Tractor (narrow, wide version)

II

III
Legal note
The information contained in this manual is as complete, accurate
and up-to-date as possible. Provided legally permissible, we shall
accept no liability for consequential damage in connection with the
use of this manual. Otherwise, we shall only be liable for intent or
gross negligence. We make no guarantee that alterations to the soft-
ware programs and devices of other manufacturers referred to in
this manual will not affect the usability of the information con-
tained in this manual.
The author reserves all rights. The manual may not be duplicated
completely or in part in whatever form without the consent of the
author.
The content of this manual is subject to alteration without notice.
Please also read the information following the table of contents.

IV
Daily Printer Operation
Chapter 3 - 6
Troubleshooting
Chapter 8
Accessories
Chapter 7
Assembling, Setting Up
Chapter 1, 2 Programming
Chapter 10 - 17
Technical Data
Appendix A - D
Paper Formats
Appendix E
Short Reference
Appendix H
Guidance through the manual
The first part of this manual is directed largely at users who have no
or very little technical knowledge. Experienced users, suppliers
and technicians will find additional technical information in the
"Programming" part and in the appendices.
There are three ways of accessing the information in this manual:
●You can read the text in the order in which the manual is
arranged.
●You can find the passages you are looking for under the head-
ings below or the table of contents.
●The index in appendix F will guide you to the passages in the
manual relating to specific printer terms and messages.

V
Chapter 1: Assembling and setting up the printer 1
Chapter 2: A guided tour of the printer 2
Chapter 3: Paper handling 3
Chapter 4: Printer menu settings 4
Chapter 5: Printer control 5
Chapter 6: Consumables and cleaning 6
Chapter 7: Accessories 7
Chapter 8: Troubleshooting 8
Chapter 9: Packing the printer for transportation 9
Chapter 10: IBM - Standard functions 10
Chapter 11: IBM - Graphics 11
Chapter 12: IBM - Control code tables 12
Chapter 13: IBM - Characters sets 13
Chapter 14: Epson - Standard functions 14
Chapter 15: Epson - Graphics 15
Chapter 16: Epson - Control code tables 16
Chapter 17: Epson - Characters sets 17
OperationProgramming

VI

VII
Appendix A: Technical Data A
Appendix B: Code pages B
Appendix C: Bar codes C
Appendix D: Interface data D
Appendix E: Paper formats and printing areas E
Appendix F: Index / Glossary F
Appendix G: Trademarks G
Appendix H: Short reference H
Appendices

VIII
Table of contents
III Legal note
IV Guidance through the manual
XV Safety advice
XVI Servicing / maintenance
XVII Advice and warning symbols
XVIII Meaning of text styles in the manual
XVIII Consumables / accessories
XIX Machine-readable fonts
XIX Further information
Chapter 1: Assembling and setting up
1-1 Unpacking the printer
1-1 Checking the items supplied
1-2 Assembling the printer
1-2 Location
1-2 Power supply
1-3 Setting up the printer
1-3 Removing the transport packing
1-4 Inserting the ribbon cassette
1-5 The paper support
1-5 Fitting the paper support
1-6 Raising the paper support
1-7 Removing the paper support
1-7 The paper separator
1-8 Removing the paper separator
1-8 Fitting the paper separator
1-9 Connecting the printer to the computer
1-10 Connecting the printer to the power supply
1-11 Emulation / printer drivers
Chapter 2: A guided tour of the printer
2-1 The printer and its components
2-1 Front view
2-2 Inside view
2-3 Rear view
2-4 The operator panel
2-4 The indicator lamps
2-5 The buttons
...

IX
2-5 Button functions in ON LINE / OFF LINE mode
2-7 Button functions in menu mode
2-7 Print functions
2-8 PRINT QUALITY
2-8 CHARACTER PITCH
2-9 RESET
Chapter 3: Paper handling
3-1 Notes on paper types
3-2 Paper lever
3-2 Adjusting for the paper thickness
3-2 Print head lever
3-3 Adjusting the print head gap
3-7 Paper feed: cut sheets
3-8 Paper feed: continuous paper
3-8 Feeding continuous paper from the rear
3-11 Feeding continuous paper from the bottom
3-11 Switching between continuous paper and cut sheets
3-11 From continuous paper to cut sheets
3-11 From cut sheets to continuous paper
3-13 Setting Top of Form
3-13 Changing Top of Form
3-14 Indicating or changing print position
3-15 Automatic advance to Form Tear-Off position
3-16 Checking Top of Form
3-16 Changing the Tear-Off position
Chapter 4: Printer menu settings
4-1 The printer menu
4-1 Activate menu mode
4-1 Print menu settings
4-2 Changing the menu settings
4-3 End menu mode
4-4 Layout of the printer menu
4-9 Explanation of menu items
4-9 Printer Control
4-9 Font
4-9 Symbol Sets
4-10 Rear Feed, Bottom Feed, Top Feed
4-11 Set-Up
4-14 Parallel I/F
4-14 Serial I/F

X
Chapter 5: Printer Control
5-1 Emulation
5-1 Printer drivers
5-3 Characters and control characters
5-3 Printing under DOS
5-5 Printing under DOS with serial interface
5-6 Troubleshooting
Chapter 6: Consumables and cleaning
6-1 Changing the ribbon cassette
6-2 Inserting a new ribbon cassette
6-3 Cleaning
Chapter 7: Accessories
7-1 Cut sheet feeder
7-2 Checking the items supplied
7-2 Adjusting the length of the feed rail
7-3 Installing the feed rail
7-5 Installing the cut sheet feeder
7-7 Paper feed
7-8 Automatic paper feed
7-9 Manual paper feed
7-10 Feeding of cut sheets and continuous paper
7-10 Print area
7-10 Selecting the paper tray
7-10 Removing the cut sheet feeder
from the printer
7-11 Adjusting the mounting bracket
7-12 The pull tractor
7-12 Checking the items supplied
7-13 Installation
7-15 Feeding continuous paper
7-17 Removing the tractor feed
7-18 The bottom tractor
7-18 Checking the items supplied
7-18 Fitting the bottom tractor feet
7-20 Installing the tractor feet
7-22 Feeding continuous paper
7-24 Changing between formats of
continuous paper formats
...

XI
7-25 The roll paper stand
7-25 Checking the items supplied
7-25 Installation
7-26 Paper feed
7-28 Interface cards
7-28 Installation
Chapter 8: Troubleshooting
8-1 Possible faults
8-4 Fault tables
8-6 Major faults
8-7 Testing options
Chapter 9: Packing the printer for transportation
Chapter 10: IBM - Standard Functions
10-1 Print quality
10-3 Print modes
10-6 Print attributes
10-7 Multifunction commands
10-10 Tabulators
10-12 Positioning
10-16 Page formatting
10-18 Line spacing
10-18 Paper feed
10-20 Control of the Cut Sheet Feeder
10-21 Character sets
10-26 Other commands
Chapter 11: IBM - Graphics
11-1 Bit image graphics
11-4 Graphics of high resolution
11-6 Programming graphics
11-8 Graphics of low resolution
11-8 Graphics densities
11-10 Aspect ratio
11-15 Print alignment
Chapter 12: IBM - Control Code Tables

XII
Chapter 13: IBM - Character Sets
13-1 IBM Character Sets
13-1 National Character Sets
13-2 Code Pages
Chapter 14: Epson - Standard Functions
14-1 Print quality
14-2 Print modes
14-6 Print attributes
14-8 Multifunction commands
14-9 Tabulators
14-12 Positioning
14-15 Page formatting
14-17 Line spacing
14-18 Paper feed
14-19 Control of Cut Sheet Feeder
14-20 Character Sets
14-22 Other commands
14-27 Additional ESC/P2 commands
14-27 Step size and character spacing
14-31 Vertical print position
14-33 Print area
14-35 Select font
14-41 Character sets and code pages
Chapter15: Epson - Graphics and downloadable characters
15-1 Bit image graphics
15-4 Graphics of high resolution
15-5 Programming graphics
15-8 Graphics of low resolution
15-9 Programming graphics
15-11 Print alignment
15-12 Downloadable characters
15-15 Generate downloadable characters
15-17 Additional ESC/P2 commands
15-17 Raster graphics
Chapter 16: Epson - Control Code Tables

XIII
Chapter 17: Epson - Character Sets
17-1 Epson Character Sets
17-1 National Character Sets
17-2 Code Pages
Appendix A: Technical Data
Appendix B: Code Pages
B-1 Overview
B-2 Conversion table
B-3 Code pages
Appendix C: Bar Codes
C-2 Bar code types
C-2 Positioning
C-3 Selection of type and size of Bar code
C-8 Printing of a 24 pin Bar code
C-17 Examples
C-18 Zip Code
C-20 Setting the print position
Appendix D: Interface Data
D-1 Parallel Interfacing (Centronics)
D-2 Pin Description
D-3 Signal levels
D-4 Timing
D-4 Interface test
D-5 RS-232C Serial Interface
D-6 Pin Description
D-7 Signal levels
D-8 Interface wiring
D-10 Interface test
D-11 RS-422A Serial Interface
D-12 Pin Description
D-13 Signal levels
D-14 Menu options of serial interfaces
D-15 Transmission protocols
D-16 Connections of the RS-422A Interface
D-17 Diagrams
D-21 Interface test
...

XIV
D-22 Coresident RS-232C/Current Loop Interface
D-22 Technical Data
D-23 Pin description
D-24 Interface selection
D-26 Transmission protocols
D-29 Connections of the Current Loop Interface
D-30 Diagrams
D-37 Interface test
Appendix E: Paper formats and print areas
E-1 Continuous paper
E-1 Format
E-2 Weight
E-2 Thickness
E-2 Perforation
E-4 Further information
E-4 Cut sheet paper
E-4 Format
E-5 Weight
E-5 Labels (on single sheet)
E-6 Format
E-6 Weight
E-6 Further information
E-6 Labels (on continuous paper)
E-7 Format
E-7 Weight
E-7 Further information
Appendix F: Index / Glossary
Appendix G: Trademarks
Appendix H: Short reference

XV
Safety advice
Your printer has been developed with the utmost care to ensure
safe, reliable operation over many years. Like all electrical devices,
there are a few basic precautions you need to observe. These pre-
cautions are necessary in the first instance for your own safety but
also protect the printer against any damage. Please read through
the manual carefully and keep it handy.
Make sure...
●the printer is standing on a stable, flat surface. To prevent over-
heating, there should be free space all around the printer; open-
ings should not be covered. Never place the printer directly next
to a radiator or the air outlet of an air-conditioning system. Do
not expose the printer to direct sunlight;
●the printer does not come into direct contact with liquids.
●no objects are pushed into the ventilation slots of the printer as
you run the risk of an electrical shock or could cause a fire;
●you only perform the routine maintenance on the printer de-
scribed in the manual. Opening the case can result in an electri-
cal shock or other harm. Make sure you always remove the plug
from the mains socket before opening the printer case. Do not
alter the printer in any way not described in the manual - this
may cause damage to the printer and result in repairs for which
you will be liable.
Like all electronic devices, the printer can be damaged by electro-
static charges. Static charges can form when walking on unsuitable
floor coverings, for example, and are then transferred to the device
by touching the case. Bear this in mind when choosing the location
for the printer.
Setting up the
printer

XVI
Power supply Ensure yourself ...
●that the ratings of the power supply match the ratings shown on
the back of the printer. If in doubt, ask your supplier;
●that the printer is connected to an earthed mains socket with the
cable supplied;
●when using an extension cable or multiple socket that you do
not exceed the maximum electrical load for this;
●all reasonable precautions have been taken to prevent damage
to the power cable. Do not place objects on the cable and make
sure it is routed so that nobody walks on it or trips over it;
●that a damaged cable is replaced immediately;
●before cleaning the printer or the case, that the power cable is
removed from the power supply. Use only a clean cloth for
cleaning. Do not use liquids or aerosol cleaners;
●you have removed the plug from the mains outlet to ensure
complete isolation from the mains supply. The mains outlet you
are using must be located close to the printer and be easily
accessible.
The three wires of the power cable are colour coded. The earth wire
is yellow-green, the neutral wire is blue and the live current is on
the brown wire.
Servicing / maintenance
Any servicing work on the machine that goes beyond the mainte-
nance described in the manual should be carried out by an author-
ised supplier. We are not liable for damage arising due to unauthor-
ised servicing or through improper maintenance by unauthorised
personnel.
Cable wiring

XVII
Printhead is HOT!
Advice and warning symbols
Observe all warnings and instructions stated on the product itself
and in the accompanying documentation. At particularly impor-
tant points in the manual, warnings are marked with appropriate
symbols.
NOTE: text passages marked thus contain supplementary informa-
tion or instructions.
WARNING - damage: this symbol indicates a possible cause of
damage. Follow all instructions to prevent damage.
CAUTION - risk of injury: this symbol indicates a possible source
of danger. Follow all instructions to prevent injury.
CAUTION - electricity: this symbol indicates a possible source of
danger. Follow all instructions to prevent injury through an electri-
cal shock.
CAUTION - hot: this symbol indicates a possible source of danger.
Follow all instructions to prevent injury through heat.
Should you wish to replace the
ribbon, do not touch the print
head until it has stopped mov-
ing and has cooled down.
☞

XVIII
Meaning of text styles in the manual
To emphasise important passages in the text or differentiate
between the meaning of a printer function and a printer message,
the following text styles or emphases are used in the manual:
●BOLD BLOCK CAPITALS represent the display lamps of the
control panel.
●Bold letters indicate the groups, positions and settings of the
printer menu.
●BLOCK CAPITALS indicate the mode of the printer.
●Italic BLOCK CAPITALS indicate the buttons of the control
panel.
●»Brackets« highlight a printer function.
Consumables / accessories
To ensure that the printer operates perfectly and provides the
proper print quality, we recommend you use only original ribbons
or accessories supplied by us. We accept no liability for damage
resulting from the use of non-original ribbons or accessories which
would have been avoided by using original ribbons or accessories.
Original ribbons and accessories can be purchased from your
supplier.
To ensure good printing results, make sure you keep ribbons and
printing materials (paper, transparencies, etc.) for the shortest time
possible. Materials should be kept no longer than one year.

XIX
Machine-readable fonts
The perfect readability of fonts such as OCR-A, OCR-B or bar codes
(EAN, UPC, Zip) by machines is affected by ...
●the printing technique (resolution, edge sharpness);
●the technical state of the printer;
●the quality of the printing medium (toner, ink ribbon);
●the state of the print material (glossiness, smoothness, coating,
age, reflection, surface uniformity);
●the technical state of the reading device.
Further information
●Leave your printer components in their packing until the manu-
al expressly describes when and how to install them.
●Do not fit or use the serial and parallel interface cables at the
same time.
●Only use a clean cloth to clean the control panel and case.
●The oiling and greasing of moving parts by the user is unneces-
sary.
●If the machine is damaged, switch it off and remove the plug
from the outlet socket. Immediately arrange for it to be repaired.
●Before contacting your supplier’s customer service department,
read the notes in Chapter 6. You may incur costs even during the
warranty period if you call on customer service when the cus-
tomer is expected to remedy the fault or defect himself as
described in Chapter 6.
●When sending off the machine, the carrier or insurer will not
accept responsibility for damage due to unsuitable packing.
Other manuals for ML3390
1
This manual suits for next models
1
Table of contents
Other Oki Printer manuals

Oki
Oki ES2024 User manual

Oki
Oki C5300nccs Quick start guide

Oki
Oki C5800Ldn Series User manual

Oki
Oki lp-1030-mf User manual

Oki
Oki C9600hdn Use and maintenance manual

Oki
Oki C9850hdn Quick start guide

Oki
Oki B710n Quick start guide

Oki
Oki ML490 Series Quick start guide

Oki
Oki MICROLINE 8810 User manual

Oki
Oki OKIPAGE 14e User manual