manuals.online logo
Brands
  1. Home
  2. •
  3. Brands
  4. •
  5. OKIDATA
  6. •
  7. Printer
  8. •
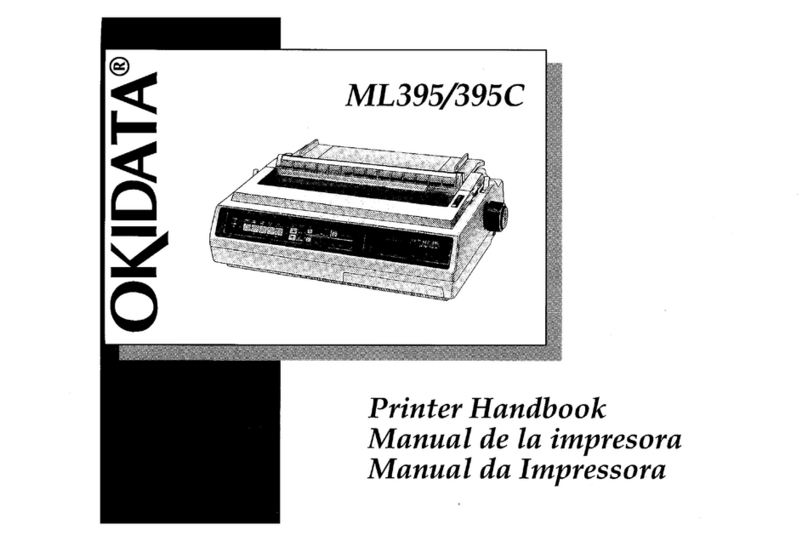
  9. OKIDATA Microline 93 User manual

OKIDATA Microline 93 User manual

OIQDATA
PERSONAL
PRINTER
USER'S
MANUAL
MICROLINE
92
and
93
Printers
Note
To The User
This manual
has
been
written
to
help
you
install and
use
your
new
OKI
DA
TA
printer
.
Our
goal
was
to
explain clearly
and
simply
everything
you
need
to
know
in
order
to
take
full
advantage
of
the Microli
ne
92 and 93
's
many special features.
If
for
any reason you
need
additional assistance
after
reading
this
booklet,
please contact
your
dealer
for
fast, personal
service.
If
your
dealer cannot answer
your
questions,
please
call
us
at: 609-235-2600, and
ask
for
Technical
Support.
Every
effort
has
been made
to
insure
that
the
information
in
this
document
is
complete, accurate
and
up-to-date.
OKI-
DAT
A
assumes
no responsibility
for
the results
of
errors
beyond its
control
.
OKI
DAT
A cannot guarantee
that
changes in
the
software
and
equipment made
by
other
manufacturers and referred
to
in
this
book
will
not
affect
the
applicability
of
the
information
in
it.
Copyright©
1983
by
OKI
DATA
Corporation.
All
rights reserved , including the
right
to
reproduce this
book
or
portions
thereof
in any
form
.
Revised
edition
September 1983
MICROLINE
92
AND
93
PERSONAL
PRINTERS
USER'S
MANUAL
TABLE
OF
CONTENTS
Page
1.
SETTING
UP
..
..
.
..
. .
...........
.
.........
....
5
Unpacking.
....
.
.............
..
. .
......
.
..
. . 6
Getting
Acquainted . .
......
...
.............
.
..
12
Running Solo
...
. . .
...........
.
.............
12
Self Test
.............
.. ..
.
.......
...
.. ..
..
.
21
2.
CONNECTING
YOUR
PRINTER
...
..
....
..
.
..
...
. .25
Matching Requirements
..............
....
.
....
.26
Closing Up
.....................
.
............
33
Wrapping Up
.....
. .
...
..
..
.....
...
...
.
..
....
35
3.
RUNNING
WITH
YOUR
COMPUTER .
... ...
...
..
...
39
Loading Paper
.....
. .
......
.
........
.
........
41
Individual Sheets.
..
.
.....
.
.............
...
41
Roll Paper
.. .. ..
..
......
..
...
..
. . .
....
.
..
41
Installing Stand
..
.
......
..
.........
....
43
Sprocket Paper
..................
...
......
46
Installing
Tractor
Unit
......
.
...
....
..
..
. 46
Removing
Tractor
Unit
..
.....
...
. . .
...
. .46
Using Sprocket Paper
without
tractor
unit
(ML92
only)
.
...........
.
.. ..
..
..
48
Using Sprocket Paper
with
tractor
unit
.
.....
50
Paper Adjustments
..........
.
.............
56
Indicator
Lights
and
Control
Buttons
.
...
.......
..
58
Adjusting
Pap
er . . .
......
.
...
..
..........
..
59
TOF
Set
Button
. .
....
.
...
.....
..
.
........
59
Form F
ee
d
Button
........................
59
Line
Feed
Button
.......................
..
60
Form Length
Sel
ection Dial
...
...
...........
60
4. BELLS
AND
WHISTLES .
........
..
..............
63
Using a
Softwar
e
Package
.
..
...
.......
........
. 65
The BASICs
.........
.
....
.
.. ..
.
...
...
.......
67
A Word
About
Notation
..
.
....................
75
Char
ac
ter
Si
z
es
....
......
..
........
..........
76
Correspondence
Quality
and
Data Processing
Printing
.........
.
....
.
......
.....
.....
..
. 78
iii
iv
TABLE
OF CONTENTS (Continued)
Page
Character Spacing (Correspondence Quality
only) ...
..................
.
.......
....
.
80
Line Spacing . . . . . . . . . . . . . . . . . . . . . . . . . . . . . . . . 82
Emphasized and Enhanced Printing. . . . . . . . . . . . . . . 84
Underlining. . . . . . . . . . . . . . . . . . . . . . . . . . . . . . . . . 85
Superscripts and Subscripts. . . . . . . . . . . . . . . . . . . . . 86
Form Length, Top
of
Form, and Form Feed
........
87
Direct Line Skip . . . . . . . . . . . . . . . . . . . . . . . . . . . . . 89
Vertical Formatting. . . . . . . . . . . . . . . . . . . . . . . . . . .
90
Setting the Left Margin. . . . . . . . . . . . . . . . . . . . . . . .
94
Horizontal Tabs
..
. . . . . . . . . . . . . . . . . . . . . . . . . . . . 96
Character Column Tabs.
........
.........
...
96
Dot Column Tabs . . . . . . . . . . . . . . . . . . . . . . . . . 98
Summary. . . . . . . . . . . . . . . . . . . . . . . . . . . . . . . . 99
Indenting
..
....
.
....
..
.
..
. .
....
..
..
...
......
101
Carriage Return and Line Feed
.....
...
.
......
..
. 103
Cancel
.....................................
104
Print Suppress
...............................
105
Custom-Designed Characters
..
...
... ... ...
.
.....
106
Downline Loadable Character Generator
.. ..
....
106
APA
Graphics
...............................
112
5. MAINTAINING YOUR PRINTER
..................
121
Troubleshooting
...........
...
...............
121
APPENDICES
A.
Making a Parallel Interface Cable
.............
.
A-1
B.
Setting The
High
Speed RS232-C Interface
Switches
...
.
...
..............
..
.........
B-1
C.
Making an RS232-C Interface Cable
...........
C-1
D.
Interface Connections and Switch Settings for
Popular Computers
........................
D-1
E.
Dot Patterns . . . . . . . . . . . . . . . . . . . . . . . . . . . . .
E-1
F.
ASCII Character Code Chart
...
..
.....
.....
..
F-1
G.
Control Code Quick Reference Chart
..
.
....
. . .
G-1
H.
Specifications . .
..
..
. .
.....
......
.
..
......
H-1
GLOSSARY
INDEX

ST
AND
ARD
FEATURES
160
cps
bidirectional
printing
Fast
throughput
-
more
printing
can
be
completed
in
less
time.
Emphasized
and
enhanced
printing
at
80
cps
Highlights
data
for
better
comprehension.
Correspondence
Quality
printing
at
40
cps
High
quality
printing
for
your
most
important
documents.
Short-line
seeking
logic
Buff
er
looks
ahead
at
next
line
of
data
-
determines
where
to
start
printing
the
n
ext
line in
order
to
save
printing
time.
9-pin
stored
energy
printhead
Allows
printhead
to
print
at
a
faster
rate
using less
power.
Extends
the
printhead
life
to
200
million
characters.
Printhead
temperature
check
Automatic
switch
to
unidirectional
printing
to
allow
print
-
head
to
cool
down.
Printer
halted
if
necessary
.
This
feature
also
helps
extend
printhead
life.
Full
96
character
ASCII
set
Lower
case
characters
with
descenders
Prints
lower
case
characters
with
true
descenders
(g
j
p q
y).
Downline
Loadable
Character
Generator
(DLCG)
Cr
eate
special
characters
(standard
or
descend
er)
for
special
n
ee
ds
.
Three
font
sizes:
10
cpi,
12
cpi,
17.1
cpi
Suit
the
character
size
to
the
data.
At
17
.1
cp
i,
the
Micro-
1
ine
92
prints
up
to
136
characters
per
line,
and
the
Micro
-
line
93
prints
up
to
233
characters
per
line.
Double
width
characters
P
ermits
emphasis
for
headlines
or
titles.
Superscripts
and
subscripts
Makes it easy
to
print
footnotes
and
formulas.
v
VI
Continuous Underlining
APA
Graphics
Creates high-resolution
illustrations.
Electronic Vertical
Format
Unit
(VFU)
Permits you
to
pre-program up
to
12 sets
of
vertical tab
positions.
Horizontal Tabulator
Allows
up
to
16
tab stops. Tabs
can
be
set
either
in
dot
column
or
character mode.
6
and
8 lines per inch -program-controlled
Optional
line spacing
to
permit
more
printing
per page.
Self Test
Insures
unit
is
printing
correctly
without
computer
control.
Versatile paper handling
For
both
printer
models,
friction
and
tractor
feed (an
option
for
the
Microline
92)
permit
printing
on single sheet paper
or
sprocket hole
forms
of
various
widths;
continuous
form
paper can
be
fed
from
bottom
or
rear.
For
the
Microline
92,
its
fixed-pin
platen allows
you
to
print
on
9.5"
wide sprocket hole paper
without
the op-
tional
tractor
unit,
and the
optional
roll paper stand lets
you
print
on inexpensive roll paper.
Regular paper -
up
to 4 parts
Capable
of
printing
clear crisp
copy
first
sheet
to
last.
4,000
hours Mean
Time
Between Failures
Provides
more
on-line
time
for
more
continuous
through-
put.
15 minutes Mean
Time
To
Repair
Quick
turn-around
if
repair
is
needed.
FOR
STARTERS
.•.
Congratulations on
your
choice
of
the MICROLINE
92/93
printer!
We
at
OKIDATA know it
will
meet your high ex-
pectations for reliability, economy, versatility and ease
of
operation -and we're sure
that
once you get
to
know
your
printer you'll be pleasantly surprised
at
what it can do.
We've designed this User's Manual to make it easy
to
set up
and run your printer, regardless 'Jf how you plan
to
use it.
The manual
is
arranged so you can read through it quickly
for a simple, direct introduction
to
your
printer's operation
and then later you can use it for quick day-to-day reference.
We've
put
technical information
in
the
back so it
won't
get
in
your
way if you
don't
need it.
Here's how the book
is
organized. Chapter 1 gets you
started. It tells you how to set up and try
out
your new
printer using the built-in "Self
Test"
feature. You
don't
even need a
computer
at
this stage,
but
you do need
paper - a small
but
important detail.
Chapter 2 tells you how
to
hook
your
printer up
to
your
computer. For this you'll need the following:
a
computer
,
a phillips-head screwdriver with a shaft
at
least
4"
long, and
an interface cable
The type
of
cable you need depends on what kind
of
com-
puter you have. Your dealer
will
be
able to supply the
right one for your computer.
If
you have the know-how
and the inclination
to
make your own, you'll find the
necessary technical information
in
Appendices A and
C.
You'll also need to set a few switches inside the printer so
it
will
work properly with your computer. We've provided
settings for many
of
the most popular personal computers
in
Appendix
D.
If yours isn't included,
don't
panic -
your
dealer has OKIDATA USERS TIPS to cover
other
systems.
2
Chapter 3 tells
you
how
to
operate
your
printer
:
what
the
buttons
do,
what
the lights mean, and
how
to
load paper.
By the
time
you've
finished
that
chapter,
you'll
be
able
to
print
out
information
from
a software package in
"plain
vanilla"
-the normal
printing
your
printer
is
set
for
when
you
turn
it
on.
In Chapter 4
you'll
learn all
about
the
MICROLINE
92/93's
many special features. We'll show you
how
they
work
and
how
to
use
them,
and walk
you
through
some examples
for
each one.
You'll
need
an
elementary knowledge
of
BASIC
to
follow
the examples,
but
if
you're
not
a programmer,
don't
worry
. Most software packages
let
you
use
special
printing
features
without
programming. The
instructions
for
your
software should explain
how
to
do
it.
Your
dealer
can
assist
you
with
OKI
DATA
USERS TIPS
that
provide
special hints
for
a
growing
number
of
popular
software
packages.
Experiment
a
little
and
you'll
see
how
easy
it
is
to
be
creative
with
your
MICROLINE
printer.
OKIDATA
printers
are
famous
for
their
reliability
and
durability.
Chapter 5 gives you a
few
simple
tips
to
help
you
keep
your
printer
running
in
top
form,
and tells
you
how
to
solve some
minor
problems
if
they
occur
.
Finally,
you'II
find
a
number
of
appendices and reference
aids in the back
of
the
book.
These give technical details
on interfaces, specifications, setup
information
for
popular
personal computers,
information
on the character
sets
and
quick
reference charts
of
control
codes and ASCII
(Ameri-
can
Standard Code
for
Information
Interchange -the
"language"
your
computer
uses
to
talk
to
your
printer},
as
well
as
a complete index and glossary
to
help
you
out
with
the jargon.
Take a few minutes to
read
through this
book
before
you
start setting up
your
printer
-
you'll
feel more
comfortable
with
the procedures
if
you
know
where
you're
headed.
We
also suggest
you
check
your
computer
and software manuals
for
details on
how
they
control
printing
functions.
If
you have any problems
not
covered here, see
your
dealer,
who can
give
you fast, personal service. If
your
dealer
can't
assist you, get
in
touch with
us
-
Technical
Support
Group
OKI
DATA
CORPORATION
111
Gaither Drive
Mt. Laurel, N.J.
08054
(609) 235-2600
3/
4
CHAPTER
1
----------
Setting Up
Overview
You're probably anxious to see
your
printer perform. Before
you
connect
your
printer to
your
computer, in this section
we
'II
identify some
of
the printer's external parts and opera-
tional controls and tell
you
how
to
set
the printer up alone
to test its operation. All
you
need
is
the printer itself, the
supplied ribbon, some paper, and
an
adapter for the power
plug
if
you
do
not
have agrounded electrical outlet. Later
on
you
'II
need
an
interface cable to connect
your
printer to
your
computer,
but
you'll
learn all about interfacing in the
next
chapter.
5
6
CHAPTER
1
First
of
all, select a sturdy surface to place your printer after
you unpack it. The printer's
"home"
should be:
well-ventilated
away from direct sunlight
away from heat-generating equipment
near your computer (naturally)
on a slotted printer stand (if you
'II
be inserting
paper from the bottom)
Unpacking
Your
Printer
Remove the two top sections
of
the packaging foam.
Carefully lift the printer (with the bottom packaging foam
attached) with both hands, and remove it from the carton.
Set the printer down on a flat, sturdy surface.
Remove the packaging material, and remove the printer
from its plastic cover.
NOTE:
Be
sure
to
save all
the
packaging
material
in
the
carton
in
case
you
ever
want
to
store
your
printer
or
ship it
anywhere.
Make
sure
that
all
these items are included
in
the carton
(refer to Figure 1-1):
printer
platen knob (set
in
packaging foam)
tractor feed unit (Microl i
ne
93 standard, Microl i
ne
92 option)
ribbon and empty ribbon spool *
spare fuse (2.5 amp) *
*These items are packed together.
IMPORTANT:
After
you've
read
this
chapter,
you'll
need an
interface
cable
to
connect
your
printer
to
your
computer.
(See
Chapter
2
for
information
on
interfacing
with
your
computer.)
If you have purchased the Microline 92 printer, these paper
feed accessories are available to you:
the roll paper stand, OKIDATA Part
No.
54132001
-the tractor feed unit, OKI DATA Part
No.
54112101
-----------
Setting Up
Microline
92
Microline 93
Figure1-1 7
CHAPTER
1
-----------
Roll Paper
Stand
Tractor
Unit
Fig4re 1-2
8
Setting Up
You'll
notice
that
the
printer's
power
cord
has a
3-pronged
grounded
plug.
If
you
do
not
have a
grounded
electrical
out-
let,
you
must
use a
UL-approved
grounded
adapter
that
you
can
purchase
at
a
hardware
or
electrical
supplies
store.
The
printer
must
always
be
grounded,
so
don't
use a
conver-
sion
plug
(like an
extension
cord}
which
ignores
the
ground-
ing
prong.
Take
the
platen
knob
out
of
the
packaging
foam,
and
install
it
on
the
printer's
right
side
(there
is
a
hole
there
for
it):
Match
the
flat
section
of
the
knob
with
the
flat
section
of
the
platen
shaft,
and
fit
the
knob
over
the
platen
shaft.
Press
the
knob
inward
until
it
seats
firmly
on
the
platen
shaft.
Now
turn
the
platen
knob
to
make
sure
the
platen
turns.
Remove
the
shipping
tie:
Open
the
access
cover
by
pulling
it
up
and
out
as
shown
in
the
figure.
Remove
the
shipping
tie
that
holds
the
printhead
in
place
during
shipment
(refer
to
Figure
1-3).
IMPORTANT:
Always
remember
to
replace
this
shipping
tie whenever
you
ship
your
printer.
It
secures the
printhead
in place
to
protect
it
from
damage.
If
you
have a
220/240
VAC
model,
your
printer
left
the
factory
with
220
V
selected.
If
you
want
to
change
the
voltage
supplied
to
your
printer
to
240
V,
you'll
have
to
change
the
position
of
the
Voltage
Select
Switch:
1.
Remove
the
upper
cover
by
following
the
instruc-
tions
on
page 27.
2.
Locate
the
Voltage
Select
Switch
on
the
power
c"
ircuit
board
directly
behind
the
power
cord
(see
Figure 1-4).
3.
Set
the
switch
to
the
left
side
for
230
or
240
V.
9
CHAPTER
1
-----------
Platen knob
10 Figure 1-3
---------------
Setting
Up
Circuit
breaker
Figure
1-4
11
12
CHAPTER
1
Getting Acquainted
Let's take a closer look
at
the printer. The
components
and
the printer controls identified and illustrated here (see Figure
1-5)
will
be explained
in
detail later
in
Chapter 3.
_Running
"Solo"
Now we're going to show you how
to
prepare
your
printer
for running
"solo"
-
that
is,
without
the
computer.
This pro-
cedure
will
take only a few minutes and
will
reassure you
that
your printer
is
operating properly.
You'll
be
loading the printer with ribbon and paper, plugging
it in, and printing the self test.
If
you're more adventurous and familiar with
computer
sys-
tems and printers, you can install the ribbon
as
described on
page 14, then skip this section and proceed directly
to
Chapter
2 for instructions on connecting
your
printer
to
your
compu-
ter. Chapter 3
will
show you how
to
load paper, install any
accessories such
as
the tractor feed unit or the roll paper
stand, and how to operate the printer manually with its
operator controls.
If
vou want
to
test the water before taking the plunge, fol-
low these instructions to print the self test.
Printing the Self Test
Before you start make sure the printer
is
off and unplugged.
First-
Remove the printer's access cover.
Second-
Remove the shipping tie from the printhead if you haven't
already.
If
you ever have to ship the printer, be sure
to
re-
place this tie to
protect
the printhead from damage during
shipment.
Setting Up
Tractor feed
unit
Front
Upper cover
Control
On/Off
switch
AC power cord
_J-
connector
serial interface
Figure 1-5
13
14
CHAPTER
1
Third-
Install ribbon
These instructions apply
to
both printer models. Remember
that
you must use genuine OKIDATA ribbon because it
contains a special chemical which lubricates the pins
in
the
printhead constantly during printing. If you use any
other
ribbon, the printhead warranty may be voided.
When you change the ribbon
in
the future, you can refer
to
the handy installation diagram on
the
reverse side
of
the
access cover.
Installing or Replacing Ribbon:
1. Make sure the printer
is
OFF.
2.
When
replacing ribbon, discard the full ribbon spool
and save the empty spool.
3. Loosen the end
of
the new ribbon.
4. Mount the full ribbon spool on the right spool
shaft (as you face the printer from the front). Make
sure
that
the ribbon winds counter-clockwise, and
that
the ribbon drive pin fits into the pinhole
in
the
center
of
the ribbon spool (see Figure 1-6).
5. Thread the loose ribbon end
as
shown
in
Figure
1-7
.
Read these hints before you start threading the
ribbon.
Be
careful not to twist
or
fold the ribbon.
Make sure the ribbon
is
threaded through the
guide rollers and around the ribbon guides.
The ribbon must
go
between the ribbon shield
and the printhead.
Make sure
that
the ribbon winds
in
the correct
direction.
When you reach the left side, hold the
empty
spool so the arrow faces the full spool. Attach
the end
of
the ribbon (sometimes there
is
a hole
in
the ribbon for this) to the hook on the empty
spool core, and wind the ribbon
onto
the spool
(refer
to
Figure 1-8).
Make sure that the metal eyelet on the ribbon
is
on the spool side
of
the eyelet
detector
lever.
If
it isn't, lift the ribbon
up
and move the eyelet
to
the spool side. This
is
necessary
to
insure
that
the ribbon
will
change direction when it gets to
the end
of
the spool .

This manual suits for next models

1

Other OKIDATA Printer manuals

OKIDATA Microline 393 User manual

OKIDATA

OKIDATA Microline 393 User manual

OKIDATA OL600e User manual

OKIDATA

OKIDATA OL600e User manual

OKIDATA MICROLINE ML590 User manual

OKIDATA

OKIDATA MICROLINE ML590 User manual

OKIDATA OL810e User manual

OKIDATA

OKIDATA OL810e User manual

OKIDATA MICROLINE 320 User manual

OKIDATA

OKIDATA MICROLINE 320 User manual

OKIDATA ML320 Turbo User manual

OKIDATA

OKIDATA ML320 Turbo User manual

OKIDATA ML184Turbo User manual

OKIDATA

OKIDATA ML184Turbo User manual

OKIDATA OKIMATE 20 User manual

OKIDATA

OKIDATA OKIMATE 20 User manual

OKIDATA ML1120 User manual

OKIDATA

OKIDATA ML1120 User manual

OKIDATA PT330 Installation instructions

OKIDATA

OKIDATA PT330 Installation instructions

OKIDATA Pacemark 4410 User manual

OKIDATA

OKIDATA Pacemark 4410 User manual

OKIDATA 321 Turbo Manual

OKIDATA

OKIDATA 321 Turbo Manual

OKIDATA OL400e Series User manual

OKIDATA

OKIDATA OL400e Series User manual

OKIDATA OKIMATE 10 User manual

OKIDATA

OKIDATA OKIMATE 10 User manual

OKIDATA Microline ML395 User manual

OKIDATA

OKIDATA Microline ML395 User manual

OKIDATA PT390 Installation instructions

OKIDATA

OKIDATA PT390 Installation instructions

OKIDATA ML320 Turbo User manual

OKIDATA

OKIDATA ML320 Turbo User manual

OKIDATA Microline 320 Turbo Use and care manual

OKIDATA

OKIDATA Microline 320 Turbo Use and care manual

OKIDATA OL830 User manual

OKIDATA

OKIDATA OL830 User manual

OKIDATA OKIFAX 5700 User manual

OKIDATA

OKIDATA OKIFAX 5700 User manual

OKIDATA DOC-IT Series User manual

OKIDATA

OKIDATA DOC-IT Series User manual

OKIDATA ML172 Series User manual

OKIDATA

OKIDATA ML172 Series User manual

OKIDATA OKIOFFICE 44 User manual

OKIDATA

OKIDATA OKIOFFICE 44 User manual

OKIDATA 120 User manual

OKIDATA

OKIDATA 120 User manual

Popular Printer manuals by other brands

Oki C5100n user guide

Oki

Oki C5100n user guide

Panduit COUGAR LS9Q Operator's manual

Panduit

Panduit COUGAR LS9Q Operator's manual

Logic Controls LR1100 user manual

Logic Controls

Logic Controls LR1100 user manual

Lexmark C720 SERIES Setup guide

Lexmark

Lexmark C720 SERIES Setup guide

Canon PIXMA MP160 user guide

Canon

Canon PIXMA MP160 user guide

Gainscha GA-F3300 user manual

Gainscha

Gainscha GA-F3300 user manual

Epson U925 - TM B/W Dot-matrix Printer Specifications

Epson

Epson U925 - TM B/W Dot-matrix Printer Specifications

Lexmark E360 Brochure & specs

Lexmark

Lexmark E360 Brochure & specs

Epson SC-P10000 SERIES Maintenance Guide

Epson

Epson SC-P10000 SERIES Maintenance Guide

Sony UP-DR200 Specifications

Sony

Sony UP-DR200 Specifications

Epson Stylus 10000 Series user guide

Epson

Epson Stylus 10000 Series user guide

Citizen CBM-262 Type II Command reference guide

Citizen

Citizen CBM-262 Type II Command reference guide

Aficio SP 1200S Quick installation guide

Aficio

Aficio SP 1200S Quick installation guide

IBM RS/6000 44P Series 270 user guide

IBM

IBM RS/6000 44P Series 270 user guide

GRAVOGRAPH IM4 user manual

GRAVOGRAPH

GRAVOGRAPH IM4 user manual

Astro Machine ASTROJET 2650P Operator's manual

Astro Machine

Astro Machine ASTROJET 2650P Operator's manual

Craind Impianti FT190S user manual

Craind Impianti

Craind Impianti FT190S user manual

Epson Stylus Photo 900 Setup

Epson

Epson Stylus Photo 900 Setup

manuals.online logo
manuals.online logoBrands
  • About & Mission
  • Contact us
  • Privacy Policy
  • Terms and Conditions

Copyright 2025 Manuals.Online. All Rights Reserved.