OKM FS Future Series User manual

FS Future Series®
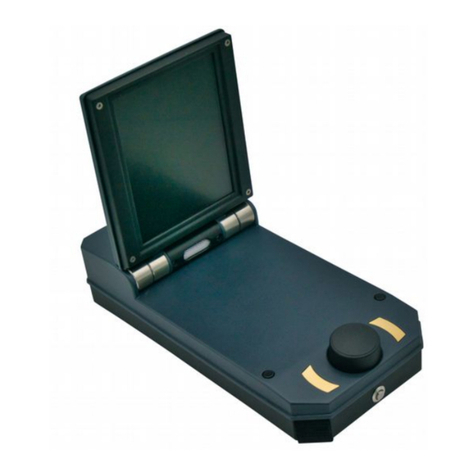
GeoSeeker
User's Manual

Any information contained in these operating instructions may be changed without prior notice.
OKM does not make any warranty for this document. This also applies without limitation to implied assurances of
merchantability and fitness for a specific purpose. OKM does not assume any responsibility for errors in this manual
or for any incidental or consequential damage or loss associated with the delivery, e ploitation or usage of this
material.
This documentation is available "as presented" and without any kind of warranty. In no circumstances OKM takes
responsibility for lost profits, usage or data loss, interruption of business activities or all kind of other indirectly
damages, which developed because of errors in this documentation. This instruction manual and all other stored
media, which are delivered with this package should only be used for this product. Program copies are allowed only
for security- and safety purposes. The resale of these programs, in original or changed form, is absolutely forbidden.
This manual may not be copied, duplicated or translated into another language, neither in part nor completely, over
the copyright matters without the prior written consent of OKM.
Copyright ©2002 – 2015 OKM GmbH. All rights reserved.

3
Table of contents
1 Introduction ........................................................................................................................................... 7
1.1 Preface ........................................................................................................................................... 8
1.2 Important Notes ............................................................................................................................. 9
1.2.1 Security Guidelines ................................................................................................................ 9
1.2.2 General Notes ........................................................................................................................ 9
1.2.3 Surrounding Area ................................................................................................................... 9
1.2.4 Voltage / Power Supply ......................................................................................................... 10
1.2.5 Maintenance and Services ................................................................................................... 10
1.2.6 Danger of E plosion during E cavation ............................................................................... 10
2 Technical specifications ....................................................................................................................... 13
2.1 Controller (Receiving Unit) .......................................................................................................... 14
2.2 Power Bo (Sending Unit) ............................................................................................................ 14
2.3 Electrodes .................................................................................................................................... 14
2.4 Cable Drums ................................................................................................................................ 15
2.4.1 Power Drum (Ø 290 mm) ...................................................................................................... 15
2.4.2 Voltage Drum (Ø 100 mm) .................................................................................................... 15
2.5 Tablet PC, Minimum requirements ............................................................................................... 15
3 Scope of delivery .................................................................................................................................. 17
4 Control elements .................................................................................................................................. 19
4.1 Electrodes .................................................................................................................................... 20
4.2 Cable Drums ................................................................................................................................ 20
4.2.1 Power Cable Drums (Ø 290 mm) .......................................................................................... 20
4.2.2 Voltage Cable Drums (Ø 120 mm) ........................................................................................ 21
4.3 Controller ..................................................................................................................................... 22
4.4 Tablet Holder ............................................................................................................................... 24
4.5 Power Bo .................................................................................................................................... 24
5 Android Application ............................................................................................................................. 27
5.1 Download & Installation ............................................................................................................... 28
5.2 Operating modes and functionality .............................................................................................. 29
5.2.1 New Measurement ............................................................................................................... 29
5.2.2 Continue Measurement ........................................................................................................ 34
5.2.3 View Measurement ............................................................................................................... 35
5.2.4 Activation ............................................................................................................................. 36
5.2.5 Support Information ............................................................................................................. 37
6 Preparing and maintaining the equipment ........................................................................................... 39
6.1 Preparing the Controller .............................................................................................................. 40
6.1.1 Placing and charging the batteries ....................................................................................... 40
6.1.2 Mounting the Tablet PC holder ............................................................................................ 41
6.1.3 Mounting the Voltage Cable Drums ...................................................................................... 42
6.2 Preparing the Power Bo .............................................................................................................. 43
OKM GmbH
www.okmmetaldetectors.com

4
6.2.1 Charging the internal batteries ............................................................................................ 43
6.3 Creating a Wi-Fi Connection ........................................................................................................ 44
7 Conducting a measurement ................................................................................................................. 47
7.1 Basic Information ......................................................................................................................... 48
7.2 General Measurement Procedure ................................................................................................ 49
7.3 Setting up a measurement ........................................................................................................... 54
7.3.1 Setting up your scan field with markers ............................................................................... 54
7.3.2 Setting up the power injection for active scan modes .......................................................... 55
7.3.3 Setting up the voltage measurement .................................................................................... 56
7.3.4 Final connection schemas .................................................................................................... 58
7.3.4.1 Active Scan (Accurate) ................................................................................................. 58
7.3.4.2 Active Scan (Quick) ...................................................................................................... 58
7.3.4.3 Passive Scan ................................................................................................................. 59
8 Analyzing a Measurement .................................................................................................................... 61
8.1 Interpretation of scan values ....................................................................................................... 62
8.2 Interpretation of graphical representations ................................................................................. 63
8.2.1 Active Scan ........................................................................................................................... 63
8.2.2 Passive Scan ......................................................................................................................... 64
8.3 E amples ...................................................................................................................................... 65
8.3.1 Passive Measurement ........................................................................................................... 65
8.3.2 Active Measurements ........................................................................................................... 65
8.3.2.1 Water Deposits ............................................................................................................. 65
8.3.2.2 Water deposits with areas of high resistivity ................................................................ 66
8.3.2.3 Cavities ......................................................................................................................... 66
8.3.2.4 Impervious layers ......................................................................................................... 67
9 Tips and Tricks ..................................................................................................................................... 69
9.1 Improving your scan results ......................................................................................................... 70
9.2 Speeding up your measurement ................................................................................................... 70
9.2.1 Operation with 3 people ....................................................................................................... 71
9.2.2 Operation with 5 people ....................................................................................................... 71
9.3 Measurements under tough soil conditions .................................................................................. 72
OKM GmbH
www.okmmetaldetectors.com

5
Table of figures
Figure 4.1: Elements of the electrodes ................................................................................................... 20
Figure 4.2: Elements of the power cable drums ..................................................................................... 21
Figure 4.3: Elements of the voltage cable drums .................................................................................... 22
Figure 4.4: Control elements of the Controller ....................................................................................... 23
Figure 4.5: Elements of the tablet holder ............................................................................................... 24
Figure 4.6: Control elements of the Power Bo ....................................................................................... 25
Figure 5.1: Installation of the application via Google Play Store ............................................................ 28
Figure 5.2: Application's main menu ...................................................................................................... 29
Figure 5.3: New Measurement - Creation process .................................................................................. 30
Figure 5.4: New Measurement - Project title / notes .............................................................................. 30
Figure 5.5: New Measurement - Scan mode ........................................................................................... 31
Figure 5.6: New Measurement - Scan profile ......................................................................................... 31
Figure 5.7: New Measurement – Depth settings ..................................................................................... 32
Figure 5.8: New Measurement - Field dimensions .................................................................................. 32
Figure 5.9: New Measurement - Arrangement of electrodes .................................................................. 33
Figure 5.10: Continue Measurement ...................................................................................................... 34
Figure 5.11: View Measurement – List of files ........................................................................................ 35
Figure 5.12: View Measurement - 3d representation .............................................................................. 35
Figure 5.13: Activation ........................................................................................................................... 36
Figure 5.14: Support Information ........................................................................................................... 37
Figure 6.1: Placing batteries into the Controller's compartments .......................................................... 40
Figure 6.2: Connecting the Controller's charger .................................................................................... 41
Figure 6.3: Tablet PC mounted to Controller .......................................................................................... 42
Figure 6.4: Voltage Cable Drums mounted to Controller ........................................................................ 42
Figure 6.5: Connecting the Power Bo Charger ...................................................................................... 43
Figure 6.6: Enabling Wi-Fi ...................................................................................................................... 44
Figure 6.7: Entering Wi-Fi password ...................................................................................................... 45
Figure 7.1: Detection of thick objects is better than flat objects ............................................................ 48
Figure 7.2: Dividing the field into scan points and setting up markers ................................................... 49
Figure 7.3: Power injection depth depends on electrodes distance ........................................................ 50
Figure 7.4: Available Scan Modes ........................................................................................................... 50
Figure 7.5: Instruction screen for setting up a measurement ................................................................. 52
Figure 7.6: Arrangement of electrodes during Active Scan (Accurate) ................................................... 58
Figure 7.7: Arrangement of electrodes during Active Scan (Quick) ........................................................ 58
Figure 7.8: Arrangement of electrodes during Passive Scan .................................................................. 59
Figure 8.1: Measure values as indicated during a measurement ............................................................ 62
Figure 8.2: Graphical 3d representation of an active scan ..................................................................... 63
Figure 8.3: Graphical 3d representation of a passive scan ..................................................................... 64
Figure 8.4: E ample of a passive measurement – flowing water ............................................................. 65
OKM GmbH
www.okmmetaldetectors.com

6
Figure 8.5: E ample of an active measurement - water deposit ............................................................. 65
Figure 8.6: E ample of an active measurement - water deposit and barrier .......................................... 66
Figure 8.7: E ample of an active measurement - cavity .......................................................................... 66
Figure 8.8: E ample of an active measurement - impervious layer / barrier .......................................... 67
Figure 9.1: Electrodes need good electrical ground contact ................................................................... 70
Figure 9.2: Electrodes have to be equally set into the ground ................................................................ 70
Figure 9.3: Operating the GeoSeeker with 3 people ............................................................................... 71
Figure 9.4: Operating the GeoSeeker with 5 people ............................................................................... 71
Figure 9.5: Drilling a hole and refilling it for the electrode .................................................................... 72
OKM GmbH
www.okmmetaldetectors.com
1 Introduction
CHAPTER 1
Introduction

8 Introduction
1.1 Preface
Dear Customer,
first of all we would like to thank you in choosing a product manufactured by OKM. The present product
is based on a geoelectrical measuring method utilizing the Schlumberger technique to measure the
resistivity of different soil layers.
With our team of specialists we guarantee that our products are under recurrent control. Our specialists
are constantly implementing new developments in terms of further quality improvements for you. Of
course by selling our products we cannot guarantee that you will make a find during your research. The
recognition of hidden structures depends on a huge number of factors – as you are already aware of.
Determining factors like the dielectric constant of the ground, the grade of mineralization and the
conductivity of different soils. Especially in very wet soils like clay and sand with high conductivity or
attenuation of the ground. In certain conditions recording of the measured results can be falsified
strongly.
For more information regarding where this equipment has been used and operated, please visit our web
site. Our equipment is constantly being tested and when improvements or upgrades are available, we
will list them also on our web site.
It is necessary for our company to protect our developments and all of the information learned during
the “Research and Development” phases in creating our technology. We strive to stay within the given
framework of legislation, patents and trademark registration.
Please take the time to read this User Manual and familiarize yourself with the operation, functionality
and how to utilize the GeoSeeker. We also offer training for your equipment in our factory. We strive to
maintain a worldwide dealer network for assistance and support. Please visit our web site for more
information.
OKM GmbH
www.okmmetaldetectors.com
Introduction 9
1.2 Important Notes
Prior to using the GeoSeeker and its accessories, please read these operating instructions carefully.
These instructions give information on how to properly use this geoelectrical detector and shows
potential sources where precautions should be taken.
1.2.1 Security Guidelines
The GeoSeeker has a ma imum output of 390 V and 0.5 A even if it is not present at all times. But under
some circumstances the ma imum output can be present at the electrodes of the GeoSeeker. Therefor
you have to take special care when handling the electrodes:
•Do not touch any of the electrodes when measuring is in progress.
•Before replacing any of the electrodes unplug the connecting cable to isolate the electrodes from
active power supply.
•Do not initiate any measuring as long as someone is handling the electrodes.
•Instruct all your helpers and assistants concerning these security guidelines to avoid
unnecessary injuries.
1.2.2 General Notes
Being an electronic device, the GeoSeeker has to be treated with caution and care as with any electronic
device. Any failure to observe the safety precautions given or any use for purposes other than the ones it
is designed for may result in damage or destruction of the processing unit and/or its accessories or
connected components.
The device has a built in anti-tampering module which will destroy the unit if it is improperly opened.
There are no end user serviceable parts on the inside of the unit.
1.2.3 Surrounding Area
When moving this unit from a cold place to a warmer place, watch out for condensation. Do not
immediately operate the unit until any possible condensation has evaporated. The unit is not weather
proof and water, moisture or condensation can destroy the unit.
Avoid strong magnetic fields, which may occur in places where there are large electric motors or
unshielded loudspeakers. Try to avoid using this equipment if someone else is using this type of
equipment closely.
Avoid using this equipment around active military installations and airports or where there may be other
devices that may hamper the signals received. Radars for aircraft, boats and weather reporting may
lower the units capabilities.
OKM GmbH
www.okmmetaldetectors.com
1 Introduction
1.2.4 oltage / Power Supply
The power supply should not be outside the indicated range of values. Use only approved chargers,
batteries and rechargeable batteries which are included in the scope of delivery. Only use the
recommended type of batteries or rechargeable batteries as indicated in this user's manual.
1.2.5 Maintenance and Services
In this section you will learn how to maintain your measuring instrument with all of its included
accessories. This will keep it in good condition a long time and you will be able to get good measuring
results.
The following list indicates what you absolutely should avoid:
•penetrating water
•strong dirt and dust deposits
•hard impacts
•strong magnetic fields
•strong microwave fields
•high and long lasting heat effect
To clean your device please use a dry soft cloth. To avoid any damage you should always transport the
device and accessories in the appropriate carrying cases.
Prior to using your GeoSeeker please be sure that all batteries and accumulators are fully charged. Also
allow the batteries to completely discharge before recharging them, regardless if you are working with
the e ternal battery or with internal accumulators. This way your batteries will have a long and durable
life.
1.2.6 Danger of Explosion during Excavation
Unfortunately, the last two world wars also made the ground in many places of the world a potentially
e plosive scrap heap. A host of those lethal relics are still buried in the ground. Do not start digging and
hacking for an object wildly when you receive a signal of a piece of metal from your device. Firstly, you
might indeed cause irreparable damage to a truly rare find, and secondly, there is a chance that the
object reacts in an insulted way and strikes back.
Note the color of the ground close to the surface. A red or reddish color of the ground is an indicator of
rust traces. As regards to the finds themselves, you should definitely pay attention to their shape.
Curved or round objects should be a sign of alarm, especially if buttons, rings or little pegs can be
identified or felt. The same applies to recognizable ammunition or bullets and shells. Leave that stuff
alone and where it is, do not touch anything and, most importantly, do not take any of those items home
OKM GmbH
www.okmmetaldetectors.com

Introduction 11
with you. The killing machines of war made use of many diabolical inventions such as rocker fuses, acid
fuses and ball fuses. Those components have been rusting away in the course of time, and the slightest
movement may cause parts of them to break and be triggered. Even seemingly harmless objects such as
cartridges or large ammunition are anything but that. E plosives may have become crystalline over time,
that is, sugar-like crystals within them have formed, they are still dangerous and should be regarded as
a potential killer.
Moving such an object may cause those crystals to produce friction, leading to an e plosion. If you come
across such relics, mark the place and do not fail to report the find to the police or proper authority.
Such objects always pose a danger to the life of hikers, walkers, farmers, children and animals.
OKM GmbH
www.okmmetaldetectors.com

2 Technical specifications
CHAPTER 2
Tec nical specifications

14 Technical specifications
The following technical indications are medial values. During operation small variations are quite
possible. Technical changes due to development are also possible.
2.1 Controller (Receiving Unit)
Dimensions (H W D) .............................................................................................. 130 270 110 mm
Weight ............................................................................................................................................... 0.6 kg
Weight (with mounted cable drums and batteries) ............................................................................ 2.1 kg
Power Supply (8 AA batteries) .................................................................................................. 8 – 14 VDC1
Operating Time (charged batteries) ...................................................................................... min. 16 hours
Charging Time (empty batteries) ............................................................... typically 3 hours, ma . 5 hours
Input (Charger) ..................................................................................................................... 12 VDC, 1.5 A
CPU ............................................................................................................................... 80 MHz Corte M3
ADC ................................................................................................................................................... 16 bit
Communication with Tablet PC ................................. WLAN-Accesspoint, 2.4 GHz band, channel 6, WPA2
Communication with Power Bo .................................................... 2.4 GHz band, on-demand, proprietary
Effective Range (differential) ....................................................................................... -1400 to +1400 mV
Input Resistance (static) ...................................................................................................... appro . 12 MΩ
Data Sampling Rate ................................. 4096 Hz (64 times oversampling of a 512 samples mean value)
Measurement Period per Scan Point ................................................................................. min. 16 seconds
2.2 Power Box (Sending Unit)
Dimensions (H W D) .............................................................................................. 230 550 360 mm
Weight ............................................................................................................................................. 15.8 kg
Weight (with mounted Electrodes) ..................................................................................................... 18 kg
Internal Power Supply ......................................................................... Lead Acid Battery (2 12 V, 10 Ah)
Output ................................................................................................................... ma . 390 V, 0.5 A, 20 W
Operating Time (min. Power) ......................................................................................... appro . 100 hours
Operating Time (average Power) ..................................................................................... appro . 40 hours
Operating Time (ma . Power) ............................................................................................ appro . 8 hours
Charging Time ........................................................................................................................ ma . 8 hours
Input (Charger) ........................................................................................................................ 24 VDC, 2 A
Communication with Controller ..................................................... 2.4 GHz band, on-demand, proprietary
2.3 Electrodes
Dimensions (L W D) ..................................................................................................440 120 35 mm
Weight ............................................................................................................................................. 0.52 kg
1 Equates 8 AA batteries; Use only boost chargeable NiMh batteries or primary cells with a minimum capacity of
2000 mAh; Do not use other kind of batteries with the supplied charger (danger of e plosion);
OKM GmbH
www.okmmetaldetectors.com

Technical specifications 15
2.4 Cable Drums
2.4.1 Power Drum (Ø 290 mm)
Dimensions (H W D) ............................................................................................... 360 290 200 mm
Weight ............................................................................................................................................... 6.5 kg
Cable Length ..................................................................................................................................... 255 m
Markers .................................................................................................................................................. 15
2.4.2 oltage Drum (Ø 100 mm)
Dimensions (H W D) ................................................................................................. 120 120 45 mm
Weight ............................................................................................................................................. 0.65 kg
Cable Length ....................................................................................................................................... 26 m
Markers .................................................................................................................................................. 25
2.5 Tablet PC, Minimum requirements
Operating System .................................................................................................. Android 4.0.3 or higher
Wi-Fi / WLAN ................................................................................................................................ Required
USB Chargeable ..................................................................................................................... Micro-USB-B
Display ............................................................................................. 7” Tablet Screen, Outdoor Brightness
OKM GmbH
www.okmmetaldetectors.com


3 Scope of delivery
CHAPTER 3
Scope of delivery

18 Scope of delivery
In the following section you can find all standard equipment and optional parts of the GeoSeeker.
Description Quantity
Controller 1
Power Box (carrying case) 1
Power Cable Drum (290 mm cable drum) 2
Voltage Cable Drum (120 mm cable drum) 2
AA batteries rechargeable 8
Tablet Holder 1
Android Tablet PC 1
User manual 1
Extension cable 2 m 2
Charger for Controller 1
Charger for Power Box 1
Electrode 4
USB Power Pack with charger and travel adapter 1
Table 1: Scope of delivery
OKM GmbH
www.okmmetaldetectors.com

4 Control elements
CHAPTER 4
Control elements
In this section you will learn more about the fundamental use of all control elements for this measuring
instrument. All connections, inputs and outputs are e plained in detail.

2 Control elements
4.1 Electrodes
There are 4 electrodes in total, 2 electrodes with a red socket (Power Electrodes) and 2 electrodes with
a black socket (Voltage Electrodes).
Handle / Shaft: Use the handle to push the electrode's shaft into the underground as deep as possible.
You may use a hammer to do so. The shaft is made of stainless steel to be robust against moisture and
weird soil conditions.
Socket: The socket is used to connect the cables whereas the red socket is used for the power injection
and the black socket is used for measuring the voltage.
4.2 Cable Drums
There are 4 cable drums on the whole, 2 big ones and 2 small ones. The big cable drums – referred to as
“Power Cable Drums” – are used to connect the Power Electrodes (electrodes with red socket) with the
Power Bo , whereas the small ones – referred to as “Voltage Cable Drums” – are used to connect the
Voltage Electrodes (electrodes with black socket) with the Controller.
4.2.1 Power Cable Drums (Ø 290 mm)
The two larger cable drums – also called “Power Cable Drums” – are the link between the Power Bo and
the Power Electrodes.
OKM GmbH
www.okmmetaldetectors.com
Figure 4.1: Elements of the electrodes
Shaft
Socket
Handle
Other manuals for FS Future Series
4
This manual suits for next models
1
Table of contents
Other OKM Security Sensor manuals
Popular Security Sensor manuals by other brands

Autronica
Autronica AutroSense 75 Installation & Commissioning Handbook

ELTEX
ELTEX UPG-Stitch instructions

PCB
PCB 2303-02A Installation and operating manual

Larson Electronics
Larson Electronics EXP-MS-N4X-AT-HV instruction manual

Det-Tronics
Det-Tronics X9800 Addendum

ComSonics
ComSonics QAM Sniffer Quick reference guide