Page | 6
Popcorn Cart Assembly
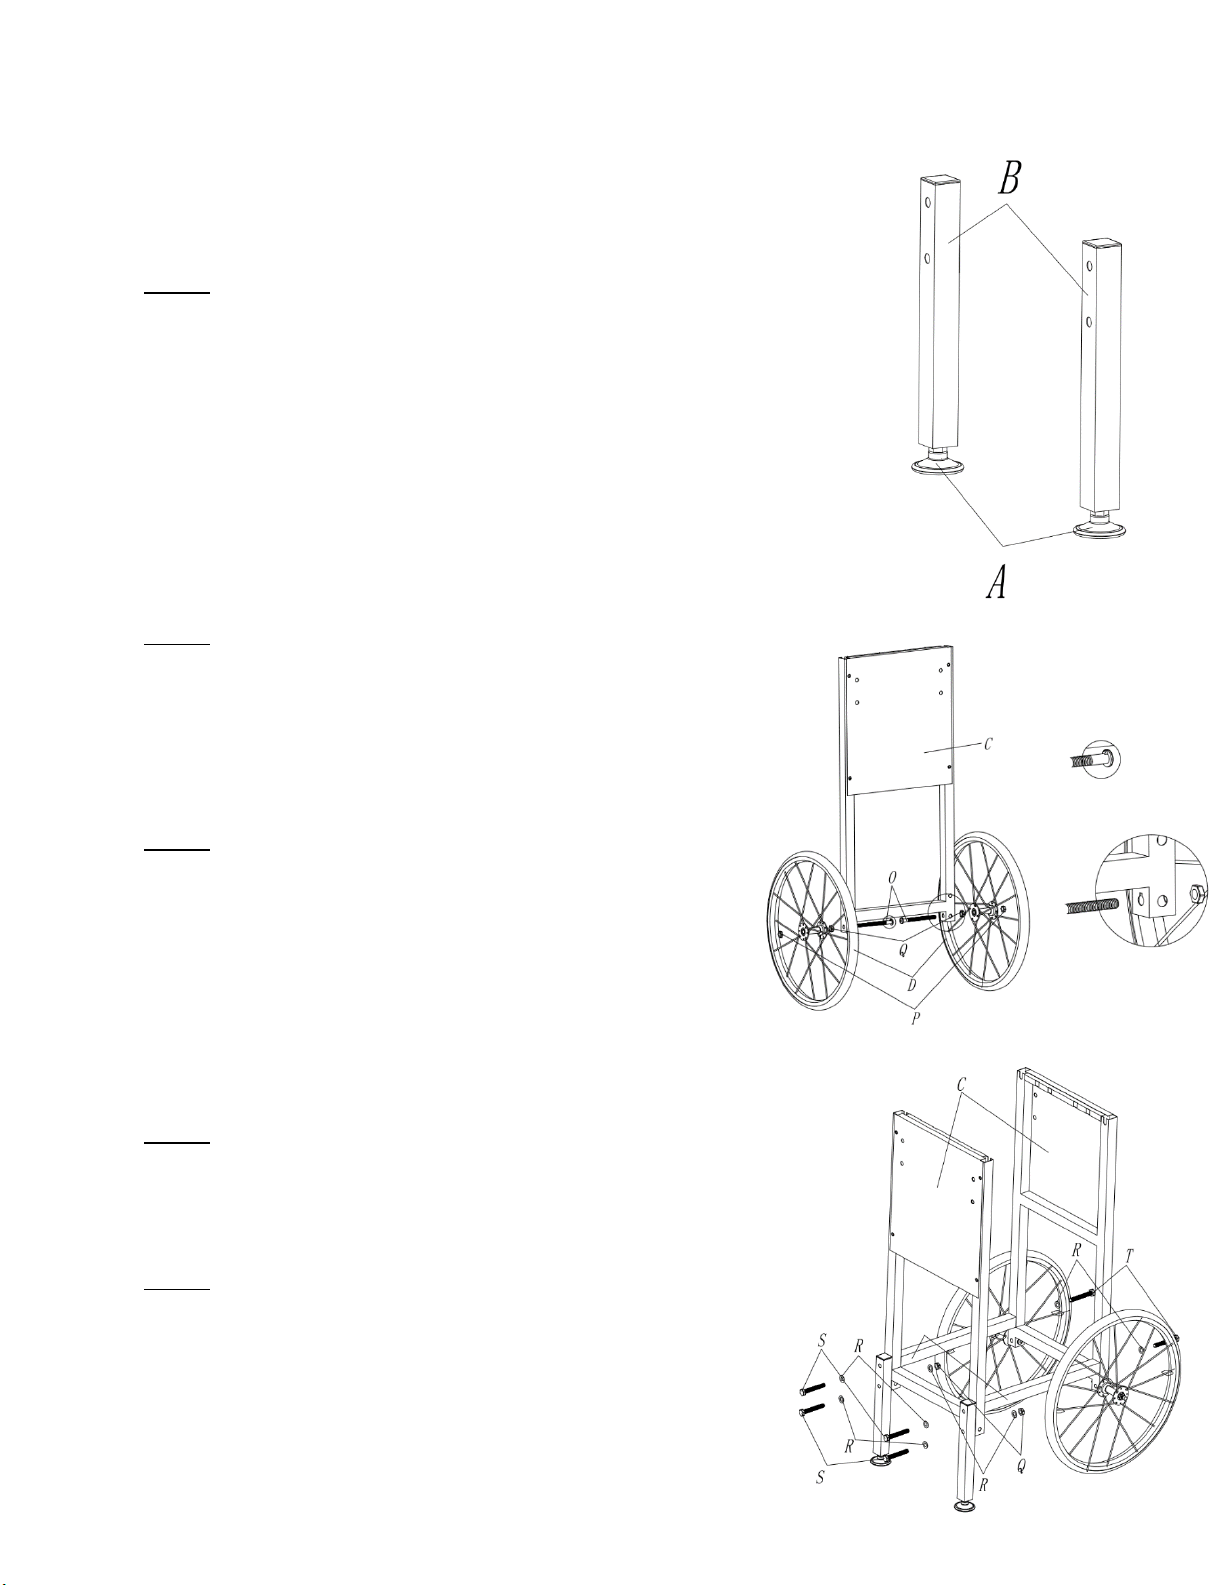
STEP 1:
Screw one of the RUBBER FEET (A) into the bottom of each SUPPORT LEG
(B). Tighten both rubber feet.
STEP 2:
Insert one WHEEL BOLT (O) into the bottom holes located on
each side of the SUPPORT STAND (C). NOTE: Insert bolt from
the inside out. Secure wheel bolts with one NUT (Q) on each
side. Tighten with wrench.
STEP 3:
Hang one WHEEL (D) onto one WHEEL BOLT (O) and secure
with one NYLOC NUT (P). Tighten with wrench. Repeat step
for second wheel. Note: Do not overtighten. Make sure both
wheels spin freely.
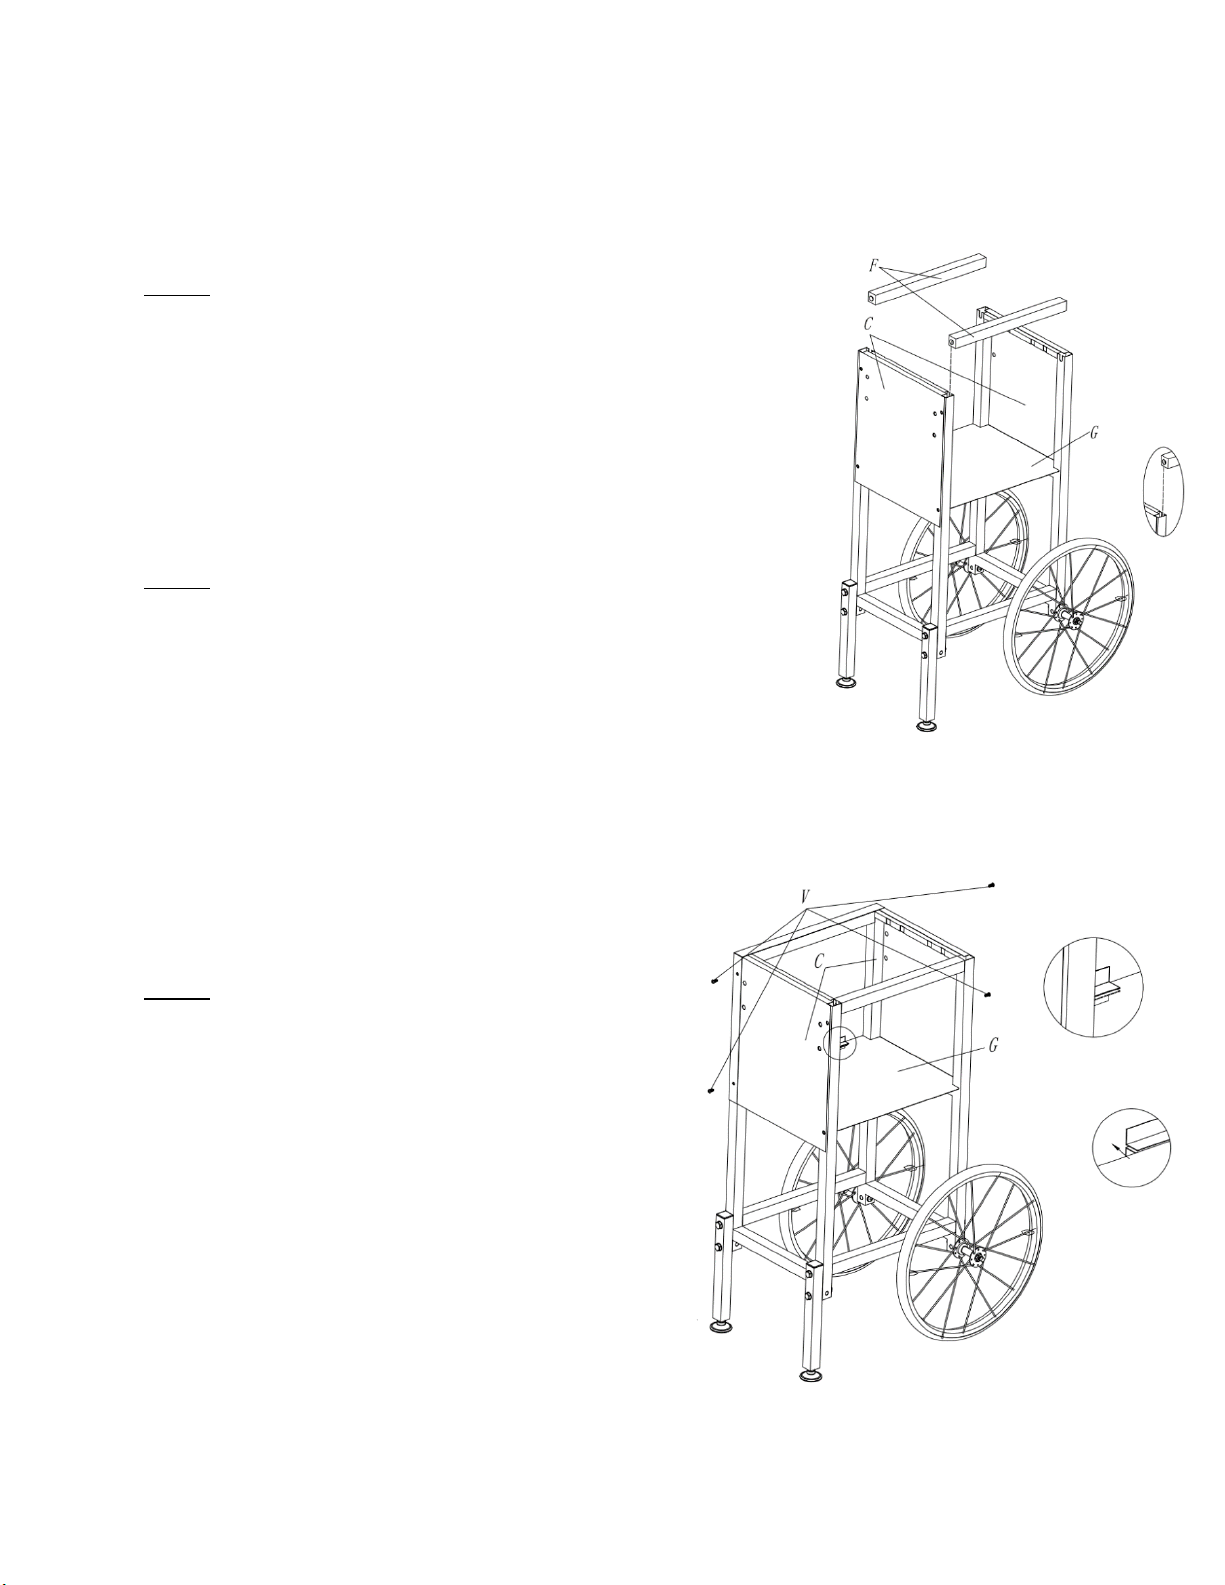
STEP 4:
Attach both HORIZONTAL SUPPORTS - BASE (E) to the same
SUPPORT STAND (C) using two BOLTS (T) each with one
WASHER (R). Tighten with wrench.
STEP 5:
Insert two BOLTS (U), each with one WASHER (R), into each
SUPPORT LEG (B). Attach SUPPORT LEG (B) to the SUPPORT
STAND (C) on the opposite side of the wheels. Tighten with
wrench.