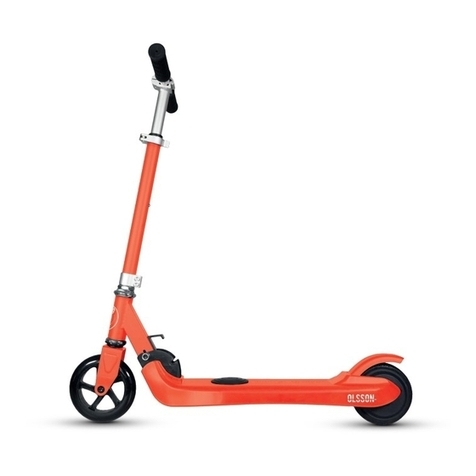
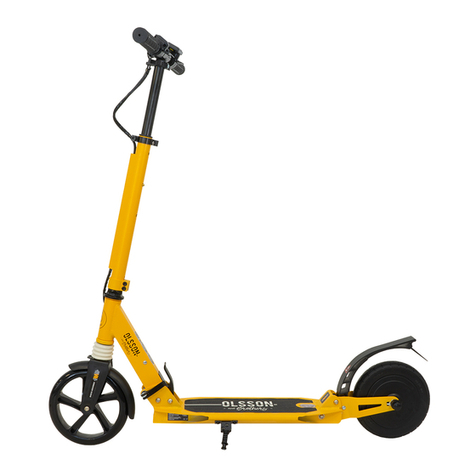
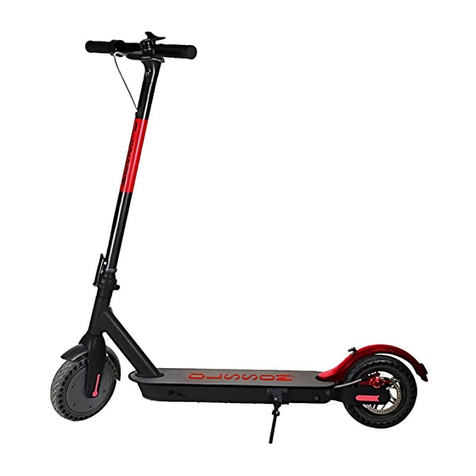
Olsson and Brothers Fresh Advanced User manual

MANUAL DE USUARIO Y GARANTÍA
USER’S MANUAL AND WARRANTY
GUIA DO UTILIZADOR E GARANTIA
GUIDE DE L’UTILIZATEUR ET GARANTIE
BENUTZERHANDBUCH UND GARANTIE

ÍNDICE
INDEX / INHALTSVERZEICHNIS
03 | Español
14 | English
25 | Português
36 | Français
47 | Deutsch

ES
3
PATINETE ELÉCTRICO OLSSON&BROTHERS
FRESH
MANUAL DE USUARIO Y GARANTÍA
Bienvenido a la familia
Olsson&Brothers
Descubre tu nuevo patinete eléctrico FRESH
Gracias por habernos elegido. Para poner en funcionamiento tu patinete eléctrico
y empezar a disfrutar de una experiencia enriquecedora te aconsejamos leer muy
atentamente este manual.
INDICE
1. Contenido de la caja...................................................................................................... 4
2. Consejos de seguridad.............................................................................................. 4
3. Mantenimiento....................................................................................................................... 4
4. Carga y mantenimiento de la batería............................................... 5
5. Componentes del patinete eléctrico................................................... 6
6. Pasos para encender tu patinete eléctrico................................ 6
7. Panel de control del display multifunción...................................... 7
8. Montaje del patinete eléctrico....................................................................... 8
9. Como plegar el patinete eléctrico........................................................... 8
10. Indicaciones para el manejo del patinete................................. 9
11. Ajuste del disco de freno........................................................................................ 9
12. App Olsson Stroot............................................................................................................. 9
13. Prestaciones equipos................................................................................................. 11
14. Más información y soporte............................................................................... 12
ADVANCED

ES
4
3. MANTENIMIENTO
Limpia y seca el patinete después de cada uso.
No mojes tu patinete. Si se estropea, no estará cubierto por la garantía.
El neumático debe reemplazarse cuando aparezca algún síntoma de desgaste o rotu-
ra, contacta con el distribuidor para reemplazar el neumático cubierta original.
2. CONSEJOS DE SEGURIDAD
1. CONTENIDO DE LA CAJA
x 1
x 1
x 1
x 1
x 2
›Patinete eléctrico
›Manual de usuario
›Cargador
›Llave allen
›Este producto no es un juguete.
›Producto recomendado a partir de 8
años y en niños siempre supervisado
por un adulto.
›Sólo puede ir una persona sobre el
patinete.
›Utiliza casco y protecciones de ma-
nos, codos y rodillas.
›Es obligatorio llevar siempre calzado
›Conduce siempre con las dos manos
en el manillar, no utilices el teléfono ni
hagas movimientos o saltos peligrosos.
›Antes de poner en circulación tu pa-
tinete eléctrico, asegúrate de conocer
la legislación de tu localidad.
›Utiliza sólo accesorios originales de la
marca OLSSON&BROTHERS.
›Cuanto mayor sea la velocidad del
patinete eléctrico mayor será la dis-
tancia de frenado.
›Conduce a una velocidad adecuada
y mantén siempre la distancia de
seguridad con los peatones y otros
vehículos.
›Se recomienda bajar del patinete
cuando los obstáculos sean peligrosos
por su forma, altura o deslizamiento.
›Evita la lluvia, el agua y las temperatu-
ras extremas.
›No circules por charcos de agua con
profundidad superior a 4cm.
›Ten especial precaución al circular
por zonas oscuras o con poca visibi-
lidad.
›No cuelgues objetos pesados en el
manillar.
›No toques el freno de disco después
de su uso, ya que puede producir que-
maduras.
›Asegúrate de que tu patinete eléctrico
funciona bien antes de cada viaje.
›Conserva el manual de instrucciones
impresas para su posterior consulta.
›Utiliza tu patinete eléctrico en super-
cies lisas, ya que disminuye la posibili-
dad de deterioro de las ruedas.
ES
5
Este patinete incorpora un sistema de frenado con piezas de desgaste; vigila su estado
y en caso necesario, visita un centro ocial para su sustitución.
Verica si hay tornillos sueltos en el patinete. Si hay alguno ojo, apriétalo.
Mantén limpio el disco de freno trasero para evitar roturas.
Advertencia: No utilices alcohol, gasolina, queroseno, disolventes quími-
cos volátiles u otras soluciones corrosivas para limpiar el patinete. De lo
contrario, causarás graves daños a la estructura y/o los elementos in-
ternos.
4. CARGA Y MANTENIMIENTO DE LA BATERÍA
Te recomendamos cargar la batería al completo antes de usar por primera vez tu pa-
tinete eléctrico.
El patinete tiene que estar apagado para cargar la batería.
Conecta el cargador a tu patinete eléctrico a través del conector situado en el lateral
de la base. A continuación enchufa el cargador a la corriente.
El visualizador de la batería te indicará el nivel de carga.
El tiempo de carga de la batería dependerá de su capacidad, pudiendo llegar a tardar
hasta 5 horas.
Cuando el patinete esté inactivo por un tiempo prolongado, debe cargarse la batería al
menos una vez al mes para que no sufra daños.
El cargador está provisto de una función de protección de carga, de modo que la carga
se detendrá automáticamente cuando la batería esté cargada al 100%.
No utilices baterías de otras marcas ni cargadores no compatibles.
Evita el contacto con objetos metálicos para evitar que ocurra un cortocircuito.
Advertencia: Ante la pérdida o deterioro del adaptador AC (cargador
original) te recomendamos ponerte en contacto con el servicio técnico
ocial para adquirir uno nuevo compatible.
Después de cada uso del patinete eléctrico carga la batería para prolongar su vida útil.
Usar el patinete eléctrico a temperatura ambiente normal permite que la batería pueda
recorrer una distancia mucho mayor y su rendimiento sea mejor, pero si utiliza el patine-
te eléctrico a temperaturas inferiores a 0 grados, el rendimiento del patinete disminuirá.
Advertencia: Las baterías de los patinetes Olsson&Brothers incorporan
un chip inteligente que almacena información sobre su carga-descar-
ga. Si no cargas la batería durante mucho tiempo, puedes causar daños
graves no incluidos en el servicio de garantía gratuito.

ES
6
Recuerda hacer esto cada vez que quieras utilizarlo.
Enciende el patinete
pulsando el botón On Acelera al máximo y
mantenlo pulsado
Mientras aceleras al
máximo aprieta la
maneta de freno hasta
el nal. A continuación,
escucharás un bip
6. PASOS PARA ENCENDER TU PATINETE ELÉCTRICO
¡ATENCIÓN! SIGUE ESTOS PASOS ANTES DE ENCENDER EL PATINETE
1 2 3
Maneta de freno
Acelerador
Panel de control
Plegado
Rueda motor
Compartimento
batería
Soporte
Luz freno
Disco freno
Hebilla cierre
plegado
Puerto carga
alimentación
Luz delantera
Botón encendido
5. COMPONENTES DEL PATINETE ELÉCTRICO

ES
7
Botón de encendido/apagado: Para encender el scooter, pulse el botón de la parte
superior y para apagarlo, mantenga pulsado el botón durante varios segundos.
Botón de encendido/apagado de luces: Pulsa solo una vez de manera rápida.
Indicador de velocidad: Muestra la velocidad del patinete en ese momento.
Indicador de nivel de batería: Muestra mediante 5 barras el nivel de batería.
Cuando el nivel de batería sea bajo, la luz parpadeará y se activará automática-
mente el modo de ahorro de energía reduciendo la potencia del motor.
Indicador del modo de velocidad: Para cambiar de un modo a otro presiona el
botón de encendido/apagado 2 veces seguidas.
MODO PEATÓN Velocidad máxima de 6 km/h
MODO ECO Velocidad máxima de 15 km/h
MODO DRIVE Velocidad máxima de 20 km/h
MODO SPORT Velocidad máxima de 25 km/h
*Las velocidades máximas en función del modo de conducción pueden cambiar según modelo y versión
Modo control de crucero:
1. Pulsa el acelerador hasta llegar a la velocidad deseada.
2. Mantén esa velocidad durante unos segundos.
3. ¡Tu patinete eléctrico emitirá un pitido y habrás activado el modo crucero!
Desactivar el modo control de crucero: Frena tu patinete apretando el freno de
mano o el eléctrico.
4
5
3
2
1
7. PANEL DE CONTROL DEL DISPLAY MULTIFUNCIÓN
E
D
S
Indicador modo
velocidad
Indicador de
velocidad
Indicador
Bluetooth
Botón de
encendido/apagado
Indicador
encendido Luces
Indiciador de
nivel de batería
3
4
5
6
1
2
Indicador
Averia 7

ES
8
9. COMO PLEGAR EL PATINETE ELÉCTRICO
Antes de plegar tu patinete asegúrate de que está apagado.
Advertencia: Si observas que el
manillar tiene alguna vibración
durante la conducción, comprue-
ba que los tornillos del mecanis-
mo de plegado están bien apre-
tados.
8. MONTAJE DEL PATINETE ELÉCTRICO
21
3
1 2 3
Instala el
cabezal del
manillar
en la barra
vertical y
asegúrate de
que los cables
quedan por
dentro
Coloca los 4 tornillos incluidos para jar el
manillar a la barra
ADVERTENCIA: Enrosca todos los tornillos suavemente
para asegurar que están bien colocados y una vez
asegurados apriétalos con la llave allen.
Apretar los tonillos uno por uno puede causar que
nalmente no encajen correctamente.
Pulsa el botón de encendido situado en el display.
Despliega
la barra
vertical y
asegúrala
con el cierre
Smart
Security

ES
9
10. INDICACIONES PARA EL MANEJO DEL PATINETE
›Enciende el patinete y comprueba el nivel de batería.
›Con un pie colócate sobre la base del patinete y con el otro impúlsate.
›En movimiento coloca los dos pies sobre la base.
›Sólo cuando los dos pies estén bien colocados sobre la base del patinete puedes
presionar el acelerador. Es importante tener cuidado y no acelerar bruscamente.
›Para reducir la velocidad, debes de presionar el acelerador en modo contrario o
bien frenar con la maneta del freno. Este patinete incorpora un doble sistema de
freno (freno eléctrico y freno de disco) que actúan conjuntamente a través de la
maneta de freno situada en el manillar.
›El patinete incorpora el Sistema E-ABS que hace que la rueda delantera no se blo-
quee en las frenadas para así evitar derrapes.
11. AJUSTE DEL DISCO DE FRENO
›Si la maneta de freno está muy dura o tensa y notas que el patinete frena mucho o
muy brusco, utiliza la llave Allen para aojar el tornillo que hay en la pinza de freno y
alarga un poco la longitud del cable del freno. Vuelve a apretar el tornillo.
›Si la maneta de freno está muy oja o notas que el patinete frena poco, utiliza la
llave Allen para aojar el tornillo que hay en la pinza de freno y acorta un poco la
longitud del cable del freno. Vuelve a apretar el tornillo.
12. APP OLSSON STROOT
¡Descárgate la app
“Olsson Stroot’’!
La velocidad y autonomía pueden variar por diferentes variables; peso de usuario, tipo de
conducción, calidad del asfalto, temperatura, pendientes en el recorrido, entre otras. Las
características técnicas y accesorios incluidos pueden ser susceptibles de cambio según
versión de producto. La imagen impresa en la caja puede ser diferente del producto real.
Lee atentamente el manual de usuario antes de poner en marcha el equipo. Este producto
no es un juguete se recomienda el uso de protecciones.

ES
10
CONFIGURA TU PATINETE:
Cambia el modo de velo-
cidad o la velocidad, con-
sulta el nivel de batería
y enciende o apaga las
luces.
BLOQUEA TU PATINETE:
Pulsa el icono de bloqueo
para mantener tu patinete
seguro en todo momento.
El icono del candado se ilu-
minará cuando esta fun-
ción esté activada.
Encendido o apagado de
luces con un solo clic. Cambia de un modo de
velocidad a otro.

ES
11
13. PRESTACIONES EQUIPOS
500W (NOMINAL 400W)
10.000 mAh
HASTA 25 KMH
HASTA 6 HORAS
MOTOR W
BATERIA
VELOCIDAD
TIEMPO CARGA
10”
ANTI PINCHAZOS
ALUMINIO REFORZADO
SISTEMA DOBLE SEGURIDAD
SI
SI
SI
SI
SI
14,6KG
SI
ALTO 1150MM X ANCHO
435MM X 1180MM DE LARGO
ALTO 520MM X ANCHO 435MM
X 1180MM DE LARGO
120KG
RUEDA PULGADAS
CLASE
TIPO RUEDA
MATERIAL CUADRO
PLEGADO
FRENO DISCO
LUZ DELANTERA/TRASERA
FRENO ELÉCTRICO
APP
BLUETOOTH
PESO
DISPLAY
SIN PLEGAR
PLEGADO
PESO MAX SOPORTADO
2

ES
12
Sergio Barquín, Gerente
20 de Marzo de 2022
14. MÁS INFORMACIÓN Y SOPORTE
Para más información de nuestros productos, consejos prácticos, preguntas frecuen-
tes, manuales de usuario, etc… visita nuestra web en www.olssonandbrothers.com
Para contactar con nuestro servicio de asistencia técnica contáctanos a través del
Este producto incorpora una batería de litio, que en caso de destrucción del patinete,
debe de extraerse para su adecuada gestión.
DECLARACIÓN DE CONFORMIDAD
La empresa Rider Division SL, ubicada en polígono industrial de Barros nº 29, 39408
Barros, Cantabria con número de teléfono 942812900 y cif 39856463.
Declaramos bajo nuestra exclusiva responsabilidad la conformidad de los productos:
FRESH ADVANCED
EN 17128:2020 (CLASE 2)
Con las disposiciones de la directiva 2014/30/EU Estándares: EN17128:2020, EN 55014-
1:2017, EN 55014-2:2015, EN 61000-6-1:2019, EN 61000-3-2:2019, EN 61000-3-3:2013+A1:2019, EN
61000-6-3:2007+A1:2011+AC:2012, EN 62233:2008
Made in
P.R.C.

ES
13
CERTIFICADO DE GARANTÍA
Modelo:
Nº serie: (Incluido en el equipo)
Fecha de compra:
Rider División S.L., concede a través de este certicado el periodo de garantía aplica-
ble según la normativa legal en el país de compra. Esta garantía se dará tanto para el
producto como para las piezas a las que pueda imputarse un defecto de fabricación.
Consulte la ley actual de su país para más información. Además, es imprescindible que
mantenga la factura de compra junto a este documento de garantía, siendo ambos
imprescindibles para hacer uso de la misma.
La Garantía Legal cubre la reparación, en tal caso, éstas serán gratuitas para el consu-
midor, incluyendo mano de obra y materiales. En todo caso, las reparaciones en garan-
tía deben ser efectuadas por Servicio de Asistencia Técnica Ocial de Rider Division o
distribuidores autorizados. La reparación o sustitución suspenderá el cómputo del plazo
de la Garantía Legal, no dando lugar en ningún caso a un nuevo plazo de dos años de
garantía desde la entrega del producto reparado/sustituido.
Además, en ningún caso existirá falta de conformidad y por lo tanto no será de aplica-
ción la Garantía Legal cuando:
Dicho producto o cualquiera de sus identicativos (número de serie, etc.) hayan sido,
total o parcialmente, abiertos, montados, desmontados, manipulados y/o reparados
por persona ajena a los
Servicios de Asistencia Técnica Ocial o distribuidores autorizados de Rider Division.
La falta de conformidad sea consecuencia de una instalación incorrecta (salvo que la
instalación haya sido realizada por el vendedor autorizado de Rider Division o bajo su
responsabilidad. La falta de conformidad se deba al uso de accesorios, cargadores o
consumibles que no sean originales de Rider Division y diseñados para el producto.
Haya rotura de cualquiera de los sellos de la carcasa o celdas de la batería, o bien indi-
cios evidentes de manipulación en los mismos.
Los daños que se produjeran en el producto fueran causados por cualquier causa de
fuerza mayor o caso fortuito.
No realizar el mantenimiento aconsejado en el manual de usuario.
Ninguna de las garantías aquí recogidas cubre la sustitución de piezas debido al des-
gaste o rotura de mecanismos, gomas, carcasas y/o plásticos.
No se cubre la sustitución de la batería, que requiere de un mantenimiento especial y su
vida útil esta limitada por el numero de descargas.
No se cubren los deterioros estéticos debidos al uso normal del producto.
Datos del propietario
Nombre/apellidos:
Domicilio:
C.P: Localidad:
Provincia: Teléfono:
Sello establecimiento vendedor:

EN
14
OLSSON&BROTHERS ELECTRIC SCOOTER
FRESH
USER MANUAL AND WARRANTY
Welcome to the
Olsson&Brothers family
Discover your new electric scooter FRESH
Thank you for choosing us. To put your electric scooter into operation and start
enjoying and enriching experience, we recommend you to read this manual very
carefully.
INDEX
1. Contents of the box........................................................................................................................... 15
2. Safety advice............................................................................................................................................. 15
3. Maintenance.............................................................................................................................................. 15
4. Battery charging and maintenance...................................................................... 16
5. Electric scooter components............................................................................................ 17
6. Step-by-step guide to getting started with an electric scooter....... 17
7. Multifunction display control panel........................................................................... 18
8. Assembly of the electric scooter.................................................................................. 19
9. Como plegar el patinete eléctrico............................................................................ 19
10. Indications for the operation of the scooter............................................ 20
11. Brake disc adjustment................................................................................................................. 20
12. App olsson stroot............................................................................................................................... 20
13. Prestaciones equipos.................................................................................................................. 22
14. Más información y soporte................................................................................................ 23
ADVANCED

EN
15
2. SAFETY TIPS
1. CONTENTS OF THE BOX
x 1
x 1
x 1
x 1
x 2
›Electric scooter
›User’s manual
›Charger
›Allen key
›This product is not a toy. Product re-
commended for children from 8 years
of age and older, always supervised
by and adult.
›Only one person may ride on the
scooter.
›Use helmet and hand, elbow and knee
protectors.
›It is mandatory to wear shoes at all ti-
mes.
›Always ride with both hands on the
handlebar, do not use the pone or
make dangerous movements or
jumps.
›Before putting your electric scooter
into circulation, make sure you know
your local legislation.
›Use only original OLSSON&BROTHERS
brand accessories.
›The higher the speed of the electric
scooter the greater the braking dis-
tance.
›Drive at an appropriate speed and
always keep a safe distance from pe-
destrians and other vehicles.
›It is recommended to get off the scoo-
ter when obstacles are dangerous be-
cause of their shape, height or sliding.
›Avoid rain, water and extreme tempe-
ratures.
›Do not drive through puddles of water
deeper than 4 cm.
›When driving in dark or poor visibility
areas, be extremely cautious.
›Do not hang heavy objects on the
handlebar.
›After using the disc brake, do not touch
it as it may cause burns.
›Make sure your electric scooter is in
good working order before each trip.
›For future reference, keep the printed
instruction manual.
›Use your electric scooter on smooth
surfaces, as it decreases the possibi-
lity of wheel damage
3. MAINTENANCE
Clean and dry the scooter after each use.
Do not get your scooter wet. If it gets damaged, it will not be covered under warranty.
The tire must be replaced when any symptoms of wear or breakage appear, contact the
distributor to replace the original tire-casing.

EN
16
This scooter incorporates a braking system with wearing parts; monitor their condition
and if necessary, visit an ofcial center for replacement.
Check for loose screws on the scooter. If any are loose, tighten them.
Keep the rear brake disc clean to avoid breakage.
Warning: Do not use alcohol, gasoline, kerosene, volatine chemical sol-
vents or other corrosive solutions to cleam the scooter. Otherwise, you will
cause serious damage to the structure and/or internal elements.
4. BATTERY CHARGING AND MAINTENANCE
We recommend that you fully charge the battery before using your electric scooter for
the rst time.
The scooter must be turned off to charge the battery.
Connect the charger to your electric scooter through the connector on the side of the
base. Then plug the charger into the power supply.
The battery display will indicate the charge level.
The battery charging time will depend on the capacity of the battery and can take up
to 5 hours.
When the battery is inactive for a long period of time, it should be charged at least once
a month to avoid damaging it.
The charger is provided with a charge protection function, so that charging will stop au-
tomatically when the battery is 100% charged.
Do not use other brands of batteries or non-compatible chargers.
Avoid contact with metal objects to prevent a short circuit from occurring.
Warning: If the AC adapter (original charger) is lost or damaged, we re-
commend that you contact the ofcial technical service to purchase a
new compatible one.
After each use of the electric scooter, charge the battery to prolong its life.
Using the electric scooter at normal ambient temperature allows the battery to travel a
much longer distance and its performance will be better, but if you use the scooter at
temperaturas below 0 degrees, the performance of the vehicle will decrease.
Warning: Olsson&Brothers scooter batteries incorporate a smart chip
that stores information about their charge-discharge. If you do not char-
ge the battery for a long time, you may cause serious damage not inclu-
ded in the free warranty service.

EN
17
5. ELECTRIC SCOOTER COMPONENTS
Make sure you do this every time you use it.
Turn on the scooter by
pressing the On button
Hold the accelerator at full
throttle and accelerate to
full speed
While accelerating at full
throttle, press the brake
lever all the way down.
Then you will hear a beep
6.STEP-BY-STEPGUIDETOGETTINGSTARTEDWITHANELECTRICSCOOTER
ATTENTION! FOLLOW THESE STEPS BEFORE STARTING THE SCOOTER
1 2 3
Handbrake
Throttle
Control Panel
Folding
Motor Wheel
Battery
Parking
Sop light
Disc Brake
Buckle
Charging Port
Front LED
Power Button

EN
18
On/Offbutton: To turn the scooter on, press the button on the top of the scooter and
to turn it off, press and hold the button for several seconds.
Light on/off button: Press once quickly.
Speed display: shows on the screen the scooter speed at that time.
Battery level indicator: Displays the battery level with 5 bars.
When the battery level is low, the light will ash and the energy saving mode will be
automatically activated by reducing the motor power.
Speed mode indicator: To switch from one mode to another press the on/off but-
tons 2 times in succession.
PEDESTRIAN MODE Maximun speed 6 km/h
ECO MODE Maximun speed 15 km/h
DRIVE MODE Maximun speed 20 km/h
SPORT MODE Maximum speed of 25 km/h
*Maximun speeds depending on driving mode may change depending on model and version
Cruise control mode:
1. Press the accelerator until the derired speed is reached.
2. Maintain this speed for a few seconds.
3. Your electric scooter will beep and you have activated cruise mode!
Deactivated the cruise control mode: Brake your scooter by pressing the hand or
electric brake.
4
5
3
2
1
E
D
S
7. MULTIFUNCTION DISPLAY CONTROL PANEL
Speed mode
indicator
Speed
Indicator
Bluetooth
Indicator
Power button
Lights ON
Indicator
Battery level
indicator
3
4
5
6
1
2
Fault
Indicator 7

EN
19
9. HOW TO FOLD THE ELECTRIC SCOOTER
Before folding your scooter, make sure it is turned off
Warning: If you notice any vibra-
tion of the handlebar while riding,
check that the screws of the fol-
ding mechanism are tightened
securely.
8. ASSEMBLY OF THE ELECTRIC SCOOTER
21
3
1 2 3
Install the
handlebar
head on the
vertical bar
and make
sure that the
wires are on
the inside
Place the 4 screws included to attach the
handlebar to the bar
WARNING: Screw in all crews softly to ensure that they are
properly positioned and once secured, tighten them with
the allen wrench.
Tightening the screws one by one may cause them to
eventually not t correctly.
Press the power button located on the display.
Unfold the
vertical bar
and secure
it with the
Smart
Security lock

EN
20
10. INDICATIONS FOR THE HANDLING OF THE SCOOTER
›Turn on the scooter and check the battery level.
›With one foot place yourself on the base of the scooter and with the other foot push
off.
›In movement, place both feet on the base.
›Only when both feet are well positioned on the base of the scooter can you press
the accelerator. It is imporant to be careful and not to accelerate sharply.
›To slow down, you must press the accelerator in reverse mode or brake with the
brake lever. This scooter incorporates a doublé brake system (electric brake and
disc brake) that act together through the brake lever located on the handlebar.
›The scooter incorporates the E-ABS system that prevents the front wheel from loc-
king during braking to avoid skidding.
11. BRAKE DISC ADJUSTMENT
›If the brake lever is too hard or too tight and you notice that the scooter brakes too
mucho r too abrupty, use the Allen key to loosen the screw on the disc brake and ex-
tend the length of the brake cable a Little. Retighten the screw.
›If the brake lever is too loose or you notice that the scooter brakes too Little, use the
Allen key to loosen the screw on the disc brake and shorten the length of the brake
cable a Little. Retighten the screw.
12. OLSSON STROOT APP
Download the ‘’OLSSON
STROOT’’ App!
The speed and autonomy can vary by different factors; user weight, type of driving, asphalt
quality, temperature, slopes along the route, among others. The technical characteristics
and accessories included may be subject to change depending on the product version.
The image printed on the box may be different from the actual product. Read the user’s
manual carefully before rst use. This product is not a toy. The use of protections is
recommended.
Table of contents
Languages:
Other Olsson and Brothers Scooter manuals

Olsson and Brothers
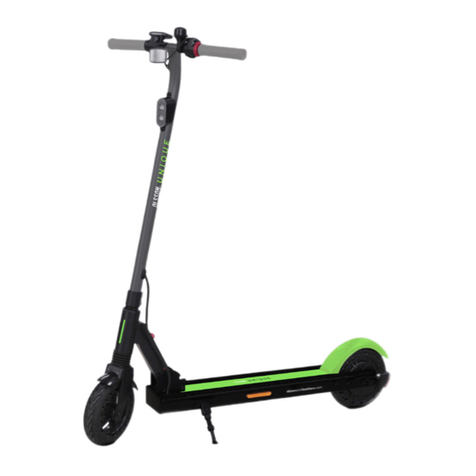
Olsson and Brothers Unique User manual

Olsson and Brothers
Olsson and Brothers STROOT BONNEVILLE 5 User manual

Olsson and Brothers
Olsson and Brothers STROOT B8 User manual

Olsson and Brothers
Olsson and Brothers Stroot FLIP User manual

Olsson and Brothers
Olsson and Brothers STROOT SPECTRE User manual

Olsson and Brothers
Olsson and Brothers E-SCOOTER User manual

Olsson and Brothers
Olsson and Brothers Fresh Wildred User manual

Olsson and Brothers
Olsson and Brothers Stroot FUN User manual

Olsson and Brothers
Olsson and Brothers Fresh Neon User manual