manuals.online logo
Brands
  1. Home
  2. •
  3. Brands
  4. •
  5. Olympus
  6. •
  7. Microscope
  8. •
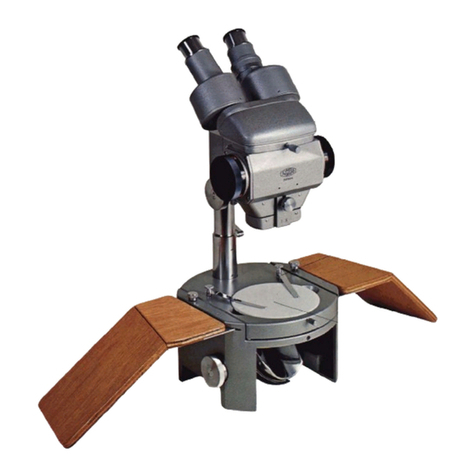
  9. Olympus SZ4045TR User manual

Olympus SZ4045TR User manual

This manual suits for next models

2

Other Olympus Microscope manuals

Olympus DP21-SAL User guide

Olympus

Olympus DP21-SAL User guide

Olympus CH30 User manual

Olympus

Olympus CH30 User manual

Olympus SZX16 User manual

Olympus

Olympus SZX16 User manual

Olympus U-LGPS User manual

Olympus

Olympus U-LGPS User manual

Olympus FLUOVIEW FVMPE-RS User manual

Olympus

Olympus FLUOVIEW FVMPE-RS User manual

Olympus CKX31 Operating instructions

Olympus

Olympus CKX31 Operating instructions

Olympus DP71 User manual

Olympus

Olympus DP71 User manual

Olympus BHSU Installation instructions

Olympus

Olympus BHSU Installation instructions

Olympus Fluoview FV1000 Manual

Olympus

Olympus Fluoview FV1000 Manual

Olympus CX21LED User manual

Olympus

Olympus CX21LED User manual

Olympus FV5-LD405 User manual

Olympus

Olympus FV5-LD405 User manual

Olympus BX-RLA2 User manual

Olympus

Olympus BX-RLA2 User manual

Olympus FHT-521 User manual

Olympus

Olympus FHT-521 User manual

Olympus SZX-DA User manual

Olympus

Olympus SZX-DA User manual

Olympus CH Series Operating instructions

Olympus

Olympus CH Series Operating instructions

Olympus SZX16 User manual

Olympus

Olympus SZX16 User manual

Olympus BX41 User manual

Olympus

Olympus BX41 User manual

Olympus IX73 User manual

Olympus

Olympus IX73 User manual

Olympus BH2 Series User manual

Olympus

Olympus BH2 Series User manual

Olympus SZX10 User manual

Olympus

Olympus SZX10 User manual

Olympus IX71 User manual

Olympus

Olympus IX71 User manual

Olympus IX2-RFSPOT User manual

Olympus

Olympus IX2-RFSPOT User manual

Olympus BHS User manual

Olympus

Olympus BHS User manual

Olympus BX51 User manual

Olympus

Olympus BX51 User manual

Popular Microscope manuals by other brands

Brütsch Rüegger FUTURO instruction manual

Brütsch Rüegger

Brütsch Rüegger FUTURO instruction manual

Elenco Electronics EDU-41003 instructions

Elenco Electronics

Elenco Electronics EDU-41003 instructions

Nikon SMZ25 instruction manual

Nikon

Nikon SMZ25 instruction manual

National DC3-163 instructions

National

National DC3-163 instructions

KERN Optics OPE-1 User instructions

KERN Optics

KERN Optics OPE-1 User instructions

OPTIKA MICROSCOPES B-150D Operation manual

OPTIKA MICROSCOPES

OPTIKA MICROSCOPES B-150D Operation manual

Prior Lux POL operating instructions

Prior

Prior Lux POL operating instructions

Opitec Smartscoop 115615 instructions

Opitec

Opitec Smartscoop 115615 instructions

KERN OPO-1 operating instructions

KERN

KERN OPO-1 operating instructions

Topcon SP-1P user manual

Topcon

Topcon SP-1P user manual

AO Cycloptic Reference manual

AO

AO Cycloptic Reference manual

Leica DVM5000 Setup manual

Leica

Leica DVM5000 Setup manual

MshOt MZ62 user manual

MshOt

MshOt MZ62 user manual

Celestron 44345 instruction manual

Celestron

Celestron 44345 instruction manual

KERN Optics OZR-5 User instructions

KERN Optics

KERN Optics OZR-5 User instructions

VWR VisiScope 384 Series instruction manual

VWR

VWR VisiScope 384 Series instruction manual

Leica DI C800 User's manual & installation instructions

Leica

Leica DI C800 User's manual & installation instructions

Atlantis SL 2000 user manual

Atlantis

Atlantis SL 2000 user manual

manuals.online logo
manuals.online logoBrands
  • About & Mission
  • Contact us
  • Privacy Policy
  • Terms and Conditions

Copyright 2025 Manuals.Online. All Rights Reserved.

(1) As the microscope is a piece of precision equipment, always handle with care, avoiding abrupt
movement or impact during transportation or Operation of controls.
(2) Avoid exposure to direct sunlight, high temperature and humidity, dust and Vibration.
(3) Avoid leaving dir-t or fingerprints on the lens surfaces, as a dirty mirror or lenses may reduce
image clarity.
(4) When using photomicrographic equipment or a large-size Video Camera, mount the microscope
body at an angle of less than 3” from the perpendicular in Order to assure microscope stability.
(5) Use a compact Video Camera, dedicated for C-mount, with a picture area of 2/3” or smaller and
weighing 2.5 kg or less.
(6) Be sure to hold the Camera with one hand when unloading film from a large-format Camera in
Order to prevent it from falling over.
(7) Never turn the right and left zoom control knobs in opposite directions, as malfunction may
result.
(1) Clean all glass components by wiping gently with gauze. To remove fingerprints or oil smudges,
wipe with gauze slightly moistened with a mixture of ether (70%) and alcohol 130%).
A
Since solvents such as ether and alcohol are highly flammable, they must be handled carefully.
Be sure to keep these chemicals away from open flames or potential sources of electrical
Sparks - for example, electrical equipment that is being switched on or off. Also remember
to always use these chemicals only in a weil-ventilated room.
(2) DO not use organic solutions to wipe the surfaces of other components. Plastic Parts especially,
should be cleaned with a neutral detergent.
(3) Never attempt to disassemble the microscope as decreased Performance may result.
(4) When not in use, be sure to cover the microscope with the dust cover provided, and store in
an area free from moisture to prevent rust.
CONTENTS
--
0 10 !-
Zoom stereo
microscope SZ4045TR-F
SZ6045TRF
SZ1145TR-F
0 0
3
0 0
0
Eyepiece GSWHI OX
0
Phototube SZ-PT
Photo eyepiece NFK3.3XLD
0 l 1 0
0
=F
0
0 C
l
0
0 0 0
0 0 0
C-mount Video adaptt
Stand SZ-ST
Stage plate SP-BW-2
0 0
Stage Clip
0 C
Dust cover
0 C
Note: 0 indicates the compatible components for each model.
Zoom ratio
Working distance (W.D.1
Zoom stereo
microscope body 0.67X - 4X I IX-6.3X I 1.8-IlX
6 l 6.3 l 6.1
110 mm I 100 mm / 73 mm
Zoom drive Horizontal axial drive control knobs
Observation tube inclination 45O
Right and left tubes interlocked
Adjustment range: 50-76mm (with GSWHIOX)
Interpupillary distance
adjustment
Diopter adjustment Provided on one
eyepiece tube only Provided on both eyepiece tubes
Diopter adjustment range: +5 m-‘(per metar)
Screw-in fM48X0.75)Conversion lens mount
Photo tube/C-mount Video
adapter mount Fit into mounting port with inner diameter of 38 mm
With positioning pins
Light path selection Controlled by lever, 100% BI or 100% CAMERA
Eyepiece Field number (F.N.1 22 (GSWHIOX)
Eyepiece micrometer mount $24 mm micrometer mountable
Stand Fit into mounting port with inner diameter of 76 mmMicroscope body mount
Stage plate +lOOmm, frosted white on one side and black on the other side
Stage Clip Pressed down from above
Focusing Rack-and-pinion drive on ball bearing guides, knob rotation
tension adjustment, focusing range: 120 mm
Epi-illuminator (LSGA) and trans-illuminator base mountable
Illuminator mount
Mounting to microscope
body
Photo tube Fit into mounting port with outer diameter of 38 mm
With positioning groove
Photomicrographic equipment
mount Fit into mounting port with outer diameter of 38 mm
360’ rotatable
IX
Intermediate magnification
Mounting to microscope body
C-mount Video
adapter Fit into mounting port with outer diameter of 38 mm
With positioning groove
Video Camera mount Video Camera mounting with C-mount
C-mount detachable and rotatable 360”
0.5x
Intermediate magnification
Tube length adjustment With tube length adjustment ring
With Photo tube 1
Photographit
eauioment mountina
oort
,---’ Tiqhten securely with a coin, etc.
wearing eyeglasses
Zoom control knob
(With C-mount Video adapter 1
1Video adapter 1
\ Clamping knob
Screw into the Video Camera and then
mount to the Video adapter.
Tube length
C mount
adjustment ring
- - Clamping knob
Tlghten securely with a coin, etc.
The diagram below illustrates the assembly procedure. The numbers indicate the assembly sequence.
+ Make sure all connecting surfaces are clean before assembly and avoid scratching the glass sutfaces.
IOM mount Camera1
I I
(1 I
I Photo micro adapter L
Eye shield
Eyepiece
1C-mount Video Camera 1
\8 y;
C-mount
v
“‘--7ninn
f7
Video adapter
Eyepiece w, 0 ~
I 10 knob
...
.-------- 3odv
0
Body clamping knob
Stage Clip
IX ’
“1) Mount the C-mount to the Video Camera and then to the Video adapter.
“2) Mount photomicrographic equipment in accordance with its instruction manual.
Fig. 1
Fig. 2
Diopter adjustment ring
Fig. 3
Left diopter Right diopter
adjustment ring adjustment ring
Fig. 4
(1) Usually, the Stage plates are used with the frosted white side facing
the objective. However, if the specimen is white or brightly colored, use
the black side of the plate as the darkened background increases image
contrast.
(2) To remove the Stage plates, press down the supporting end of the plate
with a fingertip, and the other end will flip up. (Fig. 1)
(1) Turn one focusing knob with the other focusing knob tightened, by
holding both knobs, in Order to increase or decrease the rotation tension,
depending on the turning direction. (Fig. 2)
(2) This adjustment is intended to prevent the microscope body from drifting.
Set the knob tension at a level slightly stiffer than that to insure no
unintentional movement and facilitate easy Operation.
q
(1) Place the specimen in the Center of the Stage plate, and hold the specimen
with the Stage Clips if necessary.
(2) Illuminate the specimen using an optional illuminator.
For SZ4045TR
(1) Minimize the magnification power by turning the zoom control knobs.
(2) Looking through the right eyepiece, bring the specimen into focus by
turning the focusing knobs.
(3) Looking through the left eyepiece, bring the specimen into focus by
turning the diopter adjustment ring. (Fig. 3)
(4) Maximize the magnification power by turning the zoom control knobs,
and bring the specimen into focus by turning the focusing knobs.
For SZ6045TR and SZ1145TR
(1) Maximize the magnification power by turning the zoom control knobs.
(2) Looking through the right eyepiece, bring the specimen into focus by
turning the focusing knobs.
(3) Minimize the magnification power by turning the zoom control knobs.
(Fig. 3)
(4) If the specimen goes out of focus, read just the focus by turning the right
diopter adjustment ring only. (Fig. 4)
(5) Maximize the magnification power again by turning the zoom control
knobs. If the specimen goes out of focus, repeat Steps (2) through (4)
above. This allows more precise diopter adjustment.
(6) Minimize the magnification power by turning the zoom control knobs
and, looking through the left eyepiece, bring the specimen into focus by
turning the left diopter adjustment ring only. (Fig. 4)
Fig. 5
Fig. 6
Mounting ring ring
Fig. 7
Microscope
body
w
4
Q
Extension tube
==%4 R==% Stand
Fig. 8
Holding the right and left eyepiece tubes, push or pull the tubes in the
direction of the ARROWS until perfett binocular Vision is obtained.
(Fig. 5)
q
0
(1) For those who do not wear eyeglasses
The observer tan keep his eyes closer to the eyepiece shields during hold
the diopter adjustment rings so that they tan not rotate, and align the
direction of the eyepiece shields to the observer’s face by turning the
eyepieces.
(2) For those who wear eyeglasses
Fold back the eyepiece shields with both hands as shown in Fig. 6.
(1) Twist and remove the mounting rings from the eyepiece. (Fig. 7)
(2) Remove dirt or dust from the eyepiece micrometer, and mount it to the
mounting ring by turning the ring clockwise with the inscription side
facing downward. (Fig. 7)
(3) Gently screw the mounting ring containing the eyepiece micrometer into
the eyepiece and tighten securely. (Fig. 7)
(4) To remove the eyepiece micrometer, twist the mounting ring. Wrap the
micrometer in clean, soft Paper for storage.
+ The e24-mm eyepiece micrometer tan also be mounted on the
GSWH15X, However, since the eyepiece’s field number is 16, the
micrometer graduations and grids beyond 16 mm are not visible.
q
:
(1) Screw the conversion lens into the mounting thread at the bottom of the
microscope body.
(2) As the working distance of the 0.5X conversion lens (llOAL0.5X and
lCOAL0.5X) is long, use the extension tube (VM-ET) when making
observations using the stand. (Fig. 8)
+ Please note that three types of conversion lenses are available-
one for the SZ4045 one for the SZ6045TR and the other for the
SZ1 145TR.
Ir 73AL0.5X doesn’t require extension tube.