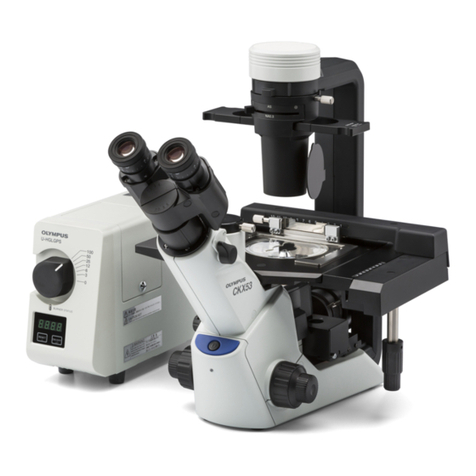
Olympus U-LGPS User manual

Instructions
This instruction manual is for the Olympus LED and LDP Light Source.
To ensure safety, obtain optimum performance and to familiarize yourself fully with the use of this
product, we recommend that you study this manual thoroughly before operating this product, and
always keep this manual at hand when operating this product.
Retain this instruction manual in an easily accessible place near the work desk for future reference.
For details of products covered by this instruction manual, see page 10.
LED and LDP Light Source
U-LGPS
Optical Microscope Accessory

This product is applied with the requirements of standard IEC/EN61326-1 concerning
electromagnetic compatibility.
- Immunity Applied to industrial and basic environment requirements.
For Korea only
이� 기기는� 업무용� 환경에서� 사용할� 목적으로� 적합성평가를� 받은� 기기로서
가정용�환경에서�사용하는�경우�전파간섭의�우려가�있습니다.
For Korea only
이� 기기는� 업무용� 환경에서� 사용할� 목적으로� 적합성평가를� 받은� 기기로서
가정용�환경에서�사용하는�경우�전파간섭의�우려가�있습니다.
In accordance with European Directive on Waste Electrical and Electronic Equipment, this
symbol indicates that the product must not be disposed of as unsorted municipal waste, but
should be collected separately.
Refer to your local Olympus distributor in EU for return and/or collection systems available in
your country.
Research, Industrial, and In vitro diagnostic medical use Products
This product is categorized as FCC Part15 Class A exempt device. Using this product may affect other
equipment in the environment. The operator of this exempted product shall be required to stop operating
the product upon a finding by the Commission or its representative that the product is causing harmful
interference. Operation shall not resume until the condition causing the harmful interference has been
corrected.

i
U-LGPS
Concept of this instruction manual............................................................................................. 1
Product Concept.......................................................................................................................................... 2
Safety precautions...................................................................................................................................... 3
Handling precautions............................................................................................................................... 7
List of combinable systems ............................................................................................................... 8
Maintenance and Storage................................................................................................................... 9
1 Nomenclature of main operating portions.....................................................................10
2 Operating Procedures......................................................................................................................11
1Turning ON the lamp............................................................................................................................................................... 11
2Turning OFF the lamp............................................................................................................................................................. 11
3Adjusting the brightness...................................................................................................................................................... 12
4Pilot lamp color and counter display........................................................................................................................12
3 Troubleshooting.....................................................................................................................................13
4 Specifications...........................................................................................................................................14
5 Assembly......................................................................................................................................................15
1Attaching U-LLG150/U-LLG300......................................................................................................................................15
2Attaching the power cord................................................................................................................................................... 16
3Connecting the USB cable................................................................................................................................................16
4Replacing the fuse.................................................................................................................................................................... 17
Contents

ii

1
U-LGPS
Concept of this instruction manual
Applicable user of this instruction manual
This instruction manual applies to users who use this product according to "Intended use" and Olympus distributors.
This instruction manual describes only the contents related to U-LGPS(LED and LDP light source).
When using this product, read all the instruction manuals supplied with the units you purchased together with this
manual.
i
GX53
1
1
2
を登りながら
6
6-1 OOOOOOOOOO
OOOOOOOO
OOOOOOOOOO
OOOOOOOOOOOOOOOOOOOOOOOOOOOOO
OOOOOOOOOOOOOOOOOOOOO
This instruction manual is created as follows.
How to read this instruction manual
Title in second layer
OOOOOOOOOOOOOOOOOOOOOOOOOOOOO
Title in third layer
Title in first layer
2
1
1, 2... indicates the operating
procedure and A, B... indicates
the portion you operate.
Operating procedure
B
A
The following symbols are used in this instruction manual.
WARNING : Indicates a potentially hazardous situation which, if not avoided, could result in
death or serious injury.
CAUTION : Indicates a potentially hazardous situation which, if not avoided, may result in
minor or moderate injury.
NOTE
: Indicates a potentially hazardous situation which, if not avoided, may result in
damage to the product or other property and/or may cause problems.
TIP
: Indicates the useful knowledge or information for use.
Cautions and references
Loosen the
clamping screw
A
using
the screwdriver.
Remove the
unit
B
.
TIP
NOTE
CAUTION
1
2
Loosen the
clamping screw
A
using
the screwdriver.
Remove the
unit
B
.
OOOOOOOOOOOOOOOOOOOOO
TIP
NOTE
CAUTION

2
Product outline
U-LGPS (LED and LDP Light Source) is a light source used for observing a sample in combination with the microscope.
Product Concept
Cautions and confirmation before use
This product includes the following items. If any item is missing or damaged, contact Olympus.
· U-LGPS
· USB cable
· Instruction manual for U-LGPS (this instruction manual)
This product is used for research, industrial and in vitro diagnostic medical purposes in combination with microscopes.
For details, refer to the instruction manual for the microscope system to be combined.
Intended Use

3
U-LGPS
Safety precautions
If the product is used in a manner not specified by this manual, the safety of the user may be imperiled. In addition, the
product may also be damaged. Always use the product according to this instruction manual.
Installation
Laser safety
Secure the space of 5 cm or more around the product.
Otherwise, the ventilation route is not secured and the heat is filled inside the product, which may cause a
fire.
WARNING
Install the product on a sturdy, level table or bench.
For safety in particular, do not place a mat, etc. under the product. Otherwise, the product may overturn.
CAUTION
·Never peel off the warning label.
CAUTION
Warning label position: Right side surface of U-LGPS
This product is specified as CLASS 1 laser product.
This product complies with 21 CFR 1040.10 and 1040.11 except for conformance with
IEC 60825-1 Ed. 3., as described in Laser Notice No. 56, dated May 8,2019.
CLASS 1 LASER PRODUCT (IEC60825-1:2007 / IEC60825-1:2014)
·Do not remove the cover.
It is very dangerous because the laser beam equivalent to CLASS 4 is emitted. And the product may also be
damaged.
This product uses the fluorescence of the phosphor excited by the laser beam emitted from the LD bank as
the illumination light.
Specifications of LD bank:
· Dominant wavelength: 455±5 nm
· Output: 36 W
TIP

4
Electric safety
·Always use the power cord provided by Olympus.
If the proper power cord is not used, our intended electric safety and the EMC (Electromagnetic Compatibility)
performance of the product cannot be assured. If no power cord is provided, please select the proper power
CAUTION
·Always connect the ground terminal.
Connect the ground terminal of the power cord and that of the power outlet.
If the product is not grounded, our intended electric safety and EMC performance of the product cannot be
assured.
·Do not use the product in close proximity to the sources of strong electromagnetic radiation.
Proper operation may be interfered. The electromagnetic environment should be evaluated prior to operation
of the product.
·If you feel smoke, odor, abnormal sound or abnormal output, etc., stop using the product immediately.
·Disconnect the power cord in case of emergency.
In case of emergency, disconnect the power cord from the power cord connector on the product or from the
power outlet.
Install the product at the location where you can reach the power cord connector or the power outlet at hand
to disconnect the power cord quickly.
·Do not connect or disconnect the power cord, cables and units while the power is on.
·Always use the USB cable provided by Olympus.
If you connect the USB cable that is not provided by Olympus, U-LGPS may not work properly.
Prevention of electric shock
·Never disassemble any part of this product.
It could cause electric shock or failure of the product.
·Be sure to turn OFF the main power of the product and then disconnect the power cord from the
power cord connector on the product or from the power outlet before performing maintenance,
storage or transportation.
It could cause electric shock or failure of the product.
·Do not allow any foreign substance into the product.
In particular, if any metal fragment or similar enters the product, electric shock or failure of the product may be
caused.
·Do not touch the product with wet hands.
In particular, if you touch the main switch of the power unit or the power cord with wet hands, electric shock,
ignition or failure of the product may be caused.
·When you hear thunder, never touch the product until thunder stops.
In particular, if you touch the main switch of the power unit or the power cord, an electric shock may be
caused.
·Do not bend, pull or tie the power cord/cables in a bundle.
The cord/cables could be damaged, causing a fire or an electric shock.
·Disconnect the power cord from the product when replacing the fuses.
To avoid electric shock hazards when replacing the fuses, set the main switch of U-LGPS to ( (OFF) and
disconnect the power cord from the product in advance.
WARNING
If no power cord is provided, please select the proper power cord by referring to the section “Proper selection
of the power cord” at the end of this instruction manual.

5
U-LGPS
Prevention of eye injury
Do not look directly at the light coming out from U-LGPS.
U-LGPS is categorized as Risk Group 3 defined in IEC62471-1 “Photobiological Safety of Lamps and Lamp
Systems”.
Possibly hazardous optical radiation emitted from this product.
Do not stare at operating lamp. May be harmful to eyes.
Be careful for the possibly hazardous optical radiation emitted from this product and the system with which
this product is combined (see page 8).
Do not stare at the emitted light. It may be harmful to eyes.
The light of invisible wavelengths (such as ultraviolet or infrared) may be emitted depending on the
illumination methods.
CAUTION
Remove the liquid light guide after the liquid light guide and the LDP light source are fully cooled
down.
Otherwise, you may get burned.
CAUTION
Liquid Light Guide
·Do not use the liquid light guide that is not conformed to this product.
You may get burned or your eyes may be damaged. For the liquid light guide that is conformed to this
product, see page 14.
·Do not remove the liquid light guide when the lamp is turned ON.
The light emitted from U-LGPS may cause a fire. In addition, you may get burned or your eyes may be
damaged.
WARNING
Software
If the application software (U-LGPS control software) that controls U-LGPS by connecting USB is hung
up, set the power switch of U-LGPS to (OFF).
The continuous emission from U-LGPS may not only damage the product but also may cause a fire.
WARNING

6
The following symbols are placed on the product.
Study the meaning of the symbols and always use the product in the safest possible manner.
Symbol Meaning
Indicates a non-specific general hazard. Follow the description given after this symbol or
in the instruction manual.
Indicates that the surface becomes hot. Do not touch with bare hands. You may get
burned.
Indicates that the seesaw type main switch is ON.
(Seesaw type is the type of switch where ON or OFF is selected by pressing it to ON or
OFF side.)
Indicates that the seesaw type main switch is OFF.
If caution labels are dirty or peeled off, contact Olympus for replacement or inquiries.
Safety warning symbols
Label position and instruction
The labels are attached to the portions which require special cautions during use and operation. Be sure to follow these
instructions.
Label Label position Instructions in instruction manual Page
Back of U-LGPS Caution for electric safety and
prevention of electric shock 4
U-LGPS liquid light guide insertion port High temperature 5
If caution labels are dirty or peeled off, contact Olympus for replacement or inquiries.

7
U-LGPS
Handling precautions
General
·This product is a precision instrument. Handle it with care and avoid subjecting it to a sudden or
severe impact.
·The liquid light guide contains a solvent. This solvent is not highly toxic, but if the liquid light guide
is damaged and the solvent comes into contact with your hands or eyes, wash it off thoroughly with
water.
·Avoid twisting the U-LGPS as much as possible to prevent damage. Also, do not pull it forcibly with a
tension of 3 kg or more.
·Never disassemble any part of this product. It could cause unexpected accidents or failure of the
product.
·Do not use the product in areas where it may be subjected to direct sunlight, high temperature and/or
humidity, dust or vibrations.
·Do not use or store this product in environments where it may be subjected to dust, strong electric
field, strong magnetic field, gas corrosion (chlorine, acid, alkali, etc.) and in sudden environmental
change.
·For systems attachable to this product, see page 8.
The use of this product in combination with other systems not only creates the risk of abnormal operation but
it also may damage the product.
Before disposing of this product, be sure to follow the regulations and rules of your local government.
NOTE
TIP

8
List of combinable systems
This section indicates systems that can be combined with this product.
System Microscope frame
Standard
IEC62471-1
IEC60825-1
JIS C6802
GB7247
FDA 21CFR Part 1040.10 and 1040.11
BX43 BX43F
Risk Group 3
(see page 5)
Laser Class 1
(see page 3)
BX53 BX53F
BX53F2
BX63 BX63F
CKX53 CKX53SF
IX73 IX73P1F
IX73P2F
IX83 IX83P1ZF
IX83P2ZF
SZX10 SZX2-ZB10
SZX16 SZX2-ZB16
SZX2-ZB16A
SZX7 SZX-ZB7
BX51WI BX51WIF
BX53M BX53MRF-S
BX53MTRF-S
BXFM BXFM-F
GX53 GX53F
MVX 10 MVX-ZB10
MX63 MX63-F
MX63L-F
SpinSR10 IX83P2ZF
The use of this product in combination with systems that are not listed in the table shown above
cannot be guaranteed. If you wish to use this product in combination with systems that are not listed
in this table, take measures under your responsibility so that the use of this product in combination
with systems you will use complies with standards required in your local area.
CAUTION

9
U-LGPS
Maintenance and Storage
Cleaning of each portion
Cautions after use
·Remove dust around the ventilation openings of the product with a vacuum-cleaner, etc.
Using the dusty product continuously may result in a fire or failure of the product.
·Do not spray the product with flammable gas. Do not use the product near the spray containing
flammable gas.
Fire may be caused.
Do not use organic solvents because they may deteriorate the coated surface or plastic parts.
· Clean the product periodically (every 100 hours as a guide).
· Wipe the product with a dry soft cloth. If the dirt cannot be removed by dry-wiping, moisten a soft cloth with
diluted neutral detergent and wipe the dirty surface with it.
· Blow off the dust attached to the edge surface of the liquid light guide with clean air.
WARNING
NOTE
TIP
· After using this product, set the main switch of U-LGPS to (OFF), wait until U-LGPS is cooled down
sufficiently, and keep it covered with a dust cover during storage.
· Do not store the product in the environment where the condensation is caused by moisture or humidity.
TIP
Lifetime
The lifetime of this product is approximately 8 years after purchase if the product is used properly according
to this instruction manual.
(except consumables)
TIP

10
1
1 Nomenclature of main operating portions
This section describes the nomenclature of main operating portions of U-LGPS, U-LLG150/U-LLG300 and U-LLGAD.
LED and LDP Light Source
U-LGPS
Liquid light guide adapter
U-LLGAD
Liquid light guide
U-LLG150/U-LLG300
Light intensity
adjustment dial
Lamp switch
Liquid light guide insertion port
Power cord connector Power switch
(ON) / (OFF)
Light intensity
adjustment dial
Power switch
Power cord connector
Incidence side
connector
Clamping screw
Emission side connector
Liquid light guide insertion port
Fuse
Fuse
Pilot lamp
Color Status
Green Standby
Blue ON
Red Error *
Pilot lamp
The color of the pilot lamp
indicates the following status.
TIP
Lamp switch
Counter
* For procedures to recover from the error, see page 12.

11
U-LGPS
2
2 Operating Procedures
This section describes the basic operating procedures of each portion.
Set the main switch Aon the back of U-LGPS to (ON).
· The pilot lamp Bon the front of U-LGPS turns ON (green).
· The numeral characters or texts are displayed on the counter
Don the front of U-LGPS.
When using U-LGPS control software:
Turn ON the power of the PC (control PC) where software is installed,
and start the U-LGPS control software.
1
TIP
Press the lamp switch Con the front of U-LGPS.
· The color of the pilot lamp Bon the front of U-LGPS turns to
blue.
· Pressing the lamp switch Callows you to select ON or OFF
of the lamp.
· You can check the status of the lamp by the color of the pilot
lamp. For details, see page 12.
2
TIPTIP
1Turning ON the lamp
2Turning OFF the lamp
A
A
C
D
Set the power switch Ato (OFF).
· The pilot lamp Bon the front of U-LGPS turns OFF.
· The numeral characters or texts on the counter Don the
front of U-LGPS disappear.
When using U-LGPS control software:
Turn OFF the power of the control PC.
2
TIP
D
B
C
DB
Press the lamp switch Cof U-LGPS.
· The color of the pilot lamp Bturns to green.
· The cooling fan may keep working for cooling purpose.
When the cooling is finished, the cooling fan stops
automatically.
When using U-LGPS control software:
Turn OFF the power of the control PC.
1
TIP

12
Rotate the light intensity adjustment dial Eto adjust the light
intensity.
· Rotating the light intensity adjustment dial Eallows you to
change the numerical characters (Min: 010, Max: 100) on the
counter Din increments of 5.
· The larger the numerical characters on the counter D
become, the brighter the lamp becomes.
When using U-LGPS control software:
· You cannot adjust the light intensity using the light intensity
adjustment dial E. Adjust the light intensity on the U-LGPS
control software.
1
TIP
3Adjusting the brightness
E
D
The relation between the color of the pilot lamp Band the display
on the counter Dare listed as follows.
4Pilot lamp color and counter display
DB
Pilot lamp BDisplay on counter D
Color Status Display Description
Green Lamp is OFF 010-100 Brightness of the
lamp when the
lamp is ON
Blue Lamp is ON
Red Error in U-LGPS (Lamp
turns OFF automatically)
c01-c23 * Details of the
error in U-LGPS
When using U-LGPS control software:
The color of the pilot lamp Bchanges as the table shown above,
and the display of the counter Dalways shows 000.
* The procedure to recover from the error is described below.
Display Recovery procedure Page
c06 Insert the liquid light guide into the liquid
light guide insertion port of U-LGPS properly.
15
Other than
c06 Set the power switch Ato (OFF), wait
for a while and turn ON the lamp.
11
If you cannot recover from the error according to the above
procedure, contact Olympus for assistance.

13
U-LGPS
33Troubleshooting
If problems occur, please review the following list and take remedial action as needed.
If you cannot solve the problem after checking the entire list, contact Olympus for assistance.
Phenomena Cause Remedy Page
Even though the power switch is
set to (ON), the pilot lamp does
not turn ON.
The power cord is not connected
properly.
Connect the power cord properly. 16
The power cord plug is not
connected properly.
Connect the power cord plug
properly. 16
The fuse is blown out. Replace the fuse with a new one. 17
The pilot lamp does not turn ON by
pressing the lamp switch. The power switch is set to
(OFF). Set the power switch to (ON). 11
The lamp is too bright.
–
Insert the optical element in the
light path of the microscope frame
to adjust the brightness.
For details, refer to the instruction
manual for the microscope frame
you use.
-
The pilot lamp is blue, but the light
from the lamp does not illuminate
the sample.
The shutter is in the light path of
the microscope frame.
Remove the shutter from the light
path.
For details, refer to the instruction
manual for the microscope frame
you use.
-
The lamp is too dark. The liquid light guide is not
attached to the U-LLGAD properly.
Or U-LLGAD is not attached to the
illuminator of the microscope frame
properly.
Connect them properly.
15
The lamp does not turn ON. The pilot lamp is green. Press the lamp switch to make the
pilot lamp blue. 12
The U-LGPS control software in use
stopped. –Set the power switch to (OFF).
Then, turn ON the lamp.
11
The liquid light guide cannot be
attached to U-LGPS or U-LLGAD.
The liquid light guide other than
the conformable liquid light guide
is used.
Use the conformable liquid light
guide. 14
Repair request
If you cannot solve the problems even though taking actions described in Troubleshooting, please contact Olympus
for assistance. At that time, please tell them the following information as well.
· Product name and abbreviation (Example: U-LGPS)
· Serial Number
· Phenomena or strings displayed on the counter on the front of U-LGPS.
This section describes the possible problems of this product and their remedies.

14
44Specifications
This section describes detail specifications, such as shape, functions and performances, etc. of this product.
Item Specifications
Light emission type LED, LDP (Laser Diode pumped Phosphor)
Wavelength range 360 to 665 nm
Peak wavelength 367, 407, 436, 470, 550 nm
Power supply AC 100-120 V / 220-240 V 50 Hz / 60 Hz
Power consumption Power consumption 180 W or less
Current consumption 2.2 A / 1.0 A
Response time 60 ms Condition specified by Olympus
I/O connector USB (B-type)
Dimension / Weight 120 (W) x 335 (D) x 214 (H) mm (excluding protrusions)
4.9 kg
Lifetime of light source 25,000 hours or more (nominal time) Condition specified by Olympus
Conformable liquid light
guide
U-LLG150, U-LLG300
Operating environment · Indoor use
· Altitude: Max. 2000 meters
· Ambient temperature: 5 to 40 °C (41 to 104 °F)
· Relative humidity: Max 80% (31 °C (88 °F) or less) (without condensation)
In case of over 31 °C (88 °F), the relative humidity in operating environment is decreased
linearly through 70% at 34 °C (93 °F), 60% at 37 °C (99 °F), and to 50% at 40 °C (104 °F).
· Supply voltage fluctuation: ±10 %
· Pollution degree 2 (in accordance with IEC60664-1)
· Installation/Overvoltage category: II (in accordance with IEC60664-1)
Transport / Storage
environment
· Ambient temperature: -20 to 70 °C (-4 to 158 °F)
· Relative humidity: 20 to 85% (without condensation)
Wavelength [nm]
Relative intensity

15
U-LGPS
This section describes the procedures to assemble U-LLG150/U-LLG150 and power cords.
5
5 Assembly
Hold the incidence side connector Aof U-LLG150/U-LLG300 with
hand, and insert it completely to the end of the liquid light guide
insertion port of U-LGPS.
1
Attach U-LLGAD to the illuminator.
Tighten the clamping screw Eof the illuminator using the Allen
screwdriver provided with the microscope.
Do not turn ON the lamp while U-LGPS is not attached to
the microscope using U-LLG150/U-LLG300 and U-LLGAD.
The light from this lamp contains the UV light. Looking
directly at the light may damage your eyes. Also, it could
cause a fire.
U-LLG150/U-LLG300 and power cords are vulnerable to
bending and twisting. Be careful not to apply excessive
force.
6
7
WARNING
NOTE
Loosen the clamping screws B C of U-LLGAD using the Allen
screwdriver provided with the microscope.
If the clamping screws B C are not fully loosened, the tip
of the emission side connector Dcontacts the clamping
screws B C and the emission side connector may not be
inserted to the correct position.
Insert the emission side connector Dof U-LLG150/U-LLG300
completely to the end of the liquid light guide insertion port of
U-LLGAD.
Tighten the clamping screws Bfirmly using the Allen screwdriver
provided with the microscope.
Pull the emission side connector Dtoward you to make sure
that it does not come out.
Tighten the clamping screws Cfirmly using the Allen screwdriver
provided with the microscope.
If the clamping screws B C are not tightened firmly,
U-LLG150/U-LLG300 may come off from U-LLGAD and a
fire may be caused.
2
TIP
3
4
TIP
5
WARNING
1Attaching U-LLG150/U-LLG300
A
3
D
C
B
6
E

16
·Always use the power cord provided by Olympus. If the
proper power cord is not used, the electric safety and the
EMC (Electromagnetic Compatibility) performance of the
product cannot be assured. If no power cord is provided,
please select the proper power cord by referring to the
section “Proper selection of the power cord” at the end of
this instruction manual.
·Connect the power plug to the grounded 3-core outlet. If
the outlet is not grounded, the electric safety performance
intended by Olympus cannot be assured.
·Be careful not to apply excessive force to power cords.
·Be sure to set the main switch to (OFF) before
connecting the power cord.
Insert the power cord completely to the end of the connector on the
back of U-LGPS.
CAUTION
NOTE
1
1
2Attaching the power cord
2
Insert the power cord plug completely to the end of the power outlet.
2
The USB cable is connected when using U-LGPS control
software.
Insert the connector (B-type) Aof the USB cable completely to the
end of the connector Bon the back of U-LGPS.
Insert the connector (A-type) of the USB cable completely to the end
of the connector of the control PC.
TIP
1
2
3Connecting the USB cable
1
1
B
A
Table of contents
Other Olympus Microscope manuals

Olympus
Olympus CK40-TBI Operating instructions

Olympus
Olympus BHTU User manual

Olympus
Olympus BX-RLA2 User manual

Olympus
Olympus CK2 User manual

Olympus
Olympus IMT-2 User manual

Olympus
Olympus BX51-P Owner's manual

Olympus
Olympus CH30 User manual

Olympus
Olympus SZX10 User manual

Olympus
Olympus CK30 User manual

Olympus
Olympus BHSU Installation instructions

Olympus
Olympus CX33 User manual

Olympus
Olympus IX71 User manual

Olympus
Olympus FH User manual

Olympus
Olympus ST. HS User manual

Olympus
Olympus SZX16 User manual

Olympus
Olympus CX31 User manual

Olympus
Olympus FLUOVIEW FV300 Installation guide

Olympus
Olympus BHS User manual

Olympus
Olympus BH2-5RE Installation instructions

Olympus
Olympus U-DA User manual