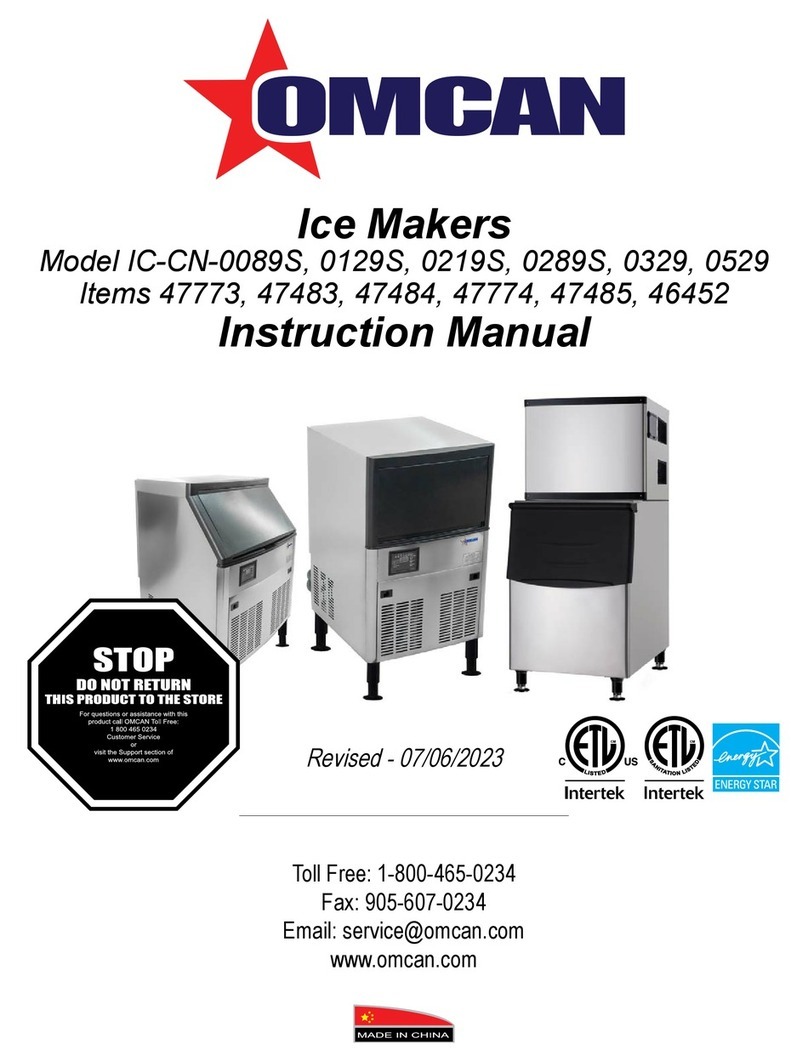
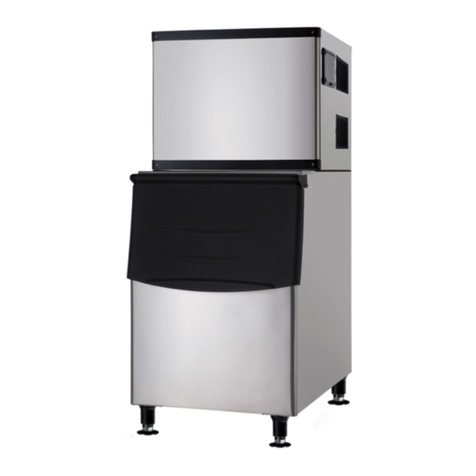
Omcan IC-CN-0129S User manual

Revised - 06/03/2022
Toll Free: 1-800-465-0234
Fax: 905-607-0234
Email: [email protected]
www.omcan.com
Ice Maker
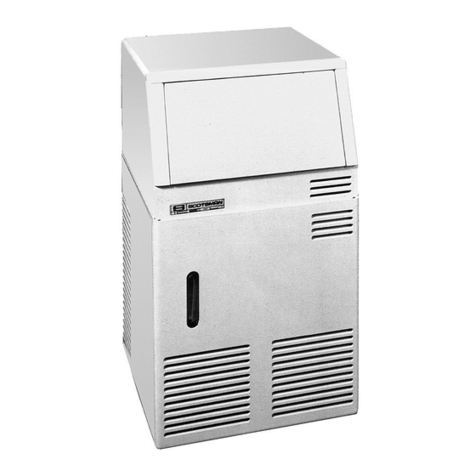
Model IC-CN-0129S, 0219S, 0329, 0529
Items 47483, 47484, 47485, 46452
Instruction Manual

2
Page
--------------------------------------------------------------------------------------------------- 3
---------------------------------------------------------------------------------- 4 - 5
--------------------------------------------------------------------------------- 6 - 8
--------------------------------------------------------------------------------- 9
-------------------------------------------------------------------------------------------- 9 - 10
-------------------------------------------------------------------------------------------- 10 - 13
---------------------------------------------------------------------------------------- 13 - 14
------------------------------------------------------------------------------------ 15 - 16
---------------------------------------------------------------------------------- 17 - 24
---------------------------------------------------------------------------------- 25
------------------------------------------------------------------------------------------------------- 26
---------------------------------------------------------------------------------- 27
Table of Contents
Section
Disclaimer
General Information
Safety and Warranty
Technical Specications
Installation
Operation
Maintenance
Troubleshooting
Parts Breakdown
Electrical Schematics
Notes
Warranty Registration
Model IC-CN-0129S / Model IC-CN-0219S
Model IC-CN-0329 / Model IC-CN-0529

3
Disclaimer
OMCAN IS NOT RESPONSIBLE FOR
ANY DAMAGES DUE TO WATER LEAKS.
WARRANTY FOR WATER LEAKS IS VOID
IF THE WICKING PAD IS NOT REPLACED
EVERY SIX MONTHS, AND IF THE AMBIENT
ROOM TEMPERATURE EXCEEDS 75°F
AND 55% RELATIVE HUMIDITY, AND THE
APPLIANCE DRAIN IS NOT CONNECTED
DIRECTLY TO THE FLOOR DRAIN.

4
General Information
Omcan Manufacturing and Distributing Company Inc., Food Machinery of America, Inc. dba Omcan
and Omcan Inc. are not responsible for any harm or injury caused due to any person’s improper or
negligent use of this equipment. The product shall only be operated by someone over the age of 18, of
sound mind, and not under the inuence of any drugs or alcohol, who has been trained in the correct
operation of this machine, and is wearing authorized, proper safety clothing. Any modication to the
machine voids any warranty, and may cause harm to individuals using the machine or in the vicinity of
the machine while in operation.
CHECK PACKAGE UPON ARRIVAL
Upon receipt of an Omcan shipment please inspect for external damage. If no damage is evident on the
external packaging, open carton to ensure all ordered items are within the box, and there is no concealed
damage to the machine. If the package has suered rough handling, bumps or damage (visible or concealed),
please note it on the bill of lading before accepting the delivery and contact Omcan within 24 hours, so we may
initiate a claim with the carrier. A detailed report on the extent of the damage caused to the machine must be
lled out within three days, from the delivery date shown in the shipping documents. Omcan has no recourse
for damaged products that were shipped collect or third party.
Before operating any equipment, always read and familiarize yourself with all operation and safety
instructions.
Omcan would like to thank you for purchasing this machine. It’s of the utmost importance to save
these instructions for future reference. Also save the original box and packaging for shipping the
equipment if servicing or returning of the machine is required.
---------------------------------------------------------------------------------------------------------------------------------------------------
Omcan Fabrication et distribution Companie Limité et Food Machinery d’Amerique, dba Omcan et
Omcan Inc. ne sont pas responsables de tout dommage ou blessure causé du fait que toute personne
ait utilisé cet équipement de façon irrégulière. Le produit ne doit être exploité que par quelqu’un de
plus de 18 ans, saine d’esprit, et pas sous l’inuence d’une drogue ou d’acohol, qui a été formé pour
utiliser cette machine correctement, et est vêtu de vêtements de sécurité approprié. Toute modication
de la machine annule toute garantie, et peut causer un préjudice à des personnes utilisant la machine
ou des personnes à proximité de la machine pendant son fonctionnement.
VÉRIFIEZ LE COLIS DÈS RÉCEPTION
Dès réception d’une expédition d’Omcan veuillez inspecter pour dommages externes. Si aucun dommage
n’est visible sur l’emballage externe, ouvrez le carton an de s’assurer que tous les éléments commandés
sont dans la boîte, et il n’y a aucun dommage dissimulé à la machine. Si le colis n’a subi aucune mauvaises
manipulations, de bosses ou de dommages (visible ou cachée), notez-le sur le bond de livraison avant
d’accepter la livraison et contactez Omcan dans les 24 heures qui suivent, pour que nous puissions engager
une réclamation auprès du transporteur. Un rapport détaillé sur l’étendue des dommages causés à la machine
doit être rempli dans un délai de trois jours, à compter de la date de livraison indiquée dans les documents
d’expédition. Omcan n’a aucun droit de recours pour les produits endommagés qui ont été expédiées ou cueilli
par un tiers transporteur.
5
General Information
Avant d’utiliser n’importe quel équipement, toujours lire et vous familiariser avec toutes les opérations
et les consignes de sécurité.
Omcan voudrais vous remercier d’avoir choisi cette machine. Il est primordial de conserver ces
instructions pour une référence ultérieure. Également conservez la boîte originale et l’emballage pour
l’expédition de l’équipement si l’entretien ou le retour de la machine est nécessaire.
---------------------------------------------------------------------------------------------------------------------------------------------------
Omcan Empresa De Fabricacion Y Distribucion Inc. Y Maquinaria De Alimentos De America, Inc. dba
Omcan y Omcan Inc. no son responsables de ningun daño o perjuicío causado por cualquier persona
inadecuada o el uso descuidado de este equipo. El producto solo podra ser operado por una persona
mayor de 18 años, en su sano juicio y no bajo alguna inuencia de droga o alcohol, y que este ha sido
entrenado en el correcto funcionamiento de esta máquina, y ésta usando ropa apropiada y autorizada.
Cualquier modicación a la máquina anúla la garantía y puede causar daños a las personas usando la
máquina mientras esta en el funcionamiento.
REVISE EL PAQUETE A SU LLEGADA
Tras la recepcion de un envio Omcan favor inspeccionar daños externos. Si no hay daños evidentes en el
empaque exterior, Habra el carton para asegurararse que todos los articulos solicitados ésten dentro de la
caja y no encuentre daños ocultos en la máquina. Si el paquete ha sufrido un manejo de poco cuidado, golpes
o daños (visible o oculto) por favor anote en la factura antes de aceptar la entrega y contacte Omcan dentro
de las 24 horas, de modo que podamos iniciar una reclamación con la compañia. Un informe detallado sobre
los daños causados a la máquina debe ser llenado en el plazo de tres días, desde la fecha de entrega que se
muestra en los documentos de envío. Omcan no tiene ningun recurso por productos dañados que se enviaron
a recoger por terceros.
Antes de utilizar cualquier equipo, siempre lea y familiarizarse con todas las instrucciones de
funcionamiento y seguridad.
Omcan le gustaría darle las gracias por la compra de esta máquina. Es de la mayor importancia para
salvar estas instrucciones para futuras consultas. Además, guarda la caja original y el embalaje para el
envío del equipo si servicio técnico o devolución de la máquina que se requiere.

6
Safety and Warranty
Please pay attention to the following warning labels on the ice maker
This label indicates a hazardous voltage. There is a risk of electric shock.
This label indicates rotating components inside. There is a risk of serious mechanical injury.
This label indicates a ammable foaming agent “Cyclopentane” used. There is a risk of re.

7
Safety and Warranty
This label indicates a ammable refrigerant “R290” used. There is a risk of re.
WARNING AND SAFETY INSTRUCTION
This product cannot be used in outdoor environment.
This ice machine is not intended for use by children, and those with physical weakness, slow
response, or mental disorders.
• The installation, repair or maintenance of this ice machine must be carried out by professional and qualied
personnel, or electric shock, re, personal injury may cause from incorrect operation.
• After the ice machine is delivered, please keep the machine still upright for more than 24 hours, to have the
lubricant be fully precipitated before startup, otherwise the compressor may be damaged.
• When handling, keep the cabinet upright, with the inclination not exceeding 45 degrees. Do not invert the
machine or lay it horizontally.
• This ice machine should not be placed in wet or easily splashed area.
• The grounding of this ice machine cannot be connected to gas pipe, water pipe, telephone line or lightning
rods, etc.
• There are rotating components in this ice machine. Do not insert slim objects into ventilation or exhaust
ports, or serious mechanical injury may occur.
• Do not store volatile or ammable substances in this ice machine, or it may result in explosion or re.
• Do not store any sundries, or freeze any food in the ice bin. Keep the ice scoop clean.
• The ice machine must be placed on the oor sucient to supports its weight. Insucient base may cause
the equipment fall over and cause injury.
• There should be sucient ventilation space around the ice machine. Keep good ventilation.
• Only the power supply specied on the machine nameplate can be used with this ice machine.
• This ice machine cannot be connected to hot water.
• Socket for this ice maker must be reliably grounded and with leakage protection.
• The ice machine must be disconnected from power before manual cleaning, repairing and maintenance.
• Before cleaning, repairing and maintenance, the remaining ice in the ice bin should be removed from the
ice machine to avoid contamination to ice.
• Do not splash water directly onto the surface of the ice machine during the cleaning process; otherwise it
may cause short circuit, leakage or other faults.
• Flammable foaming agent is used during the foaming process. The ice maker should be disposed of and
recycled by qualied personnel and institutions.
• The ice machine should be properly managed to ensure that children will not play with the machine.
• When the ice machine malfunctions, turn o the power and contact professional personnel for repairing
For the ice maker with ammable refrigerant R290:
• DANGER – RISK OF FIRE OR EXPLOSION. FLAMMABLE REFRIGERANT USED. DO NOT USE

8
Safety and Warranty
MECHANICAL DEVICES TO DEFROST REFRIGERATOR. DO NOT PUNCTURE REFRIGERANT
TUBING.
• DANGER – RISK OF FIRE OR EXPLOSION. FLAMMABLE REFRIGERANT USED. TO BE REPAIRED
ONLY BY TRAINED SERVICE PERSONNEL. DO NOT PUNCTURE REFRIGERANT TUBING.
• CAUTION – RISK OF FIRE OR EXPLOSION. FLAMMABLE REFRIGERANT USED. CONSULT REPAIR
MANUAL/OWNER’S GUIDE BEFORE ATTEMPTING TO SERVICE THIS PRODUCT. ALL SAFETY
PRECAUTIONS MUST BE FOLLOWED.
• CAUTION – RISK OF FIRE OR EXPLOSION. DISPOSE OF PROPERLY IN ACCORDANCE WITH
FEDERAL OR LOCAL REGULATIONS. FLAMMABLE REFRIGERANT USED.
• CAUTION – RISK OF FIRE OR EXPLOSION DUE TO PUNCTURE OF REFRIGERANT TUBING;
FOLLOW HANDLING INSTRUCTIONS CAREFULLY. FLAMMABLE REFRIGERANT USED.
The ice machine is fully automatic. With proper installation and connection to potable water and power source,
the ice making will start properly. When the ice cubes ll up the ice bin, the machine will automatically stop.
The ice machine is generally used in the following and similar occasions:
• The kitchen area of a store, oce or other workplace.
• Farm, hotel, car hotel and restaurant.
• Catering and similar non-retail occasions.
• This ice machine is not intended for used at home.
RESIDENTIAL USERS: Vendor assumes no liability for parts or labor coverage for component failure
or other damages resulting from installation in non-commercial or residential applications. The right
is reserved to deny shipment for residential usage; if this occurs, you will be notied as soon as
possible.
1 YEAR PARTS AND LABOUR WARRANTY
Within the warranty period, contact Omcan Inc. at 1-800-465-0234 to schedule an Omcan authorized
service technician to repair the equipment locally.
Unauthorized maintenance will void the warranty. Warranty covers electrical and part failures, not
improper use.
Please see https://omcan.com/disclaimer for complete info.
WARNING:
The packaging components are classied as normal solid urban waste and can therefore be disposed of
without diculty.
In any case, for suitable recycling, we suggest disposing of the products separately (dierentiated
waste) according to the current norms.
DO NOT DISCARD ANY PACKAGING MATERIALS IN THE ENVIRONMENT!

9
Technical Specications
Installation
Model IC-CN-0129S IC-CN-0219S IC-CN-0329 IC-CN-0529
Power 446 W 526 W 790 W 1113 W
Electrical 115V / 60Hz / 1
Bin Capacity 40 lbs. / 18 kgs. 80 lbs. / 36 kgs. 275 lbs. / 125 kgs. 375 lbs. / 170 kgs.
Production Per Day 120 lbs. / 55 kgs. 210 lbs. / 95 kgs. 350 lbs. / 160 kgs. 500 lbs. / 225 kgs.
Ice Shape Cube Half or Full cube
Max Ambient
Temperature 5 - 40°C | 41 - 104°F
Condenser Unit Air
Refrigerant R290
Weight 99.2 lbs. / 45 kgs. 127.9 lbs. / 58 kgs. 187.4 lbs. / 85 kgs. 242.5 lbs. / 110 kgs.
Packaging Weight 110.2 lbs. / 50 kgs. 145.5 lbs. / 66 kgs. 207.3 lbs. / 94 kgs. 264.6 lbs. / 120 kgs.
Dimensions 19.7” x 23.2” x 35.4”
500 x 590 x 900mm
26” x 27” x 38.2”
660 x 685 x 970mm
22” x 32.7” x 67.6”
560 x 830 x 1718mm
29.9” x 32.7” x 67.6”
760 x 830 x 1718mm
Packaging
Dimensions
22.8” x 26.4” x 32.9”
580 x 670 x 835mm
30.7” x 29.3” x 35.4”
780 x 745 x 900mm
Unit: 25.8” x 29.5” x 24.4”
655 x 750 x 620mm
Unit: 33” x 29.5” x 24”
845 x 750 x 620mm
Bin: 25.4” x 35” x 41.5”
645 x 890 x 1055mm
Bin: 33.4” x 35” x 41.5”
850 x 890 x 1055mm
Item Number 47483 47484 47485 46452
The ice machine should be installed in a proper location meeting the following conditions:
• Indoor, not more than 2,000 meters above sea level.
• Ambient temperature cannot exceed 32°C.
• Power supply: the rated voltage indicated on the machine nameplate ±6%.
• Water source: potable water, with water pressure from 1.3 Bar to 5.5 Bar; water temperature: 5-35°C.
• The ice machine should be kept away from heat sources, and should be strictly forbidden to use at
extremely high temperature or low temperature environment, and should avoid direct sunlight.
• There should be sucient ventilation space around the ice machine and keep good ventilation; the distance
from the ice maker to the wall should be no less than 30 cm for the front, 15cm for the sides, and 20 cm for
the rear.
• The ice machine must be placed on a oor sucient to support its weight.
• Socket for the ice maker must be reliably grounded and with leakage protection.
• Proper oor drainage must be provided near the installation location of the ice machine.
INSTALLATION STEPS
1. Check if the ice machine is in good condition and the accessories are complete; check the machine model
and the machine nameplate.

10
Installation
Operation
2. Clean the ice bin and the food area inside with a sponge soaked in warm water and soda. Then wash and
dry it with potable water.
3. Place the ice machine in the operation area; ensure that the machine is placed on a leveled oor. So as to
ensure the water ows evenly on the evaporator.
4. The compressor chamber is located at the back. The compressor and condenser are installed in it. For air
cooled unit, it requires good ventilation. Therefore, the front and rear of the ice maker must have ventilation
space of more than 20-30 cm.
5. The bottom of the ice machine is equipped with adjustable legs for level adjustment and oor cleaning.
6. Connect the machine’s inlet water lter and water pipe referring to the schematic diagram of installation; if
the installation site is already equipped with a drinking water system, the water lter may not be installed.
Note: the lter ow direction should be correctly installed as per the direction marker on the lter
head cover or the lter body.
Note: This machine is equipped with an inlet water lter. The lter will keep impurities from the
water used as the machine is running. Generally, it needs to be replaced every month to every 3
months.
7. Connect the machine to the water supply using the 3/4” inlet pipe supplied with the machine. It is
recommended to install a water valve (not supplied with this machine) on the water supply line.
8. Connect the drain pipe to the drain connection. In order to meet a good draining, it is recommended that
the drain pipe should have a dierence of level more than 3cm per meter; and conrm that the drain pipe is
not blocked. It is recommended that the drain pipe be connected to an open drainage port.
9. Any joint in the drain pipe must not be higher than the machine drainage port; any joint in the drain pipe
cannot be higher than the previous joint.
10. Conrm the power requirements stated in the machine nameplate; ensure that the power supply meets the
requirements.
11. A circuit breaker or switch with leakage protector and reliably grounding is required.
12. Turn o the switch on the power line and connect the machine to the power source.
STARTUP AND OPERATION
1. Before you start up the machine, please check and conrm:
• That the packaging tape inside the ice machine has been removed.
• The accessories or items in the ice bin have been taken out.
• The ice machine has been adjusted to a leveled state.
• The water pipe has been connected and the water valve is open.
• The plug has been connected to the power supply and the power switch is o.
• The ambient temperature, water temperature, and pressure of the water supply meet the above
requirements.
2. Start up: turn on the power switch. After power-on, the machine begins to make ice automatically.
3. For normal operation, please conrm:
• There is water in the water trough and no overow occurs.

11
Operation
• The pump is working properly and water is owing evenly on the evaporator.
• The compressor is running normally, the temperature of the evaporator and the ice making water is
gradually decreasing.
• For air cooled machine, check the fan is running normally, and there is stable air ow in the inlet and
outlet of the ice machine.
• The ice machine has no abnormal noise.
• The ice machine has no abnormal vibration.
• It takes about 10 to 20 minutes to make one batch ice, depending on the ambient temperature and the
temperature of the water. The higher the temperature is, the longer the ice making will take.
• Ice cube can be properly defrosted from the machine.
OPERATION INSTRUCTION
• Startup: after proper installation, connect the water source and turn on the power supply, the machine will
start working. Please conrm that the machine is operating normally when you turn it on for the rst time.
Note: In case of thunderstorm or not in use for a long time, please disconnect the power and water
source!
• Self-check: with power on for the rst time, the ice maker will do self-check and pump out remaining water.
• Preparing: after the ice machine is energized, the inlet valve opens and water will come inside the machine
until it reaches high level.
• Ice making: after pre-cooling for 30 seconds, the water pump starts, the water ows through the evaporator
smoothly and evenly, the ice cubes are gradually formed in the ice cube tray.
• Ice Harvest (Drop): after the ice making process, the water pump is turned o, the defrost valve is turned
on, allowing the hot gas to enter the evaporator for about 1-2 minutes, the ice cubes slides from the
evaporator into the ice bin.
Warning: Do not put your hand into the ice bin during the harvest process, to prevent the ice to hit
your hand!
• Shutdown: The ice maker will stop working when you click the “on/o” button on the panel during running
process.
• Bin full stop: in the running state, with the ice bin lled to a certain height, the ice sliding board cannot be
rebounded or reset because of the block of the freshly produced ice cubes, the ice maker will stop in 40
seconds.
• Repeat ice-making: when the blocking ice cubes are taken away, the ice maker will turn back to ice making
process in a few seconds.

12
Operation
INSTRUCTION OF CONTROL PANEL
1. LED Display:
• Self-check: Display “ini” code.
• Preparing: Counting seconds positively.
• Ice making: Counting seconds positively as the water temperature decreases to 0ºC. Counting seconds
down to 0 s after.
• Ice Harvest: Counting seconds positively.
• Clean: Display “CLE” during cleaning and descaling; Display “STL” during sterilizing; Display “rin” during
rinsing.
2. LED Lamps: Lights on during the related process.
3. Ice cube thickness adjustment: During the ice making process, if you are not satised with the ice
thickness, press the Ice cube “–” button for 3 seconds, then click the button “+” or “-” on the panel to adjust
the thickness of ice cube.
Note: By clicking the “+” or “-“ button one time, the ice making time is extended or shortened by
1.5 minutes.
4. Cleaning: During the normal operation, hold the cleaning button for 3 seconds to enter the cleaning
process. During the entire cleaning process, cleaning agents and disinfectants need to be put into the
water trough. When the clean process is nished, the ice maker will go to ice making process.
5. Switch: When the device is powered, click the “Switch” button to switch OFF/ON the device.
6. Voice function (only for machines with voice function): The machine with voice announcement prompts will
provide voice prompts for related operations.
7. Please open and close the ice bin door gently. Do not slam the door. After taken the ice cubes, please
close the door.
8. If the ice maker is not in use for a long time, it should be energized and run for 2 to 4 hours every 2 months.
OTHER SPECIAL PROTECTION - SHUTDOWN
• If the ice machine has not detected ice cube falling o in three cycles, it will shut down for safety protection.
The ice maker needs to be checked.

13
Operation
Maintenance
• The ice machine detects that the ambient temperature is too high and will stop for safety protection.
• If the water-cooled ice machine detects an abnormality in water supply, it will stop for safety protection.
Note: Maintenance must be done by a qualied professional personal.
Warning: Before maintenance or manual clean, be sure to cut o the water source and power supply.
EXTERIOR CLEANING
• Frequently clean the environment around the ice machine to keep it clean. Do not block the vents.
• The outer enclosure should be cleaned with a mild detergent and then wiped clean. If necessary, use
commercial stainless steel cleaners and polishes.
Note: Stainless steel may rust without proper maintenance.
INLET WATER FILTER
• The lter element should be inspected regularly. It is recommended to replace lter element every month to
every 3 months.
INTERIOR CLEANING
• The inside of the ice storage bin can be washed directly with water pipes.
Note: Check and conrm the water pressure lower than the maximum allowed pressure. Do not
ush the part above the water pump or the evaporator directly for water protection.
CONDENSER
• For the air-cooled ice maker, the condenser should be cleaned every three weeks. Use a soft brush or a
vacuum cleaner with a brush to brush it up and down along the n direction, to avoid damage to the ns
and further aecting the cooling eect.
• The condenser lter should be cleaned every 2 weeks.
Note: Be careful when doing the condenser cleaning as the edges of the ns are sharp.
WATER PIPE
• In order to ensure food safety, the water pipe of the ice machine should be cleaned regularly.

14
Maintenance
WINTERING
• Turn o the water and power supply, drain the residual water from the water trough, inlet pipe and drain
pipe.
Note: The maintenance of the ice machine is not covered by the manufacturer’s warranty!
CLEAN FUNCTION
Note: Please empty the bin of ice in advance.
Note: Please clean and sterilizing the bin and do complete rinsing.
Note: Please clean and sterilizing the ice sliding board, water distribution pipe, water supply pipe,
water pump, then do complete rinsing.
• Turn on the ice maker; push “clean” button for 3 seconds, the ice maker will get into clean process. Put in
proper amount of clean solution manually followed by the clean and sterilizing process instruction.
• Push “clean” button. The ice maker will do auto clean for about 15 minutes. Please do spray cleaning to
the evaporator at the mean time to insure a complete clean. When nished, the led display ashes “Clean”
slowly again.
• Put in proper amount of sterilizing solution manually followed by the clean and sterilizing process
instruction. Push the “clean” button again, the ice maker will do auto sterilizing for about 15 minutes. Please
do spray sterilizing to the evaporator at the mean time to insure a complete sterilizing. When nished, the
ice maker will get into rinsing process, the process will take about 5 minutes, and do 5 cycles rinsing.
• The ice maker will get back to do ice making as soon as the clean process end.
• Please throw away the next 5 batches ice in case of cleaner remained.
SERVICE CALL
If the ice machine works abnormally, please conrm below before making a service call:
1. Check the water supply.
• Whether there is water in the water trough.
• Whether the water pressure for the ice machine is 1.3 Bar to 5.5 Bar; the water temperature is 5-35 °C.
• Whether the water valve is open.
• Whether there is no water leakage.
2. Check the power.
• Whether the panel display does not display the OFF standby state.
• If the LED on the display panel is blank or “OFF”, check whether the plug and socket are normal, and
whether the power supply switch is ON.
3. Check nameplate and series number.
• Check the nameplate located on the side or back of the ice machine and record the model and series
number of the ice machine.
Note: If the machine fails due to the user’s faults, such as no supply of water, electricity or
environmental factors, rather than the fault of the ice maker, the door-to-door service will be
charged.

15
Troubleshooting
COMMON FAULTS AND TROUBLESHOOTING
Fault Potential cause Troubleshooting
Not working / Indicator is “OFF”. Power switch not turned on. Turn on the power switch.
Plug is loose. Check plug and socket.
The display shows E04 high
temperature / The display shows
E06 high pressure protection.
The ambient temperature is too
high.
Normal working temperature range
of 5-32°C.
Condenser or air lter is dirty and
blocked.
Clean the condenser and air lter.
High pressure switch wires fallen
o.
Check and correct high pressure
switch wires.
Fan does not start. Check and correct the fan.
Ice defrost abnormal. Ambient temperature too low. Normal working temperature range
of 5-32°C.
Defrost valve does not start
normally.
Check and correct the defrosting
valve.
Ice thickness too thin or too thick. Check and correct ice thickness
setting.
Poor transparency of ice cubes; ice
cubes too thin or incomplete.
Ice thickness too thin. Check and correct ice thickness
setting.
Water pressure too low. Check that the water supply
pressure is 1.3 Bar to 5.5 Bar.
Water temperature too high. Water temperature of 5-35°C.
Inlet water valve does not work. Check and correct the inlet water
valve.
Inlet water valve is dirty and
blocked.
Check whether water leaks and
correct.
Water leaking. Check and correct the inlet water
lter.
Inlet water lter has not been
replaced for a long time.
Too slow in ice making. The condenser or air lter is dirty. Clean the condenser and lter
screen.
High ambient temperature. Normal working temperature range
of 5-32°C.
Poor ventilation. Check the environment around the
ice machine.
Water temperature is too high. Check the water supply
temperature of 5-35°C.

16
Troubleshooting
Too much noise. The ice machine is not placed in a
leveled foundation or the ice maker
is not leveled.
Level the ice machine.
ERROR CODES
Code Comments Work Mode
E01 Water Curtain or Ice Full Switch
Fault.
Sleeping mode and recover after
the water curtain is reset.
E03 Ice Harvest Overtime. Sleeping mode.
E04 High Temp. Fault. Sleeping mode.
E05 Water Shortage Fault. Sleeping mode and retry every 30
mins.
E06 Over-Pressure Fault. Sleeping mode.
E07 Cond. Temp. Sensor Open Circuit
Fault. Keep working.
E08 Cond. Temp. Sensor Short Circuit
Fault. Keep working.
E09 Water Temp. Sensor Open Circuit
Fault. Keep working.
E10 Water Temp. Sensor Short Circuit
Fault. Keep working.
E13 Water Level Control Fault. Sleeping mode.

17
Parts Breakdown
Model IC-CN-0129S 47483

18
Parts Breakdown
Item No. Description Position Item No. Description Position Item No. Description Position
AK037 Ventilation Window Filter for 47483 1 AK048 Evaporator for 47483 13 AK056 Condenser for 47483 25
AK038 Display Panel Bracket for Vertical Type
for 47483 2 AK049 Sprinkler Tube Assembly for 47483 14 AK057 Fan Blades for 47483 26
AC886 Display Panel for 47483 3 AK050 Pump Assembly for 47483 15 AK058 Dry Filter for 47483 27
AK039 Front Ventilation Window for 47483 4 AK051 Capillary for 47483 16 AK059 Foot Body for 47483 28
AK040 Inner Door Panel for 47483 5 AK052 Gas-Liquid Separator for 47483 17 AC885 PC Board for 47483 29
AK041 Filter Left Card Slot for 47483 6 AK053 Silicone Hose for 47483 18 AK060 LED Lamp Reed Tube Magnetic Switch
for 47483 30
AK042 Filter Right Card Slot for 47483 7 AC881 Defrost Valve Body for 47483 19 AK061 Compressor DLE6.5CN for 47483 31
AK043 Door Frame Assembly - Black Gray for
47483 8 AC882 Defrost Valve Coil for 47483 20 AK062 Vertical Type Machine Display Board
for 47483 32
AK044 Cold Light for 47483 9 AF020 Ice Bin Drain Pipe for 47483 21 AK063 Control Panel Labeled-31 for 47483 33
AK045 Sink for 47483 10 AK054 Inlet Valve for 47483 22 AK064 Outer Door Panel for 47483 34
AK046 Skateboard for 47483 11 AC874 Condensation Sensor for 47483 23 AK065 Foot Block for 47483 35
AK047 Ice Full Sensor - Hall Type for 47483 12 AK055 Fan for 47483 24
Model IC-CN-0129S 47483

19
Model IC-CN-0219S 47484
Parts Breakdown

20
Parts Breakdown
Model IC-CN-0219S 47484
Item No. Description Position Item No. Description Position Item No. Description Position
AC886 Display Panel for 47484 1 AK073 Capillary for 47484 13 AC885 PC Board for 47484 25
AK038 Display Panel Bracket for Vertical Type
for 47484 2 AF020 Ice Bin Drain Pipe for 47484 14 AK076 Compressor NUY80RR for 47484 26
AK066 Front Ventilation Window for 47484 3 AK054 Inlet Valve for 47484 15 AK060 LED Lamp Reed Tube Magnetic Switch
for 47484 27
AK067 Door Panel Assembly - Black Gray for
47484 4 AC881 Defrost Valve Body for 47484 16 AK052 Gas-Liquid Separator for 47484 28
AK068 Door Frame Assembly - Black Gray for
47484 5 AC882 Defrost Valve Coil for 47484 17 AK077 Filter Right Card Slot for 47484 29
AK044 Cold Light for 47484 6 AK053 Silicone Hose for 47484 18 AK078 Filter Left Card Slot for 47484 30
AK069 Sink-160 for 47484 7 AK058 Dry Filter for 47484 19 AK079 Ventilation Window Filter for 47484 31
AK070 Skateboard for 47484 8 AK055 Fan for 47484 20 AK062 Vertical Type Machine Display Board
for 47484 32
AK071 Evaporator-91 for 47484 9 AC874 Condensation Sensor for 47484 21 AK063 Control Panel Labeled-31 for 47484 33
AK072 Sprinkler Tube Assembly for 47484 10 AK074 Fan Blades for 47484 22 AK080 Outer Door Panel for 47484 34
AK047 Ice Full Sensor - Hall Type for 47484 11 AK075 Condenser for 47484 23 AK065 Foot Block for 47484 35
AK050 Pump Assembly for 47484 12 AK059 Foot Body for 47484 24
This manual suits for next models
7
Table of contents
Other Omcan Ice Maker manuals

Omcan
Omcan IC-CN-0529 User manual

Omcan
Omcan 37865 User manual

Omcan
Omcan 37864 User manual

Omcan
Omcan IC-CN-0016 User manual

Omcan
Omcan IC-CN-1450 User manual

Omcan
Omcan IC-CN-0050 User manual

Omcan
Omcan IC-CN-0040 User manual

Omcan
Omcan Santos 53 User manual

Omcan
Omcan IC-CN-0089S User manual

Omcan
Omcan Santos 09 User manual