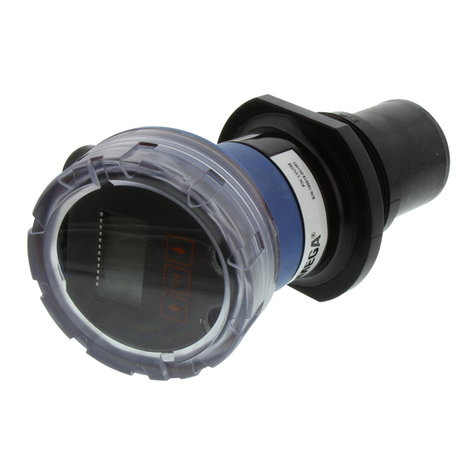
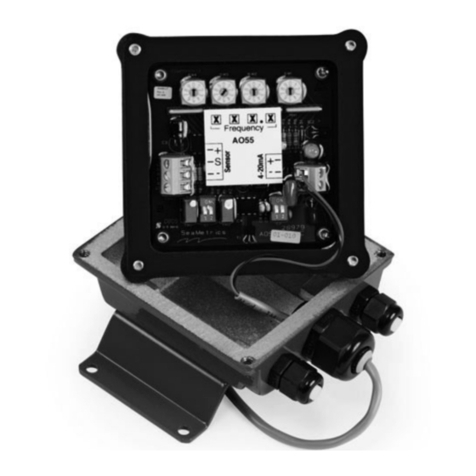
Omega UWPC-2-NEMA User manual

UWPC-2-NEMA
Wireless Process
Voltage/Current Transmitter
MADE IN
e-mail: [email protected]
For latest product manuals:
omegamanual.info
Shop online at
omega.com®
User’s Guide

Servicing North America:
U.S.A.: Omega ngineering, Inc., One Omega Drive, P.O. Box 4047
ISO 9001 Cert f ed Stamford, CT 06907-0047 USA
Toll Free: 1-800-826-6342 T L: (203) 359-1660
FAX: (203) 359-7700 e-mail: [email protected]
Canada: 976 Bergar
Laval (Quebec), H7L 5A1, Canada
Toll-Free: 1-800-826-6342 T L: (514) 856-6928
FAX: (514) 856-6886 e-mail: [email protected]
For immediate technical or application assistance:
U.S.A. and Canada: Sales Service: 1-800-826-6342/1-800-TC-OM GA®
Customer Service: 1-800-622-2378/1-800-622-B ST®
ngineering Service: 1-800-872-9436/1-800-USA-WH N®
Mexico/ T L: 001 (203) 359-1660 FAX: 001 (203) 359-7700
Latin America: e-mail: [email protected]
Servicing Asia:
China:: 1698 Yi Shan Road, Unit 102
Min Hang District
Shanghai, China 201103 P.R.C.
Hotline: 800 819 0559/400 619 0559
e-mail: [email protected]
Servicing Europe:
Benelux: Toll-Free: 0800 099 3344 T L: +31 20 347 21 21
FAX: +31 20 643 46 43 e-mail: [email protected]
Czech Republic: Frystatska 184
733 01 Karviná, Czech Republic
T L: +420-59-6311899 FAX: +420-59-6311114
e-mail: [email protected]
France: Toll-Free: 0805 541 038 T L: 01 57 32 48 17
FAX: 01 57 32 48 18 e-mail: [email protected]
Germany/ Austria: Daimlerstrasse 26
D-75392 Deckenpfronn, Germany
Toll-Free: 0800 8266342 T L: +49 (0) 7056 9398-0
FAX: +49 (0) 7056 9398-29 e-mail: [email protected]
United Kingdom: OM GA ngineering Ltd.
ISO 9001 Cert f ed One Omega Drive, River Bend Technology Centre, Northbank
Irlam, Manchester M44 5BD United Kingdom
Toll-Free: 0800-488-488 T L: +44 (0) 161 777-6611
FAX: +44 (0) 161 777-6622 e-mail: [email protected]
MEGAnet®nline Service Internet e-mail
omega.com info@omega.com
It is t e policy of OMEGA Engineering, Inc. to comply wit all worldwide safety and EMC/EMI
regulations t at apply. OMEGA is constantly pursuing certification of its products to t e European New
Approac Directives. OMEGA will add t e CE mark to every appropriate device upon certification.
T e information contained in t is document is believed to be correct, but OMEGA accepts no liability for any
errors it contains, and reserves t e rig t to alter specifications wit out notice.
WARNING: T ese products are not designed for use in, and s ould not be used for, uman applications.

Table of Contents
Section ............................................................................................................ Page
Section 1 Introduction ........................................................................................... 1-1
1.1 Precautions ................................................................................................. 1-1
1.2 Statement on FCC and C ....................................................................... 1-2
1.3 General Description and System Components ..................................... 1-2
Section 2 Hardware ............................................................................................... 2-1
2.1 Unpacking and Inspection ....................................................................... 2-1
2.2 Included Items ........................................................................................... 2-1
Section 3 peration ............................................................................................... 3-1
3.1 Main Transmitter Board ........................................................................... 3-1
Section 4 Software ................................................................................................. 4-1
4.1 Getting Started ........................................................................................... 4-1
4.2 Software Installation ................................................................................. 4-1
Section 5 End Device peration ......................................................................... 5-1
5.1 Setup and Configuration .......................................................................... 5-1
5.2 Mounting Installation ............................................................................... 5-7
5.3 Battery Replacement ................................................................................. 5-9
5.4 Input Connections ................................................................................... 5-11
Section 6 System peration ................................................................................. 6-1
6.1 Introduction ............................................................................................... 6-1
6.2 RF Communication Basics ....................................................................... 6-1
6.3 Basic System Overview ............................................................................ 6-1
6.4 nvironment/ Operating Conditions .................................................... 6-2
6.5 Transmit Rate vs. Battery Life ................................................................. 6-3
Section 7 Service and Calibration ....................................................................... 7-1
7.1 Service and Calibration ............................................................................ 7-1
Section 8 Specifications ......................................................................................... 8-1
Section 9 Approvals, Regulatory Compliance .................................................. 9-1
i
UWPC-2-NEMA
Wireless Process Voltage/Current Transmitter

List of Figures
Section Figure Description ............................................................... Page
Section 3.1 3-1 Main Transmitter Board ........................................... 3-1
Section 4.2.2 4-1 Software - Welcome Screen ...................................... 4-1
Section 4.2.2 4-2 Software - Select Installation Screen ....................... 4-2
Section 4.2.2 4-3 Software - Confirm Installation Screen .................. 4-2
Section 4.2.2 4-4 Software – License Agreement Screen ................... 4-3
Section 4.2.2 4-5 Software – Installation Complete Screen ............... 4-3
Section 5.1 5-1 USB Cable ................................................................... 5-1
Section 5.1.4 5-2 Main Transmitter Board ........................................... 5-3
Section 5.1.4 5-3 Launch Setup Utility ................................................. 5-3
Section 5.1.4 5-4 Utility Program - Welcome ...................................... 5-4
Section 5.1.4 5-5 Utility Program – Connect To Transmitter ............ 5-4
Section 5.1.4 5-6 Utility Program – Setup Transmitter ...................... 5-5
Section 5.1.4 5-7 Utility Program – stablish Link ............................ 5-5
Section 5.1.4 5-8 Utility Program – Choose Options ......................... 5-6
Section 5.1.4 5-9 Utility Program – Send Setting To Transmitter ..... 5-6
Section 5.2.1 5-10 Mounting .................................................................... 5-7
Section 5.2.1 5-11 Fresnel Zone ............................................................... 5-7
Section 5.3 5-12 Battery Replacement ................................................. 5-9
Section 5.3.2 5-13 Fresnel Zone ............................................................. 5-10
Section 5.4 5-14 Input Connection Diagrams .................................. 5-11
Section 6.3 6-1 nd Device/Receiver ............................................... 6-1
ii
UWPC-2-NEMA
Wireless Process Voltage/Current Transmitter

Section 1 - Introduction
Please read this manual completely before installing and operating your wireless
end device and receiver system. It’s important read and follow all notes,
cautions, warnings and safety precautions before operating this device. “Device”
refers to your transmitter or receiver unit.
1.1 Precautions
• This device is not designed for use in any medical or nuclear applications.
• Do not operate this device in flammable or explosive environments.
• Never operate with a power source other than the one recommended in this
manual.
• This device has been designed for dry, moisture free indoor applications only.
• Do not operate this device outside of the recommended use outlined in this
manual.
• No co-location with other radio transmitters is allowed. By definition, co-
location is when another radio device or it’s antenna is located within 20 cm
of your connector/transmitter and can transmit simultaneously with your
UWPC unit.
• Never install wireless transmitters within 20 cm or less from each other.
• Never install and/or operate your UWPC transmitter closer than 20 cm to
nearby persons.
• Never use your UWPC transmitter as a portable device. Your unit has been
designed to be operated in a permanent installation only.
There are no user serv ceable parts ns de your dev ce.
Attempt ng to repa r or serv ce your un t may vo d your
warranty.
1-1
Introduction 1
NOTE:

1.2 Statement on FCC and CE Marking
1.2.1 FCC Marking
FCC ID: OUR-XB PRO IC #4214A-XB PRO
This device complies with Part 15 of the FCC rules. Operation is subject to the
following two conditions: 1.) This device may not cause harmful interference.
2.) This device must accept any interference received, including interference that
may cause undesired operation.
1.2.2 CE Marking
It is the policy of OM GA to comply with all worldwide safety and MI/ MC
regulations that apply. OM GA is constantly pursuing certification of its
products to the uropean New Approach Directives. OM GA will add the C
mark to every appropriate device upon certification.
1.3 General Description & System Components
1.3.1 General Description
Model UWPC-2-N MA Wireless Process transmitter features a stand-alone,
compact, battery powered N MA design that transmits measurements back to a
host receiver up to 90 m (300') away. When activated the wireless transmitter will
transmit readings continuously at pre set time interval that was programmed by
the user during the initial setup. ach unit measures and transmits: Process
Voltage or Current Readings, RF Signal Strength and Battery Condition to the
receiver and is displayed on your PC screen in real time using the provided
software.
Introduction
1
1-2

Section 2 Hardware
It is important that you read this manual completely and follow all safety
precautions before operating this instrument.
2.1 Package Inspection
Remove the packing list and verify that you have received all your equipment. If
you have any questions about the shipment, please call our Customer Service
Department at
1-800-622-2378 or 203-359-1660. We can also be reached on the Internet at
omega.com
e-mail: cservice@omega.com
When you receive the shipment, inspect the container and equipment for any
signs of damage. Note any evidence of rough handling in transit. Immediately
report any damage to the shipping agent.
The carr er w ll not honor any damage cla ms unless all
sh pp ng mater al s saved for nspect on. After exam n ng
and remov ng contents, save pack ng mater al and carton n
the event resh pment s necessary.
2.2 Included Items
The following items are supplied in the box.
• 1 UWPC-2-N MA transmitter
• 1 User’s Guide
• Measurement/Data Logging Software
• 3.6V Lithium Battery
• USB Cable
2-1
Hardware 2
NOTE:

Section 3 - Operation
3.1 Main Transmitter Board
Figure 3-1. Main Transmitter Board
3-1
Operation
3
ON/OFF SETUP USB
STATUS
LOW BATTERY

Section 4 Software
4.1 Getting Started
The following program files are included on the TC-Central User Software CD
supplied with your Receiver. These files can also be downloaded from the
omega.com website should you misplace your CD.
• nd Device Setup Utility Software
• Receiver/Transceiver Setup Utility Software
• TC-Central Measurement and Data Logging Software
4.2 Software Installation
4.2.1 System Requirements
Your PC should meet the following minimum requirements:
• Pentium Class processor
• Hard Drive Space: 210 meg
• Ram: 256 meg or higher
• 1 Available USB Port
• 1 CD-ROM Drive
• Windows 2000, XB, or Vista (32 bit) Operating System
4.2.2 Software Installation
Insert the TC-Central User CD that was included with your receiver unit into the
CD-ROM drive on your PC. Your system should begin the installation process
automatically.
Figure 4-1. Software - Welcome Screen
4-1
Software 4

This welcome screen should be visible on your computer screen. To continue
with installing the program, click the “Next >” button.
Figure 4-2. Software - Select Installation Screen
From this screen you select the folder were you want the program files installed
on your PC. The default setting will install the software under your “Program”
folders in a new folder named “Omega” To continue with installing the program
click the “Next >” button.
Figure 4-3. Software - Confirm Installation Screen
The setup wizard now has all the information to complete the installation of the
software on your PC. To continue with installing the program click the “Next >”
button.
Software
4
4-2

Figure 4-4. Software - License Agreement Screen
From this screen you must select “Agree” to continue installing your program.
After making your selection click the “Next >” button. The setup wizard will
now install the software.
Figure 4-5. Software - Installation Complete Screen
Congratulations! You have just successfully installed the TC-Central Program on
your PC. To end installing the program and close the setup wizard click the
“Close” Button.
Software 4
4-3

Section 5 - End Device Operation
5.1 Setup and Configuration
5.1.1 Connecting your device
Connect the USB cable to your connector/transmitter unit and also to an
available USB port on your computer. See figure below. This cable was provided
in the box with your receiver unit. This same cable is used for programming
your nd Device and for receiver operation later.
Figure 5-1. USB Cable
5.1.2 Configure Your End Device
Now that you have connected your USB cable to your PC and transmitter you
will complete the following steps to configure your nd Device before placing
the unit into operation. You will be using the configuration software utility that
you installed onto your PC in Section 4. If you have not installed the
configuration software utility you should do so now. During this procedure you
will be setting the following parameters in your transmitter.
5.1.3 Button peration
(1.) “PR SS ON/OFF”
The “PR SS ON/OFF” button on the front of your connector/transmitter is used
to turn your unit “ON” or “OFF”
(2.) “PR SS S TUP”
The “PR SS S TUP” button on the front of your connector/transmitter is only
5.1.4 Indicator Lights
(1) Transmit (TX) Green Indicator Light
The green indicator light marked “TX” on the front of the connector/transmitter
will blink every time the unit sends data to the receiving unit. xample; If you
selected a 5 sec sample rate the green TX led will blink one time every 5 seconds.
(2) Low Battery (Low Bat) Red Indicator Light
The red indicator light marked “Low Bat” on the front of the
connector/transmitter will turn on when the battery reaches a level at or below
the power level required for normal operation. When this indicator turns on it’s
time to install a fresh battery in your unit. For procedures on how to change your
battery see Section 5.3.
5-1
End Device Operation
5

Channel Number
This sets a unique address number into your transmitter. Later, when you set up
your measurement software you will again set channel numbers to receive
readings from the corresponding unit(s). ach unit must be set for a different
channel number for your system to operate correctly.
If you w ll be us ng more than one rece ver un t n your area t
s mportant to set the transm tter address numbers to be a
correspond ng number n your TC-Central software.
Example Rate
For the f rst rece ver: Set the channels on your transm tters to
101, 102, 103, 104, etc. Then set the channels n your TC-
Central user software to match.
For the second rece ver: Set the channels on your transm tters
to 201, 202, 203, 204, etc.
Then set the channels n your TC-Central user software to
match.
Th s number ng scheme can be expanded to match the
number of rece vers you are us ng.
Sample Rate
This will program your nd Device to transmit 1 data reading to your receiver at
a specified time interval. Available settings are 2, 3, 5, 15, 30, 45, 60, 75 or 90
seconds
The sample rate you set w ll have the most d rect effect on the
l fe of the battery n your End Dev ce. It s recommended that
you set the longest sample t me that your appl cat on can l ve
w th to extend t me between battery replacement. See
Sect on 5.3 for more nformat on on battery
End Device Operation 5
5-2
NOTE:
NOTE:

STEP 1. Enter the “SETUP” mode.
To place your transmitter into the “S TUP” mode for programming follow this
procedure.
Figure 5-2. Main Transmitter Board
Press and hold the “ON/OFF” button. While the “ON/OFF” button is being
held, press the “S TUP” button one time and then release the “ON/OFF”
button. The green (TX) indicator on the front of your device should be blinking
at a steady rate. This indicates your nd Device is ready to run the configuration
utility software.
STEP 2. Launch Setup Utility Program.
To launch the nd Device setup utility program on your PC begin by accessing
the “Programs” list under your “Start Menu”.
Scroll through the list of to find the Omega “TC-Central” folder, then select the
nd Device Configuration Program.
Figure 5-3. Launch Setup Utility
End Device Operation
5
5-3
ON/OFF SETUP USB
STATUS
LOW BATTERY

STEP 3. Programming your settings into your End Device
Figure 5-4. Utility Program - Welcome Screen
After starting the setup utility program this will be the first screen you will see.
Click the “Next >” button to proceed and continue setting up your nd Device.
ach screen will provide instruction details on how to proceed.
Figure 5-5. Utility Program - Connect To Transmitter Screen
If you have not already connected your nd Device to a USB port on your PC
you must do this now before continuing. After your unit has been connected
click the “Next >” button to proceed and continue setting up your unit.
End Device Operation 5
5-4

Figure 5-6. Utility Program - Setup Transmitter Screen
If you have not already placed your nd Device into the “Setup” mode you
should do this now before continuing. After your unit has been placed into the
“Setup” mode click the “Next >” button to proceed and continue setting up your
unit.
Figure 5-7. Utility Program - Establish Link Screen
After successful communication between your connector/transmitter has been
established you can click the “Next >” button to proceed and continue setting up
your connector/transmitter. If you did not receive this confirmation of proper
communication you should click the “Back” button to try connecting again.
End Device Operation
5
5-5

Figure 5-8. Utility Program - Choose ptions Screen
From this screen you will select the main operating settings for your end device.
(Note: ach end device must have a different address number for proper
operation). After making your selections click the “Next >” button to proceed
and program your settings into your unit.
Figure 5-9. Utility Program - Send To Transmitter Screen
Congratulations! You have successfully programmed your end device. After
your unit has been programmed click the “Finish” button to close the utility
program.
End Device Operation 5
5-6

5.2 Mounting, Installation and Antenna connection
5.2.1 Mounting
Figure 5-10. Mounting
When mounting your end device, care should be taken to make sure it is as far
away from any metal objects. If nearby metal gets too close to your unit, it has
the potential to interfere with the way the unit radiates and may cause signal
lose or possibly even the inability to communicate at all with your receiver.
5.2.2 Installation
When installing your nd Device it is important to position your device in such
a way as to optimize the antenna location within what’s known as the “Fresnel
Zone”.
The Fresnel Zone can be thought of as a football-shaped invisible tunnel between
two locations that provides a path for RF signals between your nd Device and
your receiver.
Figure 5-11. Fresnel Zone
End Device Operation
5
5-7
4.3 (0.17)
MOUNTING HOLE
DIMENSIONS mm (in)
50.0 (1.97)
82.0 (3.23)
70.0 (2.76)
80.0 (3.15)
55.0 (2.17)
END DEVICE
FRESNEL ZONE
RECEIVER
ANTENNA

In order to achieve maximum range, the football-shaped path in which radio
waves travel must be free of all obstructions. Obstacles in the path (especially
metal) will decrease the communication range between your nd Device and
receiver. Also, If the antennas are mounted just barely off the ground, over half
of the Fresnel zone ends up being obstructed by the earth resulting in significant
reduction in range. To avoid this problem, the antennas should be mounted high
enough off of the ground so that the earth does not interfere with the central
diameter of the Fresnel zone.
It s mportant to understand that the env ronment may
change over t me due to new equ pment or mach nery be ng
nstalled, bu ld ng construct on, etc. If new obstacles ex st
between your End Dev ce and rece ver, the dev ces can be
ra sed on one end or on both ends to hopefully clear the
Fresnel Zone of obstruct ons.
No co-locat on w th other rad o transm tters s allowed. By
def n t on, co-locat on s when another rad o dev ce or the
dev ce’s antenna s located w th n 20 cm of your
connector/transm tter and can transm t s multaneously w th
your un t.
Never nstall mult ple End Dev ces w th n 20 cm or less from
each other.
Never use your End Dev ce as a portable dev ce. Your un t
has been des gned to be operated n a permanent nstallat on
only.
5.2.3 Antenna Connection
Your nd Device has been shipped to you with a standard approved antenna.
Use of any other antenna then what’s suppl ed w th your End
Dev ce w ll vo d all FCC, IC and CE regulatory compl ance.
End Device Operation 5
5-8
NOTE:
NOTE:
NOTE:
NOTE:
NOTE:

5.3 Battery Replacement
5.3.1 Model UWPC-2-NEMA
To install or replace the battery in your nd Device you must first remove the
four screws located on the Lid of the enclosure. This will allow you to access the
battery compartment.
Figure 5-12. Battery Replacement
Your nd Device is equipped with a “C” size lithium power cell assembly.
Omega Part Number: UWTC-BATT-C. To install a replacement battery assembly
follow steps outlined here.
A. Remove the two screws that secure the main circuit board assembly.
B. Lift the circuit board just high enough to allow you to unplug the connector
that attaches the battery assembly to the bottom of the circuit board.
C. Remove the old power cell.
D. Install your new battery assembly into the housing in the same position as the
old battery was located.
. Connect the battery assembly connector to the mating connector on the
bottom of the circuit board.
F. Install the circuit board back into the housing and secure with the two screws
you removed in step one.
G. Installation complete
End Device Operation
5
5-9
LID
LID SCREW
PCB SCREW
PC BOARD
BATTERY
ENCLOSURE
FEMALE CONNECTOR
MALE CONNECTOR
ANTENNA
Table of contents
Other Omega Transmitter manuals

Omega
Omega UWTC Series User manual

Omega
Omega LVU800 Series User manual

Omega
Omega FMG-1000-MAW User manual

Omega
Omega TX12 User manual

Omega
Omega OS102E User manual

Omega
Omega DRST-CM User manual

Omega
Omega UWBT Series User manual

Omega
Omega TX92A User manual

Omega
Omega LVU2800 Series User manual
Omega
Omega LVU500 Series User manual

Omega
Omega OM-CP-RF Series User manual

Omega
Omega MT12TX Series User manual

Omega
Omega W Series User manual

Omega
Omega DRST-UR User manual

Omega
Omega DMD4059 User manual

Omega
Omega OS137 SERIES User manual

Omega
Omega TX787 User manual

Omega
Omega XW-ED User manual

Omega
Omega FP7002 User manual

Omega
Omega PHTX-11 User manual