Omni OMB2010 User manual

ARTICLE NO.: OMB2010
Article name: Generator Home trainer
Ergometer
Tagma
!
OMB2010 Tagma_Instructions manual 2011_GB.indd 1 23.01.2012 17:20:57

www.omni-tness.eu
2
INTRODUCTION
DEAR CUSTOMER,
Congratulations on your purchase of an OMNI home
trainer. Home trainers are still the most popular tness
equipment.
A new era has begun for OMNI brand products - OMNI -
Intelligent Fitness is the new brand for innovative tness
equipment.
With our dynamic and elegant design, OMNI represents
the leading edge in technology, ecological sustainability
and quality.
In the home trainer eld in particular, our focus is on preci-
sion action.
Thanks to the precision of its joint technology and the
detail-tuned mechanical system, this home trainer oers a
perfect action.
OMNI products are equipped with in-
novative generator technology. Power
without an electrical connection. The
energy generated by the user during
exercise is converted into electricity, just
like with a bicycle dynamo, and used for
braking and to power the equipment
throughout the entire workout.
WE ARE THERE IF YOU NEED US!
Should you have any diculties setting up or using your
equipment, give us a call before sending it back! In most
cases, problems have simple causes and can easily be
resolved over the phone, even if technical complex devices
are concerned.
Our service team will be pleased to help you.
NOTE:
Please keep the installation and operating guides, your
proof of purchase and the transport packaging throughout
the warranty period. Returns will only be accepted, after
approval by our service department in original packaging,
accompanied by the assembly/instruction manual, a de-
tailed description of the defect, and the original or a copy
of the proof of purchase.
EXPLANATION OF SYMBOLS
Please note! Please ob-
serve these warnings care-
fully!
Useful tips and notes.
Caution: Read the instruc-
tions for use prior to use !
OMNI Service
An der Nordhelle 19
D-51645 Gummersbach
Tel.: (0049) - (0)1805 - 346412
0.14 Euros/min. from land lines in German/Ger-
man cellular networks maximum 42 cents/min.
Other charges apply when calling from abroad.
(Rates: dated Feb./2011)
Monday – Friday 9.00 am to 6.00 pm
Email: service@omni-tness.eu
OMB2010 Tagma_Instructions manual 2011_GB.indd 2 23.01.2012 17:20:57

TABLE OF CONTENTS
INTRODUCTION ..................................................................................................................................... 2
EXPLANATION OF SYMBOLS ................................................................................................................ 2
SAFETY INSTRUCTIONS ........................................................................................................................ 4
ASSEMBLING THE FITNESS EQUIPMENT ............................................................................................. 5
ASSEMBLY PARTS LIST ......................................................................................................................... 6
EXPLODED ASSEMBLY DRAWING ...................................................................................................... 7
TECHNICAL SPECIFICATIONS ................................................................................................................ 8
OVERVIEW OF EQUIPMENT ................................................................................................................. 9
STEP 1 - Assembling the stabilizers ......................................................................................................................10
STEP 2 - Assembling the pedals ...........................................................................................................................10
STEP 3 - Assembling the handlebar column ........................................................................................................10
STEP 4 - Assembling the handlebar .....................................................................................................................11
STEP 5 - Assembling the saddle post and saddle .................................................................................................11
STEP 6 - Assembling the computer .....................................................................................................................11
GETTING STARTED ................................................................................................................................ 11
COMPUTER FUNCTIONS AND USE ....................................................................................................... 12
FUNCTIONS ........................................................................................................................................... 12
USER PROGRAMS ................................................................................................................................. 13
Quick start and manual program ........................................................................................................................13
PROGRAM ............................................................................................................................................................13
H.R.C. ...................................................................................................................................................................13
USER PROGRAM ..................................................................................................................................................13
WATTS .................................................................................................................................................................14
RECOVERY ...........................................................................................................................................................14
Finding the right sitting position. ......................................................................................................... 15
Handlebar inclination ............................................................................................................................ 15
HAND PULSE SENSORS & HEART RATE MONITOR ............................................................................. 16
And now: On your marks, set, go! ........................................................................................................ 17
OUTPUT CHART ..................................................................................................................................... 18
OUTPUT CHART ..................................................................................................................................... 19
CARE ...................................................................................................................................................... 20
MAINTENANCE ...................................................................................................................................... 20
WASTE DISPOSAL AND ENVIRONMENTAL PROTECTION ................................................................... 20
DISPOSAL OF THE DEVICE ....................................................................................................................................20
WARRANTY............................................................................................................................................ 21
COMPLETE LIST OF PARTS .................................................................................................................... 22
EXPLODED DRAWING ........................................................................................................................... 23
OMB2010 Tagma_Instructions manual 2011_GB.indd 3 23.01.2012 17:20:57

www.omni-tness.eu
4
SAFETY INSTRUCTIONS
This device complies with the requirements of the stand-
ards EN 957-1, EN 957-5, use class H (H = home use). The
device is designed for home use. The device was tested
taking safety factors according to European standard EN
957 into consideration.
Please note that this is a class A exercise device. It thus has
an extremely accurate display.
This is a speed and/or rpm independent device. When oper-
ating the device the resistance is kept constant independ-
ently of the speed.
Resistance measurement/wattage measurement:
The wattage measurement and/or resistance measure-
ment is taken o at the crank (without taking the pedals
into consideration).
Measuring with the pedals assembled would lead to devia-
tions.
Individual user data, such as size, weight and custom set-
tings to the pedals also have a considerable inuence on
the value.
Performing wattage measurement
Speed for test: Settings to check:
50 rpm 50 W and 100 W
60 rpm 150 W and 200 W
The CE label relates to the electromagnetic compatibil-
ity of the device (EU Directive 2004/108/EU). The tness
equipment is not a toy and must be kept out of the reach
of children when not used. Keep small children out of the
range of the device during exercise in order to avoid risk of
injury. Proper use of this equipment is reserved for adults
or youths with appropriate physical and mental develop-
ment. Make sure that each user is familiar with the use and
handling of the device or is under supervision. Parents and
other guardians should be aware of their responsibilities,
as children's natural play instinct and love of experiment-
ing can result in situations and behaviour for which the
tness equipment was not designed.
Above all, point out to children that the equipment is not
a toy.
To avoid impairing your health, or to minimise existing
risks, consult a doctor before your rst exercise session to
perform a general tness check. In case of special impedi-
ments, e.g. if you have a pacemaker, are pregnant, have
orthopaedic problems or take medication, please discuss
the exercise with your doctor rst. Improper or excessive
exercise can endanger your health, cause damage/injury,
and even fatality! Stop training immediately if you feel
weak or dizzy, if you feel nauseous or experience chest
pain, heart palpitations, or other symptoms. Consult a doc-
tor immediately if these symptoms arise.
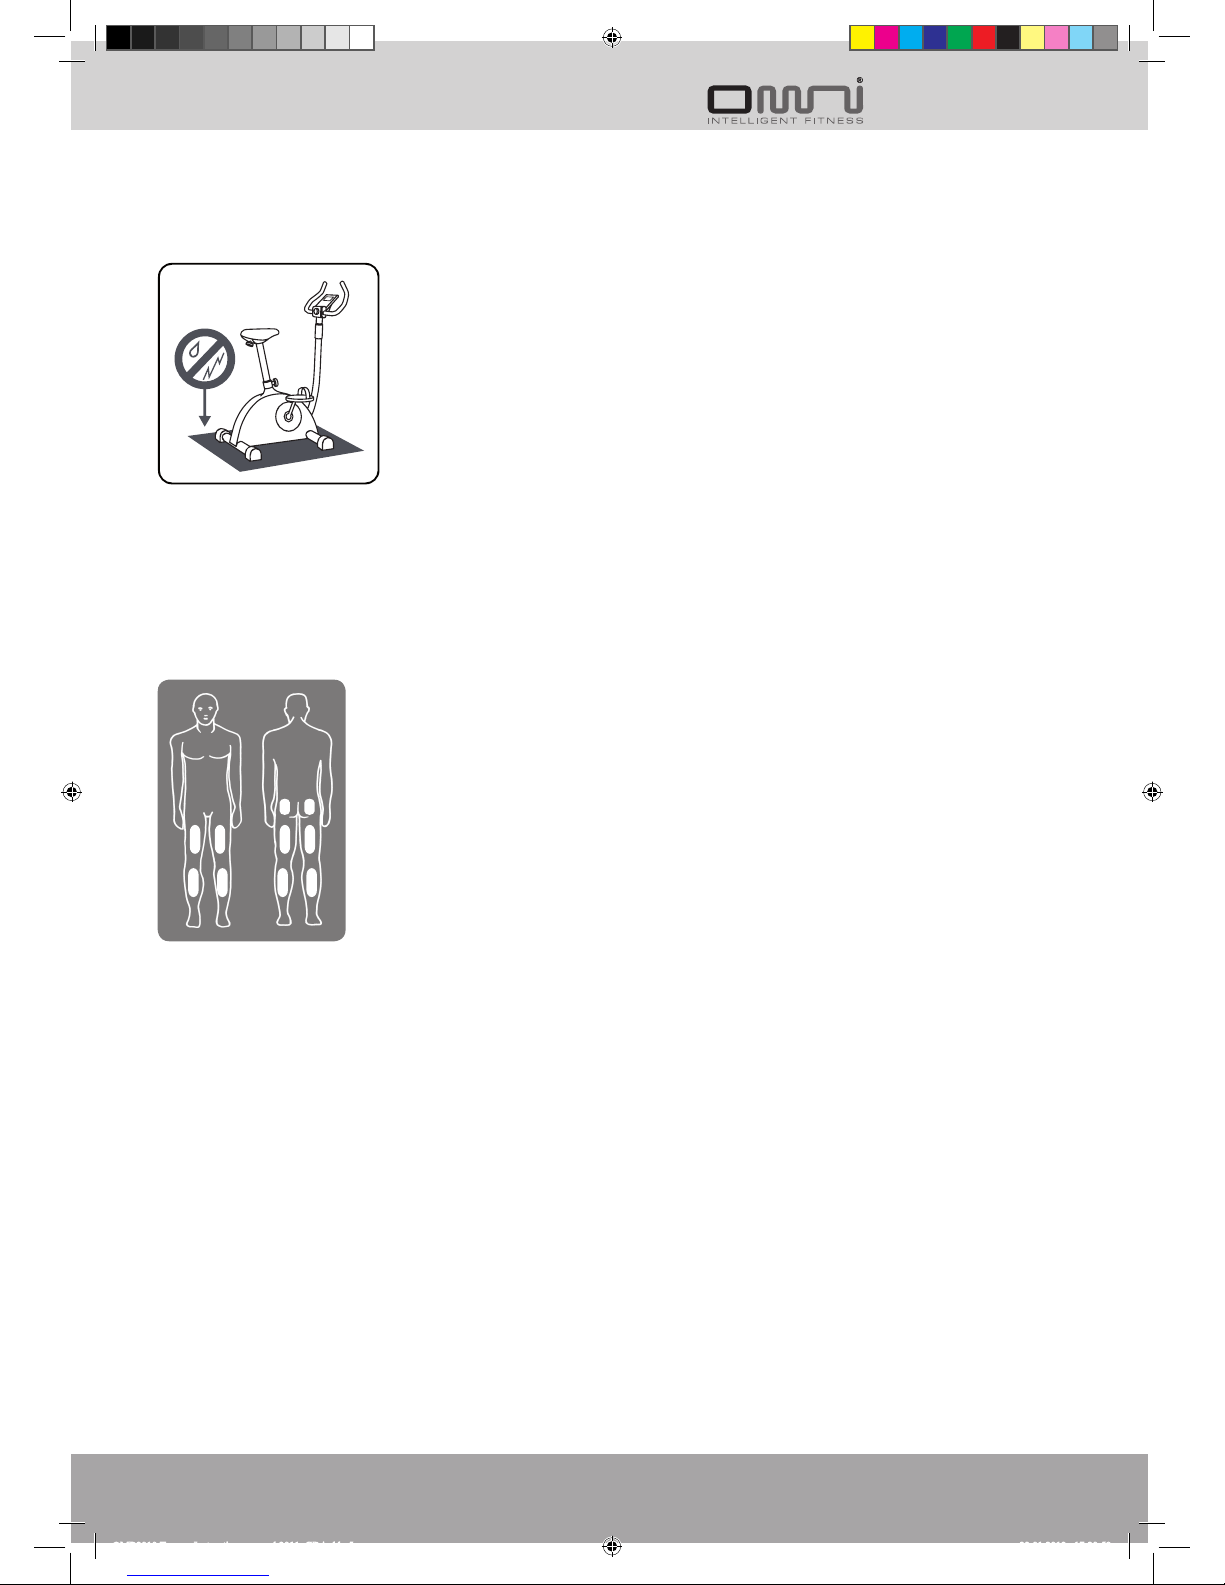
Excessive temperature changes, high moisture levels, and
wetness can aect the working life of your exercise equip-
ment, in particular of electronic parts, and may damage
them beyond repair.
The equipment is not suitable for outdoor use.
To achieve optimum training results and avoid injury,
always allow time for a warm-up phase before training and
a cool-down phase after training. Check the "Warm-up and
Stretching Exercises" section for appropriate exercises.
When exercising, wear comfortable, but not excessively
loose clothing in order to avoid getting caught. Always
wear suitable footwear, such as gym shoes; never exercise
bare footed.
"WARNING! Heart frequency monitoring systems can be
inaccurate. Excessive exercising can damage your health
or be fatal. Stop exercising immediately if you feel dizzy/
weak".
The braking system on this device is not adjustable.
Before you start exercising, make sure the equipment is
standing rmly on a stable and at surface. Make sure the
surface is rm, at and not slippery. Level the device in
case of an uneven oor.
Note minimal insertion point marks - "max" for maximum
mark - when setting up the equipment.
When exercising with the
equipment, make sure that
you have enough space to
move and that no levers,
adjusting mechanisms or
setting aids, or persons, es-
pecially small children, pro-
trude into the movement
area and thus impair your
training or cause injury.
We recommend a safety
margin of 1.5 x 1.5 m around
the device. After use, always leave or store the tness
equipment in a safe state to avoid injury from protruding
parts.
Wattage testing
device
Motor
system
Computer Wattage
display
CPU
Controller
Braking
system
Flywheel
55
cm
116
cm
148
cm
OMB2010 Tagma_Instructions manual 2011_GB.indd 4 23.01.2012 17:20:58

Intended use: The device is intended only for the purpose
of exercising as described in this instruction manual. The
exercise equipment is designed for use by one person only
at any given time.
Before you start using
the exercise equipment,
observe the following: the
equipment is designed only
for private use and not
suitable for commercial
use. Keep the instruction
manual at hand near the
device; you will also need it
to order spare parts.
Despite careful quality
checks, abrasion dust may fall out of moving parts. To
avoid damage to carpets or ooring, we recommend
placing the equipment on a non-slip underlay (e.g. a cloth
or a mat). Neither your dealer nor the vendor accept any
liability for damage to ooring caused by abrasion dust
dropping out of moving parts or for other reasons. Make
sure the exercise room is well ventilated during exercise,
but avoid draughts.
The home trainer is particularly
well suited to exercising the
front and rear leg/calf/buttock
muscles, for generally improv-
ing your stamina and burning
fat.
The equipment is designed for
a maximum bodyweight of 150
kg.
ASSEMBLING THE FITNESS EQUIPMENT
1. Before you starting assembling the equipment, you
should allow it to acclimatise at room temperature for
one to two hours.
2. Choose a space on the oor or a workbench where
you have sucient freedom of movement to assem-
ble the tness equipment. To avoid damage to the
ooring, always assemble the exercise equipment on a
suitable underlay such as a piece of cloth or a mat. The
device should always be placed on a suitable underlay,
mat etc. during use/exercise to avoid damage to the
ooring.
3. Remove all parts from the transport packaging and
remove all protective lms, transport straps, and belts.
Caution: Avoid protective foils from becoming a deadly
trap for children (danger of suocation!).
4. Lay out all the parts in the correct order and check
the parts list to make sure that you have all the parts,
screws, and other components. If parts are missing or
damaged, please contact our service team directly on:
+49 (0) 1805 / 346412 Mo - Fr 9.00 a.m. - 6.00 p.m.
(CET/CEST)
(14 Euro cts./min. for calls from Dt. Telekom landline in Germany.
Max. charge of 42 cents/minute applies to calls from mobile net-
works. Calls from abroad may vary).
5. If you experience diculty setting up or commission-
ing your equipment, our service department will be
happy to help you! In most cases, problems have sim-
ple causes and can easily be resolved over the phone,
even if technical complex devices are concerned.
OMB2010 Tagma_Instructions manual 2011_GB.indd 5 23.01.2012 17:20:59

www.omni-tness.eu
6
ASSEMBLY PARTS LIST
Part Designation Quantity
A Computer 1pc
A-1 Phillips screw 4pc
B Handle set 1pc
C Handlebar column 1pc
C-1 Computer wire handlebar column 1pc
C-2 Phillips screw 3pc
D Main frame 1pc
D-1 Flat washer 4pc
D-3 Allen screw 4pc
D-4 Main frame computer wire 1pc
D-15 R Right pedal 1pc
D-15 L Left pedal 1pc
D-26 D/C power cable 1pc
D-28 Bottle holder 1pc
H Front stabilizer 1pc
I Rear stabilizer 1pc
J Seat post 1pc
J-2 Hand knob for vertical saddle adjustment 1pc
J-11 Saddle 1pc
K-1 Handlebar locking clamp 1pc
K-2 Front handlebar cover 1pc
K-3 Flat washer 2pc
K-4 Spring washer 2pc
K-5 Allen screw 1pc
K-6 Cross tube end cap 1pc
K-7 T-grip pedal knob 1pc
K-8 Handlebar rear cover 1pc
K-9 Allen screw 8pc
K-10 Self-locking screw 4pc
M Adapter 1pc
OMB2010 Tagma_Instructions manual 2011_GB.indd 6 23.01.2012 17:20:59

SCOPE OF DELIVERY: Installation tools: Allen
key, screw driver with at spanner, multifunc-
tional tool, installation and operation manual.
Assembly parts as described in enclosed list of
parts. (Some pre-assembled)
Note: Before you starting assem-
bling the equipment, you should
allow it to acclimatise at room tem-
perature for one to two hours.
EXPLODED ASSEMBLY DRAWING
OMB2010 Tagma_Instructions manual 2011_GB.indd 7 23.01.2012 17:21:01

www.omni-tness.eu
8
TECHNICAL SPECIFICATIONS
Article number: OMB2010
Net weight: 29,4 kg
Dimensions: 85 x 51 x 147 cm (LxWxH)
Max. user weight: 150 kg
Standards: EN-957-1, EN-957-5
Flywheel mass system: ca. 14 kg
Power supply: Generator and A/C current 110-230V
Pulse measurement: Hand-pulse sensors/heart rate receiver
(chest belt not included in scope of delivery)
OMB2010 Tagma_Instructions manual 2011_GB.indd 8 23.01.2012 17:21:02

OVERVIEW OF EQUIPMENT
51
cm
85
cm
147
cm
OMB2010 Tagma_Instructions manual 2011_GB.indd 9 23.01.2012 17:21:03

www.omni-tness.eu
10
Assembly instructions: Some parts of the equipment are
heavy and dicult to handle. Make sure that a second per-
son helps you with the assembly.
STEP 1 - Assembling the stabilizers
Hold the front stabilizer (H) against the main frame (D) and
secure in place with 4 Allen screws (K-9).
Make sure that the rollers on the stabilizer (30) are pointing
downward.
Hold the rear stabilizer (H) against the main frame (D) and
secure in place with 4 Allen screws (K-9).
8*
STEP 1
STEP 2 - Assembling the pedals
Note that the pedals (D-15R, D-15L) are labelled (R) and (L)
for "right" and "left". Start by attaching the toe loops to
the pedals, if they are not preassembled.
1. Screw the left pedal (D-15L) counterclockwise into the
left pedal post (D-18).
2. The right pedal (D-15R) is screwed clockwise into the
right pedal post (D-14).
STEP 3 - Assembling the handlebar column
First loosen the Allen screws (D-3) with matching at wash-
ers (D-1), which are pre-assembled on the main frame (D).
Then connect the computer wire (C-1) on the handlebar
column (C) with the computer wire (D-4) on the main
frame (D). Make sure that the cable connection is correctly
retained to avoid malfunctions.
1. Now place the handlebar column (C) onto the main
frame (D).
Take care to avoid crushing or other damage to
the computer wire. Secure this connection with 4
Allen screws (D-3) and an arc washer (D-1) each.
4*
STEP 3
OMB2010 Tagma_Instructions manual 2011_GB.indd 10 23.01.2012 17:21:09

STEP 4 - Assembling the handlebar
1. Hold the handlebar (B) against the cut-out on the han-
dlebar column (C). Secure the handlebar (B) with the
handlebar clamp (K-1), a spring washer (K-3), a washer
(K-4), and an Allen screw (K-5).
2. Route the hand pulse cable (B-4) through the drill hole
on the front of the handlebar column (C) and back out
at the top.
3. Secure the front cover (K-2) with a spring washer (K-3),
a washer (K-4), a spacer sleeve (K-6) and the T-grip
hand screw (K-7).
4. Secure the rear plastic cover (K-8) to the handlebar col-
umn (C) with 4 self-locking screws (K-10) and a Phillips
screw (C-2).
STEP 5 - Assembling the saddle post and saddle
1. Secure the saddle (J-11) on the saddle post mount (J).
Pull out the height adjustment screw (J-2) and push the
saddle post (J) onto the main frame (D).
2. Release the height adjustment screw. Make sure that
the saddle post clicks correctly into place.
STEP 6 - Assembling the computer
1. Connect the hand pulse cable on the handlebar column
with the computer cable on the rear of the computer.
2. Then insert the computer cable on the handlebar col-
umn into the rear of the computer.
3. Secure the computer on the mount on the handlebar
column using 4 Allen screws (A-1). Avoid crushing the
cable to prevent malfunctions.
GETTING STARTED
The device has a generator system. The rechargeable bat-
teries may be totally discharged after an extended period
of disuse. A mains plug is provided for this case.
We recommend charging the batteries for approx. 8 hours
using mains power before use.
Note: Always plug the power plug into the device rst, and
then into the mains.
1*
1*
1*
1*
2*
2*
4*
STEP 4
DANGER - Danger of injury
The saddle post must be inserted into the
saddle post mount up to the minimum
insertion depth. Note the max. mark on the
saddle post.
OMB2010 Tagma_Instructions manual 2011_GB.indd 11 23.01.2012 17:21:16

www.omni-tness.eu
12
COMPUTER FUNCTIONS AND USE
Note:
The device has a generator system. The rechargeable bat-
teries may be totally discharged after an extended period
of disuse or following transportation. Because of this, the
computer may fail to start even if connected to the mains. In
this case, please wait for a couple of seconds.
After connecting the device to the mains power, all indicators
on the display light for approx. 2 seconds. The computer then
enters the main screen.
1. Now start the computer and start to push the pedals.
2. Enter your personal data. You can store up to four dier-
ent sets of user data. You must enter the following data:
sex, age, height, weight
3. The computer has an automatic on/o function. If the
computer does not receive a signal for more than 90
seconds, it switches o.
4. If wires are not correctly connected, the display shows
"E1" and a loud buzzer sounds. Please unplug the power
adapter and recheck all the wiring connections (see also
Troubleshooting, Special Notes).
FUNCTIONS
Starting or ending exercise programs
"Fitness grade" between 1- 6 after complet-
ing training. Press the button; then press the
balls of your hands against the hand pulse
sensors for 60 sec. You will see your tness
grade F1 - Very good - F6 - very poor
Starting body fat measurement
2 functions:
1. Before training: Toggle between the pre-
sets.
2. During training: Adjust the
resistance. Press these keys to set your train-
ing presets in ascending order.
Pressing once takes you back. Press for 2
sec.: resets all data.
Conrm the entry. Display change.
OMB2010 Tagma_Instructions manual 2011_GB.indd 12 23.01.2012 17:21:17

USER PROGRAMS
After using the Mode key to enter your personal data, and
conrming your entries, you are automatically taken to the
Program menu.
The top computer line will ash originally, starting with a P
and various programs.
1. You can press the Up and Down keys to choose
between the individual programs. Manual
Program - 12 Program proles
USER
HRC
WATT
2. Press the Mode key to conrm your selection.
Quick start and manual program
Before you can start exercising, you must enter the follow-
ing data on the computer:
Time, Distance, Calories (approx. calorie consumption),
Pulse.
Use the Up and Down keys to set the values. Pressing the
Mode/Conrm key takes you to the next value that you
need to enter.
When you have nished the entries, press the Start button
to start exercising.
You can manually adjust the resistance during training by
pressing the + Up and - Down keys.
PROGRAM
1. You must set the desired exercise time rst. To do so,
press the Up and Down keys and conrm your entries
by pressing the Mode key.
2. Then use the Up and Down keys to select the desired
exercise prole. Press the Mode key to conrm the
prole. You can adjust the training resistance during
training by pressing the Up and Down keys.
H.R.C.
1. Start by entering your age using the Up and
Down keys and conrm your entries by pressing
the Mode key.
2. You can also set your target pulse between 30
and 230 manually using the Up and Down keys.
3. Press the Start key to start training.
4. Note: The computer will now set a pedal resist-
ance at which you can train constantly at your
target pulse frequency; i.e. while you are exercis-
ing as long as your pulse frequency is below the
target pulse frequency, the pedal resistance level
will automatically be raised by one level every
30 seconds and automatically reduced by one
load level every 15 seconds once you reach the
set value. If you reach the lowest load level, "1",
and if your pulse frequency is still above the set
value, an audible signal is issued 6 times every
30 seconds and the computer program stops
automatically.
USER PROGRAM
You can select the load levels yourself in this mode; you
have a choice of 16 load levels and 16 program segments.
1. The display for load segment 1 ashes. You can press
the Up and Down keys to vary the load intensity
between 1 and 32. After setting your preferred load in-
tensity, press the Mode key in each program segment
to store your entry.
2. You can press the START/STOP key to start your exer-
cise program directly.
If you would like to additionally preset individual exercise
values, press the START/STOP key and use the Up and
Down keys to adjust the settings.
A TIME message ashes on the lower display. Enter your
training values. You can press the Mode key to conrm
your entries for each function. Preset options for TIME,
DISTANCE, CALORIES and PULSE.
Note:
You can return to the main menu from any other mode at
any time by selecting Pause mode (a letter P ashes top
left in the display) and pressing the RESET key. You can
then select one of the programming options described
above.
OMB2010 Tagma_Instructions manual 2011_GB.indd 13 23.01.2012 17:21:17

www.omni-tness.eu
14
WATTS
1. The number 120 ashes on the display in this mode. You
can now preset your personal Wattage between 10 and
350 Watts by pressing the Up and Down keys. Press the
Mode key to conrm your entry.
2. A TIME message ashes in the lower display. Enter your
exercise values. You can press the Mode key to conrm
your entries for each function. Preset options for TIME,
DISTANCE, approx. CALORIES and PULSE.
3. Press the Start key to start training.
4. Body fat
1. Press the Body fat key in Pause mode to measure
your body fat.
2. Select a user (U-1 - U-4) by pressing the Up and
Down keys and then press Mode to conrm your
selection.
3. The measurement starts for 8 seconds. The two
bars on the left and right ash alternately during
the measurement.
4. After 8 seconds, the display alternately shows the
body fat proportion as a percentage and the BMI
(Body Mass Index).
During the measurement, you must keep both hands
on the hand pulse sensors, even if you are using a
chest belt or ear clip.
RECOVERY
Calculates your individual tness grade between 1 – 6 at the
end of an exercise session. Press the RECOVERY key and
then press both hands against the hand pulse sensors. The
computer times the functions and displays a countdown of
60 seconds. Your pulse rate is measured during this period.
At the end of the countdown, the computer calculates your
current tness grade from F1 to F6, where F1 stands for
excellent, F2 for good, F3 for satisfactory, F4 for sucient,
F5 for poor, and F6 for very poor.
Daily training will help you continually improve your rating.
Note:
1. If the computer does not receive a signal for 90
seconds, it will power o. Press any key on the
computer to switch it back on.
2. To determine your recovery pulse, press the Re-
covery key within the 90 seconds.
3. Charging the battery: Exercise for min. 30 minutes
with a pedal frequency of min. 35 revolutions per
minute.
4. To ensure safe use of the generator system, we
recommend a maximum pedal frequency of 120
RPM.
Technical specications Display
Time 0:00 - 99:99
Distance 0.00 - 99.99
approx. Calories 0 - 9999
Pulse P-30 - 230
Watt 0 - 999 (10-350 Watt)
Speed 0.0-99.9 km
RPM 0 - 999
OMB2010 Tagma_Instructions manual 2011_GB.indd 14 23.01.2012 17:21:17

CAUTION: Rollers can cause scratches or
similar damage to parquet ooring or soft
wooden oors. Make sure you place the
device on a sheet or mat and use the sheet
or mat to move the device. Your dealer and
the manufacturer accept no liability for any
damage caused by failure to observe these
instructions!
Handschraube
Adjusting the saddle height
1. Pull out the height adjustment mechanism and keep
tight hold of it.
2. Set the required saddle height.
3. Release the height adjustment mechanism. Make sure
that it audibly snaps back into place.
Determining the optimum saddle height.
1. Move one pedal to the lowest position and sit down on
the saddle.
2. With your leg stretched, place your heel on the pedal.
3. No insert your foot into the loop. Your leg will be slightly
angled. If you can still sit comfortably on the saddle, the
saddle is set to the right position.
Adjusting the saddle horizontally
1. Release the hand screw below the saddle.
2. Move the saddle to the required position.
3. Tighten the hand screw once again.
4. Determining the optimum saddle position
1. Tie one of the spanners provided to a piece of string and
use it as a plumb.
2. Move one pedal to a position of 45° and sit down on
your home trainer.
3. Put the balls of your feed on the pedals. If your knee
cap is now vertically above the pedal axis, the saddle is
correctly adjusted in horizontal direction. Now take the
plumb line. If the saddle is still not set correctly, repeat
steps 1-3 from the section "Adjusting the Saddle in Hori-
zontal Direction".
Finding the right sitting position.
Handlebar inclination
1. Turn the hand screw slightly counter-clockwise.
2. Adjust the inclination to suit your needs.
3. Tighten the hand screw once again
Transport
To transport the device, put one foot on the front stabilizer;
take hold of the device via the handlebar near the tness
computer and tilt the
device so that it moves on
its rollers. Never transport
the device without help. To
deposit the device, again
place one foot on the front
stabilizer, and slowly allow
the device to drop down to
the oor.
OMB2010 Tagma_Instructions manual 2011_GB.indd 15 23.01.2012 17:21:18

www.omni-tness.eu
16
HEART BEAT TARGET FREQUENCY
The heart beat frequency recommended by leading sport
medicine specialists is 60 to 80 % of your maximum achiev-
able heart frequency during exercise. This range is calcu-
lated by reference to your age and the exercise duration.
As a rule of thumb, the older you are, the lower the target
range will be.
HAND PULSE SENSORS & HEART RATE MONITOR
Measuring your pulse
There are two ways to measure your pulse:
• using a standard pulse rate transmitter, or
• with the two hand sensors on the handlebar
If you have a pacemaker, note that you must not use the
pulse rate transmitter, or consult your doctor for advice.
Measuring your pulse with the pulse rate transmitter If
you want to monitor your pulse permanently, use a pulse
rate transmitter such as a chest belt. The integrated heart
rate receiver is compatible with most standard pulse rate
transmitters that transmit at a frequency of 5.3 kHz. Our
service team will be pleased to help you if you have any
questions.
Your pulse is displayed on the computer display.
If the measured pulse is not shown, this may be due to
one of the following reasons:
• Skin/contact areas too dry (moisten or use ECG gel)
• Transmitter too cold
• Chest strap has slipped
• Radio interference (e.g. mobile phone, cycle compu-
ter, high voltage lines)
• Transmitter battery discharged
Measuring your pulse with the hand sensors
• While exercising, place both hands on the hand sen-
sors on the handlebar and wait for a short while until
your pulse is displayed. You can release the sensors if
you want to continue exercising with the handlebars.
• Place your hands back on the hand sensors if you
want to read your pulse again.
Measuring your recovery pulse
You can measure your recovery pulse after exercising. If
you do this for an extended period of time, you will be able
to track your performance improvements due to exercising
with your home trainer.
• After exercising, press the RECOVERY key and take
hold of the hand sensors, if you are not using a pulse
measuring sensor. Stand still. The computer will meas-
ure your pulse for one minute and calculate a tness
grade between F1 ("Very good") and F6 ("Very poor")
based on this. The lower the tness grade, the better
your condition and recovery.
Warning: The heart beat measurement can be impaired by
movement, friction and sweat. This value should thus not
be used for medical applications or evaluations, but simply
as an orientation value.
Special impediments such as use of a pacemaker or other
medical implants must be discussed with your doctor prior
to using the sensors.
Alter
220
200
160
140
120
100
80
180
20 25 30 35 40 45 50 55 60 65 70 75 80
Grenzwert-Tabelle
Diese wissenschaftlich erarbeitete Tabelle zeigt auf einen Blick an, in welchem ungefähren HF- Bereich Sie
trainieren sollten, je nach dem, ob Sie Ihre Kondition verbessern wollen, Fett abbauen oder einfach nur Ihre
Gesundheit stärken wollen. Hinweis: Gilt nur für gesunde Personen mittlerer Leistungsfähigkeit!
Herzfrequenz (bpm)
aerobe Zone ( Konditonssteigerung)
anaerobe Zone
OMB2010 Tagma_Instructions manual 2011_GB.indd 16 23.01.2012 17:21:18

And now: On your marks, set, go!
Important note:
Before you start with your personal exercise program,
observe the safety instructions in the introduction to the
user's manual. Always take sucient time for tness train-
ing, and always allow time for a warm-up and cool-down
phase.
How often and how long should I exercise?
Experts recommend regular exercise to get t. Random
exercise is not the right approach to achieving training suc-
cess. If you exercise once ore twice a week, you will keep
your current tness level.
If you exercise three or four times a week, you will improve
your current tness level substantially. Many experts con-
sider training three times a week to be ideal. Never overdo
exercise at the beginning; instead, increase gradually.
Increasing does not mean increasing the number of train-
ing sessions, but the duration of the individual sessions. We
recommend starting with an exercise period of approx. 20
minutes and a low resistance level.
Measuring your pulse
1. Before exercising = Rest pulse
2. 10 minutes after starting exercising = load / training
pulse
3. 1 minute after nishing exercising = recovery pulse. It is
a good idea to enter your values in a table for monitor-
ing purposes.
Structuring exercise sessions
An exercise session should comprise three phases
1. A warm-up phase 5 to 10 minutes of gymnastics and
stretching to prepare your muscles for the exercise to
come.
2. Training phase
15 to 45 minutes of intensive but not stressful exercise.
3. Cool-down phase
Wind down gradually for the last one or tow minutes.
Finish o by doing some loosening exercises.
Metabolic changes during exercise
• In the rst 10 minutes of a training session, your body
will burn up the glycogen stored in your muscles.
• Fat is burnt after another 10 minutes.
• After 30 to 40 minutes, your lipo-metabolism is activat-
ed and body fat is mainly burnt to supply energy
• Regular exercise can sustainably improve your metabo-
lism. This will results in improved performance and bet-
ter fat burning.
OMB2010 Tagma_Instructions manual 2011_GB.indd 17 23.01.2012 17:21:18

www.omni-tness.eu
18
OUTPUT CHART
This output chart gives you a perfect reference for your exercise program. Regular training will help you raise your
personal targets and improve your tness level.
Date Resting pulse Exercise
pulse
Recovery
pulse
Load level Time in min. Distance
covered
Energy con-
sumption
Fitness grade
OMB2010 Tagma_Instructions manual 2011_GB.indd 18 23.01.2012 17:21:18

Date Resting pulse Exercise
pulse
Recovery
pulse
Load level Time in min. Distance
covered
Energy con-
sumption
Fitness grade
OUTPUT CHART
OMB2010 Tagma_Instructions manual 2011_GB.indd 19 23.01.2012 17:21:18

www.omni-tness.eu
20
use it, make sure that the respective person is familiar with
its handling and use. Hand over the installation instructions
and instructions for use to the new owner to allow them to
use the device safely and successfully.
The manufacturer and/or vendor will accept no responsibil-
ity and no liability for injuries caused by improper use in
case of repairs or modications, e.g. tting of third party
parts, non-original OMNI parts not specically intended for
use with the device and similar. The user assumes the sole
responsibility for any risks that may result from the use of
this tness equipment.
WASTE DISPOSAL AND ENVIRONMENTAL PRO-
TECTION
Do not dispose of batteries as domestic waste; instead, use
the collection points intended for this purpose!
Before disposing of your exercise device (at the end of its
working life), make sure you remove the batteries.
Consumers are required by law to dispose of batteries via
a battery return point operated by an authorised battery
disposal agent (local authority, or distributor). Make sure
batteries and rechargeable batteries are discharged before
disposal!
Labelling: Pb (= lead), Hg (= mercury), Cd (= cadmium).
Packaging:
We exclusively use packaging materials that can be recy-
cled
- Transport/external packaging made of cardboard (PAP)
- Protective lms and bags made of polyethylene (PE)
- Straps and belts made of polypropylene (PP)
- Bumpers and fasteners made of CFC-free polystyrene
(PS).
Please dispose of these materials in line with local regula-
tions in order to enable environmentally friendly recycling.
DISPOSAL OF THE DEVICE
At the end of the useful life of this device, contact your
local waste disposal authority for information on correct
disposal.
CARE
Though the surface of your exercise equipment is resilient
to perspiration, it must be cleaned from time to time to
ensure hygienic training. To protect the device against
excessive soiling during exercising, we recommend the
use of a towel. When cleaning the equipment, never use
corrosive or aggressive cleaning agents that could damage
the surface. Use only a soft damp cloth. Always clean the
device after use.
STORAGE
Keep the equipment in a dry, well ventilated place out of
the reach of children. Cover it with a sheet to protect it
against dust.
MAINTENANCE
CAUTION: Locknuts will not work loose due to vibration.
However, the locking eect is only guaranteed for once-on-
ly tightening! If you need to loosen the nuts, replace them
with new locknuts.
To maintain the high quality and safety of your tness de-
vice, check that all screw and plug connections are tight at
regular intervals, after 1-2 months at the latest, and before
use after an extended period of disuse. Also check all wear
parts for visible signs of wear or breakage.
Pay special attention to end caps, weld joints, rotary joints,
screw unions etc.
To avoid danger of injury, replace defective or missing parts
immediately. Our service team will answer your queries
concerning maintenance:
Telephone: +49 (0) 1805/346412 Mon - Fri 9.00 a.m. -
6.00 p.m. (14 Ct./min. for calls in Germany
via the Dt. Telekom network. Max. charge
of 42 cents/minute applies to calls from
mobile networks. Calls from abroad may
vary).
Fax: +49 (0) 2261 / 547-77
Email: service@omni-tness.eu
Internet: www.omni-tness.eu
Postal address: Stamm Sport & Freizeit GmbH
An der Nordhelle 19
D-51645 Gummersbach / Germany
If the device is defective, do not use it until duly repaired.
No liability will be accepted if you fail to observe this.
If you pass this equipment on or allow another person to
OMB2010 Tagma_Instructions manual 2011_GB.indd 20 23.01.2012 17:21:18
Table of contents
Popular Fitness Equipment manuals by other brands

Hoist Fitness
Hoist Fitness ROC-IT RS-1415-A owner's manual

First Degree Fitness
First Degree Fitness E620 Seated UBE owner's manual

DUVLAN
DUVLAN Nerpus 6055 user manual

FitnessPod
FitnessPod Vision Fitness S60 user manual

PrimeKinetix
PrimeKinetix MyoStim 2 user manual

Northern Lights
Northern Lights 225LB Assembly instructions