HEM-7203-AP_A_M03_100518.pdf
G
H
A
B
C
D
E
F
M
N
O
P
S
Q
R
T
U
V
I J K
L
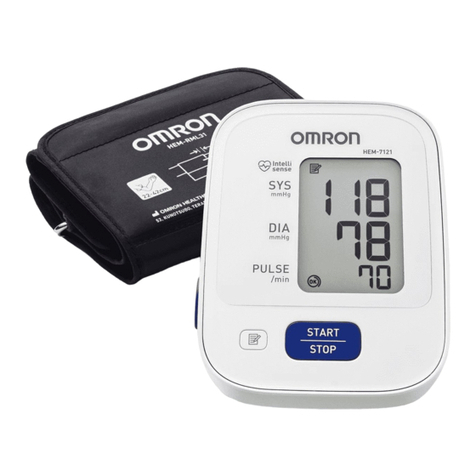
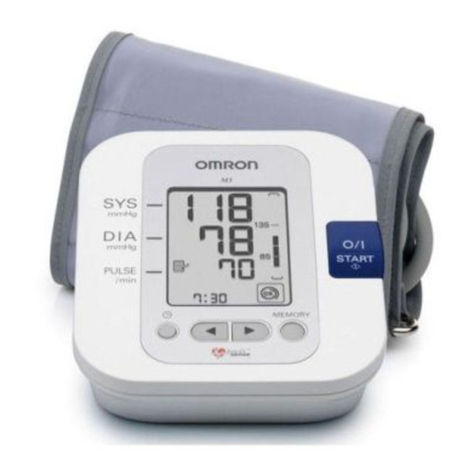
Thank you for purchasing the OMRON HEM-7203 Automatic Blood Pressure
Monitor.
The OMRON HEM-7203 is a compact, fully automatic blood pressure monitor,
operating on the oscillometric principle. It measures your blood pressure and
pulse rate simply and quickly. For comfortable controlled inflation without the
need of pressure pre-setting or re-inflation the devices uses its advanced
“IntelliSense” technology.
Intended Use
This product is designed to measure the blood pressure and pulse rate of
people within the range of the designated arm cuff, following the instructions in
this instruction manual.
It is mainly designed for general household use. Please read the Important
Safety Information in this instruction manual before using the unit.
Please read this instruction manual thoroughly before using the unit.
Please keep for future reference.
For specific information about your own blood pressure, CONSULT
YOUR DOCTOR.
Consult your doctor prior to using in pregnancy or if diagnosed with arrhythmia
or arteriosclerosis.
Please read this section carefully before using the unit.
Warning:
• Indicates a potentially hazardous situation which, if not avoided, could result
in death or serious injury.
(General Usage)
• Always consult your doctor. Self-diagnosis of measurement results and
self-treatment are dangerous.
• People with severe blood flow problems, or blood disorders, should consult a
doctor before using the unit, as cuff inflation can cause internal bleeding.
(AC Adapter Usage)
• Never plug in or unplug the power cord from the electric outlet with wet
hands.
(Battery Usage)
• If battery fluid should get in your eyes, immediately rinse with plenty of clean
water. Consult a doctor immediately.
Caution:
• Indicates a potentially hazardous situation which, if not avoided, may result in
minor or moderate injury to the user or patient or damage to the equipment or
other property.
(General Usage)
• Do not leave the unit unattended with infants or persons who cannot express
their consent.
• Do not use the unit for any purpose other than measuring blood pressure.
• Do not disassemble the unit or arm cuff.
• Use only the approved arm cuff for this unit. Use of other arm cuffs may result
in incorrect measurement results.
• Make sure that the air tube is not wrapped around other parts of your body
when taking measurements at night. This could result in injury when the air
pressure in the air tube is increased.
• Do not leave the cuff wrapped on the arm if taking measurements during the
night. This could result in injury.
• Do not inflate the arm cuff over 299 mmHg.
• Do not use a mobile phone or other devices that emit electromagnetic fields,
near the unit. This may result in incorrect operation of the unit.
• Do not operate the unit in a moving vehicle (car, airplane).
• To inflate the cuff manually, refer to Section 3.3. If the cuff is over inflated, it
can cause internal bleeding.
(AC Adapter Usage)
• Use only the original AC adapter (optional) designed for this unit. Use of
unsupported adapters may damage and/or may be hazardous to the unit.
• Plug the AC adapter into the appropriate voltage outlet. Do not use a
multiple-tap.
• Do not use the AC adapter if the unit or the power cord is damaged. Turn off
the power and unplug the power cord immediately.
(Battery Usage)
• If battery fluid should get on your skin or clothing, immediately rinse with
plenty of clean water.
• Use only four “AA” alkaline or manganese batteries with this unit. Do not use
other types of batteries.
• Do not insert the batteries with their polarities incorrectly aligned.
• Replace old batteries with new ones immediately. Replace all four batteries at
the same time.
• Remove the batteries if the unit will not be used for three months or more.
• Do not use new and used batteries together.
General Precautions
• Do not apply strong shocks and vibrations to or drop the unit and arm cuff.
• Do not take measurements after bathing, drinking alcohol, smoking,
exercising or eating.
• Do not forcibly bend the arm cuff or bend the air tube excessively.
• When removing the air tube, pull on the air plug at the connection with the
main unit not the tube itself.
• Do not inflate the arm cuff when it is not wrapped around your arm.
• Do not wash the arm cuff or immerse it in water.
• Read and follow the “Important information regarding Electro Magnetic
Compatibility (EMC)” in the Technical Data Section.
• Read and follow the “Correct Disposal of This Product” in the Technical Data
Section when disposing of the device and any used accessories or optional
parts.
Important Safety Information
Introduction
1. Overview
Main unit:
Arm cuff:
M. Systolic blood pressure
N. Diastolic blood pressure
O Heartbeat symbol
(Flashes during measurement)
P. Memory symbol
Q. Deflation symbol
R. Average value symbol
2.1 Installing/Replacing the Batteries
2. Preparation
1.
2.
Remove the battery cover.
2.2 Setting the Date and Time
1. Press the button.
2. Set the monitor to the correct date and time before
taking a measurement for the first time.
3. Press the START/STOP button to store the setting.
Notes:
• If the batteries have been removed for 30 seconds or more, the date
and time setting will need to be reset.
• If the date and time are not set, “-:--” appears during or after
measurement.
Insert four “AA” batteries
as indicated in the battery
compartment and then
replace the battery cover.
Notes:
• If the battery low symbol ( ) appears on the display, turn the unit off
then replace all batteries at the same time.
• The measurement values continue to be stored in memory even after
the batteries are replaced.
Disposal of used batteries should be carried out in accordance with the
national regulations for the disposal of batteries.
The bottom edge of the cuff should be 1 to 2 cm above the elbow.
Marker (arrow under tube) is centred on the middle of your inner arm.
Close the fabric fastener FIRMLY.
3. Using the Unit 4. Troubleshooting and Maintenance
1. Insert the air plug into the air jack.
2. Put your arm through the cuff loop.
3. Position the arm correctly.
This criteria is for home blood pressure measurement.
Systolic Blood Pressure Above 135 mmHg
Diastolic Blood Pressure Above 85 mmHg
3.1 Applying the Arm Cuff
3.3 Taking a Reading
6. Technical Data
5. Optional Parts
4.1 The Icons and Error Messages
Blink
Lit
4.2 Troubleshooting
4.3 Maintenance
Problem
3.4 Using the Memory Function
Calibration and Service
To protect your unit from damage, please observe the following:
Cause Remedy
Notes:
• When you take a measurement on the right
arm, air tube will be at the side of your
elbow. Be careful not to rest your arm on
the air tube.
Notes:
• To cancel a measurement, press the START/STOP button to turn the
unit off and to release the air in the arm cuff.
• Remain still while taking a measurement.
Press the START/STOP button.
The cuff will start to inflate automatically.
To delete all the values stored in memory
• Press the START/STOP button and repeat
measurement.
• If the problem continues, try replacing the
batteries with new ones.
If this still does not solve the problem, contact
your OMRON retail outlet or distributor.
• Do not subject the main unit and the cuff to extreme
temperatures, humidity, moisture or direct sunlight.
• Do not fold the cuff or tubing tightly.
• Do not inflate the arm cuff over 299 mmHg.
• Do not disassemble the unit.
• Do not subject the unit to strong shocks or vibrations
(for example, dropping the unit on the floor).
• Do not use volatile liquids to clean the main unit. The
unit should be cleaned with a soft, dry cloth.
• Use a soft, moistened cloth and soap to clean the arm
cuff.
• Do not wash the arm cuff or immerse it in water.
• Do not use petrol, thinners or similar solvents to clean
the arm cuff.
• The accuracy of this blood pressure monitor has been
carefully tested and is designed for a long service life.
• It is generally recommended to have the unit inspected
every two years to ensure correct functioning and
accuracy. Please consult your local authorised
OMRON distributor or dealer.
• Do not carry out repairs of any kind yourself. If a defect
occurs, consult your local authorised OMRON
distributor or dealer.
Automatic Blood Pressure Monitor
HEM-7203
LCD Digital Display
Oscillometric method
Pressure: 0 to 299 mmHg
Pulse: 40 to 180/min.
Pressure: ±3 mmHg
Pulse: ±5% of display reading
Fuzzy-logic controlled by electric pump
Automatic pressure release valve
30 Measurements with date and time
DC6V 4W
4 “AA” batteries 1.5V or AC adapter
(optional)
Capacity of new alkaline batteries is approx.
1500 measurements
= Type B
Internally powered ME equipment
(When using only the batteries)
= Class II ME equipment
(Optional AC adapter)
+10°C to +40°C / Maximum: 30 to 90% RH
-20°C to +60°C / Maximum: 10 to 95% RH
/ 700-1060 hPa
Approximately 340g without batteries
Approximately 120g
Approximately 123 (w) mm × 85 (h) mm × 141(l) mm
Approximately 146 mm × 446 mm (Medium cuff: arm
circumference 22 to 32 cm)
Nylon and polyester
Main unit, cuff, instruction manual, storage case,
battery set
Storage case:
Remove tight-fitting clothing or tight rolled up sleeve from your
upper arm.
Do not place the cuff over thick clothes.
3.2 How to Sit Correctly
To take a measurement, you need to be
relaxed and comfortably seated, under
comfortable room temperature. No eating,
smoking or exercising 30 minutes before
taking a measurement.
• Sit on a chair with your feet flat on the floor.
• Sit upright with your back straight.
• The cuff should be at the same level as your
heart.
1 to 2 cm
• The blood pressure can differ between the right arm and the left arm,
and therefore also the measured blood pressure values can be
different. Omron recommends to always use the same arm for
measurement. If the values between the two arms differ substantially,
please check with your doctor which arm to use for your
measurement.
1.
2. Remove the arm cuff.
3. Press the START/STOP button to turn the monitor off.
The monitor automatically stores the measurement in its
memory.
It will automatically turn off after five minutes.
The monitor automatically stores the result up to 30 sets. It can also
calculate an average reading based on the measurements from the last
three readings taken within 10 minutes. If there are only two readings in
memory for that period, the average will be based on two readings. If
there is one reading in memory for that period, the average will be
based on one reading.
Notes:
• If the memory is full, the monitor will delete the oldest readings.
• When viewing the reading taken without setting the date and time,
“-:--” is displayed instead of the date and time.
Note: Wait 2-3 minutes before taking another blood pressure
measurement. Waiting between readings allows the arteries to
return to the condition prior to taking the blood pressure
measurement.
Note: You cannot partially delete the stored readings.
When the memory symbol ( ) appears, first press the Memory
button. Then while holding it down, press the START/STOP button
simultaneously for about 2-3 seconds.
Self-diagnosis of measured results and treatment are dangerous.
Please follow the instructions of your doctor.
START INFLATE DEFLATE END
COMPLETE
Warning:
• Recent research suggests that the following
values can be used as a guide to high blood
pressure for measurements taken at home.
Important:
The batteries are low.
The batteries are
exhausted.
Cuff is under inflated.
Movement during
measurement.
Air plug disconnected.
Arm cuff not applied
correctly.
Clothing is interfering with
the arm cuff.
Air is leaking from the arm
cuff.
The arm cuff was inflated
above 299 mmHg when
inflating the cuff manually.
Device error.
The reading is
extremely low (or
high).
Arm cuff deflates too
soon.
Arm cuff pressure
does not rise.
Cannot measure or
readings are too low
or too high.
Nothing happens
when you press the
buttons.
Other problems.
Arm cuff not applied
correctly.
Movement or talking
during measurement.
Clothing is interfering
with the arm cuff.
The air tube is not
securely connected
into the main unit.
Air is leaking from the
arm cuff.
The arm cuff is loose.
The arm cuff has not
been inflated
sufficiently.
The batteries are
empty.
The batteries have
been inserted
incorrectly.
Apply the arm cuff
correctly.
Refer to section 3.1.
Remain still and do not
talk during
measurement.
Refer to section 3.2.
Remove any clothing
interfering with the arm
cuff.
Refer to section 3.2.
Make sure that the air
tube is connected
securely.
Refer to section 3.1.
Replace the arm cuff
with a new one.
Refer to Chapter 5.
Apply the cuff correctly
so that it is firmly
wrapped around the arm.
Refer to section 3.1.
Inflate the cuff so that it
is 30 to 40 mmHg above
your previous
measurement result.
Refer to section 3.3.
Replace the batteries
with new ones.
Refer to section 2.1.
Insert the batteries with
the correct (+/-) polarity.
Refer to section 2.1.
You should replace them
with new ones ahead of
time.
Refer to section 2.1.
You should replace them
with new ones at once.
Refer to section 2.1.
Carefully read and repeat
the steps listed under
section 3.3.
Repeat measurement.
Remain still and do not talk
during measurement.
Refer to section 3.2.
Insert the air plug securely.
Refer to section 3.1.
Apply the arm cuff correctly.
Refer to section 3.1.
Remove any clothing
interfering with the arm cuff.
Refer to section 3.1.
Replace cuff with new one.
Refer to Chapter 5.
Do not inflate the arm cuff
above 299 mmHg.
Refer to section 3.3.
Contact your OMRON retail
outlet or distributor.
Cause RemedyError Display
1. Unplug the air tube from the air connector.
2. Gently fold the air tube into the arm cuff.
4.4 Storage
Keep the unit in its storage case when not in use.
Note:
Do not bend the air tube excessively.
3.
Do not store the unit in the following situations:
• If the unit is wet.
• Locations exposed to extreme temperatures,
humidity, direct sunlight, dust or corrosive
vapours.
• Locations exposed to vibrations, shocks or where it will be at an
angle.
Place the arm cuff and main unit in the
storage case.
1.
2.
Using the Optional AC Adapter
Insert the AC adapter plug
into the AC adapter jack on
the rear side of the main
unit.
Plug the AC adapter into an
electrical outlet.
Medium Arm Cuff
Arm circumference
22 - 32 cm
Large Arm Cuff
Arm circumference
32 - 42 cm
AC Adapter “R”
Product Description
Model
Display
Measurement Method
Measurement Range
Accuracy
Inflation
Deflation
Memory
Rating
Power Source
Battery Life
Applied Part
Protection Against
Electric Shock
Operating
temperature/ Humidity
Storage temperature/
Humidity/ Air pressure
Console Weight
Cuff Weight
Outer Dimensions
Cuff Dimensions
Cuff Material
Package Content
Automatic Blood
Pressure Monitor
Model HEM-7203
Instruction Manual A. Display
B. START/STOP button
C. Memory button
D. Up/Down ( ) buttons
E. Date/Time setting ( ) button
F. Air Jack
G. Battery compartment
H. AC adapter jack (for optional AC
adapter)
I. Arm cuff (Medium cuff: arm
circumference 22-32cm)
J. Marker (arrow under tube)
K. Air tube
L. Air plug
S. Date/Time display
T. Blood pressure level indicator
U. Pulse display and Memory
number
V. Battery low symbol
Push or buttons to
change.
Push the button to confirm.
Next setting appears.
1)
2)
Year Month Day Hour Minute
If your systolic pressure is more than
220 mmHg
After the cuff starts to inflate, press and hold the
START/STOP button until the monitor inflates 30 to 40 mmHg
higher than your expected systolic pressure.
Notes:
• The monitor will not inflate above 299 mmHg.
• Do not apply more pressure than necessary.
Average Value
Alternating
date/time display
View the Average
Value
• If the previous
reading was taken
without setting the
date and time, the
average value is not
calculated.
View the Previous
Reading
• The Memory number
appears for a second
before the pulse rate
is displayed. The
newest set is
numbered “1”.
View the Readings
Stored in Memory
Previous Reading
Display:
RecentOld
To disconnect the AC adapter, unplug the AC adapter from the
electrical outlet first and then remove the AC adapter plug from the
main unit.

