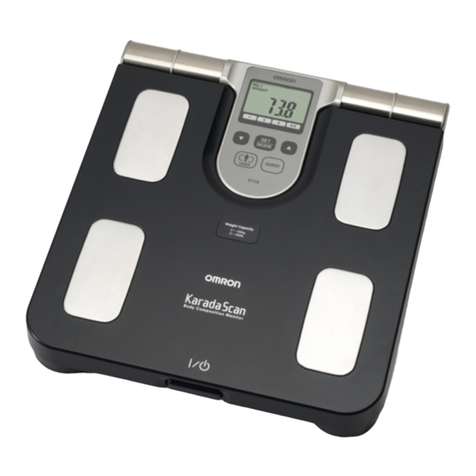
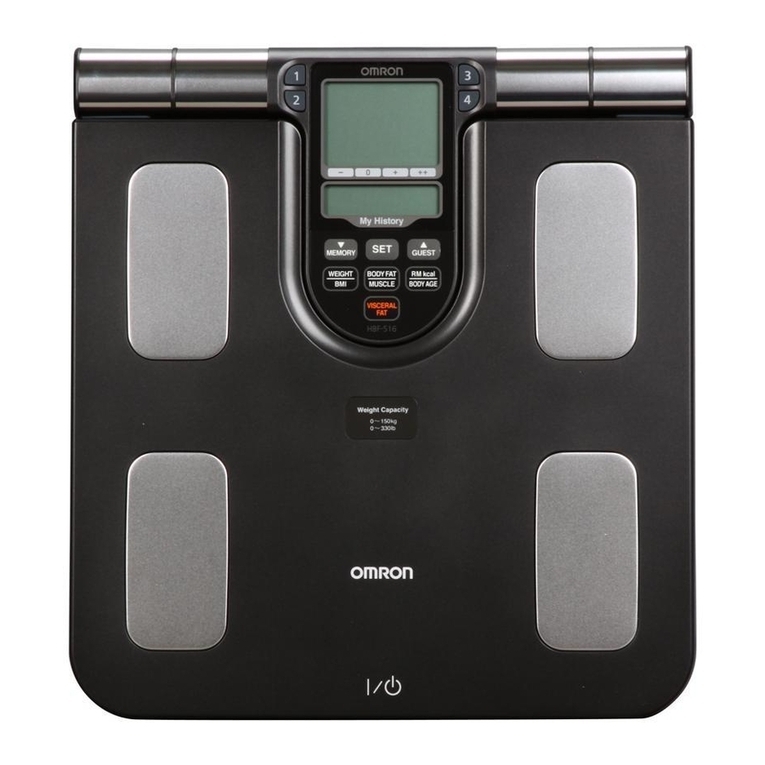
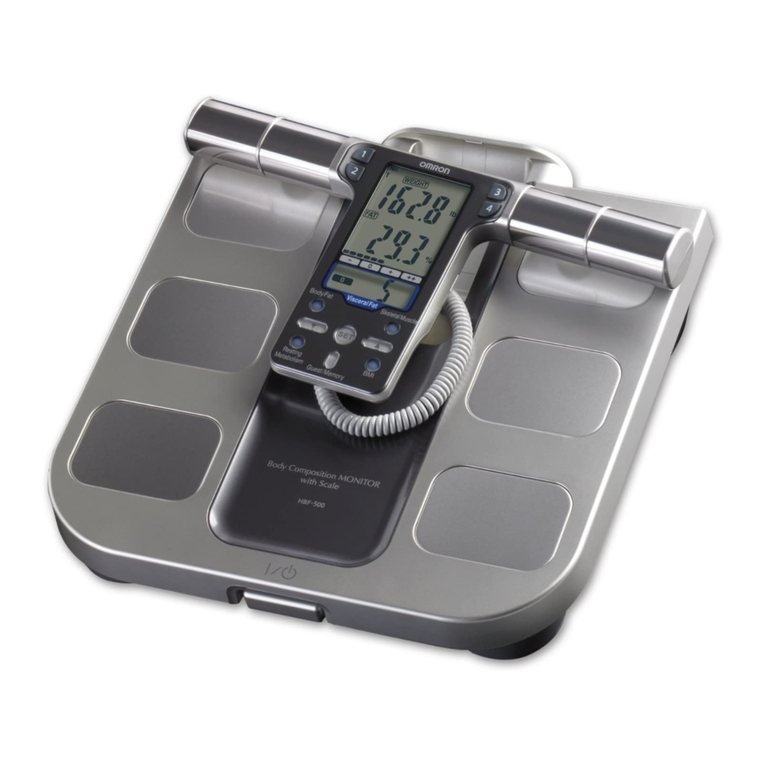
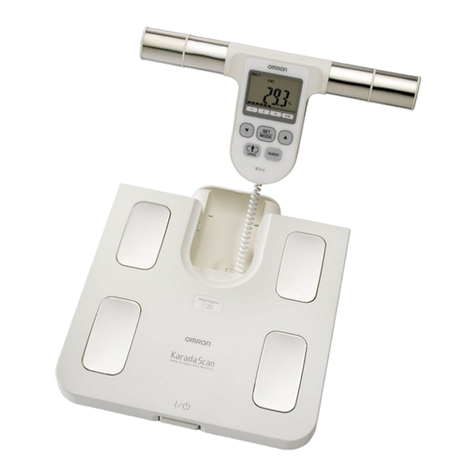
Omron HBF-510 User manual

Instruction Manual
Full Body Sensor
Body Composition Monitor
and Scale
Model HBF-510

7
INFORMATION ON BODY COMPOSITION
BODY MASS INDEX
Body Mass Index (BMI) is a number calculated from a person’s weight and height. BMI is a reliable
indicator of body fatness for people. BMI does not measure body fat directly, but research has shown that
BMI correlates to direct measures of body fat. BMI is used as a screening tool to identify possible weight
problems for adults.
BMI is calculated by using the following formula based on a ratio between your weight and height:
BMI = weight (lb) / height (inches) / height (inches) × 703
Interpreting the BMI Result
Source: Values for obesity judgment proposed by WHO, the World Health Organization.
BODY FAT
Body fat serves a vital role in storing energy and protecting internal organs. We carry two types of fat in
our bodies: 1) essential fat which is stored in small amounts to protect the body and 2) stored fat which is
stocked for energy during physical activity. While too much body fat may be unhealthy, having too little
fat can be just as unhealthy. Also, the distribution of body fat in men and women is different, so the basis
for classifying the body fat percentage is different between the genders.
Interpreting the Body Fat Percentage Result
Source: NIH/WHO guidelines for BMI
Source: Gallagher et al., American Journal of Clinical Nutrition, Vol. 72, Sept. 2000
Gender Age Low (–) Normal (0) High (+) Very High (++)
Female
20-39 < 21.0 21.0 - 32.9 33.0 - 38.9 39.0
40-59 < 23.0 23.0 - 33.9 34.0 - 39.9 40.0
60-79 < 24.0 24.0 - 35.9 36.0 - 41.9 42.0
Male
20-39 < 8.0 8.0 - 19.9 20.0 - 24.9 25.0
40-59 < 11.0 11.0 - 21.9 22.0 - 27.9 28.0
60-79 < 13.0 13.0 - 24.9 25.0 - 29.9 30.0
7.0 - 10.7
10.8 - 14.5
14.6 - 18.4
18.5 - 20.5
20.6 - 22.7
22.8 - 24.9
25.0 - 26.5
26.6 - 28.2
28.3 - 29.9
30.0 - 34.9
35.0 - 39.9
40.0 - 90.0
Less than 18.5
18.5 or more and less than 25
25 or more and less than 30
30 or more
- (Underweight)
0 (Normal)
+ (Overweight)
++ (Obese)
BMI
BMI (Designation by the WHO) BMI Classification Bar
BMI Rating
>
_
_
>
_
_
>
_
_
>
_
_
>
_
_
>
_
_

8
INFORMATION ON BODY COMPOSITION
VISCERAL FAT
Visceral fat is found in the abdomen and surrounding vital organs. It is different from fat found directly
underneath the skin, which is referred to as subcutaneous fat. Visceral fat can go largely unnoticed
because it’s not visible to the naked eye. One way visceral fat can be seen is through Magnetic
Resonance Imaging (MRI).
Too much visceral fat is thought to be closely linked to increased levels of fat in the bloodstream, which
may lead to conditions such as high cholesterol, heart disease and type 2 diabetes. In order to prevent or
improve these conditions, it is important to try to reduce the amount of visceral fat levels to an acceptable
level.
Interpreting the Visceral Fat Level Result
MRI Cross Section at the Navel Level
Subcutaneous Fat
Visceral Fat
Spine
0 (Normal) + (High)
Visceral Fat Level 9
<
_
_
10 Visceral Fat Level 14
<
_
_
<
_
_
Visceral fat area (0 - approx. 300 cm2, 1 inch=2.54 cm) distribution with 30 levels.
Source: Omron Healthcare
NOTE: Visceral fat levels are relative and not absolute values.
++ (Very High)
Visceral Fat Level 15
>
_
_

9
INFORMATION ON BODY COMPOSITION
SKELETAL MUSCLE
Skeletal muscle is the type of muscle that we can see and feel. When you work out to increase muscle
mass, skeletal muscle is being exercised. Skeletal muscles attach to the skeleton and come in pairs -- one
muscle to move the bone in one direction and another to move it back the other way. Increasing skeletal
muscle will increase your body’s energy requirements. The more muscle you have, the more calories
your body will burn. Building skeletal muscle can help prevent “rebound” weight gain. The maintenance
and increase of skeletal muscle is closely linked to resting metabolism rate.
Interpreting the Skeletal Muscle Percentage Result
Source: Omron Healthcare
Gender Age Low (–) Normal (0) High (+) Very High (++)
Female
18-39 < 24.3 24.3 - 30.3 30.4 - 35.3 35.4
40-59 < 24.1 24.1 - 30.1 30.2 - 35.1 35.2
60-80 < 23.9 23.9 - 29.9 30.0 - 34.9 35.0
Male
18-39 < 33.3 33.3 - 39.3 39.4 - 44.0 44.1
40-59 < 33.1 33.1 - 39.1 39.2 - 43.8 43.9
60-80 < 32.9 32.9 - 38.9 39.0 - 43.6 43.7
>
_
_
>
_
_
>
_
_
>
_
_
>
_
_
>
_
_

10
INFORMATION ON BODY COMPOSITION
LONG-TERM PLANNING FOR SUCCESSFUL WEIGHT LOSS
There are lots of reasons for people to lose weight. To be healthier. To look better. To feel better. To have
more energy.
No matter what the reason, successful weight loss and healthy weight management depend on sensible
goals and expectations. If you set sensible goals for yourself, chances are you'll be more likely to meet
them and have a better chance of keeping the weight off.
The foundation of a successful weight loss program remains a combination of a healthy diet and exercise
customized for you. Simply reducing food intake to lose weight can lead to a decline in muscle mass and
bone density. So even though your weight goes down, your resting metabolism is reduced making the
body more prone to putting on fat. More skeletal muscle can prevent “rebound” weight gain.
The Omron Full Body Sensor Body Composition Monitor and Scale tracks your progress by monitoring
weight, skeletal muscle, body fat and BMI to help you reach your goals.
Here’s a comparison of losing weight quickly versus slowly:
WARNING
Contact your physician or healthcare provider before beginning a weight reduction or exercise
program.
170
160
150
1234567
Weight
(lb)
Months
Fat reduction: 6 lb
A starvation diet produces rapid
weight loss of 20 lb,
but disrupts body mass...
A healthy diet
with weight loss of 20 lb...
Lean body mass reduction
(muscle, bone, etc.): 14 lb
Fat reduction: 18 lb
Lean body mass reduction
(muscle, bone, etc.): 2 lb
Change in body fat percentage
Before diet:
After diet:
36.0%
36.9%
Body fat percentage
Lean body mass (muscle, bone, etc.)
greatly reduced, while the body fat
percentage has not changed.
Change in body fat percentage
Before diet:
After diet:
36.0%
28.3%
Body fat percentage
Body fat percentage reduced to a normal
level.
Example comparing the same loss of 20 lb:
11
INFORMATION ON BODY COMPOSITION
RECOMMENDED MEASUREMENT TIMES
Being aware of the times when the body fat percentages shift within your daily schedule will assist you
in obtaining an accurate trending of your body composition. It is recommended to use this unit in the
same environment and daily circumstances. Reference the chart below:
Avoid Taking Measurements Under the Following Conditions:
- Immediately after vigorous exercise, after a bath or sauna.
- After drinking alcohol or a large amount of water, after a meal (about 2 hours).
If a measurement is taken under these physical conditions, the calculated body composition may differ
significantly from the actual one because the water content in the body is changing.
Daily activities
Waking up
Breakfast
Lunch
Dinner
Going to bed
2 hours
2 hours
2 hours
Recommended time
Recommended time
Recommended time
Recommended time
About 2 hours or more after a meal
After waking up

12
INFORMATION ON BODY COMPOSITION
Results may differ from actual body fat percentage
There are certain conditions when significant differences may occur between the estimated and the actual
body fat values. These differences may be related to changing ratios of body fluid and/or body
composition.
The body fat percentage measured by this monitor may significantly differ from the actual body fat
percentage for the following people:
• Elderly people
• People with a fever
• Body builders or highly trained athletes
• Persons undergoing dialysis
• Persons with osteoporosis who have very low bone density
• Persons with edema (swelling in the body)
• Children in growth stage

13
Operating Instructions
KNOW YOUR UNIT
Display Unit
Main Unit
(Measurement
Platform)
Front View
Grip Electrodes Grip ElectrodesDisplay
UP Button
DOWN Button
SET/MODE Button
Display Unit Holder
Cord
Foot Electrodes
Heel Electrode
Foot Electrodes
Heel Electrode
Power Switch
Components
Four AA Batteries Instruction Manual
USER Button GUEST Button
Measurement Log Sheet

14
KNOW YOUR UNIT
Measurement Start Indicator
Low Battery Indicator
Weight Results/
Body Composition Results
Measurement Progress/Body Fat Percentage, Skeletal Muscle
Percentage, Visceral Fat Level and BMI Classification Bar
Guest Indicator
Personal Profile Number
Display Mode Indicator
Gender Indicator
Age Indicator
Height Indicator

15
KNOW YOUR UNIT
USING THE DISPLAY UNIT
1. Remove the Display Unit from the Display Unit Holder
on the monitor.
2. To store the cord into the Display Unit Holder,
make sure the cord is coiled evenly, and does not
stick out of the Display Unit Holder.
3. Place the Display Unit into the Display Unit
Holder.
The display unit will click into place.
POWER SWITCH
The power switch is located at the front of the monitor.
Press the power switch to turn the monitor on and off.
The power will automatically switch off in the following conditions:
1. If the monitor is not used within one minute of 0.0 lb appearing on the display.
2. If no information is entered for five minutes when entering personal data.
3. If the monitor is not used for five minutes after the measurement results are
displayed.
4. Five minutes after the result is displayed when measuring weight only.

16
BATTERY INSTALLATION
1. Locate the Battery Cover on the back of
the unit.
1) Press the tab on the battery cover in the
direction of the arrow to release the cover as
illustrated.
2) Pull the tab of the cover upwards.
2. Install 4 “AA” size batteries so the +
(positive) and – (negative) polarities match
the polarities of the battery compartment as
indicated in the battery compartment.
For both the top row and the bottom row, slide the
first battery into the battery compartment before
inserting the second battery.
3. Replace the battery cover.
1) Align the hooks on the battery cover with the
slots in the battery compartment.
2) Push the battery cover until the tab clicks into
place.
Back
Ta b

17
BATTERY INSTALLATION
BATTERY REPLACEMENT
Personal profiles will not be deleted during battery replacement.
When the Low Battery Indicator appears on the display screen, remove all four batteries.
Replace with four new batteries at the same time.
NOTES:
• New batteries will last for approximately one year if the unit is used four times per day. Trial batteries
supplied with the unit may have a shorter life.
• Remove the batteries if you do not intend to use the unit for a period of three months or longer before
placing in storage.
CAUTION:
Should battery fluid leak and contact your eyes, skin or clothing immediately rinse with plenty of
clean water. Immediately contact your physician in case of eye or skin contact.
CAUTION:
Dispose of the device, batteries, components and optional accessories according to applicable local
regulations. Unlawful disposal may cause environmental pollution.
Low Battery Indicator

18
SETTING PERSONAL DATA
To measure Body Composition, your personal data must be set. Your personal data includes your age,
gender and height. The Full Body Sensor Body Composition Monitor and Scale provides two options to
enter your personal data.
1) Select a personal profile number to save your personal data. The monitor saves up to 4 personal
profiles. Select a number 1 through 4. Use this number to enter your personal data when taking a
measurement.
2) Select the Guest mode if you do not want to store your personal data in the unit. When you use the
Guest mode you will need to enter your personal data each time you take a measurement.
1. Press the Power Switch to turn the monitor ON.
The CAL symbol blinks on the display, then the display
changes to 0.0 lb.
Wait until 0.0 lb appears on the display.
2. Lift the Display Unit out of the Display Unit Holder.
NOTE: This monitor can be set to either the US or Metric
System. Personal Profile and results will be displayed
by selected system. To change the US/Metric mode:
1) Press and hold the DOWN button until “lb” and “kg”
blink on the display.
2) Press the DOWN button to select the mode, “lb” or “kg”.
This will automatically change “cm” and “feet/inch” under height setting.
3) Press the SET/MODE button to confirm the change.
Buttons Used in this Procedure
DOWN Button
Press this button to go back one.
Press continuously to rapidly
decrease.
UP Button
Press this button to advance one.
Press continuously to rapidly
advance.
SET/MODE Button
Use this button to confirm the
personal data and move to the next
item after confirming the set item.
USER Button
Press this button to select your
personal profile number.

19
SETTING PERSONAL DATA
3. Select a Personal Profile Number or the Guest mode.
A. Personal Profile Number
1) Press the USER button to select your personal profile number
(1 through 4).
2) Press the SET/MODE button.
NOTES:
• If no information has been entered for the Personal Profile Number
you selected, the number and the symbols for gender, age and height blink on the display.
• If the personal data has been entered for the number, the Personal Profile Number blinks on the
display.
B. Guest mode
Press the GUEST button.
The Guest indicator appears.
The default value for age blinks on the display.
4. Enter your Personal Data.
Set the age between 10 and 80.
1) Press the UP or DOWN button to change the age.
2) Press the SET/MODE button.
The age is set.
The gender symbols blink on the display.
SETTING THE AGE

20
SETTING PERSONAL DATA
Set the gender to male or female.
1) Press the UP or DOWN button to change the gender.
2) Press the SET/MODE button.
The gender is set.
The default value for height blinks on the display.
Set the height between 3' 4" and 6' 6 3/4".
(Display range in metric display mode: 100.0 cm to 199.5 cm)
1) Press the UP or DOWN button to change the height.
2) Press the SET/MODE button.
The height is set.
The current settings for age, gender and height appear in this sequence on the display.
The 0.0 lb symbol appears on the display. You can now take a measurement using the Personal
Profile Number you selected or the Guest mode.
Refer to HOW TO TAKE A MEASUREMENT on pages 22 to 26.
CHANGING PERSONAL DATA
If your personal data changes, the information in the Personal Profile Number you selected must be
changed for measurement results to be calculated correctly.
1. Press the Power Switch to turn the monitor ON.
The CAL symbol blinks on the display, then the display changes to 0.0 lb.
Wait until 0.0 lb appears on the display.
SETTING THE GENDER
SETTING THE HEIGHT

21
SETTING PERSONAL DATA
2. Select the Personal Profile Number you want to change.
1) Press the USER button to select your personal profile number (1 through 4).
The selected Personal Profile Number flashes once on the display.
2) Press the SET/MODE button.
The Personal Profile Number is set.
The current setting for age blinks on the display.
3. Refer to Step 4 on pages 19 and 20 to enter your personal
data.
DELETING PERSONAL DATA
1. Press the Power Switch to turn the monitor ON.
The CAL symbol blinks on the display, then the display changes to 0.0 lb.
Wait until 0.0 lb appears on the display.
2. Select the Personal Profile Number you want to delete.
1) Press the USER button to select your personal profile number (1 through 4).
The selected Personal Profile Number flashes once on the display.
2) Press the SET/MODE button.
The Personal Profile Number is confirmed and the selected age
setting blinks on the display.
3. Press the GUEST button for 2 seconds.
The personal data is deleted. The Clr symbol appears on the display followed by the Personal
Profile Number and the symbols for gender, age and height as illustrated below.
4. Refer to Step 3 and 4 on pages 19 and 20 to set the new personal data or press the
Power Switch to turn the monitor off.

22
HOW TO TAKE A MEASUREMENT
Your personal data must be entered before taking a measurement.
CORRECT POSTURE FOR MEASUREMENT
CAUTION:
Persons with disabilities or persons that are physically frail should be assisted by another person
when using this monitor or use a handrail, a walker, or other support device to prevent falling when
stepping on and off the monitor.
After you measure your
weight.
Raise your arms
horizontally and extend
your elbows straight to
form a 90° angle to your
body.
Stand with your
knees and back
straight and look
straight ahead.
Hold the display unit
in front of you.
Make sure your heels are positioned on
a heel electrode.
Stand with your weight evenly distributed
on the measurement platform.
Step on the Main Unit barefoot.
90°
Heel Electrodes
POSTURES TO AVOID DURING MEASUREMENT
Incorrect posture may result in inaccurate measurement of Body Composition.
Movement
during
measurement
Arms bent Arms too low
or high
Display
facing
upwards
Knees bent Standing on
edge of
monitor

23
HOW TO TAKE A MEASUREMENT
HOW TO MEASURE BODY COMPOSITION
1. Press the Power Switch to turn the monitor ON.
The CAL symbol blinks on the display, then the display
changes to 0.0 lb.
Wait until 0.0 lb appears on the display.
NOTES:
• If you step onto the monitor before 0.0 lb appears on the
display, an error message “Err” will appear.
• This monitor can be set to either the US or Metric System.
Personal Profile and results will be displayed by selected
system. To change the US/Metric mode:
1) Keep the DOWN button pressed until “lb” and “kg”
blink on the display.
2) Press the DOWN button to select the mode, “lb” or “kg”.
This will automatically change “cm” and “feet/inch” under height setting.
3) Press the SET/MODE button to confirm the change.
2. When the 0.0 lb appears on the display, lift the Display
Unit out of the Display Unit Holder.
NOTE: Do not take out the display unit until 0.0 lb appears on
the display.
How to Hold the Grip Electrodes
Place both middle fingers
along the dents of the grip
electrodes.
Hold the inner grip
electrodes firmly with your
thumb and index finger.
Press your palms firmly on the grip
electrodes.
Hold the outer grip
electrodes with your ring
finger and small finger.

24
HOW TO TAKE A MEASUREMENT
3. Select a Personal Profile Number or the Guest mode.
A. Personal Profile Number
Press the USER button to select your personal
profile number (1 through 4). The Personal
Profile Number selected will blink once.
NOTE: If the following appears on the display, no
personal data was entered for the number
you selected.
Refer to SETTING PERSONAL DATA on
pages 19 and 20.
B. Guest mode
1) Press the GUEST button while holding the Display Unit.
“G” will be indicated at the top of the display while
“AGE” data flashes.
2) Enter your personal data. Refer to SETTING
PERSONAL DATA on pages 19 and 20.

25
HOW TO TAKE A MEASUREMENT
4. Start the measurement.
1) Step onto the measurement platform and place your feet on the foot electrodes with your
weight evenly distributed.
Remain still and do not move until your weight measurement is complete.
2) When “START” appears on the display extend your arms straight at a 90°angle to your body.
3) When the measurement is completed, your weight is
displayed again. Step off the measurement platform.
The display will show your weight
and then the weight result will blink
twice.
The monitor will start to calculate
body composition.
The indicators in the measurement
progress bar at the bottom of the
display will gradually appear from
left to right, based on the
measurement being taken.
Other manuals for HBF-510
1
Table of contents
Other Omron Scale manuals

Omron
Omron HN-286 User manual

Omron
Omron HN288 User manual

Omron
Omron HN288 User manual

Omron
Omron BF510 User manual

Omron
Omron HBF-511T-E User manual

Omron
Omron BF500 User manual

Omron
Omron BF214 User manual

Omron
Omron BF306 User manual

Omron
Omron KaradaScan HBF-375 User manual

Omron
Omron HN300T2 Intelli IT User manual