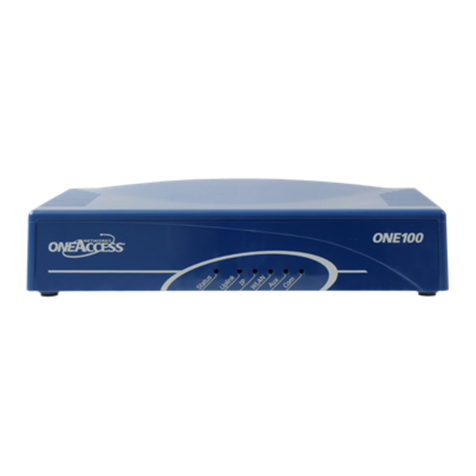
OneAccess ONE100 User manual

ONE100
Installation Guide
Version: 2.1 - 558469
22 January 2015

ONE100 Copyright, feedback
Installation Guide
2
Document Properties
Copyright Notice
The information and descriptions contained in this publication are the property of OneAccess. Such infor-
mation and descriptions must not be copied or reproduced by any means, or disseminated or distributed
without the express prior written permission of OneAccess.
This publication could include technical inaccuracies or typographical errors, for which OneAccess never
can or shall be held liable. Changes are made periodically to the information herein; these changes will
be incorporated in new editions of this publication. OneAccess may make improvements and/or changes
in the product(s) described in this publication at any time, without prior notice.
OneOS Operating System
The OneOS is a feature-rich operating system that guarantees a common feature set across the different
OneAccess product lines and a uniform support by maintenance and management tools.
The OneOS manual, which is a separate manual, describes the features of the latest version of the
OneOS operating system.
Your Feedback
Your satisfaction about this purchase is an extremely important priority to all of us at OneAccess. Accord-
ingly, all electronic, functional and cosmetic aspects of this new unit have been carefully and thoroughly
tested and inspected. If any fault is found with this unit or should you have any other quality-related com-
ment concerning this delivery, please submit the Quality Comment Form on our web page at
www.oneaccess-net.com → Support → Quality Comment Form.
Subject ONE100D/M/E
Manual type Installation Guide
Version 2.1
Code 558469
Modification date 22 January 2015 ©OneAccess

ONE100 Table of contents
Installation Guide
3
Table of contents
1 Safety Instructions ..............................................................................................5
1.1 Safety Information / Consignes de Sécurité............................................................... 6
1.2 Unpacking ................................................................................................................ 11
1.3 Selecting a Site ........................................................................................................ 12
1.4 Connection Precautions ........................................................................................... 13
1.5 Back Panel Earth Connection .................................................................................. 14
2 Directives and Standards..................................................................................16
2.1 Statements ............................................................................................................... 17
2.2 Environmental Information ....................................................................................... 18
2.3 Safety Compliance ................................................................................................... 18
2.4 Over-Voltage and Over-Current Protection Compliance .......................................... 18
2.5 EMC Compliance ..................................................................................................... 19
2.6 Environmental Compliance ...................................................................................... 19
3 Device Description ............................................................................................20
3.1 What is the ONE100?............................................................................................... 21
3.2 ONE100 Router Family Overview ............................................................................ 23
3.3 Hardware Description............................................................................................... 24
3.4 The Front Panel LED Indicators ............................................................................... 25
3.5 Rear View of the ONE100 ........................................................................................ 29
3.6 The ONE100 Motherboard ....................................................................................... 42
4 Interface Description.........................................................................................43
4.1 Connectors of the ONE100 Back Panel ................................................................... 44
4.2 SHDSL Line Specifications ...................................................................................... 46
4.3 LAN 4 port Ethernet Switch Specifications............................................................... 47
4.4 LAN Interface Specifications .................................................................................... 48
4.5 WLAN Interface Specifications................................................................................. 49
4.6 ISDN BRI Interface Specifications............................................................................ 50
4.7 FXS Analog Interface Specifications ........................................................................ 53
4.8 FXO Analog Interface Specifications........................................................................ 54
4.9 Console Port Specifications ..................................................................................... 55
5 Technical Characteristics .................................................................................56
5.1 Power Requirements................................................................................................ 57
5.2 Dimensions............................................................................................................... 57
6 Installing the ONE100........................................................................................58
6.1 Opening and Closing the Housing............................................................................ 59
6.2 Installing the WLAN Antennas.................................................................................. 63
6.3 Mounting the ONE100 on a Wall.............................................................................. 64
6.4 Mounting an Anti-Theft Security Cable..................................................................... 69

ONE100 Table of contents
Installation Guide
4
7 Powering up the ONE100..................................................................................70
Annex .................................................................................................... 71
Annex A:Console Cables ........................................................................................72
Index...................................................................................................... 73

ONE100 Chapter 1
Installation Guide Safety Instructions
5
1 Safety Instructions
This chapter gives some important safety instructions to take into account when using and installing the
ONE100. The following gives an overview of this chapter:
•1.1 - Safety Information / Consignes de Sécurité on page 6
•1.2 - Unpacking on page 11
•1.3 - Selecting a Site on page 12
•1.4 - Connection Precautions on page 13
•1.5 - Back Panel Earth Connection on page 14

ONE100 Chapter 1
Installation Guide Safety Instructions
6
1.1 Safety Information / Consignes de Sécurité
Information to user Informations pour l'utilisateur
• Any changes or modifications not expressly
approved by OneAccess could void the user's
authority to operate the equipment.
• The external power supply may be delivered
together with the ONE100.
• Tout changement ou modification non
expressément approuvé par OneAccess pour-
rait invalider l'autorisation accordée à l'utilisa-
teur de mettre l'équipement en service.
• L' adaptateur ou le câble d'alimentation élec-
trique prescrit par OneAccess peut ou non être
livré d'origine avec le ONE100.
• IEEE 802.11b/g/n operation of this product in
Canada is firmware-limited to channels 1
through 11.
• This Class A digital apparatus complies with
Canadian ICES-003.
• L'utilisation du mode IEEE 802.11b/g/n (WiFi)
de ce produit au Canada est limitée par pro-
gramme aux canaux 1 à 11.
• Cet appareil numérique de la classe A est con-
forme à la norme NMB-003 du Canada.
Electro-Magnetic Field Exposure Statement
• The radio interface installed in the ONE100 has been tested and found to comply with the in force
applicable EN50385 requirements and limits. These last have been designed to provide reasona-
ble protection against Electro-Magnetic Field exposure of the user’s body when the equipment is
operated in a commercial environment.
• At least 20 cm (8 inches) of separation distance between the ONE100 device and the user's body
must be maintained at all times.
FCC Radiation Exposure Statement
• This equipment has been tested and found to comply with the limits for a Class A digital
device, pursuant to Part 15 of the FCC Rules. These limits are designed to provide reason-
able protection against harmful interference when the equipment is operated in a commer-
cial environment. This equipment generates, uses, and can radiate radio frequency energy
and, if not installed and used in accordance with the instruction manual, may cause harmful
interference to radio communications. Operation of this equipment in a residential area is
likely to cause harmful interference in which case the user will be required to correct the
interference at his own expense.
• This equipment complies with FCC radiation exposure limits set forth for an uncontrolled environ-
ment.
• IEEE 802.11b/g/n operation of this product in the USA is firmware-limited to channels 1 through 11.
• Any changes or modifications not expressly approved by OneAccess could void the user's author-
ity to operate the equipment.

ONE100 Chapter 1
Installation Guide Safety Instructions
7
Use Precautions Précautions d'usage
• To avoid damage to the device, please
observe all procedures described in this chap-
ter.
• Disconnect the power supply before installing,
moving or servicing the device. Always discon-
nect the electrical power supply first.
• Ensure that the unit and its connected equip-
ment all use the same power and earth wiring,
to reduce noise interference and possible
safety hazards caused by differences in earth
potentials.
• If an earth stud is present, it is essential that
the earth stud, marked with , is effectively
connected to earth. Otherwise, in case of elec-
trical problems, other devices connected to the
ONE100 could be damaged.
Also refer to 1.5 - Back Panel Earth Connec-
tion on page 14.
• Pour éviter d'endommager l'équipement,
veuillez respecter toutes les procédures
décrites dans ce chapitre.
• Débranchez l'alimentation de la prise réseau
électrique avant d'installer, déplacer ou inter-
venir sur l'équipement. Débranchez toujours
l'alimentation réseau électrique en premier.
• Assurez-vous que l'équipement et ses
périphériques soient tous branchés sur un
même réseau d'alimentation électrique et une
équipotentielle de terre afin de réduire les
interférences perturbatrices et de possibles
risques de sécurité causés par des différences
de potentiel entre prises de terre.
• Si présente, il est essentiel que la borne de
terre, marquée avec , soit effectivement
raccordée à la terre. Autrement, en cas de
défaut électrique, d'autres équipements con-
nectés au ONE100 pourraient être endom-
magés.
Voir aussi 1.5 - Back Panel Earth Connection
on page 14.
Connecting the power supply Raccordement à l'alimentation
To connect the power supply, always respect fol-
lowing steps:
1. Plug power supply connector in the corre-
sponding device's input power connector.
2. Secure power supply cable by looping it once
around holding clip foreseen on device to
avoid unwanted power supply cable discon-
nection. (Only valid if device is equipped with
such a holding clip).
3. Connect the power supply plug to the electrical
power network; refer to 5.1 - Power Require-
ments on page 57.
Pour alimenter l'équipement, toujours respecter
les étapes suivantes:
1. Enfichez le connecteur d'alimentation dans le
connecteur d'entrée d'alimentation correspon-
dant de l'équipement.
2. Rebouclez le câble d'alimentation autour de la
bride de maintien prévue à cet effet sur le pan-
neau arrière pour éviter l'arrachage accidentel
du connecteur d'alimentation. (Uniquement
pour les équipements qui sont pourvus d'une
bride de maintien)
3. Branchez la fiche d'alimentation au réseau
d'alimentation électrique (voir 5.1 - Power
Requirements on page 57).

ONE100 Chapter 1
Installation Guide Safety Instructions
8
Over-current Protection Protection contre les surcharges
• Do not use another type of power supply than
the one delivered or prescribed by OneAc-
cess.
• Always use a power cable approved for this
use as the one delivered or prescribed by
OneAccess.
• This device requires that the building's electri-
cal installation is designed for protection
against short-circuit (over-current) protection.
A fuse or circuit breaker no larger that 10A
must be used on the phase conductor (AC) or
the active conductor with respect to the protec-
tive earth (DC).
• Ne pas utiliser d'autre type d'adaptateur que
celui livré ou prescrit par OneAccess.
• Toujours utiliser un type de câble d'alimenta-
tion agréé pour cet usage comme celui livré ou
prescrit par OneAccess.
• La protection contre les courts-circuits de cet
équipement dépend de l'installation électrique
du local à laquelle il est raccordé. Vérifier
qu'un fusible ou disjoncteur de maximum 10A
est installé sur le conducteur de phase (AC) ou
le conducteur actif par rapport à la terre (DC).
Safety and hazards
Do not operate the ONE100 radio interface:
• Near medical equipment, life support equipment, or any medical equipment which may be suscep-
tible to any form of radio interference. In such areas, the ONE100 radio interface MUST BE POW-
ERED OFF. Otherwise, the ONE100 radio interface can transmit signals that could interfere with
this equipment. Always obey to instructions when asked to switch off ONE100 or deactivate its
radio interface where electronic medical devices are known to operate and when asked by the
entity responsible for managing the risk. Some electronic medical devices, e.g. those used to sup-
port life, may not work normally when exposed to high-level RF fields. It is important that patients
should seek specific advice from their doctor in respect to their electronic medical device.
• In an aircraft, the ONE100 radio interface MUST BE POWERED OFF.
Otherwise, the ONE100 radio interface can transmit signals that could interfere with various
onboard systems and may be dangerous to the operation of the aircraft or disrupt the cellular net-
work. Use of a radio equipment in an aircraft is illegal in some jurisdictions. Failure to observe this
instruction may lead to legal action. Always obey to airline instructions when asked to switch off
ONE100 or deactivate its radio interface in an aircraft. Some airlines may permit the use of radio
equipment while the aircraft is on the ground and the door is open. The ONE100 radio interface
may be used normally at this time.
• Where explosive or flammable atmospheres may be present.
Because in flammable atmospheres including refuelling points, fuel depots, and chemical plants, if
high level of RF fields cause sparking, a fire or explosion may occur. Always obey to instructions
to switch off the ONE100 or deactivate its radio interface when asked to do so by the entity respon-
sible for managing the risk.
• Where electro-explosive devices may be present.
Because RF fields may cause detonators to explode, always obey to instructions to switch off the
ONE100 or deactivate its radio interface when asked to do so by the entity responsible for manag-
ing the risk.
• In areas where blasting is in progress.

ONE100 Chapter 1
Installation Guide Safety Instructions
9
Limitations notice Restrictions concernant le raccordement de
matériel
Compliance
This equipment meets the applicable Industry
Canada Terminal Equipment Technical Specifi-
cations. This is confirmed by the registration
number. The abbreviation, IC, before the regis-
tration number signifies that registration was per-
formed based on a Declaration of Conformity
indicating that Industry Canada technical specifi-
cations were met. It does not imply that Industry
Canada approved the equipment.
Conformité
Le présent matériel est conforme aux spécifica-
tions techniques d'Industrie Canada applicables
au matériel terminal. Cette conformité est con-
firmée par le numéro d'enregistrement. Le sigle
IC, placé devant le numéro d'enregistrement, sig-
nifie que l'enregistrement s'est effectué con-
formément à une déclaration de conformité et
indique que les spécifications techniques d'Indus-
trie Canada ont été respectées. Il n'implique pas
qu'Industrie Canada a approuvé le matériel.
Ringer Equivalence Number (REN)
The Ringer Equivalence Number (REN) for this
terminal equipment is 01B. The REN assigned to
each terminal equipment provides an indication of
the maximum number of terminals allowed to be
connected to a telephone interface. The termina-
tion on an interface may consist of any combina-
tion of devices subject only to the requirement
that the sum of the Ringer Equivalence Numbers
of all the devices does not exceed 5.
Indice d'équivalence de la sonnerie (IES)
L'indice d'équivalence de la sonnerie (IES) du
présent matériel est de 01B. L'IES assigné à
chaque dispositif terminal indique le nombre max-
imal de terminaux qui peuvent être raccordés à
une interface téléphonique. La terminaison d'une
interface peut consister en une combinaison quel-
conque de dispositifs, à la seule condition que la
somme d'indices d'équivalence de la sonnerie de
tous les dispositifs n'excède pas 5.

ONE100 Chapter 1
Installation Guide Safety Instructions
10
Limitations notice
Compliance
The ONE100 complies with Part 68 of the FCC rules and the requirements adopted by the ACTA. On
the bottom of this device is a label that contains, among other information, a product identifier in the
format US:AAAEQ##TXXXX. If requested, this number must be provided to the telephone company.
Ringer Equivalence Number (REN)
The REN is used to determine the number of devices that may be connected to a telephone line.
Excessive RENs on a telephone line may result in the devices not ringing in response to an incoming
call. In most but not all areas, the sum of RENs should not exceed five (5.0). To be certain of the
number of devices that may be connected to a line, as determined by the total RENs, contact the local
telephone company. For products approved after July 23, 2001, the REN for this device is part of the
product identifier that has the format US:AAAEQ##TXXXX. The digits represented by ## are the REN
without a decimal point (e.g., 03 is a REN of 0.3). For earlier products, the REN is separately shown
on the label.
Harm to the telephone network
If the ONE100 causes harm to the telephone network, the telephone company will notify you in
advance that temporary discontinuance of service may be required. But if advance notice isn't practi-
cal, the telephone company will notify the customer as soon as possible. Also, you will be advised of
your right to file a complaint with the FCC if you believe it is necessary.
Changes made by the telephone company
The telephone company may make changes in its facilities, equipment, operations or procedures that
could affect the operation of the equipment. If this happens the telephone company will provide
advance notice in order for you to make necessary modifications to maintain uninterrupted service.
In case of problems
If trouble is experienced with the ONE100, for repair or warranty information, please contact OneAc-
cess:
• Telephone: 866.533.3331
If the equipment is causing harm to the telephone network, the telephone company may request that
you disconnect the equipment until the problem is resolved.
Repair by the customer
The ONE100 is of a type that is not intended to be repaired by the customer.
Party lines
Connection to party line service is subject to state tariffs. Contact the state public utility commission,
public service commission or corporation commission for information.
Alarm dialing
If your home has specially wired alarm equipment connected to the telephone line, ensure the instal-
lation of the ONE100 does not disable your alarm equipment. If you have questions about what will
disable alarm equipment, consult your telephone company or a qualified installer.

ONE100 Chapter 1
Installation Guide Safety Instructions
11
1.2 Unpacking
Checking the shipping carton
Rough handling during shipping causes most early failures. Before installation, check the shipping car-
ton for signs of damage:
• If the shipping carton is damaged, please place a claim with the carrier company immediately.
• If the shipping carton is undamaged, do not dispose of it in case you need to store the unit or ship it
in the future.

ONE100 Chapter 1
Installation Guide Safety Instructions
12
1.3 Selecting a Site
Warning Avertissement
• Always place the unit in such a way that the air
vents are not blocked.
• To improve the quality of radio transmission,
be careful to install the product in a location
with limited electromagnetic shields such as
metallic frames, cabinets, … Otherwise, an
external antenna with an extension cable
should be used.
• Placez toujours l'appareil de sorte que les
ouïes d'aération ne soient pas obturées.
• Pour optimiser la qualité de la transmission
radio, prenez la peine d'installer l'appareil
dans un endroit peu protégé contre les
champs électromagnétiques en évitant les
structures métalliques, armoires, …
Dans le cas contraire, une antenne externe
avec un câble d'extension devrait être utilisée.
Caution Attention
• Install the unit in an area free of extreme tem-
peratures, humidity, shock and vibration. Posi-
tion it so that you can easily see and access
the front panel and its control indicators. Leave
enough clearance at the back for cables and
wires.
• The AC/DC adapter is used to switch the
device on or off by plugging it in or disconnect-
ing it, respectively.
• The socket outlet shall be installed near the
device and easily accessible.
• Installez l'appareil dans une zone exempte de
températures extrêmes, d'humidité, de chocs
et de vibrations. Positionnez-le de sorte que
vous puissiez aisément accéder au panneau
avant et voir ses témoins de contrôle. Laissez
suffisamment d'espace à l'arrière pour les fils
et les câbles.
• Le convertisseur d’alimentation AC/DC est uti-
lisé comme dispositif interrupteur.
• La prise de courant doit être installée à prox-
imité de l’appareil et facilement accessible.

ONE100 Chapter 1
Installation Guide Safety Instructions
13
1.4 Connection Precautions
ESD WARNING
The circuit boards are sensitive to electrostatic discharges (ESD) and should be handled with care. It is
advisable to ensure an optimal electrical contact between yourself, the working area and a safety ground
before touching any circuit board. Take special care not to touch any component or connector on the
circuit board.
The connectors of the ONE100 should only be connected to the following circuit types:
• Inside building circuit: Circuit remaining inside building and not subject to telecom network primary
nor secondary lightning strikes.
• Outside building circuit: Circuit routed going outside building and possibly subject to telecom network
secondary lightning strikes.
• SELV or Safety Extra Low Voltage: Inside building circuit designed to not exceed safe voltage value.
•TNVorTelecom Network Voltage: User's accessible internal circuit designed to not exceed specified
voltage limits:
- TNV-2: Inside building circuit exceeding SELV voltage limits but respecting TNV voltage limits
- TNV-3: Outside building circuit exceeding SELV voltage limits but respecting TNV voltage limits
Interface type Interface identification Connector type Circuit type
RS2321
1. V.24
Console RJ45 SELV
SHDSL SHDSL RJ45 TNV-3
LAN SWITCH E0-0/0 ... E3-0/3 2
2. 4 port Ethernet switch with 10/100 Base T ports
RJ45 SELV
ETH 1/0 RJ45 SELV
Earth stud Clinching stud/screw
hole
Earth
FXS FXS L0-5/0 ... L7-5/73
3. The actual number of FXS ports depends on the version of the device.
RJ45 TNV-2, TNV-34
4. If an FXO port is present on the device, then the first FXS port beside the FXO port is TNV-3,
the other FXS ports are TNV-2.
If no FXO port is present, all FXS ports are TNV-2.
FXO FXO L5-5/4
FXO L8-5/8
RJ45 TNV-3
T0/S0 ISDN BRI L0-5/0 ... L7-5/75
5. The actual number of BRI ports depends on the version of the device.
RJ45 SELV

ONE100 Chapter 1
Installation Guide Safety Instructions
14
1.5 Back Panel Earth Connection
Safety
• Some configurations of the ONE100 are equipped with an FXO and/or FXS interface, and will need
a hard wired Protective Earth connection between the earth stud on the back panel and the protective
earth of the load centre.
This connection must be permanent, secure and protected against corrosion.
• The earth wire must be mechanically protected when crossing floors and walls and never be built
directly.
• The connection must be made with a green/yellow wire of at least a 1 mm² section.
• The location of the earth stud on the back panel depends on whether the device is equipped with an
FXO port or not. If that is present, the earth stud is located on the left side above the console port;
otherwise it is located on the right side of the back panel. This is illustrated in the following figure:
• 2 versions of the earth stud exist, it can either be a screw hole, or a clinching stud.
How to connect the earth cable with the back panel of the devices, is different in both cases; this is
explained further down.
• For safety reasons it is essential that the hard wired Protective Earth connection is installed before
connections are made to any FXO/FXS ports.
• The hard wired Protective Earth connection must be carried out by authorized service personnel.

ONE100 Chapter 1
Installation Guide Safety Instructions
15
Earth Connection
2 versions of the earth stud exist, it can either be:
• a screw hole.
• a clinching stud.
To connect an earth wire to the screw hole on the back panel, use:
• 1 M3 spring or lock washer
• 1 M3 ring tongue
• 1 M3 screw
Proceed as follows:
To connect an earth wire to the clinching stud on the back panel, use:
• 1 M3 spring or lock washer
• 1 M3 ring tongue
•1M3nut
Proceed as follows:
Step Action
1 If not already done so, the earth cable that will be connected to the screw hole, must be
equipped with the M3 ring tongue.
2 The spring/lock washer must be mounted between the M3 ring tongue and the M3 screw;
this is necessary because the M3 ring tongue must make direct contact with the back
panel.
3 Use the M3 screw to fix everything; make sure that it is firmly fixed.
This makes sure that the three parts are firmly fixed against the back panel, and cannot
get loose anymore.
Step Action
1 If not already done so, the earth cable that will be connected to the clinching stud, must
be equipped with the M3 ring tongue.
2 Slide the M3 ring tongue over the clinching stud so that it makes direct contact with the
back panel.
3 Slide the M3 spring/lock washer over the clinching stud.
4 Use the M3 nut to fix everything; make sure that it is firmly fixed.
This makes sure that the three parts are firmly fixed against the back panel, and cannot
get loose anymore.

ONE100 Chapter 2
Installation Guide Directives and Standards
16
2 Directives and Standards
This chapter details the list of standards, which the ONE100 complies with. The following gives an over-
view of this chapter:
•2.1 - Statements on page 17
•2.2 - Environmental Information on page 18
•2.3 - Safety Compliance on page 18
•2.4 - Over-Voltage and Over-Current Protection Compliance on page 18
•2.5 - EMC Compliance on page 19
•2.6 - Environmental Compliance on page 19

ONE100 Chapter 2
Installation Guide Directives and Standards
17
2.1 Statements
www.oneaccess-net.com → Resources →
[
Log In] → choose Certificates → Choose a product
Hereby, OneAccess declares that this ONE100 complies with the essential requirements and other rel-
evant provisions of Directive 1999/5/EC.
Hierbij verklaart OneAccess dat deze ONE100 overeenstemt met de essentiële vereisten en andere rel-
evante bepalingen van Richtlijn 1999/5/EC.
Par la présente, OneAccess déclare que ce ONE100 est en conformité avec les exigences essentielles
et autres articles applicables de la Directive 1999/5/EC.
Hiermit, OneAccess erklärt daß dieser ONE100 in Fügsamkeit ist mit den wesentlichen Anforderungen
und anderen relevanten Bereitstellungen von Direktive 1999/5/EC.
Mediante la presente, OneAccess declara que el ONE100 cumple con los requisitos esenciales y las
demás prescripciones relevantes de la Directiva 1999/5/CE.
A OneAccess declara que o ONE100 cumpre os principais requisitos e outras disposições da Directiva
1999/5/EC.
Col presente, OneAccess dichiara che questo ONE100 è in acquiescenza coi requisiti essenziali e stip-
ulazioni attinenti ed altre di Direttivo 1999/5/EC.
Με το παρόν ηOneAccess δηλώνει ότι το ONE100 είναι συμμορφούμενο με τις βασικές απαιτήσεις και
με τις υπόλοιπες σχετικές διατάξες της οδηγίας 1999/5/EC.
This device complies with Part 15 of the FCC Rules. Operation is subject to the following
two conditions: (1) this device may not cause harmful interference, and (2) this device must
accept any interference received, including interference that may cause undesired operation.
Cet appareil numérique de la classe A est conforme à la norme NMB-003 du Canada.
This Class A digital apparatus complies with Canadian ICES-003.

ONE100 Chapter 2
Installation Guide Directives and Standards
18
2.2 Environmental Information
The crossed-out wheeled bin means that within the European Union the product must be taken to separate
collection at the product end-of-life. This applies to the device but also to any accessories marked with this symbol.
Do not dispose of these products as unsorted municipal waste.
If you need more information on the collection points where you can present your end-of-life equipment for
recycling, please contact your local importer.
De doorstreepte container wil zeggen dat binnen de Europese gemeenschap het product voor gescheiden afvalverzameling moet
worden aangeboden aan het einde van de levensduur van het product. Dit geldt voor het toestel, maar ook voor alle toebehoren
die van dit symbool voorzien zijn. Bied deze producten niet aan bij het gewone huisvuil.
Indien u meer informatie wenst over het inzamelpunt waar u afgedankte apparatuur kan aanbieden voor recyclage, gelieve dan
uw lokale importateur te contacteren.
Le symbole de la poubelle sur roues barrée d'une croix signifie que ce produit doit faire l'objet d'une collecte sélective en fin de vie
au sein de l'Union Européenne. Cette mesure s'applique non seulement à votre appareil mais également à tout autre accessoire
marqué de ce symbole. Ne jetez pas ces produits dans les ordures ménagères non sujettes au tri sélectif.
Si vous souhaitez plus d'information concernant le point de collecte où vous pouvez apporter vos appareils usagés afin qu'ils soient
recyclés, veuillez contacter votre importateur local.
Pour la Belgique, vous pouvez prendre contact avec rma@oneaccess-net.com.
Das Symbol der durchgestrichenen Abfalltonne auf Rädern bedeutet dass das Produkt in der Europäischen Union einer
getrennten Mülsammlung zugeführt werden muss. Dies gilt sowohl für das Produkt selbst, als auch für alle mit diesem Symbol
gekennzeichneten Zubehörteile. Diese Produkte dürfen nicht über den unsortierten Hausmüll entsorgt werden.
Falls Sie weitere Auskünfte brauchen im Betracht der Sammelplätze für ausrangierte Apparate, wenden Sie sich bitte an Ihren
örtlichen Importeur.
Für Belgien, bitte kontaktieren sie rma@oneaccess-net.com.
2.3 Safety Compliance
• EN60950-1: Safety of information technology equipment, including electrical business equipment.
• Class II equipment.
2.4 Over-Voltage and Over-Current Protection Compliance
The over-voltage and over-current protection complies with ITU-T K.44 and ETSI EN 300 386 recom-
mendations.

ONE100 Chapter 2
Installation Guide Directives and Standards
19
2.5 EMC Compliance
•CE
• FCC class A
• EN55022 Emissions
• EN55024 Immunity
• EN61000-3-2 Harmonics
• EN61000-3-3 Voltage fluctuations and flicker
• EN61000-4-2 ESD
• EN61000-4-3 Radiated immunity
• EN61000-4-4 EFT/burst
• EN61000-4-5 Surge
• EN61000-4-6 Conducted immunity
• EN61000-4-11 Voltage dips & drops
• EN300386 EMC Requirements
• ETSI EN 301 489-01 Electromagnetic compatibility and radio spectrum matters (ERM); Electromag-
netic compatibility (EMC) standard for radio equipment and services.
• ETSI EN 301 489-17 Electromagnetic compatibility and radio spectrum matters (ERM); Electromag-
netic compatibility (EMC) Standard for radio equipment and services; Part 17: Specific conditions for
2,4 GHz wideband transmission systems and 5 GHz high performance RLAN equipment.
• EN 62311 Assessment of electronic and electrical equipment related to human exposure restrictions
for electromagnetic fields (0 Hz - 300 GHz).
2.6 Environmental Compliance
• Storage conditions: ETSI ETS 300 019-1-1 Class 1.1. In addition, the storage temperature has to be
between -25 and +70°C, with a relative humidity between 0 and 95% non-condensing.
• Transport conditions: ETSI ETS 300 019-1-2 Class 2.3.
• Stationary use conditions: ETSI ETS 300 019-1-3 Class 3.1. In addition, a relative humidity between
5 and 80% non-condensing and an ambient operational temperature between 0°C and 45°C is sup-
ported.
• International protection (IP) class of protection against solid and liquids: IP30

ONE100 Chapter 3
Installation Guide Device Description
20
3 Device Description
This chapter describes the ONE100 front and back panels, and the associated technical characteristics.
The following gives an overview of this chapter:
•3.1 - What is the ONE100? on page 21
•3.2 - ONE100 Router Family Overview on page 23
•3.3 - Hardware Description on page 24
•3.4 - The Front Panel LED Indicators on page 25
•3.5 - Rear View of the ONE100 on page 29
•3.6 - The ONE100 Motherboard on page 42
Other manuals for ONE100
2
Table of contents
Other OneAccess Network Router manuals