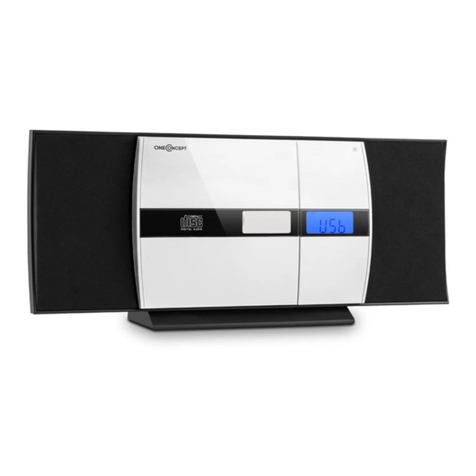
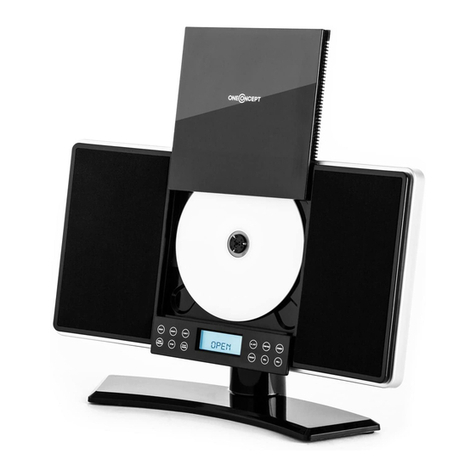
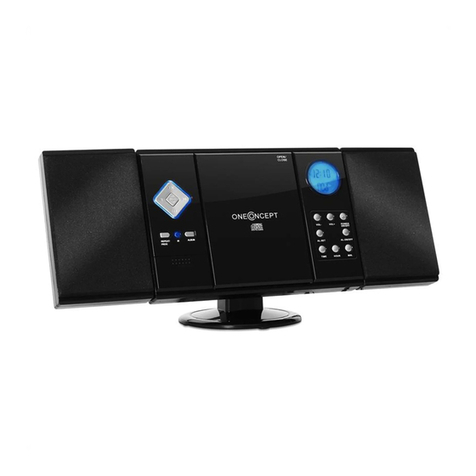
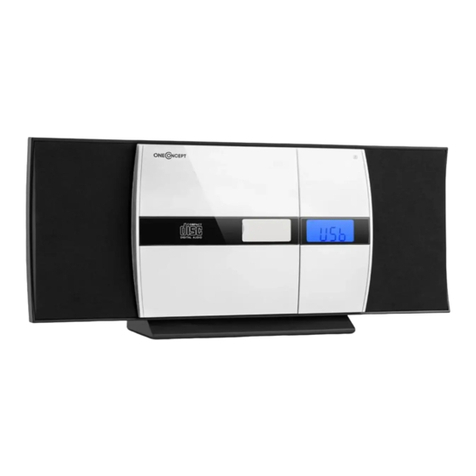
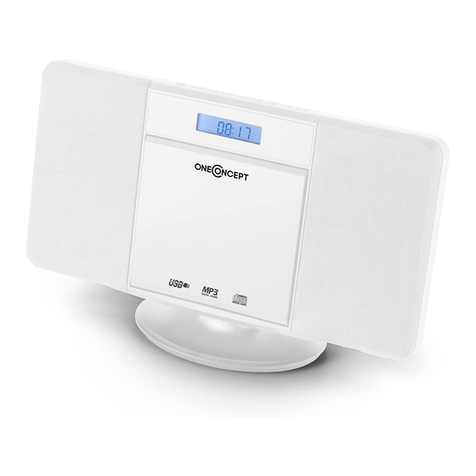
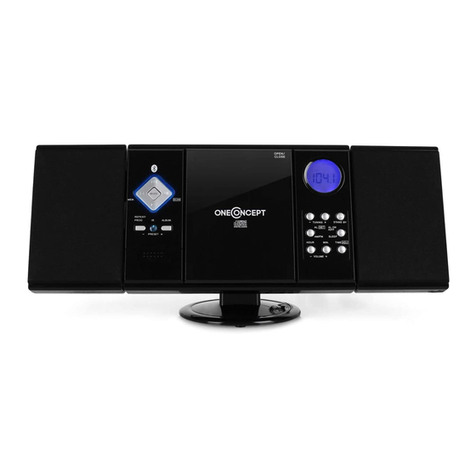
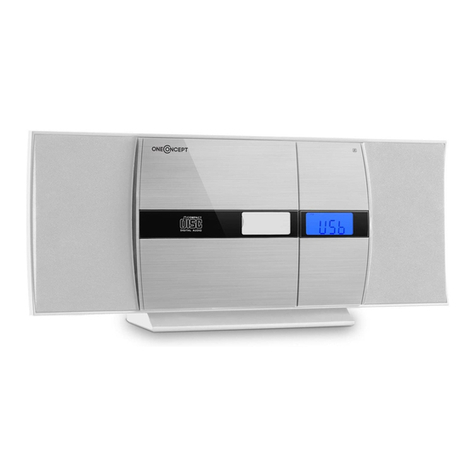
oneConcept Stereoanlage 10006663 User manual

Stereoanlage
10006663 10006664 10009512
10009513 10009514 10027658

2
Sehr geehrter Kunde,
wir gratulieren Ihnen zum Erwerb Ihres Gerätes. Lesen Sie die folgenden Hinweise sorgfäl-
tig durch und befolgen Sie diese, um möglichen Schäden vorzubeugen. Für Schäden, die
durch Missachtung der Hinweise und unsachgemäßen Gebrauch entstehen, übernehmen
wir keine Haftung.
Sicherheitshinweise
1. Lesen Sie diese Bedienungsanleitung.
2. Bewahren Sie die Bedienunsanleitung auf.
3. Beachten Sie alle Warnhinweise.
4. Befolgen Sie die Anweisungen.
5. Benutzen Sie das Gerät nicht im Wasser.
6. Nehmen Sie das Gerät zum Reinigen vom Netz. Benutzen Sie Wasser und ein Tuch.
7. Blockieren Sie Lüftungsmechanismen des Gerätes nicht.
8. Bei Standmontage platzieren Sie das Gerät auf eine eben Fläche. Bei Wandmontage
beachten Sie die Anweisungen im Fortgang dieser Bedienungsanleitung.
9. Stellen Sie das Gerät nicht in der unmittelbarer Nähe von Hitzequellen wie Heizungen,
Öfen etc..
10. Nutzen Sie das Gerät an einer dem Stecker entsprechenden Steckdose. Manipulieren Sie
den Stromstecker nicht.
11. Schützen Sie as Stromkabel vor physikalischen Einwirkungen.
12. Nutzen Sie lediglich vom Hersteller empfohlenes Zubehör.
13. Nehmen Sie das Gerät bei Gewittern oder längeren Phasen der Nichtnutzung vom Netz.
14.SolltedasGerätbeschädigtsein,ziehenSiequaliziertesServicepersonalhinzu.
15. Setzen Sie das Gerät keinem Spritz- oder Tropfwasser aus; füllen Sie keine Flüssigkeiten
in das Gerät; stellen Sie keine Gefässe mit Flüssigkeiten auf dem Gerät ab.
16. Überbeanspruchen Sie die Wandhalterung im Falle der Nutzung nicht.
17. Nutzen Sie ausschließlich Ersatzteile vom Hersteller.
18. Lassen Sie das Servicepersonal nach einer Reparatur Probeläufe durchführen
19.NutzenSiedasGerätnuraneinerSteckdose,diedieSpezikationendesStrometiketts
auf der Rückseite erfüllt..
20. Führen Sie keine Objekte in das Gerät ein.
21. Kontaktieren Sie Servicepersonal in folgenden Fällen:
a) Stromkabel beschädigt
b) Gerät war einer Flüssigkeit ausgesetzt,
c) Gerät war Wasser ausgesetzt,
d) Gerät funktioniert nicht wie beschrieben.
e) Gerät ist auf gefallen oder auf andere Weise beschädigt worden
f) Gerät zeigt Leistungsabweichungen.

3
Geräteübersicht
1 Radiotuner 12 Alarm An/Aus 23 Album-Knopf
2 Bandwahlschalter 13 Minuten-Knopf 24 Lautsprecher
3 Funktionswahlschalter 14 Kopfhörer-Eingang 25 Wandmontagelöcher
4 CD-Tür 15 AUX-Eingang 26 Lautsprecherständer
5 LCD-Display 16 Abdeckung 27 Batteriefach
6 Lautstärke senken 17 Abspielen/Pause-Knopf 28 UKW-Antenne
7 Lautstärke erhöhen 18 Titelsuche vorwärts 29 Standfuß
8 An-/Ausschalter 19 Stop-Button 30 Lautsprecheraufhängungen
9 Zeit-Knopf 20 Titelsuche rückwärts 31 CD/USB/SD-Umschaltung
10 Alarm-Knopf 21 Wiederholen/Programmieren 32 USB-Eingang
11 Stunden-Knopf 22 Fernbedienungssensor 33 SD-Karten-Eingang

4
Montage
Standfuß
Verbindung zwischen Lautsprechern und Haupteinheit

5
Wandmontage
Inbetriebnahme und Bedienung
Stromversorgung
Betreiben Sie das Gerät ausschließlich an Steckdosen mit 220V ~ 50Hz. Die Ganghilfe des
Gerätes arbeitet mit 2 AA-Batterien. Die Fernbedienung des Gerätes arbeitet mit 2 AAA-
Batterien.
Uhrzeit stellen
Die Uhrzeit muss bei der ersten Inbetriebnahme eingestetlt werden. Wenn Sie das Gerät
ans Netz an- schließen, wird die Uhrzeit “12:00” angezeigt. Um die Uhr zu stellen, befolgen
Sie folgende Schritte:
1. Drücken Sie den ZEIT-KNOPF und drücken Sie wiederholt den STUNDEN-Knopf
2. Drücken Sie den ZEIT-KNOPF und drücken Sie wiederholt den MINUTEN-Knopf
Hinweis: Wenn die “PM”-Anzeige auf dem Display leuchtet, zeigt das Gerät eine Uhrzeit
inderzweitenTages-hälftean.WennkeinePM-Anzeigeaueuchtet,zeigtdasGeräteine
Uhrzeit in der ersten Tageshälfte.

6
Radiobetrieb
1. Schalten Sie das Gerät ein.
2. Wählen Sie den Radiomodus mit dem FUNKTIONSWAHLSCHALTER.
3. Wählen Sie das gewünschte Band mit dem BANDWAHLSCHALTER.
4. Stellen Sie mit dem RADIOTUNER die gewünschte Frequenz ein.
5. Stellen Sie die gewünschte Lautstärke ein.
6. Um das Radio abzuschalten, wählen Sie einen anderen Betriebsmodus oder schalten Sie
das Gerät ab.
UKW-Stereo-Empfang
Wenn Sie den BANDWAHLSCHALTER auf „FM ST“ gelegt haben und einen starken UKW-
Sender emp- fangen, wird das Display auf dem Display Stereoempfang mit dem Symbol ST
indizieren. Bei schlech- tem Empfang setzen Sie den Bandwahlschalter auf AM. Der Emp-
fang erfolgt dann in Mono-Qualität mit einem regelmäßig besseren Klangergebnis.
CD-Betrieb
Einfaches abspielen
1. Schalten Sie das Gerät ein.
2. Wählen Sie CD mit dem FUNKTIONSWAHLSCHALTER.
3. Öffnen Sie das CD-Fach, legen Sie die CD ein und schließen Sie das Fach anschließend.
4. Das Abspielen der CD startet mit dem ersten Song der CD.
5. Drücken Sie den ABSPIELEN/PAUSE-Knopf, um das Abspielen zu unterbrechen und ein
weiteres Mal, um das Abspielen im Pause-Zustand wieder aufzunehmen.
6. Stellen Sie eine adäquate Lautstärke ein.
Wiederhol-Funktion
Drücken Sie den WIEDERHOLEN-Knopf einmal, um einen Track zu wiederholen. Drücken
Sie den WIEDER- HOLEN-Knopf ein weiteres Mal, um alle Titel der CD zu wiederholen.
Drücken Sie den WIEDERHOLEN- Knopf ein weiteres Mal, um zu einfachen Abspielbetrieb
zurückzukehren.
Titelsprung und Titelsuche
1. Drücken Sie den TITELSPRUNG, TITELSUCHE VORWÄRTS- bzw. RÜCKWÄRTS-Knopf ein-
mal, um schrittweise durch die CD-Titel zu manövrieren.
2. Drücken und halten Sie den TITELSPRUNG, TITELSUCHE VORWÄRTS- bzw. RÜCK-
WÄRTS-Knopf,uminnerhalbeinesTrackseinebestimmteStellezunden.

7
Titel programmieren
Hinweis: Sie können diese Funktion nur im STOP-Modus benutzen.
1. Drücken Sie den PROGRAMMIERKNOPF einmal. Titelnummer und die Indikation “PROG”
werden nun auf dem Display erscheinen.
2. Drücken Sie die TITELSPRUNG, TITELSUCHE VORWÄRTS bzw. -RÜCKWÄRTS-Knopf, um
zu dem Titel zu gelangen, den Sie programmieren wollen.
3. Drücken Sie den PROGRAMMIERKNOPF, um die Auswahl zu bestätigen. In der Folge wird
der zweite Titel der Songliste angeboten
4. Wiederholen Sie die Schritte 2 und 3.
5. Sie können bis zu 20 Tracks programmieren.
6. Drücken Sie den ABSPIELEN/PAUSIEREN-Knopf, um die programmierte Playlist abzuspielen.
7. Sie können wie im Punkt “TITELSPRUNG UND TITELSUCHE” durch die Tracks manövrieren.
8. Sie können die Wiederhol-Funktion wie im Kapitel “WIEDERHOL-FUNKTION” beschrie-
ben nutzen.
9. Nach dem Ausspielen einer Playlist, können Sie diese mit dem ABSPIELEN/PAUSIEREN-
Knopf erneut von Anfang an abspielen.
10. Um den Programmier-Modus zu verlassen, drücken Sie 2x den STOP-Knopf oder öffnen
Sie das CD-Fach.
11. Drücken Sie den ALBUM-Knopf, um ein Album zu wählen.
12. Schalten Sie das Gerät nach Betrieb aus.
USB/SD-Betrieb
1. Wählen Sie den CD-Modus mit dem FUNKTIONSWAHLSCHALTER und legen Sie ein USB-
bzw. SD- Speichermedium ein.
2. Mit dem Knopf CD/USB/SD-Umschaltung können Sie durch die Abspielmodi CD, USB
und SD rotieren. Das Display wird „USB“ oder „SD“ anzeigen, wenn der entsprechende
Modus aktiv ist.
3. Die Nutzung der Funktionen Wiederholen, Programmieren, Titelsprung, Titelsuche und
Album erfolgt jeweils wie im CD-Betrieb.
4. Es besteht keine Möglichkeit, sich von einem USB- oder SD-Datenträger wecken zu lassen.
Externe Audiogeräte nutzen
Sie können externe Audiogeräte – wie Laptops und MP3-Player – über das Gerät betreiben.
1. Schieben Sie die ABDECKUNG nach unten.
2. Verbinden Sie das externe Audiogerät mit der Anlage.
3. Wählen Sie AUX mit dem FUNKTIONSWAHLSCHALTER.
4. Schalten Sie die Anlage ein.
5. Spielen Sie Musik etc. über das externe Audiogerät ab.
6. Stellen Sie eine adäquate Lautstärke beim externen Auiogerät und der Anlage ein.
7. Schalten Sie das Gerät nach der Nutzung ab.
8
Wecken
Weckzeit einstellen
1. Halten Sie den ALARM-Knopf gedrückt und drücken Sie wiederholt den STUNDEN-
KNOPF.
2. Halten Sie den ALARM-Knopf gedrückt und drücken Sie wiederholt den MINUTEN-KNOPF.
Hinweis: Wenn die “PM”-Anzeige auf dem Display leuchtet, zeigt das Gerät eine Uhrzeit
inderzweitenTages-hälftean.WennkeinePM-Anzeigeaueuchtet,zeigtdasGeräteine
Uhrzeit in der ersten Tageshälfte.
Alarm ein- und austellen
1. Drücken Sie den ALARM AN/AUS-Knopf einmal. Das Symbol “ ” erscheint nur auf dem
Display und der Alarm ist aktiv.
2. Drücken Sie den ALARM-AN/AUS-Knopf ein weiteres Mal, sodass das Symbol “ ” er-
lischt, um den Alarm abzustellen.
Weckzeit prüfen
Um die Weckzeit zu prüfen, drücken Sie den ALARM-AN/AUSKnopf.
Radioalarm denieren
DenierenSieeineWeckzeit,stellenSiedenFUNKTIONSWAHLSCHALTERaufRadio,stellen
Sie eine Radiostation ein und passen Sie die Lautstärke an, schalten Sie das Gerät aus.
CD-Alarm denieren
DenierenSieeineWeckzeit,stellenSiedenFUNKTIONSWAHLSCHALTERaufCD,legenSie
eine CD ein und passen Sie die Lautstärke an, schalten Sie das Gerät aus.
Alarm mit Weckgeräusch denieren
1. Setzen Sie den FUNKTIONSAUSWAHLSCHALTER auf ALARM.
2. Mit Erreichen des Weckzeitpunktes wird das Gerät 3 Minuten lang ein Weckgeräusch
einblenden.
3. Wenn der Alarm am nächste Tag nicht eingeblendet werden soll, drücken Sie den ALARM
AN/AUS- Knopf. Auf dem Display wird die Anzeige nun ausgeblendet.

9
Fehlersuche und Fehlerbehebung
Fehler Mögliche Ursache Lösung
Radiosignal rauscht Radiostation nicht richtig eingestellt Radiostation nachstellen
Radioantenne nicht entwickelt Radioantenne entwickeln
Kein Radioempfang Gerät nicht im RADIO-Modus Wählen Sie den RADIO-Modus
Lautstärke zu niedrig Lautstärke erhöhen
CD-Laufwerk läuft
nicht
CD-Modus nicht aktiv Wählen Sie den CD-Modus
CD liegt nicht richtig im Laufwerk Legen Sie die CD richtig ein
CD enthält unlesbare Daten Prüfen Sie die CD-Inhalte
CD springt CD ist zerkratzt Reinigen Sie die CD oder erset- zen
Sie diese
Zwischengeräusche
beim Abspielen der
CD
CD ist verschmutzt Reinigen Sie die CD
Linse ist verschmutzt Reinigen Sie die Linse mit einer
Reinigungs-CD
externe physikalische Einwirkungen Stellen Sie das Gerät um
Verzerrter Sound bei
hoher Lautstärke
Lautstärkeregler auf Maximal- ein-
stellung.
Reduzieren Sie die Lautstärke
Kein Weckalarm Alarm nicht aktiv Vorhandensien von Glocken- symbol
“ ” auf dem Display sicherstellen AM/
PM beachten
Falsche Weckzeit
Entsorgung und Konformitätserklärung
BendetsichdielinkeAbbildung(durchgestricheneMülltonneaufRädern)
auf dem Produkt, gilt die Europäische Richtlinie 2002/96/EG. Diese Produkte
dürfen nicht mit dem normalen Hausmüll entsorgt werden. Informieren Sie
sich über die örtlichen Regelungen zur getrennten Sammlung elektrischer
und elektronischer Gerätschaften. Richten Sie sich nach den örtlichen Re-
gelungen und entsorgen Sie Altgeräte nicht über den Hausmüll. Durch die
regelkonforme Entsorgung der Altgeräte werden Umwelt und die Gesund-
heit ihrer Mitmenschen vor möglichen negativen Konsequenzen geschützt.
Materialrecycling hilft, den Verbrauch von Rohstoffen zu verringern.
Hersteller: Chal-Tec GmbH, Wallstraße 16, 10179 Berlin.
Dieses Produkt entspricht den folgenden Europäischen Richtlinien:
2004/108/EG(EMV)
2011/65/EU(RoHS)
2006/95/EG(LVD)

10
Dear Customer,
Congratulations on purchasing this equipment. Please read this manual carefully and take
care of the following hints to avoid damages. Any failure caused by ignoring the mentioned
items and cautions mentioned in the instruction manual are not covered by our warranty
and any liability.
Safety Instructions
1. Read these instructions.
2. Keep the users Guide.
3. Heed all warnings.
4. Follow the instructions.
5. Do not use the device in water.
6. Take the device for performing cleaning operations. Use water and a cloth.
7. Do not block ventilation mechanisms of the device.
8. Putthedeviceonaatsurface.Forwallmounting,followtheinstructionsinthecourse
of this manual.
9. Do not place the device near to heat sources such as radiators, stoves.
10. Plug the advice into an appropriate outlet. Do not manipulate the power plug.
11. Protect the power cord.
12.Onlyuseattachments/accessoriesspeciedbythemanufacturer.
13. Unplug this apparatus during lightening storms or when unused for a long periods of
time.
14.Referallservicingtoqualiedservicepersonnel.Servicingisrequiredwhentheappara-
tus has been damaged in any way
15.Donotexposetheunittodrippingorsplashingandon‘tllanyliquidsintothedevice;
donotplaceobjectslledwithliquidsontheunit.
16. Do not overload wall outlet. Use only power source as indicated.
17. Only use spare parts from the manufacturer.
18. Upon completion of any service or repairs to this product, ask the service technician to
perform safety checks.
19.Useonlyanoutletthatmeetsthespecicationsofthecurrentlabelonthebackoftheunit.
20. Never push objects of any kind into this product
21.andreferservicingtoqualiedservicepersonnelunderthefollowingconditions:
a) When the power-supply cord or plug is damaged,
b) If liquid has been spilled, or objects have fallen into the product,
c) If the product has been exposed to rain or water,
d) If the product does not operate normally by following the operating instructions. Ad-
just only those controls that are covered by the operating instructions as an improper
adjustment of other controls may result in damage and will often require extensive
workbyaqualiedtechniciantorestoretheproducttoitsnormaloperation.
e) If the product has been dropped or damaged in any way, and when the product
exhibits a distinct change in performance - this indicates a need for service.

11
Product Description
1 Tuning Control 12 Alarm On/Off 23 Album Button
2 Band Selector 13 Minute Button 24 Speakers
3 Function Selector 14 Stereo Headphone Jack 25 Hanger Holes
4 CD-Door 15 AUX In Jack 26 Fold Out Speakers Stands
5 LCD-Display 16 Door 27 Battery Compartment Door
6VolumeControl(-) 17 Play/Pause Button 28 FM Antenne
7VolumeControl(+) 18 Skip/Search Forward 29 Stand
8 Power On/Off Button 19 Stop-Button 30 Speakers Hanger Tabs
9 Time Button 20 Skip/Search Backward 31 CD/USB/SD Shift
10 Alarm Set Button 21 Repeat/Program Button 32 USB Slot
11 Hour Button 22 Remote Sensor 33 SD Card Slot

12
Mounting
Mounting on Stand
Connecting Speakers and Main Unit

13
Mounting on Wall
Use and Operation
Power Sources
This Music System operates on 220V~ 50Hz. Do not attempt to operate the radio on any
other power source. You could cause damage to the unit and void your warranty. Please be
surethepoweroutletyouplugthisunitintoisworkingandreceivesconstant(unswitched)
power. The System is also equipped with a battery back-up system for the clock that is po-
weredby2piecesof“AA”(UM-3)sizebatteries(Notincluded).
Setting the clock
Theclockhastobesetbeforeusingthesystemforthersttime.Whenyouconnectthe
SystemtotheACoutletforthersttimetheclockdisplaywillshow„12:00“andwillneed
to be set. For examp- le set the clock time at 7:30 AM.
1. Press and hold the TIME button and repeatedly press the HOUR button to set the correct Hour.
2. Press and hold the TIME button and repeatedly press the MIN button to set the correct Minute.
Note: There is a PM INDICATOR located on the left-hand side of the clock display. Be sure
to observe the PM indicator when setting the time to make sure the time is set correctly for
AM or PM. If the PM indicator appears, the time displayed is „PM“. If the PM indicator is not
shown, the time displayed is „AM“.

14
Radio operation
1. To turn the radio on, press the POWER BUTTON once. The LCD DISPLAY lights up.
2. Slide the FUNCTION SELECTOR to the “RADIO” position.
3. SlidetheBANDSELECTORtoyourdesiredband(AM,FMorFMST.).
4. Turn the TUNING CONTROL to your desired radio station. The radio frequency appears
intheLCDDISPLAY.AdjustthesoundlevelbypressingtheVOLUMEbuttons(+/-).
6. To turn off the radio, press the POWER BUTTON again. The LCD DISPLAY will go “off”.
FM Stereo Reception
With the BAND SELECTOR in the “FM ST” position, the FM Stereo Indicator “ST” will light
up when listening to a strong station that is broadcasting in “Stereo”. Slide the BAND SE-
LECTOR to the FM position when the FM stereo reception is weak. The reception may be
improved,butthesoundismonaural(MONO).
CD-player operation
PLAY MODE
1. Turn on the Music System by pressing the POWER BUTTON. The LCD DISPLAY goes “On”.
2. Slide the FUNCTION SELECTOR to the “CD” position. Flashing “--” will be displayed in
theLCDDISPLAYwhilethePlayerisreadingthetableofcontents(TOC)ontheCD.“no”
will be displayed if no disc is loaded.
3. Open the CD DOOR by pressing the CD DOOR at the “OPEN/CLOSE” mark located on the
CD door, load a CD with the label side facing upward and then close the CD door.
4. Playbackwillstartfromtrack1oncethePlayerhasnishedreadingtheTOC.ThePLAY/
PAUSE INDICATOR will appear steadily on the LCD DISPLAY.
5. While playing, press the PLAY/PAUSE BUTTON to pause, the PLAY/PAUSE INDICATOR “
”willash.PressthePLAY/PAUSEBUTTONagaintoresumeplaying.
6. AdjusttheVOLUMEBUTTONS(+/-)tothedesiredvolumelevel.
REPEAT MODE
When the REPEAT BUTTON is pressed once, the REPEAT 1 Indicator, ‘REP 1’, will appear in
the LCD DISPLAY. The current track will be played repeatedly. When the REPEAT BUTTON is
pressed twice, the REPEAT INDICATOR, “REP ALL” will light in the LCD DISPLAY. The whole
disc will be played continuously. To Cancel Repeat Function: Press the REPEAT BUTTON until
the repeat indicator is off.
SKIP AND SEARCH MODE
1. During Play or Pause mode, tap the SKIP FORWARD or SKIP BACKWARD BUTTON to go
to the next track or go back to the beginning of the current track.
2. During playback, press and hold the SEARCH FORWARD or SEARCH BACKWARD buttons
to search within the current track with audible high speed playback.

15
PROGRAM PLAY MODE
Note: Program can only be set in STOP mode.
1. Press the PROG BUTTON once. Both the Program No, “01”, and PROGRAM INDICATOR,
“PROG”willashintheDISPLAY.PresstheSKIPFORWARDorSKIPBACKWARDBUTTON
to select the track to be programmed.
3. Press the PROGRAM BUTTON again to store the selection. The Program No. will advance to
“02”andashtogetherwiththePROGRAMINDICATOR“PROG”topromptforthenextinput.
4. Press the SKIP FORWARD or SKIP BACKWARD BUTTON to select the track to be pro-
grammed. Press the PROGRAM BUTTON again to store your second selection.
6. Press the PLAY/PAUSE BUTTON to complete and start program play in the programmed
sequence. You may tap SKIP FORWARD BUTTON to go directly to other tracks ahead during
programplayandpressSKIPBACKWARDBUTTONtwicetogobacktoprevioustrack(s).
8. YoumayusetheREPEATfunctiontorepeatedlyplayacertaintrack(Repeat1)orall
tracksintheprogram(RepeatAll).
9. The Player will stop when all the programmed tracks have been played through once. To
replay program play, press the PROGRAM Button followed by the PLAY/ PAUSE Button.
10. To cancel program play, press the STOP BUTTON twice while program play is running.
11. Press ALBUM Bottom to choose the album. To turn the Player off, press the POWER BUT-
TON. The LCD DISPLAY backlight will go “off”.
USB/SD Operation
1. Choose the CD mode and insert an USB- or SD device.
2. Press the CD/USB/SD SHIFT button to rotate through the CD, USB res. SD playing mo-
des. The display will prompt “USD” or “SD” when the respective mode is active.
3. The use of the repeat, programming, skip, search und album functions equals the sche-
me outlined for the CD mode.
4. There is no option to set an USB or SD device as the source of the alarm.
AUX Operation
Youcanplayothermusicsources(iPod,MP3playerorotherdigitalaudioplayer)through
the speakers of this System by connecting the AUX IN Jack to your external player’s LINE
OUT jack or headphone jack.
1. TheAUXINandPHONESJACKSarecoveredbytheDOOR(#16).SlidetheDOORdownwards
2. Plugoneendofanaudiocable(Notincluded)intotheAUXINJackandtheotherendof
the cable to the line out or headphone jack of your digital audio player.
3. Set the FUNCTION SELECTOR to the “AUX” position.
4. Press the POWER BUTTON to turn on the System. The LCD DISPLAY goes “On”.
5. Play your digital audio player.
6. Adjust the VOLUME on the external audio player and the System until you reach a com-
fortable listening level.
7. TurntheSystemandyouraudioplayeroffwhenyouhavenishedlisteningandunplug
the audio cable.

16
Setting the Alarm
SETTING THE WAKE UP TIME
1. Press and hold the AL SET BUTTON and repeatedly press the HOUR BUTTON to set the
correct wake up Hour.
2. Press and hold the AL SET BUTTON and repeatedly press the MINUTE BUTTON to set the
correct wake up Minute.
Note: There is a PM INDICATOR located in the left-hand side of the clock display. Be sure
to observe the PM indicator when setting the alarm to make sure the alarm time is set cor-
rectly for AM or PM. If the PM indicator appears in LCD DISPLAY, the alarm will be „PM“. If
not, the alarm time will be „AM“.
TURNING ALARM FUNCTION ON/OFF
1. Press the AL.ON/OFF Button once to turn the alarm function on. The ALARM INDICATOR,
“” will appear in the DISPLAY.
2. Press the AL.ON/OFF Button again to turn the alarm function off. The ALARM INDICA-
TOR, “ ” will disappear in the DISPLAY.
CHECKING THE WAKE UP TIME
Whenever you want to check the wake up time, simply press the AL SET BUTTON. The dis-
play will change from current time to wake up time. Release the AL SET BUTTON to return
to current time.
WAKE TO RADIO
1. Press the POWER BUTTON to turn on the System. The LCD DISPLAY lights up.
2. Press the AL.ON/OFF Button once to turn on the alarm function. The ALARM INDICATOR
will light up.
3. Slide the FUNCTION SELECTOR to “RADIO” and the BAND SELECTOR to AM, FM or FM
ST as desired.
4. Tune to your desired station, and adjust the volume level that you wish to hear when the
wake up time is reached then press the POWER BUTTON again to turn off the System.
ReconrmthewakeuptimesettingbytappingtheALSETBUTTON.
5. At the selected wake up time the radio will turn ‚On‘ and remain ‘On’ until it is turned off.
6. If you do not want the alarm to turn the radio on the following day, press the AL.ON/OFF
Button again to turn off the alarm function. The ALARM INDICATOR goes off.

17
Troubleshooting
Problem Possible Cause Solution
Noise or sound dis-
torted on AM or FM
Station not tuned properly. Retune the broadcast station.
FM Wire antenna is not extended. FM: Extend the FM Wire antenna
AM or FM no sound Unit not in “RADIO” function mode. Slide FUNCTION SELECTOR to RADIO.
Volume set at minimum Increase Volume.
CD player will not
play
Unit not in CD function mode. Select CD function mode.
CD is not loaded properly. Load CD with label side up.
ICD is self-compiled, the media used
may not be compatible with the player.
Use better quality blank media and
retest.
CD skips Disc is dirty or scratched. Wipe CD with clean cloth
Intermittent sound
from CD player
Dirty or defective disc Clean or replace the defective disc
Dirty pick up lens Use a CD lens cleaning disc to clean
Player is subject to excessive shock
or vibration
Relocate the player away
Sound appears
distorted at high
volume levels.
Volume control is set to maximum. Adjust Volume Control to a lower
comfortable level.
Disposal and Declaration of Conformity
According to the European waste regulation 2002/96/EG this symbol on the
product or on its packaging indicates that this product may not be treated
as household waste. Instead it should be taken to the appropriate collection
point for the recycling of electrical and electronic equipment. By ensuring
this product is disposed of correctly, you will help prevent potential negative
consequences for the environment and human health, which could other-
wise be caused by inappropriate waste handling of this product. For more
detailled information about recycling of this product, please contact your
local council or your household waste disposial service.
Producer: Chal-Tec GmbH, Wallstraße 16, 10179 Berlin.
This product is conform to the following European Directives:
2004/108/EC(EMC)
2011/65/EU(RoHS)
2006/95/EC(LVD)

18
Chère cliente, cher client,
Toutes nos félicitations pour l’acquisition de ce nouvel appareil. Veuillez lire attentivement
etrespecterlesinstructionsdecemoded’emploiand’éviterd’éventuelsdommages.Nous
ne saurions être tenus pour responsables des dommages dus au non-respect des consignes
et à la mauvaise utilisation de l’appareil.
Consignes de sécurité
1. Lisez cette notice attentivement.
2. Conservez cette notice.
3. Respectez toutes les consignes de sécurité.
4. Respectez toutes les consignes d‘utilisation.
5. N‘utilisez pas cet appareil dans l‘eau.
6. Débranchez l‘appareil avant de le nettoyer et utilisez un chiffon et de l‘eau.
7. Ne bloquez pas les mécanismes automatiques de l‘appareil.
8. Placez l‘appareil sur une surface plane et régulière. En cas de montage mural, respectez
les consignes de montage.
9. Conservez l‘appareil à l‘abri des sources de chaleur, radiateur, etc..
10. Ne branchez l‘appareil que sur une prise compatible. Ne manipulez pas la prise.
11. Protégez le câble d‘alimentation contre les intempéries.
12. N‘utilisez que des accessoires recommandés par le constructeur.
13. Débranchez l‘appareil lors d‘orages ou lorsque vous ne l‘utilisez pas pendant longtemps.
14. Si le matériel est endommagé, faites appel à un professionnel.
15. N‘exposez pas l‘appareil à des éclaboussures ou à l‘humidité. Ne placez pas l‘appareil à
proximité de contenants liquide.
16. Ne surmenez pas votre mur lors du montage.
17. N‘utilisez que des pièces de rechange constructeur.
18. Demandez à un professionnel de faire des essais après réparation.
19. Ne branchez l‘appareil que sur des prises de courants compatibles. Reportez-vous à
l‘étiquette de voltage au dos de l‘appareil.
20. N‘insérez pas d‘objet dans l‘appareil.
21. Contactez un professionnel dans les cas suivants:
a) Câble d‘alimentation abîmé
b) L‘appareil a été exposé à l‘eau
c) L‘appareil a été exposé à l‘humidité
d) L‘appareil ne fonctionne plus correctement
e) L‘appareil est tombé et ne fonctionne plus
f) L‘appareil n‘est plus aussi performant

19
Éléments de commande
1. Tuner radio 12. Alarme ON/OFF 23. Bouton album
2. Sélecteur station 13. Bouton minute 24. Haut-parleur
3. Sélecteur fonction 14. Entrée casque 25. Trous de montage mural
4. Porte lecteur CD 15. Entrée AUX 26. Pieds haut-parleur
5. Écran LCD 16. Couvercle 27. Compartiment piles
6. Diminuer le volume 17. Bouton lecture/pause 28. Antenne FM
7. Augmenter le volume 18. Bouton avance/retour titres 29. Pied
8. Bouton ON/OFF 19. Bouton stop 30. Support haut-parleur
9. Bouton horloge 20. Bouton avance/retour titres 31. Commutateur CD/USB/SD
10. Bouton alarme 21. Répétition/programmation 32. Entrée USB
11. Bouton heures 22. Capteur télécommande 33. Entrée carte SD

20
Montage
Pied
Connexion entre les haut-parleurs et l‘unité principale
Other manuals for Stereoanlage 10006663
1
This manual suits for next models
5
Table of contents
Languages:
Other oneConcept Stereo System manuals

oneConcept
oneConcept V-12 User manual

oneConcept
oneConcept V-12 User manual

oneConcept
oneConcept Stereoanlage 10006663 User manual

oneConcept
oneConcept V-13 Series User manual

oneConcept
oneConcept 10029361 User manual

oneConcept
oneConcept Stereoanlage 10006664 User manual

oneConcept
oneConcept V355 User manual

oneConcept
oneConcept Streamo 10033704 User manual

oneConcept
oneConcept Vertical 90 User manual

oneConcept
oneConcept 10026861 User manual