ONFORU MZT-FW01 User manual

EN/DE/FR/IT/ES
SMART LED LIGHT
Product manual
MODEL: MZT-FW01
EU 100-240V AC UK 100-240V AC
US 100-240V AC

SAFETY INFORMATION / SICHERHEITSINFORMATIONEN / INOFRMATION DE
SÉCURITÉ / LA INFORMACIÓN DE SEGURIDAD / INFORMAZIONI SULLA SICUREZZA
2
EN
EN This product is not a toy. Do not let children play it as the toy.
Check all components for damage, do not use the product if it is damaged.
To ensure the product can work normally, please use it in the voltage within the range on
the lamp label.
This product is not waterproof, please do not submerge in water or do not use it in the humid
environment for a long time.
Do not install the unit on (normally) flammable surfaces.
To reduce the risk of strangulation the flexible wiring connected to this luminaire shall be
effectively fixed to the wall if the wiring is within arm's reach
The light source of this luminaire is not replaceable; when the light source reaches its end
of life the whole luminaire shall be replaced.
Never plug the light in with wet hands in case of electric shock.
The housing of the light is made of plastic, donotwipeitwithstrongdetergentsandother
chemicalcleanerswhencleaning.
Please use our power adapter and other accessories in the package. For other power
adapters, the light may not work or be damaged.
Risk of fire--Do not replace the power plug. This plug contains a safety device (fuse) which
must not be removed, if the power plug is damaged, please discard this product.
Disconnect the power supply before attempting any work on the unit!
DE Vor allen Arbeiten am Gerät muss die Stromversorgung unterbrochen werden!
Dieses Produkt ist kein Spielzeug. Lassen Sie Kinder es nicht als Spielzeug spielen
Überprüfen Sie vor der Installation alle Bauteile. Verwenden Sie das Produkt nicht, wenn
es beschädigt ist.
Verwenden Sie die Spannung im Bereich der angegebenen Spannung auf dem
Lampenetikett, um den normalen Betrieb des Produkts zu gewährleisten.
Dieses Produkt ist nicht wasserdicht, bitte nicht in Wasser tauchen oder längere Zeit in
feuchter Umgebung verwenden.
Installieren Sie das Gerät nicht auf gewöhnlichen leicht brennbaren Oberflächen.
Um das Risiko einer Strangulation zu verringern, muss die an diese Leuchte angeschlossene
flexible Verkabelung effektiv an der Wand befestigt werden, wenn die Verkabelung in
Reichweite ist.
Die Lichtquelle dieser Leuchte ist nicht austauschbar; wenn die Lichtquelle ihr Ende
erreicht Lebensdauer soll die gesamte Leuchte ersetzt werden.
Schließen Sie das Licht niemals mit nassen Händen im Falle eines Stromschlags an.
Das Gehäuse des Lichts besteht aus Kunststoff. Wischen Sie sie beim Reinigen nicht mit
einem starken Reinigungsmittel oder anderen chemischen Reinigungsmitteln ab.
Bitte verwenden Sie unser originale Netzteil und anderes Zubehör in dem Paket. Bei anderen
Netzteilen werden das Licht möglicherweise nicht funktionieren oder beschädigt sein.
Feurgefahr-ersetzen Sie bitte nicht den Netzstecker. Denn dieser Stecker enthält eine
Sicherheitsvorrichtung (Sicherung). Wenn der Netzstecker beschädigt ist, entsorgen Sie
bitte dieses Produkt.

3
FR L'alimentation doit être débranchée avant toute opération sur l'appareil!
Ce produit n'est pas un jouet, ne laissez pas les enfants jouer comme jouet.
Vérifiez si tous les composants sont endommagés avant l'installation. N'utilisez pas le
produit lorsqu'il est endommagé.
Afin d'assurer le fonctionnement normal du produit, veuillez utiliser la tension dans la plage
de la tension d'étiquette de la lampe.
Ce produit n'est pas étanche, veuillez ne pas l'immerger dans l'eau ou ne pas l'utiliser
dans un environnement humide pendant une longue période.
N'installez pas l'appareil sur des surfaces inflammables ordinaires.
Pour réduire le risque d'étranglement, le câblage flexible connecté à ce luminaire doit être
efficacement fixé au mur si le câblage est à portée de main.
La source lumineuse de ce luminaire n'est pas remplaçable; lorsque la source lumineuse
atteint sa fin de vie l'ensemble du luminaire doit être remplacé.
Ne jamais brancher la lampe avec les mains mouillées en cas de choc électrique.
L'enveloppe extérieure de la lampe est en matière plastique, ne l'essuyez pas avec un
détergent puissant et d'autres nettoyants chimiques lors du nettoyage.
Veuillez utiliser notre adaptateur secteur et nos autres accessoires. Pour les autres
adaptateurs d'alimentation, la lampe peut ne pas fonctionner ou être endommagée.
Risque d'incendie - ne remplacez pas la fiche d'alimentation. Cette fiche contient un
dispositif de sécurité (fusible) qui ne doit pas être retiré. Si la fiche d'alimentation est
endommagée, veuillez jeter ce produit.
ES ¡Antes de comenzar cualquier trabajo en el aparato, interrúmpase la alimentación de tensión!
Este producto no es un juguete, no permita que los niños lo jueguen como juguete.
Compruebe que todos los componentes se encuentran en perfecto estado.
Para garantizar el funcionamiento normal del producto, utilice el voltaje dentro del rango del
voltaje de la etiqueta de la lámpara.
Este producto no es resistente al agua, no lo sumerja en agua ni lo use en un ambiente
húmedo durante mucho tiempo.
No instale el dispositivo en superficies inflamables normales.
Para reducir el riesgo de estrangulamiento, el cableado flexible conectado a esta luminaria
debe fijarse eficazmente a la pared si el cableado está al alcance de la mano.
La fuente de luz de esta luminaria no es reemplazable; cuando la fuente de luz llega a su fin
de vida, toda la luminaria debe ser reemplazada.
Nunca enchufe la luz con las manos mojadas en caso de descarga eléctrica.
La carcasa de la lámpara está hecha de plástico y cuando se limpia, no debe ser lavada
con productos de limpieza químicos, tales como detergentes fuertes.
Por favor utilice nuestro adaptador de corriente y otros paquetes de accesorios. Dado que
si utiliza otros adaptadores de corriente, la lámpara podría no funcionar o podría dañarse.
Existe riesgo de incendio – no sustituya el enchufe de alimentación. Este enchufe contiene
un dispositivo de seguridad (fusible) que no debe ser retirado, deseche el producto si el
enchufe de alimentación está dañado.

4
IT L'alimentazione deve essere scollegata prima di eseguire qualsiasi lavoro sul dispositivo!
Questo prodotto non è un giocattolo, non lasciare che i bambini lo giochino come un giocattolo.
Verificare che tutti i componenti siano completi prima dell'installazione. Non utilizzare il
prodotto se danneggiato
Per garantire il normale funzionamento del prodotto, utilizzare la tensione entro l'intervallo
della tensione dell'etichetta della lampada.
Questo prodotto non è impermeabile, si prega di non immergerlo in acqua o di non utilizzarlo
a lungo in un ambiente umido.
Non installare il dispositivo su normali superfici infiammabili.
Per ridurre il rischio di strangolamento, il cablaggio flessibile collegato a questo apparecchio
deve essere efficacemente fissato alla parete se il cablaggio è a portata di mano.
La sorgente luminosa di questo apparecchio non è sostituibile; quando la sorgente luminosa
raggiunge la fine della vita l'intero apparecchio deve essere sostituito.
Non collegare mai la luce con le mani bagnate in caso di scossa elettrica.
Il guscio esterno della lampada è realizzato in materiale plastico, non pulirlo con detergenti
aggressivi e altri detergenti chimici per la pulizia;
Si prega di utilizzare il nostro adattatore di alimentazione e altri accessori nel pacchetto. Per
altri adattatori di alimentazione, la lampada potrebbe non funzionare o essere danneggiata;
Rischio di incendio: Non sostituire la spina di alimentazione. Questa spina contiene un
dispositivo di sicurezza (fusibile) che non deve essere rimosso , se la spina di alimentazione
è danneggiata, si prega di gettare questo prodotto;
FCC Warning:
Any Changes or modifications not expressly approved by the party responsible for compliance
could void the user's authority to operate the equipment.
This device complies with part 15 of the FCC Rules. Operation is subject to the following two
conditions:
(1) This device may not cause harmful interference, and
(2) this device must accept any interference received, including interference that may cause
undesired operation.
Note: This equipment has been tested and found to comply with the limits for a Class B digital
device, pursuant to part 15 of the FCC Rules. These limits are designed to provide reasonable
protection against harmful interference in a residential installation. This equipment generates
uses and can radiate radio frequency energy and, if not installed and used in accordance with
the instructions, may cause harmful interference to radio communications. However, there is no
guarantee that interference will not occur in a particular installation. If this equipment does
cause harmful interference to radio or television reception, which can be determined by turning
the equipment off and on, the user is encouraged to try to correct the interference by one or
more of the following measures:
-Reorient or relocate the receiving antenna.
-Increase the separation between the equipment and receiver.
-Connect the equipment into an outlet on a circuit different from that to which the receiver is
connected.
-Consult the dealer or an experienced radio/TV technician for help.
This equipment complies with FCC radiation exposure limits set forth for an uncontrolled
environment. This equipment should be installed and operated with minimum distance
20cm between the radiator & your body.
5
PARAMETER / PARAMETER / PARAMÈTRE / PARÁMETRO /
PARAMETRI
2 x 6W
MZT-FW01
253x38x43 mm 9.96x1.50x1.69 in
100-120V~60Hz / 220-240V~50Hz
Wi-Fi
>0.5PF
RGB/2700-6500K
0.83 kg / 1.83 lb
ta-25°C -40°C / -4°F-104°F

6
1
7
98
654
2 3
COMPONENTS / KOMPONENTEN / COMPOSANTS /
COMPONENTES / COMPONENTI
1. Smart LED Light 2. Screws 3. Plastic Expansion Nails 4. Angular support
5. Hanging buckle 6. 3M adhesive 7. Base 8. Adapter 9. Controller
1. Intelligentes LED lampe 2. Schraube 3. Kunststoff-Nägel 4. Winkelblock
5. Hängende Schnalle 6. 3M Kleber 7. Basis 8. Adapter 9. Controller
1. Lumière LED Intelligente 2. Vis 3. Clous d'Expansion en Plastique 4. Base d'angle
5. Boucle de suspension 6. Bande 3M 7. Base 8. Adaptateur 9. Contrôleur
1. LED Luz Inteligente 2. Tornillos 3. Clavos Plástico de Expansión 4. Asiento de Ángulo
5. Hebilla Colgante 6. Pegamento 7. Base 8. Adaptador 9. Controlador
1. Smart LED Light 2. Screws 3. Chiodi di Espansione in Plastica 4. Supporto
5. Fibbia Appesa 6. 3M Colla 7. Basamento 8. Adattatore 9. Controller
EN
DE
FR
ES
IT

7
11
7 7
9
8
EN
DE
FR
ES
IT
Connect the LED light to the Controller, and then to the power adapter.
Plug in the power cord and press the power cord switch to turn on / off the LED light.
Verbinden Sie das Stimmungslichter mit Controller, dann schließen Sie es an das
Netzteil an. Schließen Sie die Stromversorgung an und drücken Sie den Schalter am
Netzkabel, um den Schalter das Stimmungslichter zu steuern.
Connectez la lumière LED au Contrôleur, puis à l'adaptateur secteur. Branchez le cordon
d'alimentation et appuyez sur l'interrupteur du cordon d'alimentation pour allumer/éteindre
la lumière LED.
Conecte la luz ambiental al Controlador y luego al adaptador de corriente.
Conecte la alimentación y presione el interruptor del cable de alimentación para controlar
el interruptor de la luz de la atmósfera.
Collegare lampadina al Controller, e quindi collegare all'adattatore di alimentazione.
Collegare l'alimentazione e premere l'interruttore per controllare ON/OFF della lampadina.
CONNECTION DIAGRAM / ANSCHLUSSDIAGRAMM / DIAGRAMME DE
CONNEXION/ DIAGRAMA DE CONEXIÓN/ SCHEMA DI COLLEGAMENTO

8
Step 1: "Onforu Home" App Download.
There are 2 options for obtaining and downloading
the "Onforu Home" App on your smart device.
1. Scan the QR code on the right.
2. Search for "Onforu Home" in the App Store or
Google Play.
Schritt 1. Installation von “Onforu Home ”App
Es gibt 2 Möglichkeiten, die App "Onforu Home" auf
Ihrem Smartphone zu erhalten und zu installieren.
1. Scannen Sie rechts QR-Code
2. Suchen Sie nach "Onforu Home" im App-Store
oder Google Play
Étape 1. Installation de l’application « Onforu Home »
Vous avez le choix entre deux méthodes pour télécharger et installer l’application
«Onforu Home» sur votre appareil connecté.
1. Scannez le code QR sur la droite.
2. Recherchez «Onforu Home» sur le Google Play Store ou l’App Store.
Paso 1. Instale la aplicación «Onforu Home».
Hay 2 opciones disponibles para obtener e instalar la aplicación «Onforu Home» en
un dispositivo inteligente.
1. Escanee el código QR a continuación.
2. Busque la aplicación «Onforu Home» en la App Store o Google Play.
Passaggio 1. Installazione dell’applicazione "Onforu Home".
Esistono 2 opzioni per ottenere ed installare l'applicazione "Onforu Home" sul dispositivo
smart.
1. Scansionare il codice QR
2. Cercare "Onforu Home" nell'APP Store o Google Play.
PAIRING LED LIGHT WITH"Onforu" App.
EN
DE
FR
ES
IT
Turn ON/OFF the Smart LED Light three times until the LED Light starts to flash quickly,
which indicates the success of the factory reset.
Schalten Sie den Strahler dreimal ein und aus, bis sie schnell zu blinken beginnt, womit
angezeigt wird, dass die Rücksetzung auf Werkstatus erfolgreich war.
Allumez/éteignez la lumière LED intelligente trois fois jusqu’à ce qu’il se mette à
clignoter rapidement. Cela qui indique que la réinitialisation d’usine a bien été effectuée.
Encienda y apague el foco tres veces hasta que esta comience a destellar rápidamente,
lo que le indicará que ha restablecido los ajustes predeterminados con éxito.
Accendere e spegnere lampadina d'atmosfera qualche volte fino a quando lampadina
d'atmosfera inizia a lampeggiare rapidamente, indica che il reset di fabbrica avvenuto
con successo.
NOTE:
EN
DE
FR
ES
IT

Step 2: Enter the "Onforu Home" App. and register an account and log in. If you already have
an account for Onforu Home App., Please select "Log in with existing account".
Note: You will need your "Onforu Home" App. username and password to pair with Amazon
Alexa and/or Google Assistant.
Schritt 2: Registrieren Sie sich mit einem Konto auf der App "Onforu Home" und melden Sie
sich damit an. Sollten Sie bereits ein Konto für die Onforu Home App haben, wählen Sie
bitte "Mit bestehendem Konto anmelden"
Hinweis: Sie benötigen Ihren "Onforu Home" App Benutzernamen und Ihr Passwort, um
eine Verbindung mit Amazon Alexa oder Google Assistant herzustellen.
Étape 2: Lancer l’application «Onforu Home », créer un compte et se connecter. Si vous avez
déjà un compte pour l’application Onforu Home, sélectionnez «Log in with existing account»
(se connecter avec un compte existant).
Note : Vous aurez besoin du nom d’utilisateur et du mot de passe de l’application «Onforu
Home» pour l’appairage avec Amazon Alexa ou Google Assistant.
Paso 2: Abra la aplicación «Onforu Home», regístrese con una cuenta e inicie sesión. Si ya
tiene una cuenta en la aplicación de Onforu Home, seleccione «Iniciar sesión con una
cuenta existente».
Nota: Necesitará su nombre de usuario y contraseña de la aplicación «Onforu Home» para
sincronizar el producto con Amazon Alexa o el asistente de Google.
Passaggio 2: Accedere all’App "Onforu Home", effettuare la registrazione o il login. Se si
dispone già di un account per l’applicazione Onforu Home, selezionare"Accedi con account
esistente".
Nota: Sarà necessario il nome utente e password dell'applicazione "Onforu Home" per
collegarsi con Amazon Alexa e Assistente di Google.
EN
DE
FR
ES
IT
9

10
Step 3. Please turn on the Wi-Fi and Bluetooth before connecting LED lights to the
“Onforu Home” APP.
Tap "+" button on top right corner to add device, then tap"lighting device" to enter next page.
Note: This smart LED Light can only support 2.4 GHz network and cannot work with 5.0 GHz
network. Please check if your home network is 2.4 GHz and make sure that your phone has
been connected to your Wi-Fi network. Please ensure your network is not hidden.
Schritt 3. Bitte aktivieren Sie WiFi und Bluetooth, bevor Sie das Licht an die App “Onforu
Home” anschließen.
Tippen Sie auf die Schaltfläche "+" oben rechts, um das Gerät hinzuzufügen, und dann auf
"lighting device“ (Beleuchtungsvorrichtung), um zur nächsten Seite zu gelangen.
Hinweis: Diese intelligente LED Strahler unterstützt nur 2.4 GHz-Netzwerke und funktioniert
nicht mit 5.0 GHz-Netzwerke. Bitte überprüfen Sie, ob Ihr Heimnetzwerk ein 2.4 GHz ist und
vergewissern Sie sich, dass Ihr Telefon mit Ihrem Wi-Fi-Netzwerk verbunden ist. Bitte stellen
Sie sicher, dass Ihr Netzwerk nicht ausgeblendet ist.
Étape 3. Veuillez activer le Wi-Fi et le Bluetooth avant de connecter la lumière LED à
l'application « Onforu Home ».
Sélectionnez le bouton «+» situé dans le coin supérieur droit pour ajouter un appareil, puis
«lighting device» (dispositif d’éclairage) pour accéder à la page suivante.
Note : Cette lumière LED intelligente est uniquement compatible avec les réseaux Wifi
2,4 GHz et ne peut pas fonctionner sur des réseaux 5 GHz. Vérifiez que votre réseau
domestique est bien en Wifi 2,4 GHz et assurez-vous que votre téléphone est bien connecté.
Veuillez assurer que votre réseau n’est pas masqué.
Paso 3. Encienda WIFI y Bluetooth antes de conectar luces LED a la aplicación Onforu Home
Pulse el botón «+», situado en la esquina superior derecha, para añadir el dispositivo.
Después, pulse «dispositivo de iluminación» para acceder a la siguiente página.
Nota: Esta luz LED solo es compatible con redes de 2.4 GHz y, por lo tanto, no funciona
con redes de 5.0 GHz. Compruebe que su red doméstica sea de 2.4 GHz y asegúrese de que
su teléfono móvil se ha conectado a la red wifi. Por favor, asegúrese de que su red no está oculta.
Passaggio 3. Accendere il Wi-Fi e il Bluetooth prima di collegare le luci LED all'APP "Onforu Home".
Toccare il pulsante "+" nell'angolo in alto a destra per aggiungere il dispositivo, quindi toccare
"dispositivo di illuminazione" per accedere alla pagina successiva.
Nota: Questa lampadina d'atmosfera può funzionare solo con la rete 2.4 GHz e non supporta
la rete 5.0 GHz. Si prega di controllare che la rete domestica è 2.4 GHz e assicurarsi che
il telefono è stato collegato alla rete Wi-Fi. Assicurarsi che la rete non è nascosta.
EN
DE
FR
ES
IT

EN
DE
Step 4. How to pair the LED Light.
1. Power on the LED Light.
2. Power off it three times quickly until the LED chips flashes, it indicates that the flood
light has entered pairing mode.
3. Tap the confirmation button to pair the LED Light.
4. Enter Wi-Fi password to join your network.
Please Note:
a. This smart LED Light can only support 2.4 GHz network and cannot work with 5.0
GHznetwork.
b. Please check if your home network is 2.4 GHz and make sure that your phone has
been connected to your Wi-Fi network. Please ensure your network is not hidden.
5. Wait till it is successfully connected.
Note: If the LED Light is still flashing until the progress map reaches 100%, the pairing
fails, and you will need to repeat the previous 4 steps to pair the LED Light.
Schritt 4. wie man den Strahler repairieren.
1. Schalten Sie den LED Strahler ein.
2. Schalten Sie das Gerät dreimal schnell aus, bis der Strahler blinkt und in den
Pairing-Modus geht.
3. Tippen Sie nun auf die Bestätigungstaste, um den Strahler zu verbinden.
4. Geben Sie das Wi-Fi-Passwort ein, um zu Ihrem Netzwerk zu gelangen.
Bitte beachten Sie:
a. Diese intelligente LED Strahler kann nur 2.4 GHz-Netzwerke unterstützen und nicht
mit 5.0 GHz-Netzwerken funktionieren.
b. Bitte überprüfen Sie, ob Ihr Heimnetzwerk ein 2.4 GHz ist und vergewissern Sie sich,
dass Ihr Telefon mit Ihrem Wi-Fi-Netzwerk verbunden ist. Bitte stellen Sie sicher, dass
Ihr Netzwerk nicht ausgeblendet ist.
5. Warten Sie, bis die Verbindung erfolgreich hergestellt worden ist.
Hinweis: Blinkt die Lampe immer noch, wenn die Fortschrittsanzeige 100% erreicht, ist die
Verknüpfung fehlgeschlagen und Sie müssen die vorherigen 4 Schritte wiederholen, um die
Lampe anzuschließen.
11

FR
ES
IT
Étape 4. Comment synchroniser la lumière LED.
1. Allumez la lumière LED.
2. Débranchez 3 fois rapidement, jusqu'au clignotement LED, c'est à dire le mode
d'appariement.
3. Appuyez sur le bouton de confirmation pour valider l’appairage de la lumière LED.
4. Entrez le mot de passe Wifi pour rejoindre votre réseau.
Veuillez noter :
a. Cette lumière LED intelligente est uniquement compatible avec les réseaux Wifi
2,4 GHz et ne peut pas fonctionner sur des réseaux 5 GHz.
b. Vérifiez que votre réseau domestique est bien en Wifi 2,4 GHz et assurez-vous que
votre téléphone est bien connecté. Veuillez assurer que votre réseau n’est pas masqué.
5. Attendez jusqu’à la connexion est établie.
Note : Si la lumière LED continue à clignoter jusqu’à ce que la progression atteigne
100%, l’appairage n’a pas fonctionné et vous devrez renouveler les 4 étapes
précédentes pour réaliser l’appairage.
Paso 4. Cómo sincronizar la luz.
1. Enciende el foco LED.
2. Desconecte 3 veces rápidamente, hasta que el LED parpadee, es decir, el modo de
emparejamiento.
3. Pulse el botón de confirmación para sincronizar la luz.
4. Introduzca la contraseña wifi para conectarse a la red.
Nota:
a. Este foco LED solo es compatible con redes de 2.4 GHz y, por lo tanto, no funciona
conredes de 5.0 GHz.
b. Compruebe que su red doméstica sea de 2.4 GHz y asegúrese de que su teléfono
móvil se ha conectado a la red wifi. Por favor, asegúrese de que su red no está oculta.
5. Espere a que el foco se conecte con éxito.
Nota: Si el foco sigue parpadeando cuando la barra de carga haya alcanzado el 100%,
la sincronización habrá sufrido un fallo y deberá repetir los 4 pasos anteriores para
vincular la luz.
Passaggio 4. Come associare la lampadina d'atmosfera.
1. Accendi lampadina d'atmosfera.
2. Spegnere qualche volte rapidamente fino a quando lampadina d'atmosfera lampeggia,
indicando che lampadina d'atmosfera è entrato in modalità di associazione.
3. Toccare il pulsante di conferma per associare la lampadina.
4. Immettere la password Wi-Fi per accedere alla rete.
Si prega di notare:
a. Questa lampadina d'atmosfera può funzionare solo con la rete 2.4 GHz e non supporta la
rete 5.0 GHz
b. Controllare che la rete domestica è 2.4 GHz e assicurarsi che il telefono è connesso alla
rete Wi-Fi. Assicurarsi che la rete non è nascosta.
5. Attendere fino al completamento della connessione
Nota: se la lampadina d'atmosfera continua a lampeggiare fino a quando la barra di a
vanzamento raggiunge il 100%, il collegamento non è riuscito e sarà necessario ripetere
i precedenti 4 passaggi per associare la lampadina d'atmosfera.
12

EN
DE
FR
ES
IT
Step 5. Name the LED light and tap "Done". You will find the device you’ve named is shown
on the App homepage. Tap the device to enter the setting page.
You can now control the light with Onforu Home App. on this setting page.
Schritt 5. Vergeben Sie für LED Strahler eine Bezeichnung und tippen Sie auf "Fertig".
Sie werden nun das von Ihnen benannte Gerät auf der App-Homepage sehen.
Können Sie nun auf dieser Einstellungsseite das Licht mit Onforu Home App steuern.
Étape 5. Nommez lumière LED et appuyez sur « Done » (Terminé). Vous constaterez que
l’appareil que vous venez de nommer apparaît sur la page d’accueil de l’application.
Sélectionnez l’appareil de votre choix pour accéder à sa page de configuration.
Vous pouvez maintenant contrôler l’ampoule grâce à l’application Onforu Home.
Paso 5. Otórguele un nombre a la LED luz y pulse sobre «Listo». Deberá visualizar el
dispositivo nombrado en la página inicial de la aplicación. Pulse sobre el dispositivo para
entrar en lapágina de configuración.
Podrá controlar la luz mediante la página de configuración de la aplicación Onforu Home.
Passaggio 5. Dare un nome alla lampadina d'atmosfera e toccare "Fatto". Troverete che il
dispositivo che avete nominato è mostrato sull'homepage dell’App. Toccare il dispositivo
per accedere alla pagina di impostazione. è ora possibile controllare la luce con
l’applicazione in questa pagina di impostazione.
13

14
EN
DE
FR
ES
IT
AMAZON ALEXA
Please make sure that your Alexa App.
is connected to Amaozn Echo, and both
work together successfully under your
Wi-Fi network.
Step A : Log in your Alexa App., tap at
the top left corner, and tap "Skills".
Bitte stellen Sie sicher, dass Ihre Alexa
App mit Amazon Echo verbunden ist und
beide in Ihrem Wi-Fi-Netzwerk effektiv
zusammenarbeiten.
Schritt A : Melden Sie sich in Ihrer Alexa
App an, tippen Sie in der linken oberen
Ecke und dann auf "Skills".
Assurez-vous que votre application Alexa
est connectée à Amazon Echo et que les
deux fonctionnent correctement sur votre
réseau Wifi domestique.
Étape A : Connectez-vous à votre application Alexa, touchez le coin supérieur
gauche et sélectionnez « Skills ».
Por favor, asegúrese de que la aplicación de Alexa está conectada a Amazon Echo y de
que funcionan correctamente bajo la red wifi.
Paso A : Inicie sesión en la aplicación de Alexa. Pulse sobre en la esquina superior
izquierda y después sobre «Habilidades».
Assicurarsi che la app. Alexa sia collegata ad Amaozn Echo, e che entrambi funzionino
correttamente con la propria rete Wi-Fi.
Passaggio A : Accedere alla app Alexa, toccare l'angolo in alto a sinistra, e premere
"Skill".
EN
DE
FR
ES
IT
Step B : Type "Onforu Home" to search for
"Onforu Home", and enable "Onforu Home"
on Alexa.
Schritt B : Geben Sie "Onforu Home" ein, um
nach "Onforu Home" zu suchen, und
aktivieren Sie "Onforu Home" auf Alexa.
Étape B : Tapez «Onforu Home » pour
rechercher «Onforu Home » et activez
«Onforu Home » dans Alexa.
Paso B : Escriba «Onforu Home» para
buscar la aplicación y habilítela en Alexa.
Passaggio B : Digitare "Onforu Home"
per cercare "Onforu Home", e attivare
"Onforu Home" su Alexa.

15
EN
DE
FR
ES
IT
Step D : Once your Onforu Home account is
successfully connected to Alexa, the following
page will pop up. Tap "CLOSE" , then
tap "DISCOVER DEVICES" on
the next page.
Schritt D : Sobald Ihr Onforu Home Konto
erfolgreich mit Alexa verbunden ist, erscheint
die folgende Seite. Tippen Sie auf "CLOSE"
und dann auf der nächsten Seite auf
"DISCOVER DEVICES“ (Geräte
entdecken).
Étape D : Une fois votre compte Onforu Home
est connecté avec Alexa, la page suivante
s’affiche. Appuyez sur « CLOSE » , puis sur
« DISCOVER DEVICES» (découvrir les
appareils) sur la page suivante.
Paso D : Una vez haya vinculado correctamente la cuenta de Onforu Home con Alexa, aparecerá
la siguiente ventana emergente. Pulse «CLOSE», y después toque «DESCUBRIR
DISPOSITIVOS» en la página siguiente.
Passaggio D : Una volta che il proprio account Onforu Home è collegato con successo ad Alexa,
apparirà la pagina seguente. Toccare "CLOSE" , quindi toccare "SCOPRI DISPOSITIVI" nella
pagina successiva.
EN
DE
FR
ES
IT
Step C : Enter your account and password of
Onforu Home App., tap "Nest Step", then tap "
Authorize" on the next page authorize Onforu
Home Info to Alexa. Note: Same account and
password as Onforu Home App.
Schritt C : Geben Sie Ihr Konto und Ihr
Passwort für die Onforu Home ein, tippen
Sie auf "Nächster Schritt", und dann auf der
nächsten Seite auf "Autorisieren", um Onforu
Home Info für Alexa zu autorisieren.
Hinweis: Gleiches Konto und Passwort als
Onforu Home App.
Étape C : Entrez votre nom d’utilisateur et
votre mot de passe de l’application Onforu Home, sélectionnez « L'étape suivante » (lier
maintenant), puis sur « Authorize » (autoriser) sur la page suivante pour autoriser les Infos
Onforu Home sur Alexa.Note : Même compte et mot de passe que Onforu Home App.
Paso C : Introduzca la cuenta y contraseña de la aplicación Onforu Home, pulse sobre «Próximo
paso » y, después, sobre «Autorizar» en la siguiente página para autorizar que Alexa utilice la
información de Onforu Home.Nota: La misma cuenta y contraseña que la aplicación Onforu Home.
Passaggio C : Inserire il account e la password dell’app Onforu Home, toccare "Passo successivo",
quindi toccare "Autorizza" nella pagina successiva autorizzando Onforu Home Info su Alexa.
Nota: Lo stesso account e password dell'app Onforu Home.

16
EN
DE
FR
ES
IT
Step E : Wait a few seconds for Alexa to detect the LED Light from
Onforu Home App., and you will find the device named "Smart LED Light"
has been paired to Alexa App from Onforu Home App. After step E is
done, you can now control the light with Alexa App. on this setting page.
A. slide to change brightness B. tap to turn on/off the light
C. enter to change colors
Schritt E : Warten Sie ein paar Sekunden, bis Alexa den Strahler von
Onforu Home App erkennt, und Sie werden sehen, dass das Gerät mit
dem Namen "Smart LED Light" mit der Alexa App von Onforu Home
App gekoppelt wurde. Nach Abschluss von Schritt E können Sie nun
auf dieser Einstellungsseite den Strahler per Onforu Home App steuern.
A. Zur Anpassung der Helligkeit hier schieben B. Zur Ein- oder
Ausschalten des Lichts darauf tippen. C. Zur Einstellung der Farben
diese Schnittstelle aufrufen
Étape E : Patientez quelques secondes pour qu’Alexa détecte la
lumière LED liée à l’application Onforu Home et vous trouverez l’appareil nommé «Smart LED
Light» qui a été associé à l’application Alexa via Onforu Home. Une fois l’étape E terminée, vous
pouvez contrôler l’éclairage avec l’application Alexa sur cette page de réglage.
A. glisser pour régler la luminosité B. appuyez pour allumer / éteindre la lumière
C. entrer pour changer de couleurs
Paso E : Espere unos segundos a que Alexa detecte la luz desde la aplicación Onforu Home y
podrá observar que el dispositivo llamado «Smart LED Light» se ha sincronizado con la
aplicación Alexa. Tras completar el paso E, podrá controlar la luz mediante la página de
configuración de la aplicación Alexa.
A. deslice par a cambiar el brillo B. toque para encender / apagar la luz
C. entra para cambiar colores
Passaggio E : Attendere qualche secondo per permettere ad Alexa di rilevare la Luce LED
dall’app Onforu Home e verificare che il dispositivo chiamato "Smart LED Light" è stato
accoppiato ad Alexa da Onforu Home. Dopo il completamento del passaggio E, è possibile
regolare la luce con Alexa App. in questa pagina di impostazione.
A. toccare per accendere /spegnere la luce B. scivolare per cambiare la luminosità
C. entra per cambiare i colori
A
B
C

17
EN
DE
FR
ES
IT
Try these commands and see what happens by asking Alexa :
Alexa, turn on "device name"
Alexa, turn off "device name"
Alexa, set "device name" to "color"
Alexa, set "devcie name" to "number"
For example: "Alexa, turn on Smart LED Light", "Alexa, dim Smart LED Light to 50%" etc.
Note: The device name is the one you give to the LED Light on Onforu Home App. In this
user guide, the device is named "Smart LED Light".
Probieren Sie diese Befehle aus und sehen Sie, was passiert, wenn Sie Alexa Folgendes
fragen:
Alexa, schalte "Gerätename" ein.
Alexa, schalte "Gerätename" aus.
Alexa, setze "Gerätename" auf "Farbe".
Alexa, setze "Gerätename" auf "Zahl".
Zum Beispiel: "Alexa, schalte Smart LED Light ein", "Alexa, dimme Smart LED Light auf 50%"
usw.
Hinweis: Der Gerätename ist derjenige, den Sie den Strahler in der Onforu Home App geben.
In dieser Bedienungsanleitung wird das Gerät "Smart LED Light" genannt.
Essayez ces commandes vocales en demandant à Alexa :
Alexa, allumes « nom de l’appareil ».
Alexa, règles « nom de l’appareil » sur « couleur ».
Alexa, règles « nom de l’appareil » sur « numéro».
Par exemple : «Alexa, allumes Smart LED Light », « Alexa, luminosité Smart LED Light à
50 %» etc.
Note : Le nom de l’appareil est celui que vous donnez à l’ampoule dans l’application Onforu
Home . Dans ce manuel d’utilisation, elle est nommée « Smart LED Light ».
Pruebe estos comandos y vea qué sucede preguntando a Alexa:
Alexa, enciende «nombre del dispositivo»
Alexa, apaga «nombre del dispositivo»
Alexa, pon «nombre del dispositivo» «color»
Alexa, pon «nombre del dispositivo» a «número»
Por ejemplo: «Alexa, enciende Smart LED Light», «Alexa, baja la luz de Smart LED Light
al 50 %», etc.
Nota: El nombre del dispositivo es el que le da a la bombilla desde la aplicación Onforu Home.
En el presente manual de instrucciones, el dispositivo se denomina «Smart LED Light».
Provare questi comandi e verificare cosa succede chiedendo ad Alexa :
Alexa, accendi "nome del dispositivo"
Alexa, spegni "nome del dispositivo"
Alexa, imposta "nome del dispositivo" al "colore"
Alexa, imposta "nome del dispositivo" al "numero"
Esempio: "Alexa, accendi Smart LED Light", "Alexa, abbassa la luce di Smart LED Light
del 50%" ecc.
Nota: Il nome del dispositivo è quello che viene dato alla Luce LED su Onforu Home App. In
questo manuale d'uso, il dispositivo si chiama "Smart LED Light".

18
EN
DE
FR
ES
IT
EN
DE
FR
ES
IT
Step A : Open your Google Home App., tap
"Home Control" on the Left Side Bar page.
Step B : Tap "+" button on the bottom right
corner to enter next page.
Schritt A : Öffnen Sie Ihre Google Home
App, tippen Sie auf "Home Control" auf
der linken Seitenleistenliste.
Schritt B: Tippen Sie auf die Schaltfläche
"+" in der rechten unteren Ecke, um zur
nächsten
Étape A : Ouvrez votre application Google
Home, appuyez sur « Contrôle de la
maison » sur la barre latérale à gauche.
Étape B : Appuyez sur le bouton « +» en
bas à droite pour accéder à la page suivante.
Paso A : Abra la aplicación de Google Home,
pulse sobre el «Control de inicio», situado en la barra lateral izquierda de la página.
Paso B : Pulse el botón «+», situado en la esquina inferior derecha, para acceder a la siguiente
página.
Passaggio A : Aprire l’app Google Home, toccare "Home Control" nella pagina della barra
laterale sinistra.
Passaggio B : Toccare il pulsante "+" nell'angolo in basso a destra per accedere alla pagina
successiva.
Step C : Find "Onforu Home from the side bar list.
Schritt C : Suchen Sie "Onforu Home" aus der Seitenleistenliste.
Étape C : Trouvez « Onforu Home » dans la liste de la barre latérale.
Paso C : Busque «Onforu Home» en la lista de la barra lateral.
Passaggio C : Trovare "Onforu Home" dalla lista nella barra laterale.
GOOGLE ASSISTANT APP

19
EN
FR
ES
IT
EN
DE
FR
ES
IT
Step D: Enter your account and password
of Onforu Home App., tap "Link Now", then
tap "Authorize" on the next page to
authorize your Onforu Home Account Info to
Google Home .
Note: Same account and password as
Onforu Home App.
DE Schritt D : Geben Sie Ihr Konto und Ihr
Passwort für die Onforu Home App ein, tippen
Sie auf "Nächster Schritt" (Jetzt verlinken) und
dann auf der nächsten Seite auf "Authorize",
um Ihre Onforu Home Kontoinformationen
für Google Home zu autorisieren.
Hinweis: Gleiches Konto und Passwort
als Onforu Home App.
Étape D : Entrez votre nom d’utilisateur et votre mot de passe de l’application Onforu Home,
Appuyez sur « L'étape suivante », puis sur « Autoriser » sur la page suivante pour
autoriser les infos Onforu Home sur Google Home.
Note : Même compte et mot de passe que Onforu Home App.
Paso D : Introduzca la cuenta y contraseña de la aplicación Onforu Home. Pulse sobre
«Próximo paso» y, después, sobre «Autorizar» en la siguiente página para autorizar
que Google Home utilice la información de Onforu Home.
Nota: La misma cuenta y contraseña que la aplicación Onforu Home.
Passaggio D : Inserire l’account e la password di Onforu Home App., toccare "Passo
successivo", quindi toccare "Autorizza" nella pagina successiva per autorizzare Google
Home ad accedere alle informazioni del proprio account Onforu Home.
Nota: Lo stesso account e password dell'app Onforu Home.
Step E: You will find that Google Home
has found the device named "Smart
LED Light" on this page.
Step E : Sie werden sehen, dass Google
Home das Gerät namens "Smart LED Light"
auf dieser Seite gefunden hat.
Étape E : Sur cette page, vous constaterez
que Google Home a trouvé l’appareil nommé
« Smart LED Light ».
Paso E : Podrá comprobar que Google Home
ha encontrado el dispositivo llamado «Smart
LED Light» en esta página.
Passaggio E : Verificare che Google Home
mostri il dispositivo chiamato "Smart LED
Light" inquesta pagina.

20
Try these commands and see what happens by asking Google :
ok, Google, turn on "device name"
ok, Google, turn off "device name"
ok, Google, set the "device name" to "color"
ok, Google, set "device name" to "number"
For example: "ok Google, turn on Smart LED Light", "ok Google, dim Smart LED Light
To 50%" etc.
Note: The device name is the one you give to the LED Light on Onforu Home App. In this
userguide, the device is named "Smart LED Light".
Probieren Sie diese Befehle aus und sehen Sie, was passiert, wenn Sie Google Folgendes
fragen:
ok, Google, schalte "Gerätename" ein.
ok, Google, schalte "Gerätename" aus.
ok, Google, setze "Gerätename" auf "Farbe".
ok, Google, setze "Gerätename" auf "Zahl".
Zum Beispiel: "ok Google, schalte Smart LED Light ein", "ok Google, dimme Smart LED
Light auf 50%" etc.
Hinweis: Der Gerätename ist derjenige, den Sie den Strahler in der Onforu Home App
geben. In dieser Bedienungsanleitung wird das Gerät "Smart LED Light" genannt.
Essayez ces commandes vocales en demandant à l’Assistant Google :
Ok Google, allumes «nom de l’appareil ».
Ok Google, règles « nom de l’appareil » sur « couleur ».
Ok Google, règles « nom de l’appareil » sur « numéro».
Par exemple : « Ok Google, allumes Smart LED Light », « Ok Google, luminosité Smart
LED Light à 50 %» etc.
Note : Le nom de l’appareil est celui que vous donnez à l’ampoule dans l’application
Onforu Home. Dans ce manuel d’utilisation, elle est nommée «Smart LED Light».
Pruebe estos comandos y vea qué sucede preguntando a Google:
Ok, Google, enciende «nombre del dispositivo»
Ok, Google, apaga «nombre del dispositivo»
Ok, Google, pon «nombre del dispositivo» «color»
Ok, Google, pon «nombre del dispositivo» a «número»
Por ejemplo: «Ok, Google, enciende Smart LED Light», «Ok, Google, baja la luz de Smart
LED Light al 50%», etc.
Nota: El nombre del dispositivo es el que le da a la luz desde la aplicación Onforu Home.
En el presente manual de instrucciones, el dispositivo se denomina «Smart LED Light».
Provare questi comandi e vedere cosa succede chiedendo a Google :
ok, Google, accendi "nome del dispositivo"
ok, Google, spegni "nome del dispositivo"
ok, Google, imposta "nome del dispositivo" al "colore"
ok, Google, imposta "nome del dispositivo" al "numero"
Per esempio: "ok Google, accendi Smart LED Light", "ok Google, abbassa la luce di Smart
LED Light del 50%" ecc.
Nota: Il nome del dispositivo è quello che viene dato alla lampadina su Onforu Home App.
In questo manuale d'uso, il dispositivo si chiama "Smart LED Light".
EN
DE
FR
ES
IT
Table of contents
Other ONFORU Lighting Equipment manuals

ONFORU
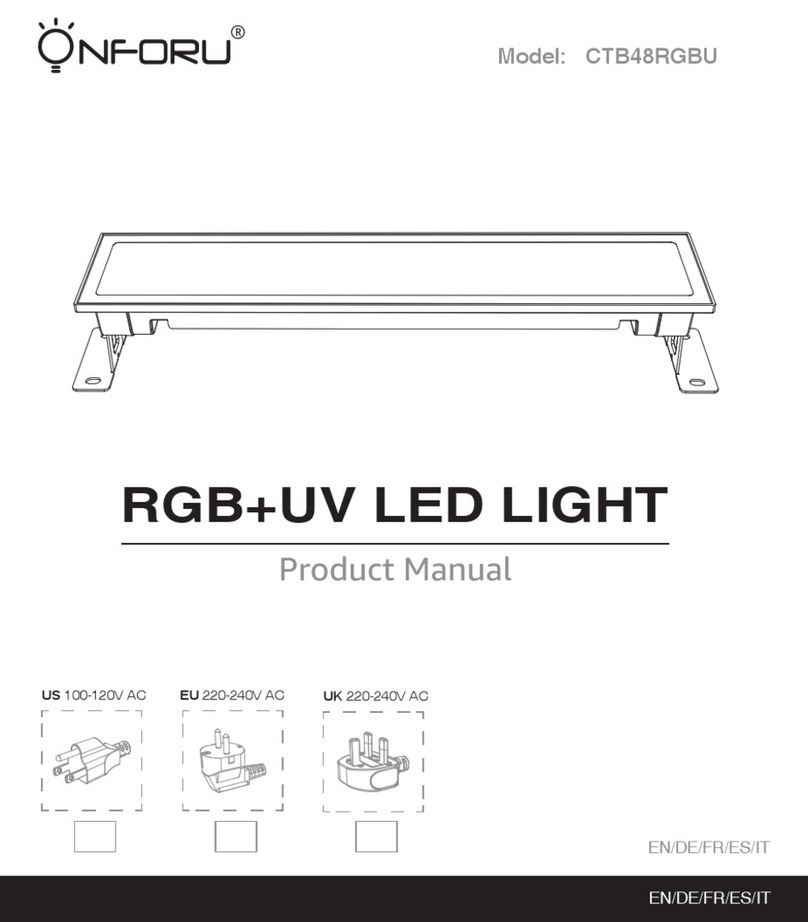
ONFORU CTB48RGBU User manual

ONFORU
ONFORU CTB24UVBL User manual

ONFORU
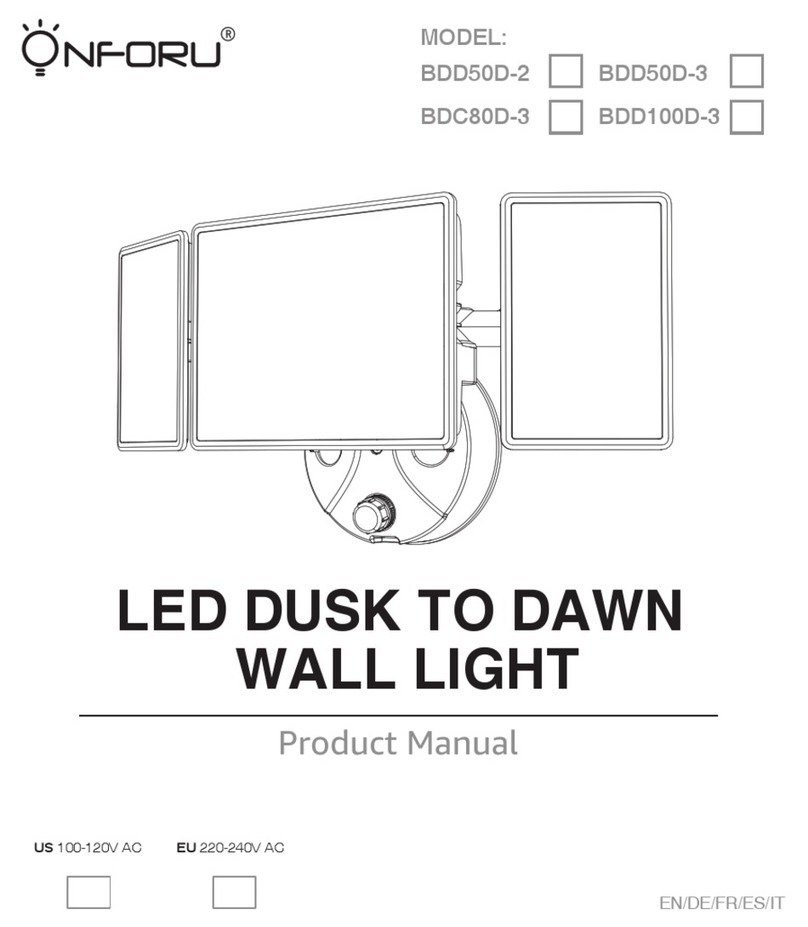
ONFORU BDD50D-2 User manual

ONFORU
ONFORU BDJ55G-3 User manual

ONFORU
ONFORU BDB55G-3 User manual

ONFORU
ONFORU DT5UV User manual

ONFORU
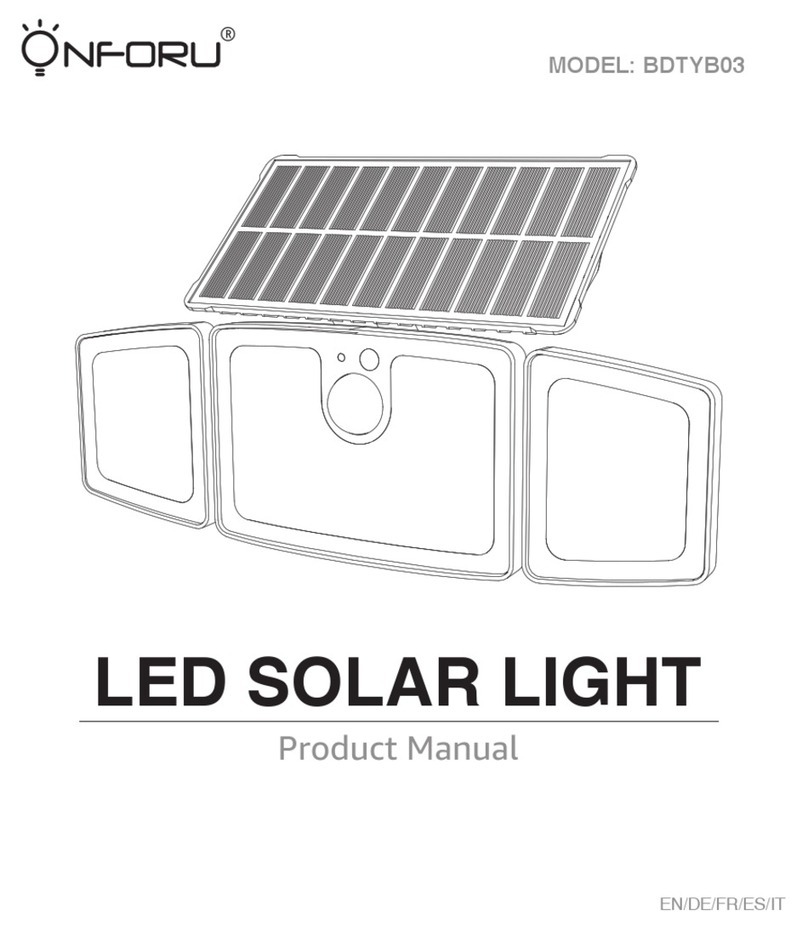
ONFORU BDTYB03 User manual

ONFORU
ONFORU CTB24UV User manual

ONFORU
ONFORU CTB24BL User manual

ONFORU
ONFORU DT5UV User manual
Popular Lighting Equipment manuals by other brands

EuroLite
EuroLite IP AUDIENCE BLINDER user manual

Federal Signal Corporation
Federal Signal Corporation Valor VALR44 Installation maintenance and service manual

Varytec
Varytec GLC-1 quick start guide

Gemas
Gemas SLIM LED instruction manual

Chroma
Chroma Inspire CHINHLRGBW32E user manual

Loop-Loc
Loop-Loc Ultra Loc III Solid installation guide