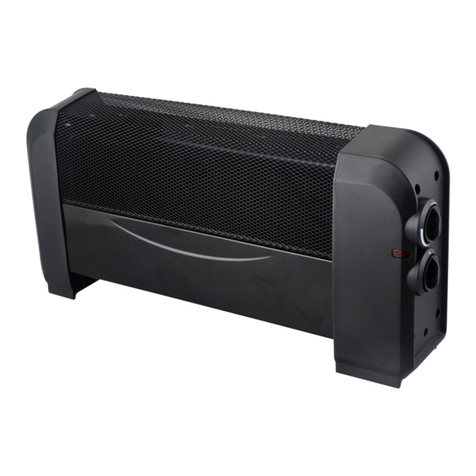
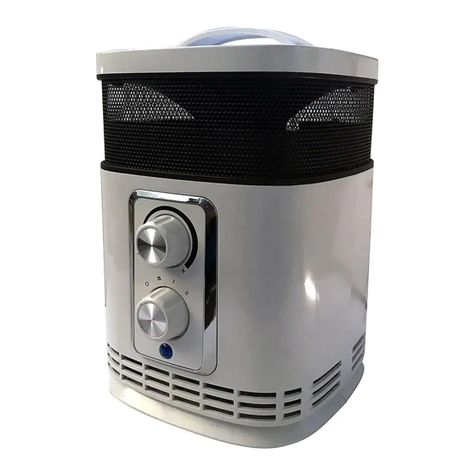
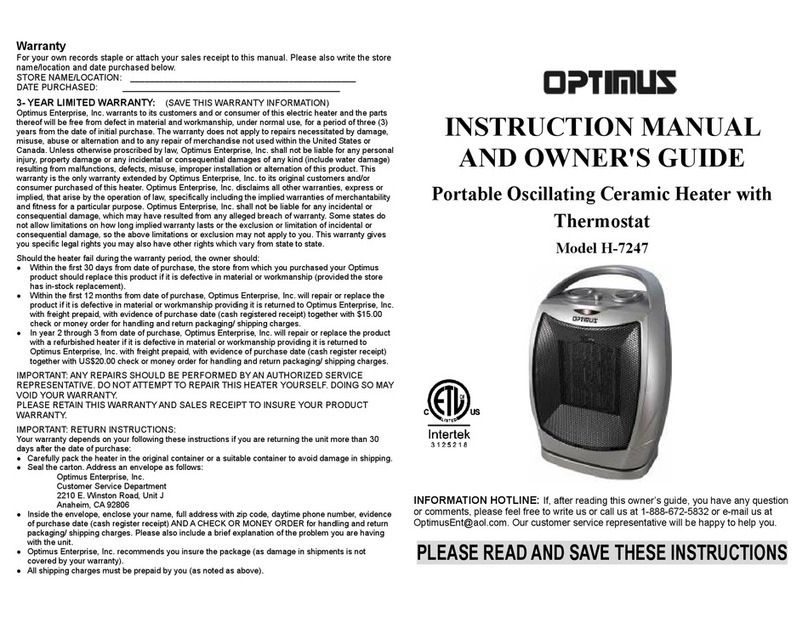
Optimus H-8214 User manual

INFORMATION HOTLINE: If, after reading this owner’s guide, you have any question or
comments, please feel free to write us or call us at 1-888-672-5832 or e-mail us at
you.
PLEASE READ AND SAVE THESE INSTRUCTIONS.
IMPORTANT INSTRUCTIONS:
PLEASE READ AND SAVE THESE IMPORTANT SAFEGUARDS
Thank you for choosing an Optimus heater. To ensure the best performance from your heater, please read
and save the following instructions.
When using this electric unit, basic safety precautions should always be followed to reduce the risk of fire,
electric shock, and injury to persons, including the following:
Read ALL instructions before using this unit.
CAUTION: Risk of Electric Shock. DO NOT open or try to repair the heater yourself.
This heater may get hot when in use. To avoid burns, DO NOT let bare skin touch hot surfaces. If
provided, use handles when moving this heater.
Keep combustible materials, such as furniture, pillows, bedding, paper, clothes, and curtains at
least 3 ft from the front of the heater and keep them away from the sides, top, and rear. DO NOT
place towels or other objects on the heater.
Extreme caution is necessary when any heater is used by or near children or the disabled, or when
the heater is left operating and unattended.
DO NOT operate any heater with a damaged cord or after the heater malfunctions, has been
dropped or damaged in any manner. Return heater to authorized service facility for examination,
electrical or mechanical adjustment, or repair.
This heater is not intended for use in bathrooms, laundry areas and similar indoor locations.
NEVER locate heater where it may fall into a bathtub or other water container. To protect against
electrical hazards, DO NOT immerse in water or other liquids.
DO NOT touch the control panel or plug with a wet hand.
DO NOT run cord under carpeting. DO NOT cover cord with throw rugs, runners, or similar
coverings. Arrange cord away from traffic area and where it will not be tripped over.
DO NOT insert or allow foreign objects to enter any ventilation or exhaust opening as this may
cause an electric shock or fire, or damage the heater.
To prevent a possible fire, DO NOT block the air intakes or exhaust in any manner. DO NOT use on
soft surfaces, like a bed, where openings may become blocked.
A heater has hot and arcing or sparking parts inside. DO NOT use in areas where gasoline, paint,
explosive and/or flammable liquids are used or stored. Keep unit away from heated surfaces and
open flames.
Always plug heaters directly into a wall outlet/receptacle. Never use with an extension cord or
relocatable power tap (outlet/power strip).
To avoid fire or shock hazard, plug the unit directly into a 120 V AC electrical outlet.
To disconnect heater, turn controls to OFF, then remove plug from outlet. Pull firmly on the plug,
DO NOT unplug by pulling on the cord.
Always unplug the unit before moving or cleaning, or whenever the heater is not in use.
Use only for intended household use as described in this manual. Any other use not recommended
by the manufacturer may cause fire, electric shock, or injury to persons. The use of attachments
not recommended or sold by unauthorized dealers may cause hazards.
Always use on a dry, level surface. Use on floor only.
DO NOT use outdoors.
WARNING: To reduce the risk of fire or electric shock, DO NOT use this unit with any solid-state
speed control device.
DO NOT attempt to repair or adjust any electrical or mechanical functions on this unit. Doing so will
void your warranty. The inside of the unit contains no user serviceable parts. Qualified personnel
should perform all servicing only.
Connect to properly grounded outlets only.
INSTRUCTION MANUAL AND
OWNER'S GUIDE
Quartz Infrared Heater with Remote
Model H-8214

This heater is for use on 120 volts. The cord has a plug as shown in Figure A. See Figure 1 for grounding
instruction. An adapter as shown at C is available for connecting three-blade grounding type plugs to two-slot
receptacles. The green grounding plug extending from the adapter must be connected to a permanent ground
such as a properly grounded outlet box. The adaptor should not be used if a three-slot grounded receptacle is
available. Always plug heaters directly into a wall outlet/receptacle. Never use with an extension cord or
relocatable power tap (outlet/power strip).
WARNING
To avoid injury from unexpected starting or electrical shock, do not plug the power cord into a source
of power during unpacking and assembly. The cord must remain unplugged whenever you are
adjusting/assembling the heater.
If any part is missing or damaged, do not attempt to use or plug in the power cord until the missing or
damaged part is correctly replaced. To avoid electric shock, use only identical replacement
parts when servicing double-insulated tools.
CLEANING/ MAINTENANCE INSTRUCTIONS:
During Season Care:
Before cleaning, be sure to turn off and UNPLUG the heater.
Clean the Heater with a vacuum brush attachment on your vacuum cleaner. This will remove lint and dirt
from the inside of the heater
Do not immerse the Heater in water.
Never use gasoline, benzene or thinner. This will damage the surface of the heater.
After cleaning, be sure to completely dry the unit with a cloth or towel.
After Season Care:
Store heater in a cool and dry location with power cord properly secured.
Please store the unit in its original carton or suitable container.
OPERATING INSTRUCTIONS:
PRE-OPERATING INSTRUCTIONS:
Carefully remove your heater from the box (please save the carton for off-season storage).
Make sure the unit is in the OFF position before plugging the heater into the outlet.
Put the heater on a flat and stable surface.
OPERATING INSTRUCTIONS:
Plug the cord into a 120V AC/60Hz electric outlet. Only operate heater in upright position
with caster wheels attached.
Turn the heater ON by turning the Heat Selection Switch
CONTROL PANEL
1. Power indicator light: Indicates that the heater is receiving power from outlet. Will flash when powered
“ON”.
2. ON/OFF button: Powers the display on and off.
3. Mode button: To select between High, Low and Eco modes.
4. ℃/ ℉Button: Alternates between Fahrenheit and Celsius.
5. Timer button: Used to engage timer mode and to set hour value for the timer.
6. Temp down button: To decrease desired temperature.
7. Temp up button: To increase desired temperature.
8. High Mode indicator light: Will be lit when High Heat mode is engaged.
9. Low Mode indicator light: Will be lit when Low Heat mode is engaged.
10. Energy-saving mode indicator: Will be lit when energy-saving mode is engaged.
11. Fahrenheit indicator light: Will be lit when temperature displayed is in Fahrenheit.
12. Celsius indicator light: Will be lit when temperature displayed is in Celsius.
13. Timer indication light: Will be lit when the Timer mode is engaged.
14. Digital display: Indicates set room temperature or time.
SAVE THESE
INSTRUCTIONS

OPERATING INSTRUCTIONS
NOTE: There is a MAIN POWER SWITCH at the BACK of the heater.
1. Start and select working mode
Turn the heater on by pressing the ON/OFF button
on the control panel or by pressing the Power
button on the supplied remote control.
Once power is off, heating element will stop
working at first. Fan will prolong working for 1
minutes to emit plenty of heat inside and to cool
down all the heating elements.
Select a heat Mode
Press the MODE button to toggle between the
three heat
modes.
High Mode uses 1500W; Low Mode uses 750W.
ECO mode is an Economic Energy Saving
Function. When ECO mode is chosen, the heater
will operate from less to more heating power
(watts) in an attempt to maintain a constant warm
68℉(20℃).
NOTE: When ECO Mode is on, the heater will not
cycle on and off. Heater will continue working to
maintain the desired temperature.
2. Setting Desired Temperature
Adjust the desired temperature by pressing the
Up/Down arrows on the control panel or remote
control.
Desired temperature options vary from 59℉ to 86
℉,or from 15℃ to 30℃. Once you have chosen
the desired temperature, the heater will remain on
until the room temperature increases to the
temperature on the digital display. The heater will
cycle on and off to maintain the desired room
temperature.
Press ℃/℉ button to change the
display temperature between
Fahrenheit and Celsius.
The Fahrenheit indicator LED will light , when the
temperature is displayed in Fahrenheit.
The Celsius LED will light, when the temperature is
displayed in Celsius.
3. Setting the POWER OFF TIMER Function
Note: The Power-Off-Timer Function will allow for the heater to power OFF after a certain set time, and
can only be set while the heater’s display is in the “On” position.
Turn the heater to the “On” position .Press the
Timer button on the heater’s control panel or the
remote.
The digital display changes from the “temperature”
to the “hours” option for the timer. Continue to
press the timer button to change the number of
hours you would like the heater to run before
powering itself off .The hour options for the timer
are from 0 to 12 hrs. (in 1 hr increments).
The selected hour increments will flash for a few
seconds, then revert back to the set desired
temperature .The Timer indicator light will remain lit
as long as the Timer is set. The heater will power
OFF when the internal heater clock counts down
the hour increments you set.
4. Setting the POWER-ON-TIMER Function
Note: The Power-ON-Timer Function will allow for the heater to power ON after a certain set time, and
can only be set while the heater’s display is in the “Off” position.
Turn the heater to the “OFF” position .Press the
Timer button on the heater’s control panel or the
remote.
The digital display shows the “hours” option for the
timer. Continue to press the timer button to change
the number of hours you would like the heater’s
internal clock to count down before powering itself
on .The hour options for the timer are from 0 to 12
hrs. (in 1 hr increments).
The Timer indicator light will remain lit as long as
the Timer is set. The heater will power itself ON
when the internal heater clock counts down the
hour increments you set.

5. Setting electro lock
The Electro Lock can help avoid the heater from being accidentally engaged by children. The locking
mechanism can be set in both the ON and OFF modes.
Press Temp Up and Temp Down buttons at the
same time for 3 seconds. Locking is complete when
you hear a beep. When locked, the functions of the
control panel and remote will be locked for use.
When you need to unlock it, press Temp Up and
Temp Down buttons at the same time for 3 seconds.
You will hear a beep .The control panel and remote
control will become functional again.
MAINTENANCE
1. Turn off the power switch in the rear of the unit.
2. Unplug the unit and let it cool completely.
3. To keep the heater clean, the outer shell may be cleaned with a soft, damp cloth. You may use a
mild detergent if necessary. After cleaning, dry the unit with a soft cloth. CAUTION: DO NOT let
liquid enter the heater.
4. DO NOT use alcohol, gasoline, abrasive powders, furniture polish, or rough brushes to clean
the heater. This may cause damage or deterioration to the surface of the heater.
5. DO NOT immerse the heater in water.
6. Wait until the unit is completely dry before use.
7. Air filter needs cleaning after being used for 3 months. Please take off the filter following the 3
steps in the drawing below. Flush and clean the filter with water and then, dry it out and
re-assemble.
8. If you do not use the heater for a long time, please take out the remote batteries (to prevent
corrosion) as shown below. Store the remote in a safe place.
SAFETY FEATURES
This unit is equipped with a tip-over safety feature. Once the heater is tipped over, an internal
switch will automatically shut the heater off. Once the heater is restore in the upright position,
the heater will reset. To continue the operation, turn on the heater using the supplied remote
control or the control panel on the heater.
OVERHEAT SAFETY FEATURE
This heater is equipped with an overheat safety feature. When the heater’s internal
components reach a certain temperature that could cause overheating and possible fires, the
heater will automatically shut off.
SERVICE INSTRUCTIONS:
Do not attempt to repair or adjust any electrical or mechanical functions on this unit. Doing so
will void the warranty.
If you have any questions regarding this unit’s operation or believe any repair is necessary,
please call 1-888-672-5832 to speak with a Customer Service Representative or email us at
If you need to exchange the unit, please return it, in its original carton with a sales receipt
enclosed, to the store you purchased it. If you are returning the unit more than 30 days after
the date of purchase, please see the enclosed warranty.
If you have any other question or comments, feel free to write us:
Optimus Enterprise, Inc.
2201 E. Winston Road, Unit J
Anaheim, CA 92806

Warranty
For your own records, staple or attach your sales receipt to this manual. Please also write the store
name/location and date purchased below.
STORE NAME/LOCATION: ____________________________________
DATE PURCHASED: _________________________________________
THREE YEAR LIMITED WARRANTY:
(SAVE THIS WARRANTY INFORMATION)
Optimus Enterprise, Inc. warrants to its customers and or consumer of this electric heater and the parts thereof
will be free from defect in material and workmanship, under normal use, for a period of three (3) years from the
date of initial purchase. The warranty does not apply to repairs necessitated by damage, misuse, abuse or
alternation and to any repair of merchandise not used within the United States or Canada. Unless otherwise
proscribed by law, Optimus Enterprise, Inc. shall not be liable for any personal injury, property damage or any
incidental or consequential damages of any kind (include water damage) resulting from malfunctions, defects,
misuse, improper installation or alternation of this product. This warranty is the only warranty extended by
Optimus Enterprise, Inc. to its original customers and/or consumer purchased of this heater. Optimus
Enterprise, Inc. disclaims all other warranties, express or implied, that arise by the operation of law, specifically
including the implied warranties of merchantability and fitness for a particular purpose. Optimus Enterprise,
Inc. shall not be liable for any incidental or consequential damage, which may have resulted from any alleged
breach of warranty. Some states do not allow limitations on how long implied warranty lasts or the exclusion or
limitation of incidental or consequential damage, so the above limitations or exclusion may not apply to you.
This warranty gives you specific legal rights you may also have other rights which vary from state to state.
Should the heater fail during the warranty period, the owner should:
● Within the first 30 days from date of purchase, the store from which you purchased your Optimus product
should replace this product if it is defective in material or workmanship (provided the store has in-stock
replacement).
● Within the first 12 months from date of purchase, Optimus Enterprise, Inc. will repair or replace the product
if it is defective in material or workmanship providing it is returned to Optimus Enterprise, Inc. with freight
prepaid, with evidence of purchase date (cash registered receipt) together with $30.00 check or money
order for handling and return packaging/ shipping charges.
● In year 2 through 3 from date of purchase, Optimus Enterprise, Inc. will repair or replace the product with a
refurbished heater if it is defective in material or workmanship providing it is returned to Optimus
Enterprise, Inc. with freight prepaid, with evidence of purchase date (cash register receipt) together with
US$35.00 check or money order for handling and return packaging/ shipping charges.
IMPORTANT: ANY REPAIRS SHOULD BE PERFORMED BY AN AUTHORIZED SERVICE
REPRESENTATIVE. DO NOT ATTEMPT TO REPAIR THIS HEATER YOURSELF. DOING SO MAY VOID
YOUR WARRANTY.
PLEASE RETAIN THIS WARRANTY AND SALES RECEIPT TO INSURE YOUR PRODUCT WARRANTY.
IMPORTANT RETURN INSTRUCTIONS:
Your warranty depends on your following these instructions if you are returning the unit more than 30 days
after the date of purchase:
● Carefully pack the heater in the original container or a suitable container to avoid damage in shipping.Seal
the carton. Address an envelope as follows:
Optimus Enterprise, Inc.
Customer Service Department
2201 E Winston Road, Unit J,
Anaheim, CA 92806
● Inside the envelope, enclose your name, full address with zip code, daytime phone number, evidence of
purchase date (cash register receipt) AND A CHECK OR MONEY ORDER for handling and return
packaging/ shipping charges. Please also include a brief explanation of the problem you are having with
the unit.
● Optimus Enterprise, Inc. recommends you insure the package (as damage in shipments is not covered by
your warranty). All shipping charges must be prepaid by you (as noted as above).
MANUAL de INSTRUCCIONES
GUIA para el USARIO
Cuarzo Calentador Infrarrojo
con Remoto
Modelo H-8214
LINEA DIRECTA A EL CLIENTE: Si despues de leer esta guia de el usuario, usted tiene preguntas o
comentarios, porfavor escribanos o llamenos con toda comfianza a el telefono
1-888-672-5832 o enviandonos un correo electronico a: Service@optimusnet.com.
Nuestro representante de servicio a el cliente le ayudara gustozamente.
POR FAVOR LEA Y GUARDE ESTAS INSTRUCCIONES.

INSTRUCCIONE IMPORTANTE:
Por favor lea y guarde estas importantes instrucciones.
Gracias por escoger un Calentador Optimus. Para asegurar el mejor desempeño de su calentador,
porfavor lea y guarde las instrucciones siguientes.
CUANDO SE USEN APARATOS ELECTRICOS, SIEMPRE DEBERAN SER USADAS
PRECAUSIONES BASICAS, PARA REDUCIR EL RIESGO DE FUEGO, UN CHOQUE
ELECTRICO O ERIR A UNA TERCERA PERSONA.
Deberan seguirse precauciones basicas incluyendo las siguientes:
Lea todas las instrucciones antes de usar el calentador.
Este calentador se calienta cuando es usado, para evitar cualquier quemadura en la piel, no
toque la superficie de el calentador directamente, use las agarraderas si es que este tubiena en
caso de moverlo.
Guarde todo material que pueda encender tales como: percians, muebles, almoadas, colchas,
papeles, ropa y cortinas., retiradas cuando menos 30 Centimetros a el rededor de el calentador.
Extremada precaucion es necesaria cuando el Calentador se usado cercano niños o
minusvalidos, siempre que el calentador este sin cuidado alguno.
Siempre desconecte el calentador cuando no lo use.
No use el calentador si el cable, clavija estan dañados o esta funcionado mal, a sufrido una
caida o a sido dañado de alguna manera. Regrese el calentador a el fabricante para una
inspeccion electrica, mecanica o para reparacion. Mire su manual de garantia para mas
informacion. Deseche el calentador, o volver al centro de servicio autorizado para su revisión,
ajuste eléctrico o mecánico, o reparación.
No utilice al aire libre
Este calentador no debera ser usado en el baño, areas de lavanderia o areas similares y nunca
lo coloque en una superficie en donde pueda caer en la tina de baño o algun contenedor que
contenga agua.
Nunca pase el cordon por debajo de la alfonbra, nunca cobra el cable con ropa, o con material
parecido. Coloque el cordon fuera de el area de paso para evitar que puedan tropezar con este.
Para desconectar el calentador, primero apagelo y despues lo desconecta.
No inserte o permita que estraños objetos entren por el area de ventilacion o de escape.
para prevenit un incendio, no bloque las entradas o salidas de aire. Nunca lo use en areas
blandas, tales como: la cama en donde las entradas y salidas de aire puedan ser obstruidos.
Para evitar posibles incendios, no bloquee las entradas o salidas de aire de cualquier manera.
No utilizar sobre superficies blandas, como una cama, donde las aberturas se pueden bloquear.
El calentador tiene partes calientes y a el rojo vivo internamente, no lo use en areas donde aya
gasolina, pintura o liquidos flammables ayan sido guardados.
Utilice este calentador sólo como se indica en este manual. Cualquier otro uso no recomendado
por el fabricante puede causar incendio, choque eléctrico o lesiones a personas.
El calentador tiene partes calientes y a el rojo vivo internamente, no lo use en areas donde aya
gasolina, pintura o liquidos flammables ayan sido guardados.Este aparato no está diseñado para
ser utilizado por personas (incluidos niños) con capacidades físicas, sensoriales o mentales, o la
falta de experiencia y conocimiento, a menos que hayan sido supervisados o instruidos acerca
del uso del aparato por una persona responsable de su seguridad .
Los niños deben ser supervisados para asegurarse de que no jueguen con el aparato.
Si el calentador enciende. Mire las instrucciones de seguridad expresadas en este manual.
Este calentador es para uso en 120 voltios.El cable tiene un conector como se muestra en la figura a. Ver
Figura 1 para la instrucción de puesta a tierra.Un adaptador como se muestra en la C está disponible para la
conexión a tierra de tres palas tipo enchufes de dos recipientes de ranura.El verde se extiende desde el
adaptador de conector de puesta a tierra debe ser conectado a una tierra permanente como una salida de
caja debidamente fundamentada.El adaptador no debe utilizarse siun tres Slot castigada receptáculo está
disponible.Calentadores de siempre conectar directamente en un enchufe de pared /
recipiente.Nunca utilizar con un cable de extension o reubicables Power TAP (salida / Power Strip).
WARNING
T Para evitar lesiones de partida inesperada o choque eléctrico, no conecte el cable de alimentacion a
una fuente de poder durante el desembalaje y montaje.El cordón debe permanecer desconectado
cuando lo estan ajustando / montaje del calentador.
Si cualquier parte falta o está dañado, no intente usar o enchufar el cable de alimentación hasta los
desaparecidos o parte dañada está correctamente sustituye.Para evitar choques eléctricos, uso solo
piezas de reemplazo idénticas cuando el servicio de doble aislamiento de herramientas.
INSTRUCCIONES DE LIMPIEZA / MANTENIMIENTO:
Durante Cuidado Temporada:
Antes de limpiar, asegúrese de apagar y desenchufar el calentador.
Limpie el calentador con un cepillo accesorio de vacío en su aspiradora. Esto eliminará la pelusa y
la suciedad desde el interior del calentador
No sumerja el calentador en agua.
Nunca use gasolina, bencina o diluyente. Esto dañará la superficie del calentador.
Después de la limpieza, asegúrese de secar completamente la unidad con un paño o toalla.
Después de Cuidado Temporada:
Guarde el calefactor en un lugar fresco y seco, con cable de alimentación correctamente
asegurada.
Por favor, guarde la unidad en su caja original o en un contenedor adecuado.
INSTRUCCIONES DE USO:
INSTRUCCIONES ANTES DE FUNCIONAMIENTO:
Retire con cuidado la estufa de la caja (por favor, guarde el embalaje para el almacenamiento fuera de
temporada).
Guardar estos
Instrucciones

Asegúrese de que la unidad está en la posición de apagado antes de enchufar el calentador en el
tomacorriente.
Ponga el calentador en una superficie plana y estable.
INSTRUCCIONES DE USO:
Enchufe el cable a una toma eléctrica 120VAV/60Hz. Sólo opere el calentador en posición vertical con ruedas
unidas.
Encienda la estufa, girando el interruptor de selección de calor.
CONTROL PANEL
1 Luz indicadora de encendido : . Indica que el calentador está recibiendo energía del tomacorriente .
Parpadea cuando se enciende "ON".
2 botón ON / OFF : Enciende la pantalla y se apaga.
3 Botón Modo: Para seleccionar entre Alto, Bajo y los modos Eco .
4 C/F Button: Alterna entre Fahrenheit y Celsius .
5 Botón Temporizador : Se utiliza para activar el modo de temporizador y para establecer el valor de
horas para el temporizador.
6 hacia abajo Temperatura : . Para disminuir la temperatura deseada.
7 Botón de temperatura máximo: Para aumentar la temperatura deseada.
8 Modo de Alta Luz indicadora : . ¿Se enciende cuando el modo de calor de alta está ocupada.
Botón
9 Modo de baja luz indicadora : . ¿Se enciende cuando el modo de pocas calorías se dedica .
10 Indicador del modo de ahorro de energía : . Se encenderá cuando el modo de ahorro de energía está
activado.
11 Fahrenheit luz indicadora : . ¿Se enciende cuando la temperatura se muestra es en grados
Fahrenheit .
12 Celsius luz indicadora : . ¿Se enciende cuando la temperatura se muestra es en grados Celsius
13 Temporizador de luz de la indicación : . ¿Se enciende cuando el modo de temporizador está activado.
14 Pantalla digital : Indica que establece la temperatura ambiente o la hora.
INSTRUCCIONES DE USO
NOTA: hay un interruptor principal en la parte trasera de la estufa.
1.Iniciar y seleccione el modo de trabajo
Encienda el calentador pulsando el botón ON / OFF en el
panel de control o pulsando el botón de encendido del
mando a distancia suministrado.
Una vez que el poder está apagado, elemento
calentador dejará de funcionar en un primer momento.
Fan prolongará trabajo durante 1 minutos para emitir un
montón de calor en el interior y para enfriar todos los
elementos de calefacción.
Seleccione un modo de calor
Pulse el botón MODE para cambiar entre los tres modos
de calor.
Alto Modo utiliza 1500W; Modo de bajo utiliza 750W.
Modo ECO es una función de ahorro de energía
Económico. Cuando se selecciona el modo ECO, el
calentador funcionará de menos a más potencia
calorífica (vatios), en un intento de mantener una
constante cálida 68
℉
(20
℃
).
NOTA: Cuando el modo ECO está activado, el
calentador no se encienden y se apagan. Calentador
seguirá trabajando para mantener la temperatura
deseada.
2. Ajuste de temperatura deseado
Ajuste la temperatura deseada pulsando las
flechas arriba / abajo en el panel de control o el
control remoto.
Opciones de temperatura deseados varían de 59
℉ a 86 ℉, o de 15 ℃ a 30 ℃. Una vez que
haya elegido la temperatura deseada, el calentador
permanecerá encendida hasta que la temperatura
ambiente se eleva a la temperatura en la pantalla
digital. El ciclo del calentador voluntad encendido y
apagado para mantener la temperatura ambiente
deseada.
Presione ℃ / ℉ botón para
cambiar la visualización de la
temperatura entre grados Fahrenheit
y Celsius.
El indicador LED se iluminará Fahrenheit, cuando
se muestre la temperatura en grados Fahrenheit.
El LED se iluminará Celsius, cuando se muestra la
temperatura en grados Celsius.
3
4
5

3. Ajuste de la función Power TEMPORIZADOR
Nota: La función de apagado-Timer permitirá que el calentador se apague después de un cierto plazo,
y sólo se puede ajustar mientras la pantalla del calentador esté en la posición "On".
Apague el calentador en la posición "On". Pulse el
botón Timer en el panel de control de la calefacción
o el control remoto.
La pantalla digital cambia de la "temperatura" a la
opción "hora" para el temporizador. Siga pulsando
el botón del temporizador para cambiar el número
de horas que le gustaría que el calentador se
ejecute antes de encender por sí solo. Las
opciones de horas para el temporizador van de 0 a
12 horas. (en incrementos de 1 h).
Los incrementos seleccionados hora parpadearán
durante unos segundos, y después volverá a la
referencia de la temperatura deseada. La luz
indicadora del temporizador permanecerá
encendido mientras se ajusta el temporizador. El
calentador se apagará cuando el reloj calentador
interno cuenta atrás de los incrementos de horas
que ha establecido.
4. Ajuste de la función de encendido-TIMER
Nota: La función de encendido-Timer permitirá que el calentador se enciende después de un cierto plazo,
y sólo se puede ajustar mientras la pantalla del calentador esté en la posición "Off".
Apague el calentador en la posición "OFF".
Presione el botón del temporizador en el panel de
control de la calefacción o el control remoto.
La pantalla digital muestra la opción "hora" para el
temporizador. Siga pulsando el botón del
temporizador para cambiar el número de horas que
le gustaría el reloj interno del calentador de la
cuenta atrás antes de la puesta en sí. Las opciones
de horas para el temporizador van de 0 a 12 horas.
(en incrementos de 1 h).
La luz indicadora del temporizador permanecerá
encendido mientras se ajusta el temporizador. El
calentador encender de manera automática
cuando el reloj calentador interno cuenta atrás de
los incrementos de horas que ha establecido.
5. Ajuste de electro cerradura
El bloqueo Electro puede ayudar a evitar que el calentador está involucrado accidentalmente por los
niños. El mecanismo de bloqueo se puede configurar tanto en los modos de encendido y apagado.
Presione Temperatura Arriba y Abajo Temp de
botones al mismo tiempo durante 3 segundos. El
bloqueo es completo cuando se oye un pitido.
Cuando está bloqueado, las funciones del panel de
control y mando a distancia estarán bloqueados
para su uso.
Cuando usted necesita para desbloquearlo, pulse
Temperatura Arriba y Abajo Temp de botones al
mismo tiempo durante 3 segundos. Se escuchará
un pitido. El panel de control y mando a distancia se
harán funcional de nuevo.
MANTENIMIENTO
1. Apague el interruptor de alimentación en la parte trasera de la unidad.
2. Desenchufe la unidad y deje que se enfríe por completo.
3. Para mantener el calentador limpio, la capa exterior se puede limpiar con un paño suave y
húmedo. Usted puede utilizar un detergente suave si es necesario. Después de la limpieza,
seque la unidad con un paño suave. PRECAUCIÓN: No deje que el líquido entra en el
calentador.
4. NO utilice alcohol, gasolina, polvos abrasivos, cera para muebles, o cepillos ásperos para
limpiar el calentador. Esto puede causar daño o deterioro a la superficie del calentador.
5. NO sumerja el calentador en agua.
6. Espere hasta que la unidad esté completamente seco antes de usarlo.
7. Necesidades de limpieza del filtro de aire después de haber sido utilizado durante 3 meses.
Saque por favor el filtro siguiendo los 3 pasos en el dibujo de abajo. Enjuague y limpie el filtro
con agua y después, secarla y volver a montar.
8. Si no utiliza la estufa por un largo tiempo, por favor, saque las pilas del control remoto (para
evitar la corrosión), como se muestra a continuación. Guarde el control remoto en un lugar
seguro.

CARACTERÍSTICAS DE SEGURIDAD
Esta unidad está equipada con una función de seguridad de un vuelco. Una vez que el calentador
se volcó, un interruptor interno se apagará automáticamente el calentador. Una vez que el
calentador es restaurar en la posición vertical, el calentador se restablecerá. Para continuar con la
operación, encienda la estufa, accionando el mando a distancia suministrado o el panel de control
del calentador.
MEDIDA DE SEGURIDAD SOBRECALENTAMIENTO
Este calentador está equipado con un dispositivo de seguridad de sobrecalentamiento. Cuando
los componentes internos del calentador de llegar a una cierta temperatura que podría causar un
sobrecalentamiento y posibles incendios, la estufa se apagará automáticamente.
INSTRUCCIONES DE SERVICIO:
No intente reparar o ajustar ninguna función eléctrica o mecánica de esta unidad. Si lo
hace, anulará la garantía.
Si usted tiene alguna pregunta relacionada con el funcionamiento de esta unidad o si
cree que requiere alguna reparación, por favor llame al 1-888-672-5832 para hablar con
un Representante de Servicio al Cliente o envíenos un email a Service@optimusnet.com
Si necesita cambiar la unidad, devuélvala en su caja original junto con el recibo de
compra incluido, a la tienda donde lo compró. Si devuelve la unidad más de 30 días
después de la fecha de compra, por favor consulte la garantía incluida.
Si usted tiene cualquier otra pregunta o comentario, no dude en escribirnos:
Optimus Enterprise, Inc.
2201 E. Winston Road, Unit J
Anaheim, CA 92806
Email: service@optimusent.com
Garantía
Para su propio archivo, engrape su recibo de compra a este manual y tambien escriba el nobre dela tienda, y
fecha de compra.
NOMBRE DE LA TIENDA:______________________________________
FECHA de COMPRA:____________________________________________________
TRES (3) AÑOS LIMITE DE GARANTIA:
Guarde esta informacion de la garantia.
Optimus Enterprise, Inc. Garantiza a sus clientes o consumidores de este calentador electrico, que
esta libre de defectos de materia prima, fabricacion, bajo condiciones de uso normales, por un periode
de 3 años, desde la fecha marcada en el recibo de compra.
La garantia no cubre las reparaciones de daños causados, por: uso incorrecto, alteraciones o
cualquier reparacion que se aga fuera de los Estados Unidos o Canada. A menos que haya sido
ordenado por la ley. Optimus Enterprise, Inc. No se hace responsable por daños personales, daños a
propiedad or accidente, o daños consecuetes de cualquier indole, incluyendo daños causados por
lluvia. Resultando en mal funcionamiento, uso incorrecto, instalacion inapropiada o alteraciones echas
a este producto. Esta Poliza es la unica Garantia, expedida por Optimus Enterprise, Inc. Optimus
Enterprise, Inc., No es responsable por culquier otra Poliza, que surga o que le implique, por la ley,
especificamentelas garantias de mercancia y salud, para un proposito particular.
La empresa Optimus Enterprise, Inc. No sera responsible de ningun daño casual o consecuente, que
puede haber resultado de la garantia. La empresa Optimus. , no es responsable por cualquier
accidente o consecuencia dañina, la cual puede ser el resultado de cualquier parte de la garantia.
Algunos estados no tienen limites en cuanto a el periodo de la poliza de la garantia, o excluyen los
incidentes o daños consecuentes, que puedan ocurrirle.
Esta poliza le da algunos derechos especificos, usted puede tener alguno otros, pero! Estos varian
dependiendo de el lugar.
Si el calentdor falla durante el tiempo de la garantia, usted debera hacer lo siguiente:
1. Dentro de los primeros 30 dias, regreselo a la tienda en donde lo compro, si el defecto es de
fabricacion, o mano de obra, la tienda le cambiara por uno que tenga en inventario.
2. En el periodo de 12 meses, despues de fecha de compra. Optimus Enterprise, Inc., reparara o
reemplazara, el calentador, si el defecto es de fabricacion o mano de obra, regreselo a Optimus
Enterprise, Inc. con la prueva de compra , con todos los gastos de envios pagados, y con un
cheque por $30.00 USD, para manejo y envio.
3. En el periodo de 2 a 3 años, despues de la fecha de compra, la empresa reparara o cambiara el
producto por algun otra que haya sido reparado anteriormente, debera ser regresado a Optimus
Enterprise, con todos los recardos prepagados, y con un cheque de $35.00 USD, para cabrir los
recargos por manejo y envio.
IMPORTANTE:
CUALQUIER REPARACION DEBERA SER HECHA POR UN CENTRO AUTORIZADO. NO INTENTE
REPARAR ESTE CALENTADOR POR USTED MISMO. SI LO HACE PERDERA LA GARANTIA.
PORVAFOR GUARDE EL RECIBO DE COMPRA JUNTO A ESTA POLIZA, PARA HACERLE VALIDA LA
GARANTIA DE EL PRODUCTO.
La garantia depende de que usted siga las siguientes instrucciones, para regresar el calentador
despues de los 30 dias, despues de la fecha de compra.
Cuiddosamente empaque el calentdor en el carton original o alguna caja en donde pueda
poner el calentador, sin sufrir mas daños.
Cierre el carton, y envielo a la direccion siguiente, con un sobre :
Optimus Enterprise, Inc.
Customer Service Department
2201 E. Winston Rd., Unit J
Anaheim, CA 92806
Dentro de el sobre envie una nota con su nombre , direccion, codigo postal, numero
telefonico, recibo de compra y un cheque para cubrir los gastos de manejo y envio.
Asegurese de asegurar el paquete, ya que la garantia no cubre daños por envoi
Table of contents
Languages:
Other Optimus Heater manuals

Optimus
Optimus H-1322 User manual

Optimus
Optimus H-4110 User manual

Optimus
Optimus H-4501 User manual

Optimus
Optimus H-7231RD User manual

Optimus
Optimus H-5511 User manual

Optimus
Optimus H-4438 User manual

Optimus
Optimus H-1411 User manual

Optimus
Optimus H-7232 User manual

Optimus
Optimus H-7328 User manual

Optimus
Optimus H-4500 User manual
Popular Heater manuals by other brands

STIEBEL ELTRON
STIEBEL ELTRON CWM 500 P Operation and installation

SHX
SHX SHXPH550 operating instructions

Kunft
Kunft KTE3782 instruction manual

Rowi
Rowi HWH 2500/2/1 D Convection operating instructions

Roberts Gorden
Roberts Gorden GordonRay BH Installation & operation

EINHELL
EINHELL NHT 2000 operating instructions