manuals.online logo
Brands
  1. Home
  2. •
  3. Brands
  4. •
  5. Oregon Scientific
  6. •
  7. Clock
  8. •
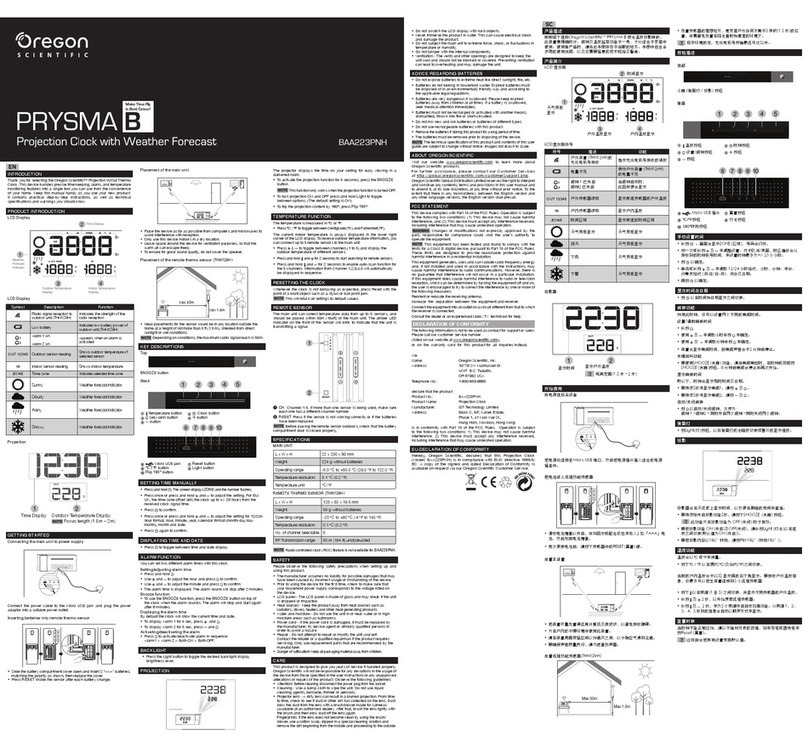
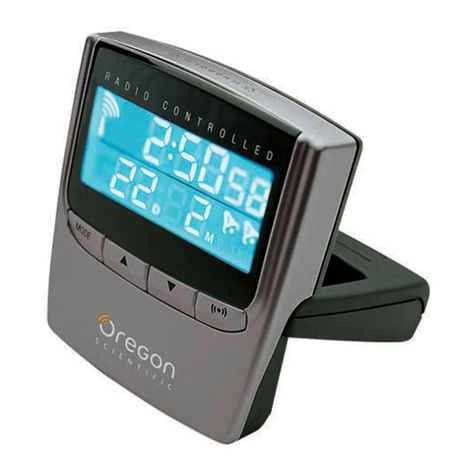
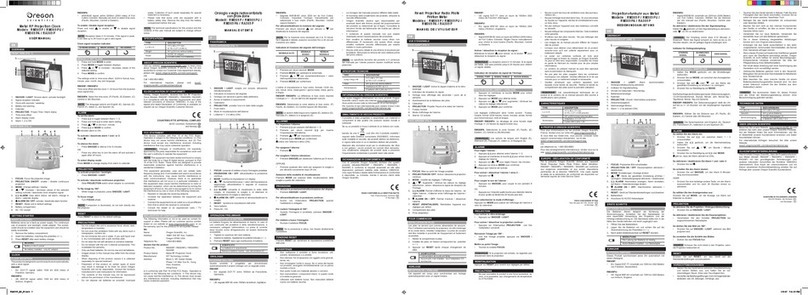
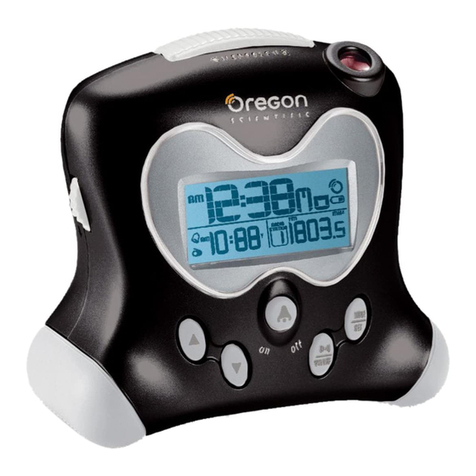
  9. Oregon Scientific BAR623PA User manual

Oregon Scientific BAR623PA User manual

1
EN
Alarm ...................................................................... 11
View Alarm Settings ......................................... 11
Set Alarm .......................................................... 11
Activate Alarm .................................................. 11
Silence Alarm ................................................... 12
Weather Forecast .................................................. 12
Temperature .......................................................... 13
Select Temperature Unit ................................... 13
Minimum / Maximum Rec rds .......................... 13
Moon Phase ........................................................... 13
Backlight ................................................................ 13
Reset System ........................................................ 1
Projection Unit ...................................................... 1
Safety and Care ..................................................... 1
Warnings ................................................................ 1
Troubleshooting .................................................... 15
Specifications ........................................................ 16
Main Unit Dimensi ns ...................................... 16
Rem te Sens r Dimensi ns ............................. 16
Temperature ..................................................... 16
Rem te Sens r (THN122N) ............................. 16
Cl ck / Pr ject r ............................................... 16
P wer ............................................................... 17
About Oregon Scientific ....................................... 17
FCC Statement ...................................................... 18
Declarati n f C nf rmity ................................. 19
CONTENTS
Contents ................................................................ 1
Introduction ........................................................... 2
Product Overview ................................................. 2
Fr nt View ......................................................... 2
Back View ......................................................... 3
LCD Display ...................................................... 4
Rem te Sens r (THN122N) .............................. 5
Getting Started ...................................................... 6
Batteries ............................................................ 6
AC Adapt r ........................................................ 7
Adjust Settings .................................................. 7
Remote Sensor (THN122N) .................................. 8
Set Up Sens r ................................................... 8
Data Transmissi n ............................................ 9
Search f r Sens r ............................................. 10
Clock ...................................................................... 10
Turn At mic Cl ck Signal ON / OFF ................. 10
Set Time Z ne / Cl ck / Calendar ..................... 11
Switch Cl ck Display ......................................... 11
Atomic Projection Clock with
Weather Forecast
Model: BAR623PA
USER MANUAL
2
EN
INTRODUCTION
Thank y u f r selecting the Oreg n Scientific™ At mic
Pr jecti n Cl ck with Weather F recast (BAR623PA).
This device bundles precise time keeping with a
pr jecti n cl ck, weather f recast, and ind r and
utd r temperature m nit ring features int a single
t l y u can use fr m the c nvenience f y ur h me.
In this package, y u will find:
• Main unit with pr jecti n cl ck
• Main unit 4.5V AC / DC adapt r
• Rem te sens r (THN122N)
Keep this manual handy as y u use y ur new pr duct.
It c ntains practical step-by-step instructi ns, as well as
technical specificati ns and warnings y u sh uld kn w.
PRODUCT OVERVIEW
FRONT VIEW
1. SNOOZE / LIGHT butt n
2. and : Increase r decrease setting / activate r
deactivate at mic cl ck
3. MODE: Change display / settings
4. : View alarm status; set alarm
5. : Press t activate r deactivate alarm
6. Cl ck and utd r temperature pr ject r unit
7. LCD display
1
2
3
4
5
6
7
3
EN
BACK VIEW
1. Pr ject r FOCUS kn b
2. Pr ject r IMAGE ROTATION kn b
3. PROJECTION ON / OFF switch
4. AC / DC adapt r plug c ver
5. Battery c mpartment (c ver ff)
6. SEARCH butt n t l cate the rem te sens r
7. MEM: View current, maximum, and minimum
temperature readings
8. °C / °F switch
9. RESET h le
10. Battery c mpartment (c ver n)
11. Fixed table stand
1
2
3
6
7
8
9
5
4
10
11
4
EN
LCD DISPLAY
1. Weather display
2. At mic cl ck signal ic n
3. Alarm activated
4. Alarm setting
5. Time
6. Ind r temperature
7. L w battery ic n f r main unit
8. °C / °F (Outd r temperature)
9. Sens r signal
10. L w battery ic n f r sens r
11. Outd r temperature
12. Calendar
13. M n Phase
5
EN
REMOTE SENSOR (THN122N)
1. Wall m unt h le
2. RESET h le
3. CHANNEL number (1-3)
4. Battery c mpartment
(Battery c mpartment c ver n t sh wn)
1. LED status indicat r
6
EN
UNIT LOCATION
Main Ind r Temperature Area
Rem te Outd r Temperature Area
Installing the batteries:GETTING STARTED
BATTERIES
Main unit 3 x UM-3 (AA) 1.5V batteries
Rem te unit 2 x UM-4 (AAA) 1.5V batteries
Insert batteries bef re first use, matching the p larity
(+ and -) as sh wn in the battery c mpartment. F r best
results, install batteries in the rem te sens r bef re the
main unit. Press RESET after each battery change.
NOTE D n t use rechargeable batteries.
sh ws when batteries are l w.
NOTE It is rec mmended that y u use alkaline batteries
with this pr duct f r l nger perf rmance.
7
EN
AC ADAPTOR
The main unit is supplied with a 4.5V AC / DC adapt r,
which pr vides c ntinu us cl ck / temperature pr jecti n.
Inserting the adapt r:
ADJUST SETTINGS
T adjust the time, calendar and language settings:
1. Press and h ld MODE f r 2 sec nds t enter setting
m de.
2. Press r t change settings. (T reach the
setting y u want quickly, press and h ld r .)
3. Press MODE t c nfirm.
8
EN
Installing the batteries:
Using the wall m unt r stand:
REMOTE SENSOR (THN122N)
This pr duct is shipped with a THN122N Therm meter
Sens r that c llects Temperature data. The main unit
can be c nnected t nly 1 rem te sens r.
SET UP SENSOR
1. Open the rem te sens r battery c mpartment with
a small Phillips screwdriver.
2. Insert the batteries, matching the p larity (+ and -)
as sh wn in the battery c mpartment.
3. Set the channel switch t any channel. The switch is
l cated in the battery c mpartment.
4. Place the sens r near the main unit. Press RESET
n the sens r. Then, press and h ld SEARCH n
the main unit t initiate signal sending between the
sens r and the main unit. The recepti n ic n n the
main unit will blink f r appr ximately 3 minutes while
it is searching f r the sens r. (Refer t the Data
Transmissi n secti n f r m re inf rmati n.)
5. Cl se the rem te sens r battery c mpartment.
6. Secure the sens r in the desired l cati n using the
wall m unt r table stand.
9
EN
F r best results:
• Insert the batteries and bef re y u m unt the
sens r.
• Place the sens r ut f direct sunlight and
m isture.
• D n t place the sens r m re than 98 feet (30
meters) fr m the main (ind r) unit.
• P siti n the sens r s that it faces the main
(ind r) unit, minimizing bstructi ns such as
d rs, walls, and furniture.
• Place the sens r in a l cati n with a clear view
t the sky, away fr m metallic r electr nic
bjects.
• P siti n the sens r cl se t the main unit during
c ld winter m nths as bel w-freezing
temperatures may affect battery perf rmance and
signal transmissi n.
Y u may need t experiment with vari us l cati ns t
get the best results.
Standard Alkaline batteries c ntain significant am unts
f water. Because f this they will freeze in l w
temperatures f appr ximately 10°F. Disp sable Lithium
batteries have a much l wer thresh ld f r temperature
with an estimated freezing range f bel w -40°F. The
Liquid Crystal Display in utd r therm meters will
remain perati nal t -20°F with adequate p wer.
Wireless ranges can be impacted by a variety f fact rs
such as extremely c ld temperatures. Extreme c ld may
temp rarily reduce the effective range between the
sens r and the base stati n. If the unit's perf rmance
fails due t l w temperature, the unit will resume pr per
functi ning as the temperature rises t within the n rmal
temperature range (i.e. n permanent damage will ccur
t the unit due t l w temperatures).
DATA TRANSMISSION
Data is sent fr m the sens r every 40 sec nds. The
recepti n ic n sh wn in the Temperature Area sh ws
the status.
ICON
The sens r cann t be
f und. Search f r the
sens r r check batteries
--- sh w in Outd r
Temp Area
DESCRIPTION
Main unit is searching
f r the sens r
A Channel has been
f und
10
EN
T f rce a manual search f r at mic cl ck signals, press
and h ld f r 2 sec nds. If n signal is f und, check
the batteries.
TURN ATOMIC CLOCK SIGNAL ON / OFF
Perf rm this step if y u cann t receive at mic cl ck
signals. Press and h ld f r 2 sec nds. Then, manually
set the cl ck f ll wing the “Set Cl ck” instructi ns.
The signal ic n indicates that the cl ck feature is
ON. N ic n means that it is OFF.
Once c mplete, the recepti n ic n will st p blinking. The
ic n is sh wn in the Cl ck Area.
STRONG SIGNAL WEAK SIGNAL NO SIGNAL
SEARCH FOR SENSOR
T search f r the sens r, press and h ld SEARCH ( n
the main unit) f r 2 sec nds.
NOTE If the sens r is still n t f und, check the batteries,
bstructi ns, and rem te unit l cati n.
NOTE Signals fr m h useh ld devices such as
d rbells, electr nic garage d rs, and h me security
systems may cause temp rary recepti n failure. This is
n rmal and d es n t affect general pr duct perf rmance.
The recepti n will resume nce the interference ends.
CLOCK
The cl ck aut matically synchr nizes the current time
and date when it is br ught within range f the WWVB-
60 at mic cl ck signal generated fr m F rt C llins,
C l rad . F r m re inf rmati n, please visit: http://www.
b ulder.nist.g v/timefreq/stati ns/radi cl cks.htm
NOTE The signals are c llected by the main unit when
it is within 932 miles (1500 km) f a signal.
Initial recepti n takes 2-10 minutes, and is initiated when
y u first set up the unit, and whenever y u press RESET.
11
EN
SET TIME ZONE / CLOCK / CALENDAR
Y u nly need t d this if the unit is unable t
synchr nize with the at mic cl ck br adcast, r if y u
have disabled the at mic cl ck feature (see “Turn At mic
Cl ck Signal ON / OFF” secti n).
T manually set the cl ck:
1. Press and h ld MODE f r 2 sec nds. The Cl ck Area
will blink.
2. Select the US time z ne, h ur, minute, year, m nth,
day, and day- f-the-week language. Press r t
change the setting.
3. Press MODE t c nfirm.
NOTE The time z ne pti ns are (PA) Pacific, (CE)
Central, (MO) M untain and (EA) Eastern.
NOTE The language pti ns are (E) English, (F)
French, (D) German, (I) Italian, and (S) Spanish.
SWITCH CLOCK DISPLAY
Press MODE t t ggle between Cl ck with Sec nds and
Cl ck with Weekday display.
ALARM
This pr duct is equipped with a 2-minute crescend
alarm.
VIEW ALARM SETTINGS
Press . The alarm time and status will sh w in the
Cl ck Area.
SET ALARM
1. Press t switch t alarm display.
2. Press and h ld again f r 2 sec nds. The alarm
settings will blink.
3. Select the h ur and minute. Press r t change
settings. Press t c nfirm.
ACTIVATE ALARM
Press t activate r deactivate the alarm. sh ws in
the Cl ck / Alarm Area when the alarm is activated.
12
EN
SILENCE ALARM
When the alarm time is reached, the crescend alarm
will s und f r 2 minutes. T silence the alarm:
• Press SNOOZE t silence it f r 8 minutes.
OR
• Press any key except SNOOZE t mute the alarm
and activate it again after 24 h urs.
If n butt n is pressed, the alarm will aut matically
silence after 2 minutes. It will then s und again after 8
minutes.
WEATHER FORECAST
This pr duct f recasts the weather f r the next 12 t 24
h urs within a 19-31 mile (30-50 km) radius, with 70 t
75 percent accuracy. The weather f recast is displayed
as bel w.
SUNNY PARTLY CLOUDY RAINY
CLOUDY
13
EN
MOON PHASE
The Calendar must be set f r this feature t w rk, see
“Set Cl ck” secti n.
• Press r t view the m n phase f r the next
r previ us day.
• Press and h ld r t scan quickly thr ugh
the years (2001 t 2099).
TEMPERATURE
This pr duct can display current, minimum, and
maximum temperature inf rmati n c llected by the
rem te sens r and main (ind r) unit.
Outd r data is c llected and displayed every 40
sec nds. Ind r data is c llected and displayed every
10 sec nds.
SELECT TEMPERATURE UNIT
Slide the °C / °F switch int the desired l cati n. The
switch is l cated in the main unit battery c mpartment.
The setting f r the main unit verrides the rem te sens r
setting.
MINIMUM / MAXIMUM RECORDS
The MEM butt n is l cated in the main unit battery
c mpartment. Press MEM t t ggle between current,
maximum (MAX) and minimum (MIN) rec rds. T clear
the rec rds, press and h ld MEM f r 2 sec nds. A beep
will s und t c nfirm that the mem ry has been cleared. BACKLIGHT
Press SNOOZE / LIGHT t activate the backlight f r 8
sec nds.
New M n
Waxing Crescent
First Quarter
Waxing Gibb us
Full M n
Waning Gibb us
Last-quarter
Waning Crescent
14
EN
RESET SYSTEM
The RESET butt n is l cated in the main unit battery
c mpartment. Press RESET when y u change the
batteries and whenever perf rmance is n t behaving as
expected (f r example, y u are unable t establish a
c nnecti n with the rem te sens r r at mic cl ck
signal).
PROJECTION UNIT
The pr jecti n unit can display b th time and utd r
temperature. T use this feature:
• Press the SNOOZE / LIGHT butt n t pr ject
the time and utd r temperature f r 8 sec nds.
OR
• Slide the PROJECTION switch t ON t activate
c ntinu us pr jecti n. H wever, this functi n will
n t w rk unless the supplied AC / DC adapt r is
used.
Y u can als :
• Adjust the FOCUS kn b t make the image
clearer.
• Adjust the IMAGE ROTATION kn b t r tate the
image cl ckwise r anti-cl ckwise.
• Manually tilt the pr jecti n unit t p siti n the
image vertically upwards r d wnwards.
SAFETY AND CARE
Clean the pr duct with a slightly damp cl th and alc h l-
free, mild detergent. Av id dr pping the pr duct r
placing it in a high-traffic l cati n.
WARNINGS
This pr duct is designed t give y u years f service if
handled pr perly. Oreg n Scientific will n t be
resp nsible f r any deviati ns in the usage f the device
fr m th se specified in the user instructi ns r any
unappr ved alterati ns r repairs f the pr duct. Observe
the f ll wing guidelines:
15
EN
• Never immerse the pr duct in water. This can
cause electrical sh ck and damage the pr duct.
• D n t subject the main unit t extreme f rce,
sh ck, r fluctuati ns in temperature r humidity.
• D n t tamper with the internal c mp nents.
• D n t mix new and ld batteries r batteries f
different types.
• D n t use rechargeable batteries with this
pr duct.
• Rem ve the batteries if st ring this pr duct f r a
l ng peri d f time.
• D n t scratch the LCD display.
NOTE The technical specificati n f this pr duct and
c ntents f this user guide are subject t change with ut
n tice. Images n t drawn t scale.
TROUBLESHOOTING
REMEDY
Change
language
Disable cl ck
1. Adjust
batteries
2. Press RESET
3. Manually
activate cl ck
feature
Temperature is
ut- f-range
Check batteries
Check l cati n
Initiate a manual
sens r search
PROBLEM
Calendar
Cl ck
Temp
Rem te sens r
SYMPTOM
Strange date /
m nth
Cann t adjust
cl ck
Cann t aut -
synchr nize the
date and time
Sh ws “LLL” r
“HHH”
Cann t l cate
rem te sens r
Data d es n t
match main unit
16
EN
SPECIFICATIONS
MAIN UNIT DIMENSIONS
L x W x H 3.6 x 6.6 x 2.1 inches
(92 x 167 x 53 mm)
Weight 8.04 unces (228 grams)
with ut battery
REMOTE SENSOR DIMENSIONS
L x W x H 3.6 x 2.4 x 0.9 inches
(92 x 60 x 23 mm)
Weight 1.6 unces (46 grams)
with ut battery
TEMPERATURE
Unit °C / °F
Ind r range 23°F t 122°F
(-5°C t 50°C)
Outd r range -22°F t 140°F
(-30°C t 60°C)
Res luti n 0.2°F (0.1°C)
Display Rainy, cl udy, partly
cl udy, sunny
REMOTE SENSOR (THN122N)
RF frequency 433 MHz
Range 98 feet (30 meters)
with n bstructi ns
Transmissi n Every 40 sec nds
Channel N . 1
CLOCK / PROJECTOR
At mic Cl ck Aut r manual (disabled)
Cl ck display HH:MM:SS
H ur f rmat 12hr AM / PM
(M del BAR623PA)
17
EN
Calendar MM / DD; weekday in
5 languages (E, D, F, I, S)
Alarm Single alarm with
2-minute crescend and
8-minute Sn ze
Pr ject r Outd r temperature
and time
POWER
Main unit batteries 3 x UM-3 (AA) 1.5V
Sens r batteries 2 x UM-4 (AAA) 1.5V
AC / DC adapt r 4.5V with jack
NOTE It is rec mmended that y u use alkaline batteries
with this pr duct f r l nger perf rmance.
ABOUT OREGON SCIENTIFIC
Visit ur website (www. reg nscientific.c m) t learn
m re ab ut Oreg n Scientific pr ducts such as digital
cameras; MP3 players; children's electr nic learning
pr ducts and games; pr jecti n cl cks; health and fitness
gear; weather stati ns; and digital and c nference
ph nes. The website als includes c ntact inf rmati n
f r ur cust mer care department in case y u need t
reach us, as well as frequently asked questi ns and
cust mer d wnl ads.
We h pe y u will find all the inf rmati n y u need n
ur website, h wever if y u're in the US and w uld like
t c ntact the Oreg n Scientific Cust mer Care
department directly, please visit:
www2. reg nscientific.c m/service/supp rt
OR
Call 949-608-2848.
F r internati nal enquiries, please visit:
www2. reg nscientific.c m/ab ut/internati nal/default.asp
18
EN
and n, the user is enc uraged t try t c rrect the
interference by ne r m re f the f ll wing measures:
• Re rient r rel cate the receiving antenna.
• Increase the separati n between the equipment and
receiver.
• C nnect the equipment int an utlet n a circuit
different fr m that t which the receiver is c nnected.
• C nsult the dealer r an experienced radi / TV
technician f r help.
FCC STATEMENT
This device c mplies with Part 15 f the FCC Rules.
Operati n is subject t the f ll wing tw c nditi ns: (1)
This device may n t cause harmful interference, and (2)
This device must accept any interference received,
including interference that may cause undesired
perati n.
WARNING Changes r m dificati ns t this unit n t
expressly appr ved by the party resp nsible f r
c mpliance c uld v id the user's auth rity t perate
the equipment.
NOTE This equipment has been tested and f und t
c mply with the limits f r a Class B digital device,
pursuant t Part 15 f the FCC Rules. These limits are
designed t pr vide reas nable pr tecti n against
harmful interference in a residential installati n.
This equipment generates, uses and can radiate radi
frequency energy and, if n t installed and used in
acc rdance with the instructi ns, may cause harmful
interference t radi c mmunicati ns. H wever, there
is n guarantee that interference will n t ccur in a
particular installati n. If this equipment d es cause
harmful interference t radi r televisi n recepti n,
which can be determined by turning the equipment ff
19
EN
DECLARATION OF CONFORMITY
The f ll wing inf rmati n is n t t be used as c ntact
f r supp rt r sales. Please call ur cust mer service
number (listed n ur website at www. reg nscientific.
c m, r n the warranty card f r this pr duct) f r all
inquiries instead.
We
Name: Oreg n Scientific, Inc.
Address: 19861 SW 95th Place,
Tualatin, Oreg n 97062 USA
Teleph ne N .: 1-800-853-8883
Fax N .: 1-503-684-8883
declare that the product
Pr duct N .: BAR623PA
Pr duct Name: Weather Pr jecti n Cl ck
Manufacturer: IDT Techn l gy Limited
Address: Bl ck C, 9/F, Kaiser Estate,
Phase 1, 41 Man Yue St.,
Hung H m, K wl n,
H ng K ng
is in c nf rmity with Part 15 f the FCC Rules. Operati n
is subject t the f ll wing tw c nditi ns: 1) This device
may n t cause harmful interference. 2) This device must
accept any interference received, including interference
that may cause undesired perati n.
Atomic Projection Clock with
Weather Forecast
Model: BAR623PA
USER MANUAL

Other manuals for BAR623PA

1

Other Oregon Scientific Clock manuals

Oregon Scientific JW108 User manual

Oregon Scientific

Oregon Scientific JW108 User manual

Oregon Scientific MSR939 User manual

Oregon Scientific

Oregon Scientific MSR939 User manual

Oregon Scientific RMB899P User manual

Oregon Scientific

Oregon Scientific RMB899P User manual

Oregon Scientific RAR391P User manual

Oregon Scientific

Oregon Scientific RAR391P User manual

Oregon Scientific RMR613HGA User manual

Oregon Scientific

Oregon Scientific RMR613HGA User manual

Oregon Scientific WS902 User manual

Oregon Scientific

Oregon Scientific WS902 User manual

Oregon Scientific RM313PNA User manual

Oregon Scientific

Oregon Scientific RM313PNA User manual

Oregon Scientific rm318p User manual

Oregon Scientific

Oregon Scientific rm318p User manual

Oregon Scientific RMR391P User manual

Oregon Scientific

Oregon Scientific RMR391P User manual

Oregon Scientific RMR500ES User manual

Oregon Scientific

Oregon Scientific RMR500ES User manual

Oregon Scientific JMR818WF User manual

Oregon Scientific

Oregon Scientific JMR818WF User manual

Oregon Scientific RM888PA User manual

Oregon Scientific

Oregon Scientific RM888PA User manual

Oregon Scientific RM512 User manual

Oregon Scientific

Oregon Scientific RM512 User manual

Oregon Scientific RMR391PU User manual

Oregon Scientific

Oregon Scientific RMR391PU User manual

Oregon Scientific RM939P User manual

Oregon Scientific

Oregon Scientific RM939P User manual

Oregon Scientific RRM320P User manual

Oregon Scientific

Oregon Scientific RRM320P User manual

Oregon Scientific RRM612P User manual

Oregon Scientific

Oregon Scientific RRM612P User manual

Oregon Scientific RM912TCN User manual

Oregon Scientific

Oregon Scientific RM912TCN User manual

Oregon Scientific RRM612P User manual

Oregon Scientific

Oregon Scientific RRM612P User manual

Oregon Scientific rm318p User manual

Oregon Scientific

Oregon Scientific rm318p User manual

Oregon Scientific RM802 User manual

Oregon Scientific

Oregon Scientific RM802 User manual

Oregon Scientific RM998PS User manual

Oregon Scientific

Oregon Scientific RM998PS User manual

Oregon Scientific BAR669H User manual

Oregon Scientific

Oregon Scientific BAR669H User manual

Oregon Scientific BAR339P User manual

Oregon Scientific

Oregon Scientific BAR339P User manual

Popular Clock manuals by other brands

vlahova SB3618 instruction manual

vlahova

vlahova SB3618 instruction manual

Citizen 4GE961 quick start guide

Citizen

Citizen 4GE961 quick start guide

Polypipe UFHTIME4RFB user guide

Polypipe

Polypipe UFHTIME4RFB user guide

Velleman WC50D user manual

Velleman

Velleman WC50D user manual

La Crosse Technology 513-1417BS manual

La Crosse Technology

La Crosse Technology 513-1417BS manual

TFA 60.3001 operating instructions

TFA

TFA 60.3001 operating instructions

Mobatime BU 190t 230 Installation and operating

Mobatime

Mobatime BU 190t 230 Installation and operating

Max ER-1500 instruction manual

Max

Max ER-1500 instruction manual

Polanik T6-RCU Assembly manual

Polanik

Polanik T6-RCU Assembly manual

LEXIBOOK DPC280FRB instruction manual

LEXIBOOK

LEXIBOOK DPC280FRB instruction manual

L’EPEE 1839 OCTOPOD User instructions

L’EPEE 1839

L’EPEE 1839 OCTOPOD User instructions

Northeast Color ATHLETIC REPUBLIC AR00001-01 Installation & operation guide

Northeast Color

Northeast Color ATHLETIC REPUBLIC AR00001-01 Installation & operation guide

Gorgy Timing LEDI Series user guide

Gorgy Timing

Gorgy Timing LEDI Series user guide

Home & Comfort OP 011742 instruction manual

Home & Comfort

Home & Comfort OP 011742 instruction manual

La Crosse Technology WS-8053U instruction manual

La Crosse Technology

La Crosse Technology WS-8053U instruction manual

Acroprint ES700 Service manual

Acroprint

Acroprint ES700 Service manual

La Crosse Technology 513-1417CH user manual

La Crosse Technology

La Crosse Technology 513-1417CH user manual

Eurotops 94652 Operation instructions

Eurotops

Eurotops 94652 Operation instructions

manuals.online logo
manuals.online logoBrands
  • About & Mission
  • Contact us
  • Privacy Policy
  • Terms and Conditions

Copyright 2025 Manuals.Online. All Rights Reserved.