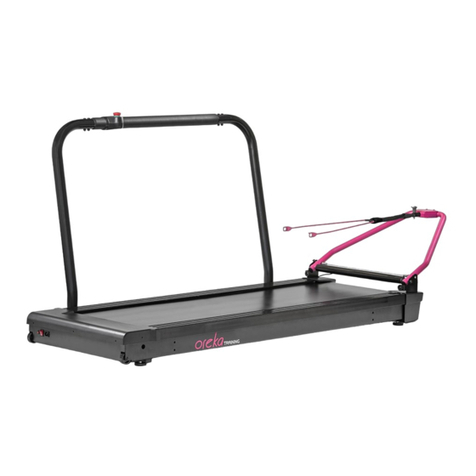
Oreka Trainer User manual

0
10/2020 V1.0
OREKA TRAINING
USER MANUAL

1
10/2020 V1.0
CONTACT
Oreka Traning, S.L. CIF: B 75150219. Address: Oreka Training SL. Poligono. Egiburuberri 3, 20100 Errenteria,
Gipuzkoa. Spain info@orekatraning.com
OREKA TRAINING
Thank you for purchasing our product.
To use our product safely, please read this manual carefully beforehand.
Should you have any doubts after reading, please visit our website or for more information contact
NOTE: the company reserves the right to modify the design of the product or its specifications to improve
quality.
Please keep this manual safe after reading

2
10/2020 V1.0
CONTENTS
1. GENERAL VIEW OF THE PRODUCT
2. TRAINER USAGE NOTES
3. ASSEMBLY AND TRANSPORT INSTRUCTIONS
4. PLACING THE BICYCLE ON THE TRAINER
5. ADJUSTING THE DAMPERS
6. BEFORE UNDERTAKING YOUR FIRST SESSION
7. EXEMPTION FROM LIABILITY
8. WARRANTY
9. TECHNICAL ASSISTANCE

3
10/2020 V1.0
1. GENERAL VIEW OF THE PRODUCT
MAIN BODY
MUSCLES
SET OF WHEELS
2X LEG POSITIOING PIN WITH
TWO POSITIONS
2X LEG SUPPORT PIN
2X FOLDING LEGS
FLYWHEEL
BELT TENSIONER
CASSETTE HUB
CENTRAL AIR
RESERVOIR

4
10/2020 V1.0
2. TRAINER USAGE NOTES
To use this product, take into account the following rules/precautions:
1Read and follow the instructions carefully before using the product
2The maximum user weight is 120KG.
3When using the trainer, make sure that no objects can enter the cassette or the rotary movement of the
trainer.
4Make sure not to wear any items that may fall during training.
5There is a safety area of 1 metre surrounding the Trainer. The area must remain clear.
6When children, elderly people or anyone with a disability come close to this product, make sure to
supervise them to avoid accidents. They must remain outside the space/room where the Trainer is being
used.
7This product is not recommended for people with physical disabilities, mental conditions or illnesses, or
children.
8Once you have finished training, please keep the trainer out of the reach of children, elderly people,
anyone with a disability, and pets.
9Incorrect or excessive training may damage your health.
10 The Trainer is designed for both indoor and outdoor use, as long as the weather conditions are good.
11 The trainer must be used on a flat and stable floor.
12 When using the trainer indoors, make sure there is correct ventilation.
13 Make sure that the bike and the axle are correctly positioned.
14 Before each training session, make sure that the trainer is well supported on the floor and that there is
no imbalance.
15 Avoid the Trainer coming into contact with any corrosive substances such as salt or saline environments.
16 To move the trainer, use the wheels delivered with it and avoid lifting the entire weight as much as
possible.
17 Do not insert or attach any additional mechanisms or sensors to the Trainer.
18 If you suspect that the trainer has suffered any damage, please contact Oreka Training to replace it.

5
10/2020 V1.0
19 The Trainer’s safety requires visual inspection to check that there is no damage to it before each use.
20 Do not disassemble the Oreka Training Trainer in case of a fault. It may release electrical charges
when handled. Please contact Oreka Training to check it.
21 Do not make holes in, slit or drill any surface of the Trainer. This may produce cracks and the warranty
will become void.
22 Stop immediately if you experience anything strange in the functioning of the Trainer. Please contact
Oreka Training to check it.

6
10/2020 V1.0
3. ASSEMBLY AND TRANSPORT INSTRUCTIONS
ASSEMBLY
To assemble the Trainer for the first time, unfold the two legs as indicated in the following image, and make
sure the two positioning and support pins of the Trainer are firmly positioned. These legs only have two
possible positions, which are interchangeable using the pins.
POSITION FOR USE
Adjusting the bicycle
-Adjust the bicycle as you would for the road. The same saddle height, handlebar height, distance from saddle to
handlebars and position of pedals.
-For the first session it is recommended to begin pedalling slowly and without a simulator. Also test the functioning
of the Trainer at different speeds and different intensities with the Oreka App, which is available for iOS/Android.
Once you are familiarised with the feeling of the Trainer, turn on the simulator.
PINS USE POSITION

7
10/2020 V1.0
TRANSPORT POSITION
TRANSPORT
To easily and comfortably transport the Trainer, take hold of the wheel axle and, lifting the Trainer through the
gap, position the set of wheels. Once the wheels are on, fold the arms. Now we can transport the Trainer
comfortably and without lifting its full weight, bearing in mind that the approximate weight of the Trainer is
30kg, so transport it at a speed that ensures stability.
PIN TRANSPORT
POSITION
PIN TRANSPORT POSITION

8
10/2020 V1.0
4. PLACING THE BICYCLE ON THE TRAINER
The Trainer is delivered with different adaptors to be compatible with the following axles that are currently
available on the market:
-Axle 130/135mm with traditional axle
-Thru axle 142x12 for racing bikes with disc
-Thru axle 148x12 for mountain bikes with disc
You should choose the appropriate bearing according to the axle of the bicycle to be installed. The bearings of
the Oreka O5 Trainer are marked with letters for easy identification. They also indicate that the axle that will join
the bicycle to the Trainer will be the same.
The sketch below shows the difference in bearings in order to choose the adaptors according to the width of the
axle:
-Axle bearings 130/135
-Axle bearings 142x12

9
10/2020 V1.0
-Axle bearings 148x12
Once the necessary bearings have been located, place them on the corresponding side of the Trainer. After
presenting the bicycle with the bearings, install the axle and make sure that it is well tightened and that there is no
play.
Make sure to install a cassette that is compatible with the hub of the Trainer.

10
10/2020 V1.0
5. ADJUSTING THE DAMPERS
The Oreka O5 uses ERGODYNAMIC technology to make the user experience as real and as natural as
possible. Thanks to this, you can enjoy hours of pedalling without straining and simply by adjusting the
muscles you can do a sprint/series of more than 1000 watts without the Trainer going anywhere.
The muscles are designed to be used within a range of 2-6 bars of pressure, with the minimum pressure achieving
the pedalling and movement similar to that of climbing a mountain pass, and with the maximum pressure a greater
tightness to perform more intense sprints or series. These muscles are interconnected with the central chamber.
This chamber is where the pressure is adjusted using the Schrader valve.
It is recommended to take 3 bars of pressure as a base. Once you are familiarised with that pressure and the feeling
it transmits, adjust 1 bar at a time until you find a balance that agrees with the feelings or demands of the training
to be carried out.

11
10/2020 V1.0
6. BEFORE YOUR FIRST SESSION
Bear in mind that the Oreka O5 uses PLUGLESS technology. The training roller works without electrical power
thanks to the permanent magnet motor. This motor, together with the flywheel and the electronic elements are
configured to generate power through movement. To pair the Trainer with a device or simulator, you must be
pedalling to gain power.
Before your first training session, download the Oreka App available on iOS/Android devices.
Start pedalling smoothly for the Trainer to gain power and for the App to detect the roller. Once it detects it, link the
Trainer to your device.
Maintain constant pedalling to familiarise yourself both with the feeling of the Trainer as well as with the App. Both
with the App and with any simulator, the Trainer will be able to simulate gradients of up to 20% and a maximum of
2000 watts.

12
10/2020 V1.0
7. EXEMPTION FROM LIABILITY
With the Trainer, we emit Bluetooth (FTMS), Ant + (FE-C) to ensure compatibility with the current market software
and to be able to use it. Oreka constantly updates the Trainer’s electronics, the only way to implement
improvements or add services, as well as to resolve possible errors. These updates are free for Trainer users.
The user recognises that they are in full physical condition and in full health to exercise on the Oreka Training and
assumes full responsibility for this exercise, relieving Oreka Training of any liability. The user is solely responsible for
choosing their sports training, as well as for the physical and mental consequences that may ensue. The possible
recommendations and/or guidelines provided by Oreka Training are solely based on the information given previously
by the User, who must always check them with a medical professional before putting them into practice.
It is recommended to consult a medical professional before starting a new training programme. The User must use
the Oreka Training/Bkool products prudently and responsibly, immediately stopping in case of any discomfort, pain
or unease, after which they must seek the advice of a medical professional as soon as possible.

13
10/2020 V1.0
8. WARRANTY
OREKA TRAINING S.L. OFFERS YOU A LIMITED WARRANTY OF 2 YEARS FROM THE ORIGINAL DATE OF PURCHASE.
DURING THE WARRANTY PERIOD OREKA TRAINING S.L. GUARANTEES THAT THE TRAINER WILL NOT SHOW ANY
DAMAGE IN ITS MATERIAL OR MANUFACTURE. OREKA TRAININGS S.L. WILL NOT BE LIABLE UNDER ANY
CIRCUMSTANCES FOR DAMAGE CAUSED BY INAPPROPRIATE USE OF THIS PRODUCT.
Application. This warranty applies exclusively to the original owner and to Trainers purchased via the Oreka Training
website, distributors and authorised stores.
Limitation and Cancellation of the warranty. Causes not attributable to the manufacturer are excluded from the
warranty. The warranty does not cover parts that have worn due to the normal use of the roller. Nor does it cover
any damage caused by accidents, improper use, inadequate care, or negligence. The warranty becomes void when:
(1) the Trainer is used for anything other than what it has been designed for, (2) the assembly and preservation
instructions have not been followed, (3) the Trainer has been subjected to repair or attempts to repair that have not
been carried out by the official technical service. In the above mentioned circumstances, Oreka Training S.L. declines
all responsibility for eventual damage that may directly or indirectly ensue.
9. TECHNICAL ASSISTANCE
At www.orekatraning.com you will find information on how to obtain personalised technical assistance. You can
also contact us via the email address info@orekatraning.com. Bear in mind that you must present the proof of
purchase with the date printed, so please keep this safe.

14
10/2020 V1.0
Table of contents
Other Oreka Fitness Equipment manuals
Popular Fitness Equipment manuals by other brands

Nautilus
Nautilus Inspiration 4-Station owner's manual

BODYKORE
BODYKORE GRS1602 owner's manual

Marcy
Marcy ECLIPSE UB1000 owner's manual

Body Champ
Body Champ WB 125 owner's manual

Goalsetter Systems
Goalsetter Systems Junior Hoop Installation & owner's instructions

York Fitness
York Fitness Mega Max 3001 instructions

Vectra Fitness
Vectra Fitness VX-DC owner's manual

Soozier
Soozier A91-122 Assembly & instruction manual

vidaXL
vidaXL 90665 Operating and safety instructions

Panasonic
Panasonic EU6441 operating instructions

BH FITNESS
BH FITNESS G6176E Instructions for assembly and use

Vision Fitness
Vision Fitness S60 Service manual