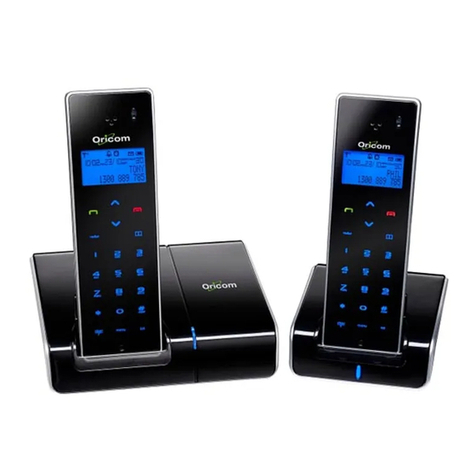
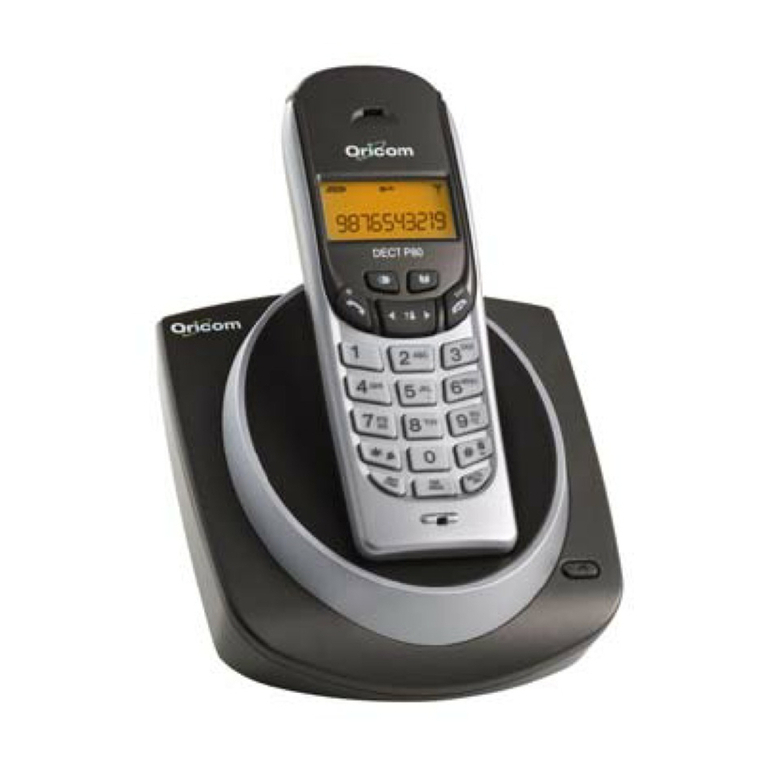
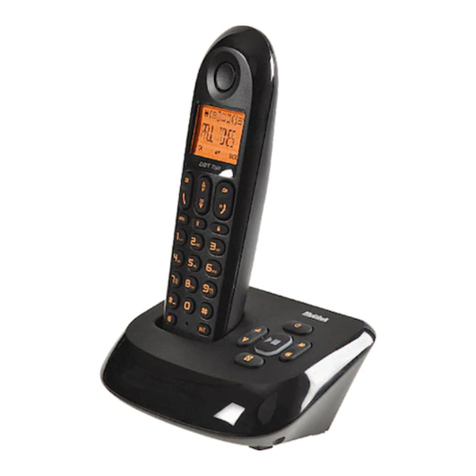
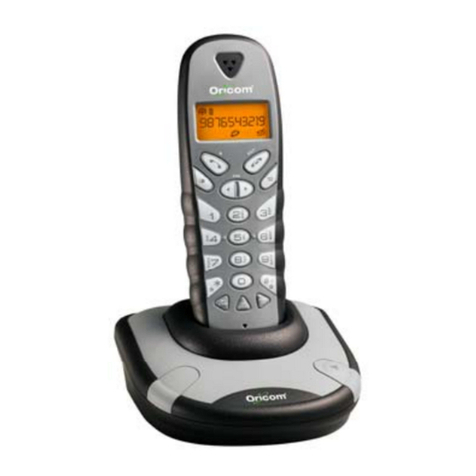
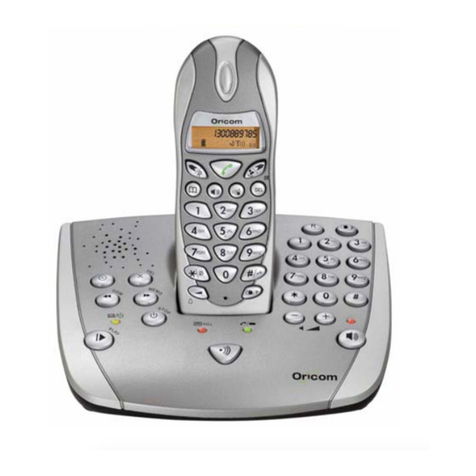
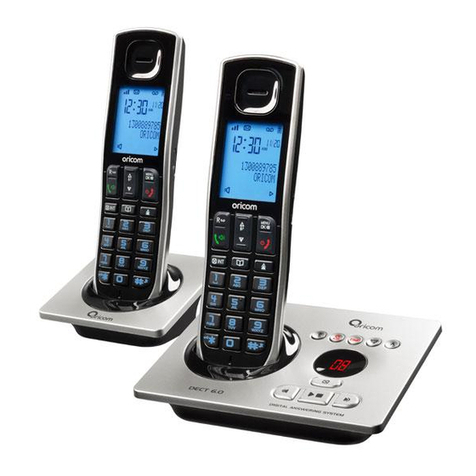
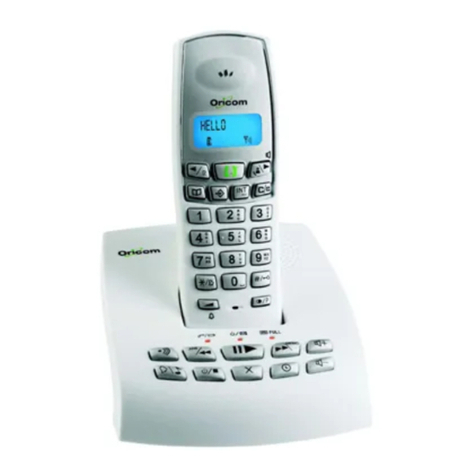
Oricom M600 Series User manual

USER GUIDE
DECT Digital Cordless Telephone
with Answering System
Operating Instructions
M600 Series
Keep this user guide for future reference. Always retain your proof of purchase in case of
warranty service and register your product on line at: AUSTRALIA: www.oricom.com.au

TABLE OF CONTENTS
SAFETY INFORMATION 1
GETTING STARTEd 3
BUTTON LAYOUT 7
TELEphONE OpERATION 8
hANdSET dISpLAY INFORMATION 9
TELEphONE 10
OThER FEATURES 13
CALL LOG / REdIAL 14
phONE BOOk 16
TELEphONE SETTINGS 18
ANSwERING MAChINE 24
REGISTERING/dE-REGISTERING hANdSETS 31
USING ThE INTERCOM 33
AppENdIx 35
TROUBLEShOOTING 36
dEFAULT SETTINGS 39
CUSTOMER SUppORT 40
wARRANTY 41

1
TABLE OF CONTENTS SAFETY INFORMATION
IMPORTANT
• Avoidexposureofthistelephonetomoisture
or liquid.
• Topreventelectricshock,donotopenthe
handset or base cabinet.
• Avoidmetalliccontact(e.g.metalclips,keys)
between the battery contacts and charging
conductors.
• Thereisaslightchancethatthetelephone
could be damaged by an electrical storm. It is
recommended that users unplug the phone
fromthemainssupplyandtelephonesocket
during a storm.
• Donotusethehandsetinanexplosivehazard
areasuchaswherethereisgasleaking.
• Followthelocalregulationsregardingthe
disposalofyourpackingmaterials,exhausted
batteriesandusedphone.Whereverpossible,
recycle those materials.
• Thisphoneshouldnotbeusednearintensive
care medical equipment. Persons with
pacemakersshouldconsulttheirDoctoror
cardiologist before using this phone.
• Cleanwithadry,soft,lint-freecloth.Never
usecleaningagents,particularlyaggressive
solvents.
Need Help?
If you need assistance setting up or using your
Oricomproductnoworinthefuture,callOricom
Support.
Australia 1300 889 785
www.oricom.com.au
Mon-Fri8am–6pmAEST
NewZealand 0800674266
www.oricom.co.nz
Mon-Fri10am–8pmNZST

2
• Donotuseyourtelephoneduringan
electrical thunderstorm as it is possible to
getanelectricshock.Refertoinformation
contained in White pages directory.
• Thisphoneisdesignedforconnectionto
aPSTNtelephonelineorananalogue
extensionportofaPBXsystem.Ifyou
connectthisdevicetoadigitalextensionofa
PBX,damagemayresulttothePBX.
Use only the mains adaptors supplied with this
product. Incorrect adaptor polarity or voltage can
seriously damage the unit.
Adaptor for base unit and charger:
BaseUnitpowersupply–Input:100-240VAC
50/60HzOutput:6V0.5A
ExtChargerpowersupply–Input100-240VAC
50HzOutput:7V420mA
CAUTION
!
• Becausethephoneworksbysendingradio
signalsbetweenbasestationandhandset,
wearersofhearingaidsmayexperience
interference in the form of a humming noise.
• Yourphonecaninterferewithelectrical
equipmentsuchasansweringmachines,TV
andradiosets,clockradiosandcomputersif
placed too close. It is recommended that you
position the base unit at least one metre from
such appliances.
• Thistelephonecomplieswithapplicable
safetyrequirementsforexposuretoradio
waves(EMR).Themeanpowerofthis
telephonedoesnotexceed20mWlimitat
which point testing is required.
• Privacyofcommunicationsmaynotbe
ensured when using this telephone.
• Theearpieceofthehandsetmayattractsmall
metalobjectssuchasstaplesandpins.Care
shouldbetakenwhenplacingthehandset
near these items.
• Thistelephoneisnotdesignedformaking
emergency telephone calls when the mains
power fails. Always have a corded phone
availabletobeabletomakeandreceivecalls
to emergency services if the mains power fails.
SAFETY INFORMATION

3
Getting Started
Location
Youneedtoplacethebaseunitwithin2metresofthe
mainspowersocketandtelephonesocketsothatthe
cableswillreach.Makesureitisatleast1metreaway
from other electrical appliances to avoid interference.
Yourcordlessphoneworksbysendingradiosignals
between the handset and base. The strength of the
signal depends on where you site the base. Putting it
as high as possible ensures the best signal.
Handset range
The range is up to 300 metres outdoors when there
is a clear line of sight between the base and handset.
Any obstruction between the base and handset will
reduce the range significantly. With the base indoors
andhandseteitherindoorsoroutdoors,therangewill
normallybeupto50metres.Thickstonewallscan
severely affect the range.
Signal strength
The icon on your handset indicates when you are in
range. When out of range of the base the icon flashes
andthehandsetgivesanout-ofrangewarningtone
every minute. This tone is repeated until you move
backintorange.
Ifyoumoveoutofrangeduringacall,thetelephone
callwillbedisconnected.Movebackwithinrange
beforeyoumakeanyfurthercalls.Thehandsetwill
automaticallyre-connecttothebase.
The base station must be plugged into the
mainspoweratalltimes.Donotplugthe
telephonelinecordintothewallsocketuntil
the handset is fully charged. Only use the
power and telephone cables supplied with
the product.
IMPORTANT
!
Battery low warning
If the iconashesinthedisplay,youwillneedto
recharge the handset before you can use it again.
Duringcharging,the icon in the display will scroll.
Battery performance
Inidealconditions,fullychargedbatteriesshouldgive
about10hourstalktimeor100hoursstandbytime
from a single charge.
Notethatnewbatteriesdonotreachfullcapacityuntil
they have been in normal use for several days.
The charge capacity of rechargeable batteries will
reducewithtimeastheywearout,givingthehandset
lesstalk/standbytime.Eventuallytheywillneedtobe
replaced.
Batteriesandhandsetsmaybecomewarmduring
charging. This is normal.
SAFETY INFORMATION GETTING STARTEd
4
Tip!
It is good practice to put the cordless handset on the
charging cradle when it is not in use to ensure that
the handset is always fully charged.
DONOTUSESTANDARD/ALKALINE
BATTERIESINTHISPRODUCT,AS
THEREISARISKOFEXPLOSIONAND/
ORINJURY.ONLYUSETHENi-MH
RECHARGEABLEBATTERIES SPECIFIED
INTHISUSERGUIDE.CONTACTORICOM
FORREPLACEMENTBATTERIES.
RISKOFEXPLOSIONIFBATTERYIS
REPLACEDBYANINCORRECTTYPE.
Neverusenon-rechargeablebatteries.
Use recommended type supplied with this
product.
• Neverusealkalineorlithiumbatteries.
• Donotdisposeofthebatteriesinare,as
theycanexplode.
• Donotopenormutilatethebattery.
Released electrolyte is corrosive and can
causedamagetotheeyesorskin.Itcan
betoxicifswallowed.
• Avoidcontactwithmetalobjectswhen
handling the battery. These objects could
short out the batteries or cause the
conductor to overheat resulting in burns.
• Donotattempttorechargethebatterycell
by heating it. Sudden release of battery
electrolyte can cause burns or irritation to
theeyesorskin.
WARNING
• Observetheproperpolarity,ordirection,
of any battery. Reverse insertion of the
batterycellcanresultinleakageor
explosion.
• Removethebatteriesifyoudonotplanto
use the product for several months at a time.
• Followthelocalregulationsregarding
thedisposalofyourpackingmaterials,
exhaustedbatteriesandusedphone.
Whereverpossible,recyclethosematerials.
WARNING
!
Pack contents
Dependingonthemodelyouhavepurchasedthis
packshouldcontainthefollowingitems:
Ifanyofthesearemissing,pleasecontactOricom
directly.
Single Twin Triple
Baseunit 1 1 1
Cordlesshandsets 123
Chargingcradle 0 1 2
Power adaptors 1 23
Line cord 1 1 1
User guide 1 1 1
HandsetRechargeable
Ni-MH1.2V450mAh
Batteries
2 4 6
!
GETTING STARTEd

5
Purchasing additional handsets
Youmayexpandyourcordlesssystembyadding
morehandsets(M6050).Thesecanbepurchased
separately from the retailer where you purchased the
product,ordirectlyfromOricom(Australia)
www.oricom.com.au.
TheM600canaccommodateatotalof5cordless
handsets.
If you have a Broadband line
If you connect your telephone to a line with a
broadband conne ction, you must connect an in
line filter (not supplied) between the telephone
socket and your phone base to ensure that your
broadband and M600 will work properly.
If you do not install the filter you will experience
interference on the cordless phone and your
Broadband may suffer dropouts. Please refer to
the user guide of the in line filter for installation.
In a home with broadband, every telephone, fax
or answering system must have a in-line filter
connected, not just the one at the telephone point
that your modem is connected to.
Additional in-line filters can be purchased from
electronic stores.
TELEPHONE
WALLSOCKET
MICROFILTER
Connecting the base station
Connectthebasestationasillustratedinthediagram.
Forreasonsofsafety,onlyusethepoweradaptor
and telephone connection line cord supplied.
Inserting the batteries
1) Openthebattery compartment cover. Install
the AAA rechargeable batteries into handset
inaccordancewiththepolaritymarkedinthe
battery compartment.
2) Closethebatterycompartmentcover,slidingitinto
placeandpressingrmlytomakesureitissecure.
Note:
Beforethehandset/sareusedforthersttime,
chargethebatteriesforaminimumof16hours.
GETTING STARTEd GETTING STARTEd

6
Interference
If the sound quality gets worse as you move around
whileonacall,thisisprobablycausedbyinterference
betweenthehandsetandthebaseunit,perhaps
because you are too near to another phone or other
electrical equipment. Move to a different position to
cleartheinterference.Ifyoudonotmove,itmight
causeashortbreakoryourcallmaybecutoff.
Charging the batteries
Beforethehandsetisusedforthersttime,insertit
inthebase/chargingstationforatleast16hours.
The handset warms up during the charging process. This
isnormalanddoesnotrepresentarisk.Donotcharge
the handset with charging units from other manufacturers.
The battery charge status is indicated in the display.
When the battery charge has reached its lower limit
value,thebatteryicon flashes in the display.
Setting the time and date on the
handset
Whenusedupforthersttime,thehandsetdoesnot
showthecorrecttime(e.g.forentriesinthecalllist/
answeringmachine).Thedateandtimearesetusing
theDATETIMEmenuoption.
Setting the display language
The display language can be set to one of the 9
differentlanguagesavailable.Whendelivered,the
languageissettoENGLISH.Changethesetting
using the HANDSET > LANGUAGE menu option.
Radio signals between handset and
base unit
Touseyourhandsetandbaseunittogether,youmust
beabletomaintainaradiolinkbetweenthem.Be
awarethatanylargemetalobjects,likearefrigerator,
amirror,lingcabinet,etc,betweenthehandsetand
thebaseunitmayblocktheradiosignal.Othersolid
structures,likewalls,mayreducethesignalstrength.
GETTING STARTEd

7
Button Layout
8
45
DEF
23
JKL
ABC
MNO
WXYZ
TUV
GHI
PQRS
1
6
79
INT
R
0
Earpiece
Display
Softkey/Menu
key(inidlestate)
Internal
Talkbutton/
Handsfree
Digitkeys
Redial /
“Up”-key
Softkey/
Phonebook
key(inidle
state)
R-key
Calllist/
“Down”key
Endbutton
Microphone
Pagingkey
Chargecontacts
Theotherkeysareusedforoperatingtheanswering
machine.Fordetailspleaserefertothechapter
“Answeringmachine”startingonpage24.
GETTING STARTEd BUTTON LAYOUT

8
Understanding the cordless handset
display
Display Description
Press the button depicted.
Enterdigitsorletters.
Handsetrings.
Remove the handset from the base
station.
Place the handset in the base station.
NAME? Depictstextinthedisplay.
Battery capacity (display)
Display Description
Batteries100%charged
Batteriesapprox.50%charged
Batteriesneedcharging/Chargethe
batteries
Duringthechargingofthebatterytheiconisanimated.
Muting/unmuting the microphone during a call.
Standby mode
All descriptions in this operating manual assume that
the handset is in Standby mode. The system switches
toStandbymodebypressingtheENDbutton .
Navigating in the menu
All the functions can be accessed via the various
menus. The entire menu structure can be found in the
appendix.
Themenuisopenedinidlemodewiththeleftsoftkey
under .
Usethearrowkeys and to move within
the menu.
Pressthesoftkeyunder to open a sub menu.
Toreturntothemainmenupressthesoftkeyunder
.
TELEphONE OpERATION

9
Display icons
Indicatesthatanexternalcallisconnected
or held.
Indicates that an internal call is connected or
held.
Handsfreeisactivated.
Displayswhenthephonebookisaccessed.
Thekeypadislocked.
The microphone is muted.
There are entries in the call list. The icon will
flash when new calls have been received.
A number and this Icon will be displayed to
indicate the number of missed calls.
IndicatesyouhaveanewVoiceMailmessage.
Please contact your Service provider for
information.
The handset ringer is set to “Off”.
An alarm is set.
TELEphONE OpERATION hANdSET dISpLAY INFORMATION
Indicates that the handset is registered and
within range of the base station
Iconblinkswhenthehandsetisoutofrange
or is searching for the base.

10
Telephone
Taking a call
Yourphoneisringing.
If the handset is not in the base station:
PresstheTALKbutton.ToactivateHandsfree
press the TALK button once again.
If the handset is in the base station and Auto Talk is
not activated:
PresstheTALKbutton.ToactivateHandsfree
press the TALK button once again.
If the handset is in the base station and Auto Talk is
activated:
Pickupthehandsetfromthebase-the
callwillbetakenautomatically.
Making a call
Enterthetelephonenumber.Deletewrong
charactersbypressingthesoftkeyunder
.
The telephone number is being dialled.
Ending a call
/ PresstheENDbuttonorreplacethe
handset in the base station.
Redial
Open the redial list.
/ Select an entry.
PresstheENDbutton.
Note:
YoucanalsopresstheTALKbuttonandyou
will hear the dialling tone. The entered number
will be dialled immediately. It is not possible
to correct wrong digits individually using this
dialling procedure.
Note:
Yourhandsetsavesthelast10dialledtelephone
numbers.Ifacallerisstoredinyourphonebook,
the name will be displayed.
TELEphONE

11
Making a call from the call list
Open the call list.
/ Select an entry.
Press the TALK button.
Making a call from the phone-book
Openthetelephonebook(right
softkeyunder ).
/ Select an entry.
Press the TALK button.
Note:
Yourhandsetsavesthenumbersofthelast20
incoming calls in the call list. If a caller is stored
inyourphonebook,thenamewillbedisplayed.
Savingcanonlytakeplaceifthefunction“Phone
numbertransmission(CLIP)”isavailableatyour
connectionandcallerIDisnotsuppressedby
the caller or was not transmitted for any other
reason.
Note:
Youcanstoreupto50entriesinthephonebook.
Forcreatingentriesseesection“Phonebook”.
Call timer
Yourhandsetautomaticallytimesthedurationofevery
call in minutes and seconds.
Setting the earpiece/loudspeaker
volume
/ Duringacallyoucanadjustthe
volume in 5 levels when using the
handset the earpiece volume is
adjusted and when using handsfree
thespeakervolumeisadjusted.
These seperate settings will remain
at the last selected level when you
end the call.
Muting the microphone
Duringacallyoucanswitchyourhandset’smicrophone
off.
Pressthesoftkeyunder .
Tounmutepressthesoftkeyunder .
TELEphONE TELEphONE

12
Internal calls
Making an internal call
Press the INTkey.Entertheinternal
number of the desired handset.
Transferring an external call to another handset
Duringanexternalcall...
Press the INTkey.
Entertheinternalnumberofthe
desired handset.
Theexternalcallisputonhold.When
the called handset answers you
can announce the call transfer.
PresstheENDkey.Thecallwillbe
transferred.
Note:
Internalcalls,transfersandconferencecalls
are only possible if multiple handsets are
registered.
Note:
If the called handset does not answer you will
getbacktotheexternalcallbypressingthe
softkeyunder .
3-Party Conference
Duringanexternalcall...
Press the INTkey.
Entertheinternalnumberofthe
desired handset.
When the called handset answers
pressthesoftkeyunder .
The3-partyconferenceis
established.
External call during an internal connection
When you are on an internal call an
attention tone in the earpiece will
announceanincomingexternalcall.
PresstheENDkey.Theinternalcall
will be ended.
Theexternalcallwillbesignalled.
PresstheTALKkeytotakethe
externalcall.
Note:
Any handset hangs up during a conference call
will leave the other handset still in connection
withtheexternalcall.
TELEphONE

13
Other features
Key lock
Pressandholddownthe#keyuntil
Keypad Locked appears in the display.
Forunlockingthekeypadagain
pressthesoftkeyunder and
subsequentlythe#keybriey. Keypad
Unlocked appears in the display.
Switching the handset ringer on/off
Pressandholddownthestar-keyuntil
Ringer Off appears in the display.
Note:
Thekeylockpreventsfunctionsassignedto
buttons being activated inadvertently. Incoming
callscanstillbetakeninthenormalwayeven
whenthekeylockfunctionisactivated.
Note:
Youcanturnofftheringerviathemenuitem
“Handset/RingerVolume”aswell.
To turn the ringer on again press
andholddownthestarkeyuntil
Ringer Off disappears.
Muting the handset ringer for an
incoming call
Pressthesoftkeyunder .
Switching off the handset
PressandholddowntheEND
button. After a few seconds the
handset will be switched off. The
display illumination goes down.
To switch the handset on again
pressandholddowntheEND
button until the display is activated
again.Youcanalsosimplyputthe
handset into the base station.
Note:
In case of an incoming call you can mute the
handsetringer.Nevertheless,youwillbeable
totakethecallaslongasthecallerdidnot
hang up.
Note:
Youcanswitchoffthehandsetforsaving
battery capacity.
Note:
Baseunitwillstilloperateevenwhenallhandsets
areturnedOFF.
TELEphONE OThER FEATURES

14
Call Log / Redial
ToreceiveCallerIDyoumayneedtocontactyour
telephoneserviceprovider,toactivateandadviseof
anychargesforthisservice.CallerIDletsyouseethe
phonenumbersofyourcallersonthehandsetdisplay,
beforeyouanswerandinyourCallLogafterwards.The
CallLogstoresthelast10externalcalls,whetherornot
youansweredthecall,soyoucancallthembacklater.
Only the most recent call is saved if there are repeat
callsfromthesamenumber.WhentheCallLogis
full,thenextnewcallwillreplacetheoldestentry.
Ifyou'vegotanewcallintheCallLog,theCaller
Displayiconwillappearonthehandsetdisplay.
If the received number is the same as one in your
phonebook,thenamefromthephonebookwill
display as well as the number.
Ifacallisfromsomeonewhowithheldtheirnumber,
thedisplaywillshowWITHHOLDID.
Ifthecallisfromsomeonewhosenumberisunavailable,
orifyouhavenotsubscribedtoCallerIDbuthavesetthe
dateandtime,thedisplaywillshowCALLINGwhenitis
receivedandUNAVAILABLEintheCallLog.
Access call log
PressCALLLOG(down)keyinstandbymodeand
press Navigationkeytobrowsethecalllist.Thecalls
are displayed in chronological order with the most
recent call at the top of the list.
1. Press Option softkeytosavecalllistnumber
entryintothephonebook.
Savecalllistentryintothephonebook
2. PressCALL LOG(down)keyinstandbymode
to go to the call list.
3. Press the Navigationkeytoselectanentry.
4. PresstheOption softkeytoselectSAVE
NUMBERandthenpressOKkeytoselect.
(Enterthenameofthecontact(maximum12
characters)andthenpressOKkeytoconrm.
Delete a Call Log entry
1. Press
CALL LOG(down)keyinstandbymode
to go to the call list.
2. PressOption softkeytoselectDELETEand
then press OKkeytoselect.
(PressOKkeyagaintoconrm.Aconrmation
beepisplayed.)
Delete all entries in the Call Log
1. Press
CALL LOG(down)keyinstandbymode
to go to the call list.
2. PressOption softkeytoselectDELETEALL
and then press OKkeytoselect.
(PressOKkeyagaintoconrm.Aconrmation
beepisplayed.)
CALL LOG / REdIAL

15
Editing the call list
Open the call list.
/
Selectanentry.Dateandtimeofthe
respectivecallareshown.Ifthecaller’s
numberisstoredinthephonebook,
the name will be shown in addition.
Pressthesoftkeyunder .
/ Select one of the following options
andpressthesoftkeyunder
.
Save Number The telephone number will be
storedinthephonebook.Enter
aname,conrmoreditthe
telephone number and select a
melody for the entry.
Delete
The entry will be deleted immediately.
Delete All The complete list will be deleted
after a confirmation query.
Editing the redial list
Open the redial list.
/ Selectanentry.Ifthecaller’snumber
isstoredinthephonebook,the
name will be shown in addition.
Pressthesoftkeyunder .
/ Select one of the following options
andpressthesoftkeyunder
.
Save Number The telephone number will be
storedinthephonebook.Enter
aname,conrmoreditthe
telephone number and select a
melody for the entry.
Delete The entry will be deleted
immediately.
Delete All The complete list will be deleted
after a confirmation query.
Call waiting
IfyouhavesubscribedtoCallWaitingservice,the
earpiece will emit a beep tone to inform you that
there is a second incoming call. The number or name
of the second caller will also be displayed on your
phoneifyouhavesubscribedtoCallerID.Please
contactyournetworkprovdierformoreinformation.
CALL LOG / REdIAL CALL LOG / REdIAL

16
Phone Book
Creating a new entry
Openthetelephonebook(right
softkeyunder ).
Emptytelephonebook:Phonebook
Empty is shown. After pressing the
softkeyunder the display
shows New Entry.
If there are entries: the first entry is
shown.
Pressthesoftkeyunder .
ConrmNew Entrywiththesoftkey
under .
Note:
Yourphonecanstoreupto50private
phonebookentrieswithnamesandnumbers.
Youcanassigneachentrytoagroup.These
groups can signal incoming calls with different
melodies. Always enter the phone numbers
with the area code; this enables a correct
display of the respective caller for whom there
isanexistingentryandwhosephonenumber
transmission to your connection is available.
Enterthename(max.16digits).
Letters are also imprinted on the
digitkeys.Letters,digitsandspecial
characters are entered by pressing
therelevantkeytherespective
numberoftimes.Youcandelete
thelastcharacterwiththesoftkey
under . Use to swich
tocapitalsandbackagain.After
ashorttimethecursorskipsone
position forwards.
After having entered the name
pressthesoftkeyunder .
Enterthetelephonenumber(max.
24digits).Ifyourtelephoneis
connectedtoaPBXstartthe
telephone number with the access
code.Ifadiallingpauseisneeded,
press after the access code the 0
keyforapprox.2sec.APappears
in the display.
After having entered the telephone
numberpressthesoftkeyunder
.
/ Select a melody for this entry.
Havingdonethispressthesoftkey
under .
Backtostandbymode.
phONE BOOk

17
Editing telephone book entries
Openthetelephonebook(right
softkeyunder ).
/ Select an entry.
Pressthesoftkeyunder .
/ Select one of the following options
andpressthesoftkeyunder
.
New Entry Youcancreateanewentry.
Edit Entry Youcanedittheentry.Usethe
softkeyunder to delete
characters and numbers then add
new characters and numbers as
required.Pleasereferto“Creating
a new entry”.
Show Details The entry is shown.
Delete Entry The entry will be deleted.
Delete All The complete list will be deleted
after a confirmation query.
Copy Entry The entry is being copied to another
suitable registered handset. All
registered handsets will be shown.
Select the desired handset using
thearrowkeys and
andpressthesoftkeyunder
.Pressthesoftkeyunder
on the respective handset
to allow the operation.
Copy All All entries will be copied to another
suitablehandset.Bythisallentries
on the other handset will be
deleted.
Copy Append All entries will be added to the other
suitablehandset’sphonebook.
Note:
Youcanenterthefirstletterofthedesired
nameusingthealphanumericalkeypad.The
first matching entry is shown. Scroll to the
desiredentryusingthearrowkeys and
.
phONE BOOk phONE BOOk

18
Telephone settings
Date/Time
Openthemenu(leftsoftkeyunder
).
/ Select Time and press
thesoftkeyunder .
/ Select Date and Time and press
thesoftkeyunder .
Enterstepbysteptheyear,the
month,theday,thehourandthe
minuteusingthedigitkeysand
confirmeachwiththesoftkey
under .
Note:
• Incaseofmainsfailurethissettingswillbe
deleted.
• Thedateandtimeonyourphonemaybe
updatedfromtheCallerIDinformation
providedbyyournetworksupplier.
Time format
Openthemenu(leftsoftkeyunder
).
/ Select Time and press
thesoftkeyunder .
/ Select Set Time Format and press
thesoftkeyunder .
/ Select 12Hour or 24Hour and
pressthesoftkeyunder .
Alarm
Openthemenu(leftsoftkeyunder
).
/ Select Time and press
thesoftkeyunder .
/ Select Set Alarm and press
thesoftkeyunder .
/ Select one of the following options
andconrmwiththesoftkeyunder
.
Once Enterthealarmtimeusingthedigit
keysandselectamelody.Thealarm
is given once at the specified time.
Every Day The alarm is repeated daily at the
speciedtime.Fordetailsforsetting
refer to “Once”.
TELEphONE SETTINGS
Table of contents
Other Oricom Cordless Telephone manuals

Oricom
Oricom CARE620 Series User manual

Oricom
Oricom IP800 User manual

Oricom
Oricom M4000 User manual

Oricom
Oricom M4000 User manual

Oricom
Oricom Professional Series PRO910 User manual

Oricom
Oricom eco50 Series User manual

Oricom
Oricom eco5100 Series User manual

Oricom
Oricom eco85 DECT User manual

Oricom
Oricom DECT MI40 User manual

Oricom
Oricom T1000 User manual

Oricom
Oricom pro600 DECT User manual

Oricom
Oricom M2400 Series User manual

Oricom
Oricom Colombo one User manual

Oricom
Oricom S209 User manual

Oricom
Oricom ECO710 User manual

Oricom
Oricom ECO800 User manual

Oricom
Oricom eco71 User manual

Oricom
Oricom M500 User manual

Oricom
Oricom M5200 Series User manual

Oricom
Oricom M5050 User manual