6
Interference
If the sound quality gets worse as you move around
because you are too near to another phone or other
electrical equipment. Move to a different position to
Checking your answering machine
messages remotely
answering machine answers and starts playing
your greeting message.
on the phone you used to dial and enter the
before you can use the remote access feature.
5. When you are finished listening to your
Charging the batteries
The handset warms up during the charging process.
charge the handset with charging units from other
manufacturers. The battery charge status is indicated
in the display. When the battery charge has reached its
Setting the time and date on the
handset
the DATE TIME menu option.
Setting the display language
The display language can be set to one of the 9
using the HANDSET > LANGUAGE menu option.
Radio signals between handset and
base unit
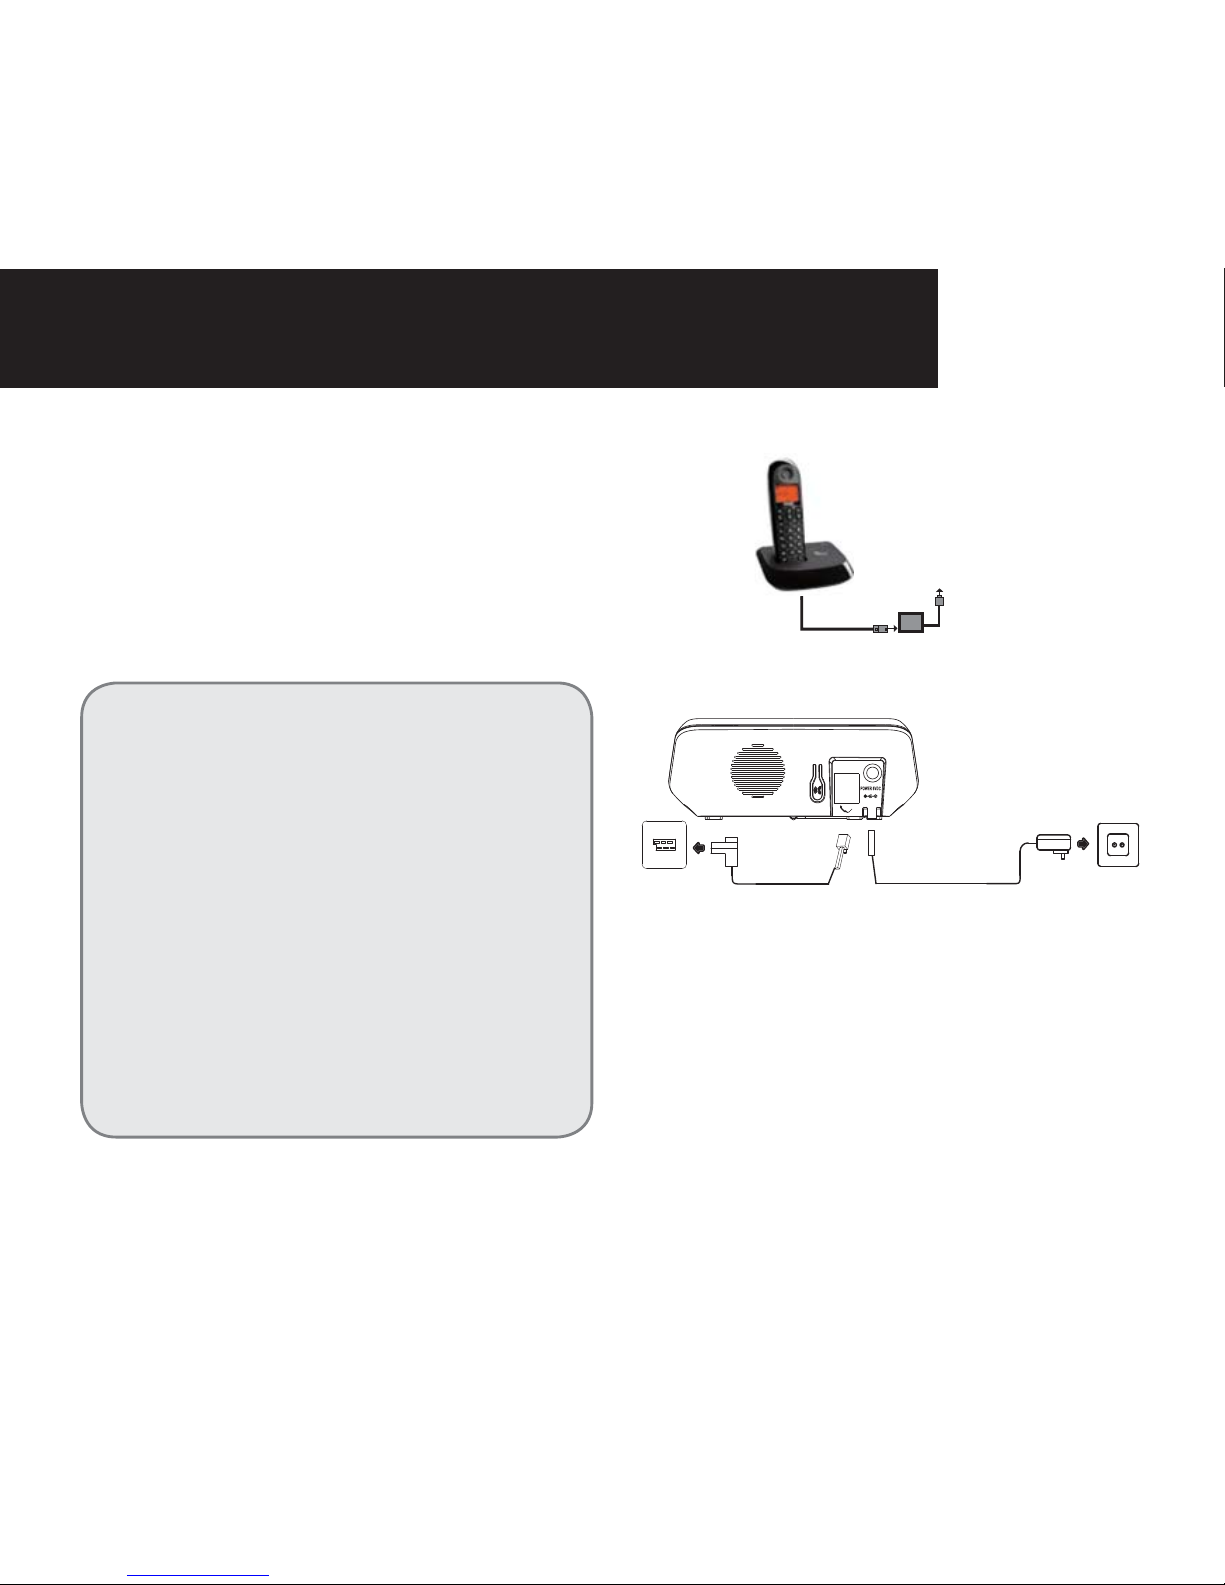
GETTING STARTED