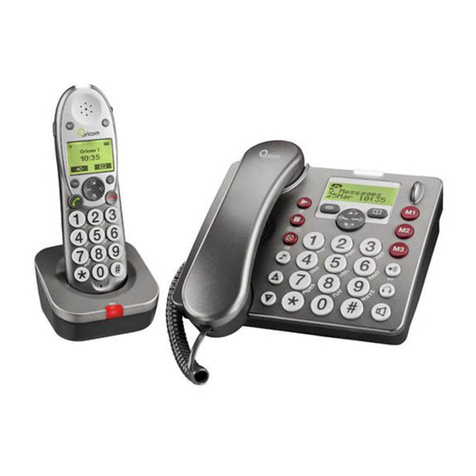
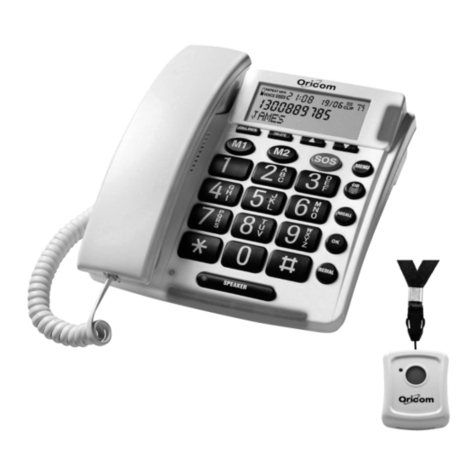
Oricom CARE920-1 User manual

Keep this user guide for future reference. Always retain your
proof of purchase in case of warranty service.
USER’S GUIDE
CARE920-1
Amplied Phone with direct dial picture buttons and
cordless handset

2
Table of Contents
General Information ......................................................................... 3
Package Contents ............................................................................ 5
Important Safety Instructions.......................................................... 6
Location............................................................................................. 7
Installing Your Phone....................................................................... 7
Getting to Know Your Phone......................................................... 10
Using Your Phone .......................................................................... 19
Phonebook...................................................................................... 27
Phone Settings .............................................................................. 29
Registration Cordless Handset to Telephone Base ................ 32
Reminder ........................................................................................ 35
Speed Dial Keys (Key 1 to Key 9) ............................................... 37
Caller Display (Network Dependent).......................................... 38
Call Block ....................................................................................... 41
Voice Mail (Network Dependent) ................................................ 46
Answering Machine ...................................................................... 46
Technical Specications.............................................................. 55
Troubleshooting............................................................................ 56
Safety .............................................................................................. 59
Environment................................................................................... 60
Express Warranty (Australia)...................................................... 60
Need Help?
If you need assistance setting up or using your Oricom product now or in the
future, call Oricom Support.
Australia 02 4574 8888
www.oricom.com.au
Mon-Fri 8am – 6pm AEST
New Zealand 0800 67 42 66
Mon-Fri 10am – 8pm NZST

3
General Information
General Information
WARNING
It is very important that you read the User Guide carefully as it
contains detailed information on installation, programming and
operational issues which you will need to be aware of to ensure
the Care Phone operates properly. Following is a list of some of
the important issues and important warnings which you need to be
aware of.
This is a summary of the important issues you must still read the
User Guide in full.
• Thistelephonewillnotoperateintheeventofamains
power failure. Please ensure that a separate telephone, not
dependentonlocalpower,isavailableforemergencyuse.
• Thetelephoneisdesignedforindooruseonly.Donotinstall
the telephone in areas where there is the risk of an explosion,
excessiveexposuretosmoke,dust,vibrations,chemicals,
moisture and heat.
• Donotuseyourtelephoneduringanelectricalthunderstorm
as it is possible to get an electric shock. Refer to information
contained in Telstra White pages directory.
• Theearpieceofthehandsetmayattractsmallmetalobjects
such as staples and pins. Care should be taken when placing
the handset near these items.
• Settingthereceivervolumetomaximummay,undersome
situations cause ear damage. We suggest returning the
handsetvolumecontroltothe“0”positionaftereachcall.
• Donotinstallindamplocationssuchasabathroomorlaundry,
do not expose the unit to direct sunlight.

4
General Information
Notes for operation in New Zealand
The grant of a Telepermit for any item of terminal equipment indicates only that
Spark has accepted that the item complies with the minimum conditions for
connection to its network. It indicates no endorsement of the product by Spark,
nordoesitprovideanysortofwarranty.Aboveall,itprovidesnoassurancethat
any item will work correctly in all respects with another item of Telepermitted
equipment of a different make or model, nor does it imply that any product is
compatiblewithallofSpark’snetworkservices.
ThisequipmentshallnotbesettomakeautomaticcallstotheTelecom“111”
EmergencyService.
Thisequipmentmaynotprovidefortheeffectivehand-overofacalltoanother
deviceconnectedtothesameline.
This equipment should not be used under any circumstances that may constitute
a nuisance to other Telecom Customers.
REN (RN for New Zealand)
TheREN(RingerEquivalenceNumber)or(RN)isofsignificanceonlyifyou
wish to connect more than 1 telephone to your telephone line. A standard
telephonelinehasamaximumRENcapacityof3(RNof5).Itispossible
toconnect3deviceswithaRENof1(RNof1)withnodegradationtothe
product’sperformance.Exceedingthislimitmaycausethevolumeoftheringer
in any phone to decrease or not ring at all.

5
Package Contents
Package Contents
This package contains the following items:
1. Cordless handset
2. Cordless handset base
3. Base unit
4. Base unit handset
5. Coiled Cord
6. ACpoweradaptors(1forbaseunitand1forcordlesshandset)
7. Telephone line cord
8. 3pcs of AAA 500mAh NiMH rechargeable batteries
9. User Guide
10.4pcsofsparetransparentphotocovers
User manual

6
Important Safety Instructions
When using your telephone equipment, basic safety precautions should always
befollowedtoreducetheriskoffire,electricshockandinjury,includingthe
following:
1. Read and understand all the instructions.
2. Follow all warnings and instructions marked on the product.
3. Unplugthisproductfromthewalloutletbeforecleaning.Donotuseliquid
cleaners alcoholic wipes or aerosol cleaners. Use a damp cloth for cleaning.
4. Toavoidhearingdamage,pleasemakesureanyonewhousesthisproduct
is aware that the product can produce loud sound when Audio boost
function is on.
5. Donotusethisproductnearwater(forexample,nearabathtub,kitchen
sink,swimmingpool).
6. Donotexposethetelephonetodirectsunlightorextremecoldenvironment.
Donotputthetelephoneclosetoaheatingsourcesuchasradiators,
cookers, etc.
7. Donotoverloadwalloutletsandextensioncordsasthiscanresultinthe
riskofreorelectricshock.
8. NEVER use your phone outdoors during a thunderstorm-unplug the base
from the telephone line and the mains socket when there are storms in your
area.
9. Donotusethetelephonetoreportagasleakinthevicinityoftheleak.
10.UseonlythesuppliedNiMH(NickelMetalHydride)batteries!Theoperation
periods for the handsets are only applicable with the default battery
capacities.
11. The use of other battery types or non-rechargeable batteries/primary cells
can be dangerous. These may cause interference and/or unit damages.
The manufacturer will not be held liable for damage arising from such
noncompliance.
12.Donotusethirdpartychargers.Thebatteriesmaybedamaged.
13.Disposeofbatteriessafely.Donotimmersetheminwater,burnthem,or
store them where they could get punctured.

7
Location
Location
Formaximumcoverageandreducedinterference,herearesomeguidelines
you should consider for base unit location,
- Placeataconvenient,height,andcentrallocationwithminimalobstructions
betweenthecordlesshandsetandbaseunitinanindoorenvironment.
- Placeawayfromelectronicappliancessuchastelevisions,microwaveovens,
radios,personalcomputers,wirelessdevicesorothercordlessphones.
- Avoidfacingradiofrequencytransmitters,suchasexternalantennasofmobile
phone cell stations.
- Avoidpluggingitintothesamepowerpointasothermajorhouseholdelectrical
appliances because of the potential for interference.
Trymovingtheapplianceorthebaseunittoanotherpoweroutlet.
If reception is poor, try to relocate to base unit if possible.
Dependingonthesurroundingconditionsaswellasspatialandstructural
factors, the range may be reduced. The range indoors is normally less than
outdoors.
Installing Your Phone
Connecting the Base Station
1. Plugoneendofthetelephonelinecordintothetelephonejackonthe
bottom of the base.
2. Plug the small end of power adaptor into the bottom of the base into the
round socket.
3. Plug the mains power end of power adaptor into a wall power outlet.
4. Plugtheotherendofthetelephonelinecordintothetelephonejack.
5. Alwaysusethecablesprovidedinthebox.

8
Installing Your Phone
Wall mounting position
NOTE:
In Australia some phone wall sockets are the old "non modular"
style.Ifyouhavethistypeofwallsocketyouwillneedtopurchase
amodularconverterplussimilartothecorrespondingimage(not
supplied).Thesecanbeobtainedfrommostelectronicstores.

9
Installing Your Phone
Connecting the Charger
Plug the power adapter into a mains socket.
IfyouhaveaBroadbandline.
If you connect your telephone to a line with a broadband connection, you will
need to insert a micro-filter between the telephone and the telephone line,
otherwise you may get interference between the telephone and the broadband.
Inafixedlinewithbroadband,everytelephonemusthaveamicro-filter
connected,notjusttheoneatthetelephonepointthatyourmodemisconnected
to.(Broadbandltersnotincluded)
Installing and charging the batteries
1. Slidedowntoopenthebatterycompartmentcoveronthecordlessphone.
2. Place the 3 supplied AAA-size NiMH rechargeable batteries as indicated.
Pay extra attention to direction of polarity.
3. Reinstallthebatterycover.
4. Place the handset on the base and charge for 15 hours before using the
handsetforthersttime.
Notes:
1. Use only the supplied NiMH rechargeable batteries.
2. Ifthehandsetwillnotbeusedforalongtime,disconnectandremovethe
batteriestopreventpossibleleakage.

10
Getting to Know Your Phone
Base Station Overview
1
18 20
1516
13
24
14
22
4
5
8
19
21
7
6
10
2
9
3
11
23
12
17
1. INCOMING CALL LED
• Flasheswhenthereisanincomingcall.
• Onwhentherethephoneisinuse.
• Onwhenadeviceisbeingregistered.
• Onwhenanothertelephone(cordless)isinuse.

11
Getting to Know Your Phone
2. MESSAGE LED
• Onwhentheansweringsystemison.
• Flasheswhentherearenewmessages/memosintheansweringsystem.
• Flashesslowlywhenpressing for slow play.
3. DIRECT MEMORY KEYS (A, B, C, D)
• Presstodialoutphonenumberstored.
12
21.8mm x
21.8mm
3
4.
• Presstorepeatplayingthecurrentmessagefromthebeginning.
• Presstwicetoskipbackwardtothepreviousmessage.
5.
• Presstoplaythemessage.
• Pressagaintostopthemessageplayback.
6.
• Presstodeletethemessagecurrentlyplaying.
• Inidlemode,longpresstodeletealloldmessages.
7.
• Presstoturnontheansweringmachine.
• Pressagaintoturnofftheansweringmachine.
8.
• Presstoslowdownthemessageplayback.
9.
• Presstomake,answerorendacallthroughbasespeaker.
• Presstoswitchbetweenthebasehandsetandthebasespeakerphone
during a call.
• OrangeLEDisonduringspeakermode.
10. ALPHANUMERIC KEYPAD / /
• Inidle/pre-dial/editingmode/duringacall:Presstoenternumbers.
• Pressanykeytoansweranincomingcall.
• Duringacall:Pressandhold to answer an incoming call when you
receiveacallwaitingalert*.
*Subjecttosubscriptionandavailabilityoftheservicefromthexedlineoperator.

12
Getting to Know Your Phone
11.
• Duringacall:Slideupanddowntoincreasethevolume/decreasethevolume.
• Duringmessageplayback:Slidetoadjustthevolume.
12.
• Soundexperience:select“NATURAL”,“BASS”or“TREBLE”duringacall
BASS(lowestposition)TREBLE(midposition)NATURAL(highestposition)
Warning:Thehandsetmayemithighvolumeofsound.TakeExtraCare
whenyouuseaudioboostkey,recommendtoadjustsuitablevolumeby
setting to minimum, and then turning on audio boost key.
13. AUDIO BOOST
• Presstoenhancetheclarityandloudnessthroughearpieceofthebase
during a call.
14. CALL BLOCK
• InIdlemode:PresstogotoCall Block menu.
• Inringingmode:PresstoblockincomingcallnumberifBlock Set is set to
ON.
15. CALL LIST
• Inidlemode:PressandholdtoaccesstheCallList.
16. REDIAL LIST
• Pressandholdtoaccessredialmenu.
17. SOFT KEYS
• Pressthesekeystoconrmtheoptionsonthescreenabovethekeys.
18. UP KEY
• Inmenumode:Presstoscrollupthemenuitems.
• InPhonebooklist/Rediallist/CallList:Presstoscrollupthelist.
• Whileenteringnamesornumbers:Presstomovethecursortotheleft.
19. VOLUME INCREASE KEY
• Duringacallandmessageplayback:Presstoincreasethevolume.
BASS
(lowestposition)
TREBLE
(midposition)
NATURAL
(highestposition)

13
Getting to Know Your Phone
20. DOWN KEY
• Inmenumode:Presstoscrolldownthemenuitems.
• InPhonebooklist/Rediallist/CallList:Presstoscrolldownthelist.
• Whileenteringnamesornumbers:Presstomovethecursortotheright.
21. VOLUME DECREASE KEY
• Duringacallandmessageplayback:Presstodecreasethevolume.
22. PHONEBOOK
• Inidlemode:Presstoaccessthephonebook.
23. BASE STAND IN WALL MOUNTING POSITION
24. HANDSET HOOK FOR WALL MOUNTING POSITION
Display Icons and Symbols of LCD
Display icons Description
OK Softkeyiconforconrmselectionandsaveinputdata.-For
Base only
Fullbatterypowerlevel.-ForCordlessHandsetonly
2/3batterypowerlevel.-ForCordlessHandsetonly
1/3batterypowerlevel.-ForCordlessHandsetonly
Flashes when the battery is low and needs charging. - For
Cordless Handset only
The speaker phone is in use.
On: if the handset ringer is turned off.
On:whentherearereceivednewVoiceMessageWaiting
(VMWI)notyetread*.
Off:whenallthevoicemessageshavebeenread.(Network
servicedependent)*
Signal strength indicator, 3 bars indicates strong signal.
- For Cordless Handset only
Displayswhentherethesignalstrengthismoderate.
Displayswhentherethesignalstrengthisweak.
Off when handset is out of range from the base.
On: New call list- Missed and new calls.

14
Getting to Know Your Phone
On:Theansweringsystem(TAM)isturnedon.
Flashes:whennewTAMmessageisreceived.
Off:Theansweringsystem(TAM)isturnedoff.
On: when an alarm is set.
Off: when an alarm is off.
On:whenaudioboosterisactivated(inearpiecemode).
Off:whenaudioboosterisdeactivated.
On: when the telephone line is in use.
Flashes: when there is an incoming call.
On:whentheentryincalllistisacontactsavedinblacklist.
Menu - Base unit.

15
Getting to Know Your Phone
Hearing Aid Compatibility:
Special feature which helps to eliminate background noise and interference
when you use this telephone with a hearing aid.

16
Getting to Know Your Phone
Handset Overview
1
11
2
12
3
4
5
10
6
9
13
7
8
1. INCOMING CALL LED
• Flasheswhenthereisanincomingcall/thebaseispagingthehandset.
2. CHARGE LED
• Onwhenthehandsetischarginginthebase.
3.
• Inmenumode:Presstoscrollupthemenuitems.
• Whileenteringnamesornumbersinthephonebook:
Presstomovethecursortotheleft.
4.
• Inidlemode:Presstoaccessphonebook.
5.
• Duringacall:Presstoendacallandgobacktoidlescreen.
• Inediting/predialingmode:Presstoclearacharacter/digit.
• Inmenu/editingmode:Pressandholdtogobacktoidlescreen.
• Inringing:Presstosuppresshandsetringer.
6.
• Inmenumode:Presstoscrolldownthemenuitems.
• Whileenteringnamesornumbersinthephonebook:
Presstomovethecursortotheright.

17
Getting to Know Your Phone
7.
• Inidle/pre-dialingmode:Presstomakeacall.
• Duringringing:Presstoansweracall.
• Duringacall:Presstoturnon/offthespeakerphone.
8.
• Presstoaccessthemenu.
• Whileinamenu:Presstoselectanitemorsaveanentryorsetting.
9.
• PresstodialoutphonenumberstoredinmemoryA,B,C,orD.,,,
10. ALPHANUMERIC KEYPAD / /
• Inidle/pre-dial/editingmode/duringacall:
Press to enter characters /numbers.
• Pressanykeytoansweranincomingcall.
• Duringacall:Pressandhold key to answer an incoming call when you
receiveacallwaitingalert*.
11. AUDIO BOOST
• Duringacall:Presstoboostthehearingvolumeinearpiece.40dBat
maximum.
Warning:Theproductmayemithighvolumeofsound.Takeextracare
whenyouuseaudioboostkey,itisrecommendedtoreducevolumetominimum
levelbeforepressingaudioboostkey.
12.
• Duringacall:slidetoincreasethevolume/decreasethevolume(6levels).
13.
• Soundexperience:select“NATURAL”,“BASS”or“TREBLE”duringacall.
14.
• Inidlemode.Longpresstoaccesstherediallist.Shortpressforstar.
• Intalkmode.Onlyforstar(accesstolocalserverservices).
BASS
(lowestposition)
TREBLE
(midposition) NATURAL
(highestposition)

18
Getting to Know Your Phone
Menu - Handset

19
Using Your Phone
Using Your Phone
Set Date & Time
Set Date & Time
Through telephone base:
1. Choose Menu.
2. Press or to select BS Setting, then press Ok.
3. Press or to select Date / Time, then press Ok.

20
Using Your Phone
4. Press or to select Set Time, then press Ok , enter the day, month,
year, then press Ok ,enterhour(24HRformat),andminutes,thenpress
Ok,youhearconrmationtones.
5. Press toselectAM/PM(12HRformat)
Note:ifwrongdigitisenteredDateorTime,youcanpress or to select the
right position and enter correct digit.
Through cordless handset:
1. Press on the handset in idle mode.
2. Press or to select HS Setting, then press .
3. Press or to select Date / Time, then press .
4. Press or to select Set Date, then press , enter the day, month, year,
then press ,enterhour(24HRformat),andminutes,thenpress , you will
hearconrmationtone.
5. Press toselectAM/PM(12HRformat)
Note:
1. Base station has to be connected to mains power during setting.
Make a Call
Preparatory Dialing
Through telephone base:
1. Enter the phone number and press or lift up corded handset to dial the
number.
2. Press C to clear entry number.
Through cordless handset:
1. Enter the phone number and press to dial the number.
2. Press to clear entry number.
Direct Dialing
Through telephone base:
Press or lift up corded handset and enter the phone number.
Through cordless handset:
Press to take the line and enter the phone number.
Call from the phonebook
Through telephone base:
1. Press OR press Menu and / to select Phonebook then Ok to
access the phonebook.
Table of contents
Other Oricom Telephone manuals

Oricom
Oricom TP29 User manual

Oricom
Oricom CARE80S User manual

Oricom
Oricom Pro900 User manual

Oricom
Oricom TP58 User manual

Oricom
Oricom Loud Clear TP1100 User manual

Oricom
Oricom TP110 User manual

Oricom
Oricom CARE80 User manual

Oricom
Oricom TP170WP User manual

Oricom
Oricom HP100 User manual

Oricom
Oricom Care10 User manual

Oricom
Oricom Professional Series PRO90 User manual

Oricom
Oricom TP58 User manual

Oricom
Oricom TP68 User manual

Oricom
Oricom TCR10 User manual

Oricom
Oricom TP9 User manual

Oricom
Oricom TP30 User manual

Oricom
Oricom TP150 User manual

Oricom
Oricom TP88 User manual

Oricom
Oricom CARE90 User manual

Oricom
Oricom TP9 User manual