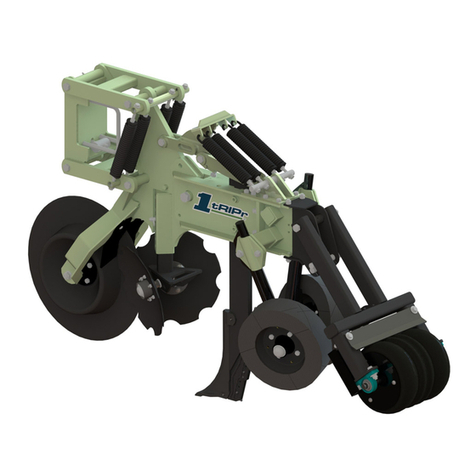
Orthman 8315 Cultivator User manual

INTRODUCTION
Orthman’s Vertical Fold Toolbars are the leading folding toolbars in the row crop industry. The innovative internal fold 4” x 24” cylinders can be set to fold
the toolbar to 90°, 115 °, 135°, or 180° making the Vertical Fold Toolbar the most versatile bar in agriculture. Vertical Fold Toolbars are factory set to fold to
the degree specied with the order. Vertical Fold Toolbars are available in size congurations up to 16 row 30”. The strong construction, utilizing 3/8” wall
tubing (1/2” wall tubing center sections on models totaling more than 30’ in total length), makes the Orthman Vertical Fold Toolbar a durable choice.
1-1
8315 Cultivator on Vertical Fold Toolbar
Category 3 or Category 4 three point hitches are available for Orthman Vertical Fold Toolbars and are available in multiple lengths and 3 dierent
hitch heights. Hinges are 14” wide and line-bored for smooth hinge movement and superior strength. All bars feature integrated bar stands, wing
rests (for toolbar foldings greater than 90°), safety lighting & decals.
This manual is considered to be an integral component of the
Vertical Fold Toolbar
and is designed to educate the owner and/or operator(s)
regarding safety, operation, maintenance, troubleshooting, and component identication. All personnel involved in the operation of this implement
are responsible for reading and understanding entire manual content. This manual is designed to keep the operator safe and knowledgeable as well
as prolong the life of the implement and maximize eld eciency. This manual should accompany the implement if it were ever to be sold.
We would like to thank you for placing your condence in Orthman Mfg., Inc. Your
Vertical Fold Toolbar
is manufactured to meet the highest
standards and is built with precision and strength to increase your agricultural operation’s dependability and protability.
Thank you for choosing Orthman.

INTRODUCTION
To The Dealer:
Inspect the implement thoroughly after assembly to be certain it is functioning properly before delivering it to the customer. The
following checklist is a reminder of points to cover. Check o each item as it is found satisfactory or after proper adjustment is
made.
Pre-Delivery Checklist
1. All Hardware properly tightened.
2. Lubrication of grease ttings.
3. All decals properly located and readable.
4. All implement tools and options are installed and set.
5. Check overall condition of implement.
6. Make sure Operator’s manual is included.
Date Set Up. Signature.
Delivery
Review the operator’s manual with the customer. Explain the following:
1. Introduce the machine to the customer. Give the customer this manual and encourage them to read it.
2. Make the customer aware of all the safety precautions that must be exercised when using and transporting this
machine.
3. Make customer aware of the dierent tooling options available.
4. This machine does not come set to run in the eld from the factory. The Field settings section in this manual is
meant to help set the machine for optimal performance. Explain all operating adjustments.
5. Explain to the customer that the life expectancy of this machine depends on regular maintenance as directed in
this manual.
6. Tell the customer to use the proper tools for service and make them aware of Orthman parts availability.
7. Write machine model number and serial number in the spaces provided below.
Date delivered. Signature.
Model Number.
Serial Number.
1-2

INTRODUCTION
WARRANTY
Orthman Mfg., Inc. warrants the whole goods products it manufactures to be free from defects in material or workmanship for a period of one (1) year from
the date of sale of the product(s) to the original user. Products not manufactured, but supplied by Orthman Mfg., Inc. on Orthman products, are subject to,
conform with, and are limited to the warranty of our suppliers.
Orthman Mfg., Inc. warrants the parts it manufactures to be free from defects in material or workmanship for a period of ninety (90) days from the date
of delivery of the product(s) to the original user. Products not manufactured, but supplied by Orthman Mfg., Inc. on Orthman products, are subject to,
conform with, and are limited to the warranty of our suppliers.
Warranty of Orthman whole goods and/or parts applies only to material and workmanship. Misuse, misapplication, neglect, alteration, accident, normal
wear, or acts of God aecting Orthman products are not eligible for warranty.
Warranty of serial numbered goods will only be considered if the product has a completed Warranty Registration on le at Orthman. This Warranty
Registration must be completed and returned to Orthman within thirty (30) days of the sale of the product(s) to the original user.
No serial numbered
goods or related parts and/or labor will be warranted without a Warranty Registration on le.
Warranty issues falling within the rst thirty days of a
product’s use will be handled at the discretion of Orthman. Warranty of parts will not require a Warranty Registration, but proof of date of delivery of the
product to the original customer must be provided.
WARRANTY CLAIMS:
A warranty claim and request to return defective product(s) must be presented to the Orthman Service Department by the selling
dealer describing the defect in material or workmanship of an Orthman product(s) within ten (10) days of its discovery. This claim may be made via phone,
e-mail, fax, or written request. Claims for warranty of serial numbered goods must include the Orthman product serial number and model number. Claims
for warranty of partswill not require a product serial number or model number, but must be identied by an Orthman part number. Claims for warranty of
whole goods or parts must also include proof of date of sale of the product to the original customer by an Orthman dealer.
The Orthman Service Department will proceed in making a preliminary decision as to the eligibility of the claim for warranty consideration. After the
Orthman Service Department deems it necessary to proceed with warranty consideration, a Return Goods Authorization (RGA) will be completed by the
Orthman Service Department in conjunction with the selling dealer. Upon completion of the RGA, the defective product(s) must be returned to Orthman
to ensure warranty consideration. Defective product(s) must be returned to Orthman by either the selling dealer or the customer. Customer delivery of
defective product(s) must be approved by Orthman and the selling dealer prior to delivery. The defective product(s) in question must be sent, freight
prepaid, within sixty (60) days of the discovery of the product(s) failure and initial warranty claim. Replacement product(s) may be sent to the selling
dealer, directly to the customer, or picked up at the Orthman facility. Replacement product(s), sent directly to the customer or picked up must be approved
by Orthman and the selling dealer. At the discretion of the Orthman Service Department, replacement product(s) may be sent prior to, or after, the
Orthman Service Department receives the defective product(s).
Any variation in the above procedure is at the sole discretion of the Orthman Service Department.
No products will be accepted at Orthman without all proper paperwork completed including Warranty Registration and RGA(s).
Parts returned to Orthman without proper authorization will be returned to the sender at the sender’s expense.
Orthman agrees to handle all warranty claims in a timely manner and will inform dealers of any revisions or modications to the Orthman Warranty Policy.
Eligible warranty claims will be processed by Orthman within sixty (60) days of receiving failed product(s) or a valid service or repair labor claim. Eligible
warranty claims regarding returned product(s) or service and/or repair labor will be paid through a credit memo issued to the appropriate dealer’s account
as determined by the Orthman Service Department.
If a warranty claim is found to be ineligible for warranty coverage, the Orthman Service Department will be responsible to inform the dealer in order to
determine the course of action to be taken. Orthman reserves the right to make changes in specication and design without notice and without incurring
any obligations to owners of products previously sold.
© Copyright 2010
Orthman Manufacturing Inc.
Lexington, Nebraska
All rights reserved.
Orthman provides this manual without warranty of any kind, expressed or implied. This manual
reects the product at the time of publication. All information within is based upon current
information on the publication date. Orthman assumes no responsibility for damages incurred due
to the use of the illustrations, information, and specications within this publication.
1-3

INTRODUCTION
TABLE OF CONTENTS
INTRODUCTION
General Information -
Vertical Fold Tillage Toolbar
.........................................................................................................................1 - 1
Delivery Checklist. ..........................................................................................................................................................................1 - 2
Warranty Information ....................................................................................................................................................................1 - 3
Table of Contents ............................................................................................................................................................................1 - 4
IMPORTANT SAFETY INFORMATION
Farm Safety.....................................................................................................................................................................................2 - 1
Your Protection - Equipment Safety - Safety Alert Symbol ............................................................................................................2 - 3
Signal Words - Shutdown and Storage ...........................................................................................................................................2 - 4
Safe Transport - Warning and Safety Lights...................................................................................................................................2 - 5
Safe Operation - No Riders..............................................................................................................................................................2 - 6
Practice Safe Maintenance..............................................................................................................................................................2 - 7
Practice Safe Maintenance - Prepare for Emergencies ...................................................................................................................2 - 8
Anhydrous Ammonia - Liquid Fertilizer Precautions - Safety Never Hurts .....................................................................................2 - 9
Safety Decals ................................................................................................................................................................................2 - 10
Orthman Decals and Orthman Serial Tag......................................................................................................................................2 - 14
PREPARATION AND SETUP
Toolbar Component Identication..................................................................................................................................................3 - 1
Preparing the
Vertical Fold Tillage Toolbar - Implement-to-Tractor Connection
............................................................................3 - 2
Shipping Conguration...................................................................................................................................................................3 - 3
Light Kit Component Identication................................................................................................................................................ 3 -4
Light and Light Bracket Assembly ..................................................................................................................................................3 - 5
Light Cable Assembly .....................................................................................................................................................................3 - 6
Change Degree of Fold....................................................................................................................................................................3 - 7
Adjustable Wing Rest .....................................................................................................................................................................3 - 8
90 Degree Folding Process - SMV Sign Assembly...............................................................................................................................3 - 9
1-4

INTRODUCTION
TABLE OF CONTENTS
FIELD SETTINGS
Field Operation................................................................................................................................................................................4 - 1
Rigid Lock Pin & Wing Leveling Bolts..............................................................................................................................................4 - 2
TROUBLESHOOTING
Tractor will not hook-up to toolbar .................................................................................................................................................5 - 1
Toolbar will not fold or unfold.........................................................................................................................................................5 - 2
Toolbar will not fold or unfold.........................................................................................................................................................5 - 3
Removal of internal cylinder assembly ...........................................................................................................................................5 - 4
Removal of internal cylinder assembly ...........................................................................................................................................5 - 5
Notes...............................................................................................................................................................................................5 - 6
MAINTENANCE
Practice Safe Maintenance..............................................................................................................................................................6 - 1
Torque Specications......................................................................................................................................................................6 - 2
Lubrication .....................................................................................................................................................................................6 - 3
Implement Inspection - Implement Storage ..................................................................................................................................6 - 4
PARTS IDENTIFICATION
Hitch Assembly (Category 3) ...........................................................................................................................................................7 - 1
Hitch Assembly (Category 4)...........................................................................................................................................................7 - 2
Hitch Clamp Assembly.....................................................................................................................................................................7 - 3
Internal Fold Assembly (180 degree fold) .......................................................................................................................................7 - 4
Internal Fold Assembly (16R30 Conguration)................................................................................................................................7 - 5
Toolbar Hinge Assembly..................................................................................................................................................................7 - 6
Hydraulic Cylinder Internal Components.........................................................................................................................................7 - 7
Hydraulic Hose Assembly ................................................................................................................................................................7 - 8
Light Mounts and SMV Bracket Assembly.......................................................................................................................................7 - 9
Light Kit Assembly - Wesbar .........................................................................................................................................................7 - 10
Light Kit Assembly - Cobo .............................................................................................................................................................7 - 11
Bar Stand Assembly.......................................................................................................................................................................7 - 12
Adjustable/180°/170° Wing Rest Assembly......................................................................................................................................7 - 13
1-5
Table of contents
Other Orthman Farm Equipment manuals
Popular Farm Equipment manuals by other brands

Schaffert
Schaffert Rebounder Mounting instructions

Stocks AG
Stocks AG Fan Jet Pro Plus 65 Original Operating Manual and parts list

Cumberland
Cumberland Integra Feed-Link Installation and operation manual

BROWN
BROWN BDHP-1250 Owner's/operator's manual

Molon
Molon BCS operating instructions

Vaderstad
Vaderstad Rapid Series instructions