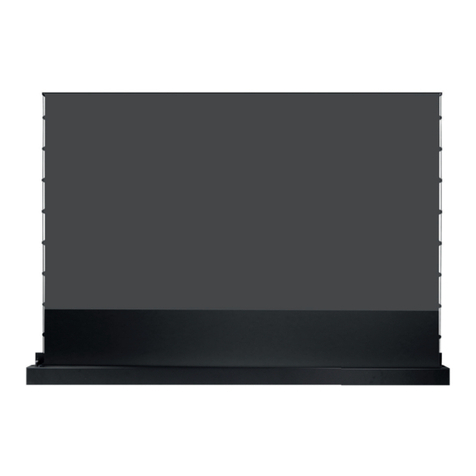
OS STP-HM-MRK2 User manual

1
STP12720E
■ Please kindly read this instruction manual carefully and use the product properly. This manual
should be kept for future reference.
Electric Screen P Selection
(Tab-tensioning system)
Index
Safety Precaustions ・・・・・・・・・・・・2〜3
Construction・・・・・・・・・・・・・・・・4
Accesssories・・・・・・・・・・・・・・・・5
Installation, Remotecontroller・・・・・・6
Howto use the screen ・・・・・・・・・・・7〜8
Maintenance、Option・・・・・・・・・・・・9
FAQ・・・・・・・・・・・・・・・・・・・10
STP-***HM-MRK2
Instruction Manual
Thankyou for purchasing OSproduct.
The installation of the device requires technical knowledge
andplease do not install iton your own.
●Please contact the installer or the distributor for
installation.
●To installers: After installation, please hand over the
manual to the user

2
STP12720E
This icon warns that it may cause death or casualty if not following
theinstructionclosely.
Thisiconindicatesthat it may cause injury or damage to the property.
Safety Precautions
Please strictly comply with the following for safety
This instruction manual is intended to prevent any danger to the user and
the third parties, or any damage to
theproperty. Thefollowingindicators aretoreminduserstostrictlyobservetheinstructions.
■
Throughout our explanation, the possible damagewhich may be caused byany negligence or disregard of
thesafetyprecaution is classified to differentlevelsaccording tothe severity.
■ For the precautions
we recommend users to notice, we explain by using the following
differentcategories
(The following
are
just example
s
)
Thisiconsuggests that thisisthenecessary procedure to follow
.
Thisiconsuggests that theactionisstrictlyprohibited.
Forlongperiodusagepleaseensurethattheinstallationpositioniswithadequatestrength.
If the supportisnot strong enough, thescreenmay falldown afterlong-perioduse.
The installation or dismantling should only be handled by more than one professional
technician.
Assemble the screen by two or more people. It might fall off causing damages and harms.
Pull out the powe
r plug, when smoke, heat, smell or strange noise happens.
Thecontinuoususe may causea fire andanelectricshock.
●Stop usingit,andconsult with the dealerordistributor.
Take off the dust, etc. ofthe power plug regularly.
It causesan insulation failure due to moisture etc. when dust is piled up
on the powerplug, and
mightcause afire.
●Pleasepull outthepowerplug, and wipe withadrycloth.
Make sure the power plug is inserted tightly.
When insertion is not enough, it may cause a fire by theelectric shock and heat.
Take the power plug to connect, not the power cable.
It may damage the powercable andcause afire andan electric shock.

3
STP12720E
Do not connect the plug to poweruntil the installation is finished.
It maycause an electric shock.
D
o notoperate the power plug witha wethand.
It maycause an electric shock.
Stop using, when anything like metal, water, or liquid goes into the screen, a
nd pull out
the power plug.
Thecontinuoususemaycauseafireandanelectricshock.
●Stop usingit, and consult with the dealer or distributor.
Pull outthe power plug, when the screen is notused for long.
Theleakmay causeafire.
Do nothanganyobjectstothescreen
This maycause damage to the screen and result in danger.
Donotforciblypulloutthe screen.
This mayresultindamage tothestructure orthescreenmaterials
.
Do notdamage the power cable and plug.
It causes theelectric shock, the short,anda fire when used with damage.
Donotalterthe designordismantle
It may cause majorfailures.
●Contactthe dealer or distributorfor repairs.
Do not touch the power plug when thundering.
It maycause an electric shock.
Withintheexpandedreachofthescreen,donotplaceanyobjectstoblockthescreenorobjectsthatareeasilybreakable.
This maycausedamage to thescreen or totheother properties in use.
Do notplace sharpobjectsnear thescreen
It may cause damage to the screen.
Exchange the same two new batteries.
Whenanold battery is mixed, it maycause heat, liquid leakage and the explosion.
Do notuse the screen near the stove andotherheatsources.
Because the screen fabric easily gets burned, it might cause fire.
Restore the screentothecaseafteruse.
Hanging the screen for long time maycause the fabric fallout.

4
STP12720E
<Overview>
<Left-side view>
Materials:Aluminum(Front panel、Case、Roller)/Steal(Casecapetc.)/Resin(Cap(ABS)、Others(POM、PC))
※1 The drawing refers to the sliding brackets.
※2 The trigger input corresponds with the projector with trigger output( DC12V).
The tally sends 5V output while operating, and displays thefunction status on the system controller.
Construction
Cautions in handling
■ The surface of the screen is specially processedto enhance projection image. The contamination
or damage may result in poor projection image. Pay close attention to the followings when
handling thisproduct.
●Donot touch the screen surface.
●Donot draw anythingonthe screensurface.
●Donot rubor scratch the surface with anything hard.
●Gently wipe thedust off the surface with thesoftdry cloth or remove witha soft brush.
■The screen surface may have an odor at first. Please ventilate enough by open
ing the window. Any
such odor will gradually fade. When the odor is strong, please keep the screen pulledout,even not
inuse.
●
Be careful in repeating the screen going up and down. The continuous use of the up and down
operations may cause the heat prevention circuitry work, and stop the screen. When this
happens, please operate after some time (10 – 20 minutes) for cooling off.(※
This is not the
breakdown.)
Neveruse a moist cloth or chemicalssuch asbenzene,thinneretc.
It may cause the poor projection image.
Case Bracket ※1
Front panel
Black mask
Powersupply
Weight bar Tension adjustmentknob
Trigger Cable Assignment
No.
Cable color
Assignment
1
Black Trigger IN
2
Red Trigger GND
3
Blank Blank
4
Blank Blank
5
Green Tally GND
6
Yellow Tally OUT
Trigger Input/Tally
Output ※2
IRreceiver Input
Wallswitch Input
Powersupply

5
STP12720E
Operation methodOther accessories, screws etc.
Remote control
Sliding brackets
×2
Side
Brackets×1set
Screw A
Cross recess
Trusstapping screw
(4×40)×6
Screw B
Crossrecess
Truss tapping screw
(4×12)×4
Accessories
※Please confirm the accessories before installation.
.
Infraredreceiver×1 Sticker(spare)×1
Infraredremotecontroller×1AAA dry batteries×2

6
STP12720E
1. Connect the modular plug ofthe Infrared receiverto the modular jack.
2. Remove the dust, water, oil and moist on the location,and stick the Infrared receiver tightly,
peeling the coated paper off. The location shouldbe where the signal of theinfrared remote
controller can reach. Avoidthe direct sunshine area.
Installation
Thingstoknow:
Whenthe reception isweak because of the direct sunshine, theinfraredreceiver location should be changed.
Therearelocationswheretheinfraredreceivercannot be stuck.
Usethe sparesticker, whentheadhesivepower of the padisweak.
Makesure thepower is off whenyouconnect it to the screen.
Itmaydestroytheproductorcauseanelectricshock.
Plug in the IR receiverplug tightly.
If not, it may cause mal-functioning.
Pleasepull outthe back panel ofthe remote controller, and put two dry batteries (size AAA).
Drybatteries
Change the two batteries to the new ones
when thesignal is weak.
Take out all
the batteries when you do not
use it for long to avoid the liquid leakage
damage
Do not use rechargeablebatteries.
Preparation of the remote controller
Make sure + or –
arecorrect.
Remote controller
Do not drop, throw away, or put water on it, or it
may cause the breakdown. Handle the
remote
controllercarefully.
Please operate it to the direction of the infrared
receiver
Modular type
IRreceiver
The operation rangeof IR remote
controller
IR receiver

7
STP12720E
・The projection position can be changed asdesired.
●To lift up the projection positon
① Stop at the desired position
UseUP
&DOWN
buttonsandpush
STOP
buttonat the desired position.
How to use the screen
Pull out the power plug, whenthe screenis not used for long
.
The leak may cause a fire
■Storingthe screen
When the screen is deployed, push theUP
button of
theremote controller.
The screen is rolled up and stored, and it stops
automatically.
■Stoppingthescreen
Please push theSTOP
button whenever you
want to stopthe operation.
■Deploying the screen
Please confirm the screen is stored, and push theDO
WN
button of the remote controller. The screen is
deployed to a prescribed projection position, and it
stops automatically.
Change of projection position
スクリーン
映写位置
の
記憶
につ
UP
button
(The screenmovesup.)
STOP button
(The screenstops.)
DOWNbutton
(The screenmovesdown.)
UP
DOWN

8
STP12720E
② Memorizing the position
1. At the desired position, pushSTOP
button
for5-6 seconds, and then push
DOWN
button within2 seconds.
2. Upon receiving the command, the screen
moves up approx. 10cm, and then stops
at thepreset position.
●To lift down the projection position
① Deploy the screen
Push DOWN
button for 5-6 seconds
andthe screen starts to come down from
thepreset position.
Push STOP
button.
② Stop at the desired position
UseUP
&DOWN
buttonsandpush
STOP
buttonat the desired position.
③ Memorizing the position
1. At thedesiredposition, pushSTOP
button
for5-6 seconds, and then push
DOWN
button within2 seconds.
2. Upon receiving the command, thescreen movesup
approx. 10cm, and then stopsat the preset position.
※NOTICEIf the DOWN
button is pushed for some time and left as it is, the screen
comes to the factorydefaultposition, andstops. The screen cannot be lower than thisposition.
PushSTOP
for
sometimes,and
thenDOWN
Push STOP
for
sometimes, and
thenDOWN
Push STOP
for
sometimes, and
thenDOWNwithin
2seconds.
UP
DOWN

9
STP12720E
●The replacement of the fabric
・When the screen fabric is damaged, the fabric can be replaced.
・For details, please contact the dealer or distributor.
・For details on replacing the fabric, please refer to the attached manual of the replacement fabric.
■Giving tensionsto the screen
①When the tension near the weight bar is lost, please perform linearity adjustment by a
tension adjustment knob.
※Adjustments should be within 3 turns, clock-wise
or counter clock-wise.
※When tension is given too much, please turn the tension
adjustment knob counter clock-wise and loosen tension.
Please keep the screen with the loosened tension for 2 or 3
days, and then perform linearity adjustment again.
②The tensions to the right and left of the screen are pre-set at factory.
● Wall embedded switch(S-R2)
Maintenance
Clock-wise:to givetension
Counterclock-wise:toloosentension
Option
①
②
②
Length of the cable
1
m

10
STP12720E
FAQ
Whenanabnormality arises,carry out the following checks before requestingfor repair. Please be
sure to take off a power plug before check. If the following checksdo not set the abnormality back
to normal, please report to the dealer or distributor.
Symptom Check Remedy
Is power plug fixed to the mains
correctly? Fixthe plugtightly.
Is the remote controller directed
to thereceiver? Direct the remote controller to
thereceiver.
Anything blocking between the
remoteandreceiver? Take off the blocking item, or
changethe receiverposition.
Is the sun or inverter lighting
reflected on the receiver? Change the position of the
receiver.
Batteries ofremote low? Change the two batteries in the
remote.(AAAtype)
Is the heat prevention circuitry
on?
Cool off the motor and operate
again after10-20 minutes.
After return, as there is
possibility of a stop position shift,
please restore the screen to the
case by[UP] operation.
Is thereceiver cable extended?
If the receiver cable is extended,
it
is easily affected by the noises.
Any modifications on the product
or the accessories would be
subject to non-warranty.
The screen does not operate.
Was therea power failureduring
operation?
After a return from a power
failure during operation, [UP] or
[down] operation once returns
the screen to the storage
position.
Downpositioncannotbe
adjusted. Were the steps described in the
manual duly followed?
Restore the screen and keep it
over 1 second before applying
thenecessaryadjustments
OSI CO., LTD.
Room1605,16/F, Seaview Centre, 139HoiBunRoad,
KwunTong,Kowloon,HongKong
PHONE :+852-3580-0087 FAX:+852-2367-4300
E-mail:info-hk@os-worldwide.com
URL :http://www.os-worldwide.com

11
STP12720E
Table of contents
Other OS Projection Screen manuals
Popular Projection Screen manuals by other brands

Da-Lite
Da-Lite DesIgner Contour Manual Instruction book

Sony
Sony KDP-51WS550 - 51" High Definition Projection... Service manual

Elite Screens
Elite Screens AEON series user guide

Epson
Epson ELPSC21 user guide

Da-Lite
Da-Lite Tensioned Advantage Deluxe Electrol specification

MEDIUM
MEDIUM RollFix Premium PRO Mounting instruction