Osstell Beacon User manual

osstell.com
USER MANUAL
Osstell Beacon
GB

25087-00 ML
2
2) Warnings and Precautions
Warnings:
Read all instructions before operating the Osstell Beacon.
Theinstrumentemitsanalternatingmagneticeldthatpoten-
tially could interfere with cardiac pacemakers! Keep the instru-
ment away from implanted electronic devices. Do not place the
instrument on the patient’s body.
A transparent, barrier sleeve must be used to cover the Osstell
Beacon when used on patients. See section 11 for recommend-
ed sleeves and section 15 for information on recommended
cleaning.
Do not autoclave the instrument.
The SmartPeg Mount must be sterilized before use.
Theinstrumentwillashred-yellow-greenduringstart-upas
a functional test of the color indication. If any or all colors are
not shown, the instrument must not be used. Contact the local
sales representative or distributor for further instructions.
Always perform a measurement in two directions, Buccal-lingual
and Mesial-Distal, as guided by the instrument. This is impor-
tant to detect the lowest implant stability.
The SmartPegs™ are disposable and should only be used for
one or multiple measurements at one treatment session, for a
single patient only (to avoid cross-contamination). Repeated
re-use may result in false readings due to wear and tear of the
soaluminumSmartPegthreads.
Table of content
1) Table of content 2
2) Warnings and Precautions 3
3) Intended Use 3
4) Indications for Use 3
5) Description 3
6) Safety Symbols 4
7) Before You Start 5
8) Operation of the Osstell Beacon Instrument 5
9) TestPeg 5
10) SmartPeg 6
11) How to Measure 6
12) How to Measure on an Abutment 7
13) Interpret the Result 7
14) Data Connection to Osstell Connect 8
15) Cleaning and Maintenance 8
16) Technical information 9
17) Troubleshooting 10
18) Service and Support 11
19) Waste and Disposal 11
Welcome
Congratulations on the purchase of your new
Osstell
®
Beacon. Before you start using your Osstell
Beacon, please read through the entire manual.

25087-00 ML
3
Do not expose the instrument to extreme high temp, e.g. leaving
it in the car dashboard on a warm sunny day.
TheOsstellBeaconisnotprotectedfromingressofuids,e.g.
water,attheUSBconnector(IP20classied).
Mains-operated power supplies or USB cable used for charging,
shall not be reachable by the patient.
Precautions:
To avoid interference with other equipment, the instrument
should not be held close to electronic devices.
Onlyusetheacceptablecleaninguidslistedinsection15
when cleaning the instrument.
Do not use the instrument in the presence of explosive or
ammablematerials.
See section 4, 5 and 10 for information about approved and
compatible accessories.
3) Intended Use
Osstell Beacon is intended for use as a Dental Implant Stability
Analyzer.
4) Indication for use
Osstell Beacon is indicated for use in measuring the stability of
implants in the oral cavity and craniofacial region.
Conditions
Surgically placed implants or abutments for which there is space
to attach a compatible SmartPeg.
Reasons for use
The Osstell Beacon can add important information to the evaluation
of implant stability and can be used as part of an overall treatment
evaluationprogram.Thenalimplanttreatmentdecisionsarethe
responsibility of the clinician.
Contraindications
Osstell Beacon is contraindicated for implant systems to which the
SmartPeg could not be attached for mechanical incompatibility
reasons. See section 10 for more information about SmartPegs.
Osstell Beacon is contraindicated when used together with Pegs not
approved by Osstell. Osstell Beacon is contraindicated where it is
not possible to attach the SmartPeg due to lack of space, or where it
impingesonotherarticialoranatomicalstructures.
5) Description
The Osstell Beacon is a handheld instrument that involves the use
of the non-invasive technique, Resonance Frequency Analysis.
The system involves the use of a SmartPeg attached to the dental
implant or abutment by means of an integrated screw. The Smart-
Peg is excited by a magnetic pulse from the instrument tip.
The resonance frequency, which is the measure of implant stability,
is calculated from the response signal. Results are displayed on the
instrument as the Implant Stability Quotient (ISQ). The ISQ is scaled
from 1 to 100. It is a measurement of the stability of the implant
and is derived from the resonance frequency value obtained from
the SmartPeg. The higher the number, the greater the stability. The
instrumentsowarecanbeupdatedbyusingtheOsstellUSBcable.

25087-00 ML
4
Caution
Follow instructions for use
Consult instructions for use
See section 2) Warnings and Precautions
Type BF applied part
Manufacturer
YYYY-MM-DD
Date of manufacture
SN Serial number
Do not dispose of with domestic waste. Li-ion battery.
CEmarkwithidenticationnumberofthenotied
body.
This electronic product is approved by Federal
Communications Comission (FCC)
FCC ID: QOQBLE113 IC: 5123A-BGTBLE113
Non-ionizing electromagnetic radiation
Not Sterilizable
Temperature limitation
Humidity limitation
Atmospheric pressure limitation
6) Safety Symbols
1 2 345 6
Your Osstell Beacon system includes the
following items:
1Osstell Beacon Instrument
2Osstell USB cable
3Osstell SmartPeg Mount
4Osstell TestPeg
5Osstell Key
6Osstell Beacon Manual
Applied Parts: Osstell Beacon instrument tip and thin part of body.

25087-00 ML
5
IP20 Protected against solid foreign objects of 12.5mm ∅
and greater. No protection against water.
Use by date
Lot/batch code
Sterilized using irradiation
RX-
Only
For US market only: Prescription use only. U.S. Federal
Law restricts this device to sale by or on the order of a
licensed practitioner
REF Catalog Number
2
Do not reuse
7) Before You Start
The Osstell Beacon is delivered from factory in a “transport” mode,
where the built-in motion sensor is deactivated.
To de-activate the transport mode and start charging, connect the
small USB connector of the Osstell USB cable to wide end of the
instrument. Connect the large USB connector to a standard USB
type A outlet of a PC, laptop or charger.
The Osstell Beacon will start-up and enter charging mode. Charge
the Osstell Beacon for at least 3 hours or until the Osstell Beacon
indicates full charge. Remove the Osstell USB cable.
Note! It is not possible to perform an ISQ measurement during
charging.
8) Operation of the Osstell Beacon
Instrument
The Osstell Beacon is activated by a built-in motion sensor. As soon
as the motion sensor detects movement, the Osstell Beacon will
start-up,ashred-yellow-greenandshortlyshowbatterystatus
in the lower display and then be ready for measurement in the BL
(Buccal – Lingual) direction, which is indicated in the upper display.
The Osstell Beacon will start to measure, indicated by an audible
sound, when near an Osstell Smartpeg or Testpeg due to a built-in
magnetic detector that senses the magnet on the top of the Osstell
Smartpeg/TestPeg. Measured data will be shown in the upper display
combined with a colored light indication below the instrument tip.
The red, yellow and green color represents low, medium or high
implantstability.Aer60secondsofnomotion,theOsstellBeacon
willturnoautomatically.
9) TestPeg
The Osstell TestPeg may be used for testing and learning how to
use the system. Place the Osstell TestPeg on the table or hold it in
your hand. Activate the Osstell Beacon by moving it and hold the
instrument tip approximately 3-5mm away from the top of the
Osstell TestPeg. The Osstell Beacon should start to measure and
present an ISQ value of 55 +/- 2 ISQ.

25087-00 ML
6
10) SmartPeg
TheSmartPegisavailablewithdierentconnectiongeometriesto
tallmajorimplantproductsonthemarket.Youcanndall
available SmartPegs on osstell.com/smartpegguide.
The SmartPegs™ are disposable and should only be used for one
or multiple measurement at one treatment session, for a single
patient only (to avoid cross-contamination). Repeated re-use may
resultinfalsereadingsduetowearandtearofthesoaluminium
SmartPeg threads.
11) How to Measure
Prior to use on a patient, place a barrier sleeve over the Osstell
Beacon. The barrier sleeve helps prevent cross-contamination and
helps keep dental composite material from adhering to the surface
of the instrument tip and body, and discoloration and degradations
from cleaning solutions.
Note:
• Barrier sleeves are single patient use only.
•Discardusedbarriersleevesinstandardwasteaereachpatient.
• Do not leave barrier sleeves on the instrument for extended periods.
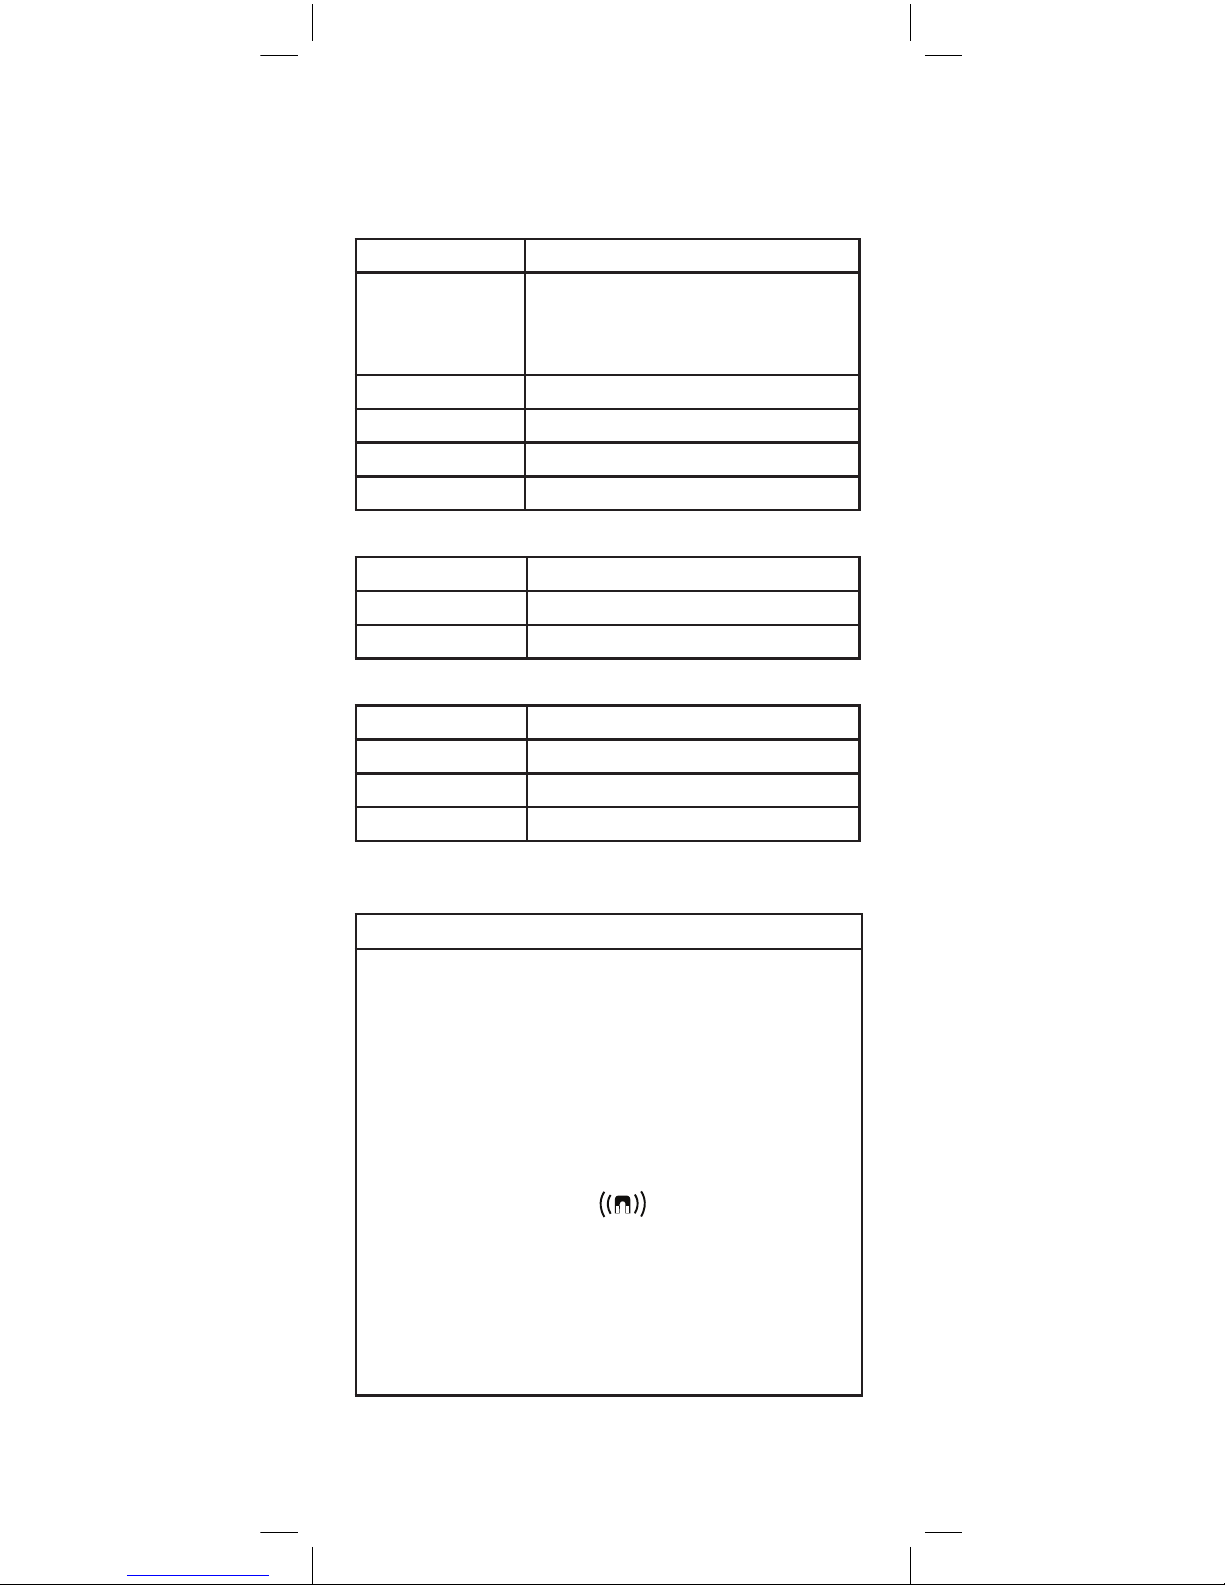
• See below for recommended barrier sleeves.
TIDIshield, Art no: 21021, Art no: 20987. www.tidiproducts.com
PremiumPlus: 123, Small short 123, Small
Please also see additional recommended barrier sleeves on:
osstell.com/get-started-beacon
• The Osstell Beacon instrument must be cleaned and sanitized
withappropriatecleaningand/orsanitizingagentsaereach
patient. See section 15) Cleaning and Maintenance for acceptable
agents.
Arstmeasurementshouldbetakenatimplantplacementtogeta
baseline for future measurements throughout the healing process.
Beforethenalrestoration,anothermeasurementistakenwhich
makes it possible to observe the stability development of the
implant.
It is recommended to measure in both Buccal-Lingual and Mesial-
Distaldirectiontondtheloweststability.Therefore,theOsstell
Beacon prompts the user to measure in both these directions.
We recommend you studying the more detailed information (videos
and quick guides) available on osstell.com/get-started-beacon,
to utilize the full functionality of your Osstell Beacon.
1. Activate the Osstell Beacon by picking it up. The instrument will
start-upandaershowingthebatterystatus,theinstrumentwill
be ready for measurement in the BL (Buccal – Lingual) direction,
which is prompted in the upper display as well as optimal angle
of the instrument tip towards the Smartpeg.
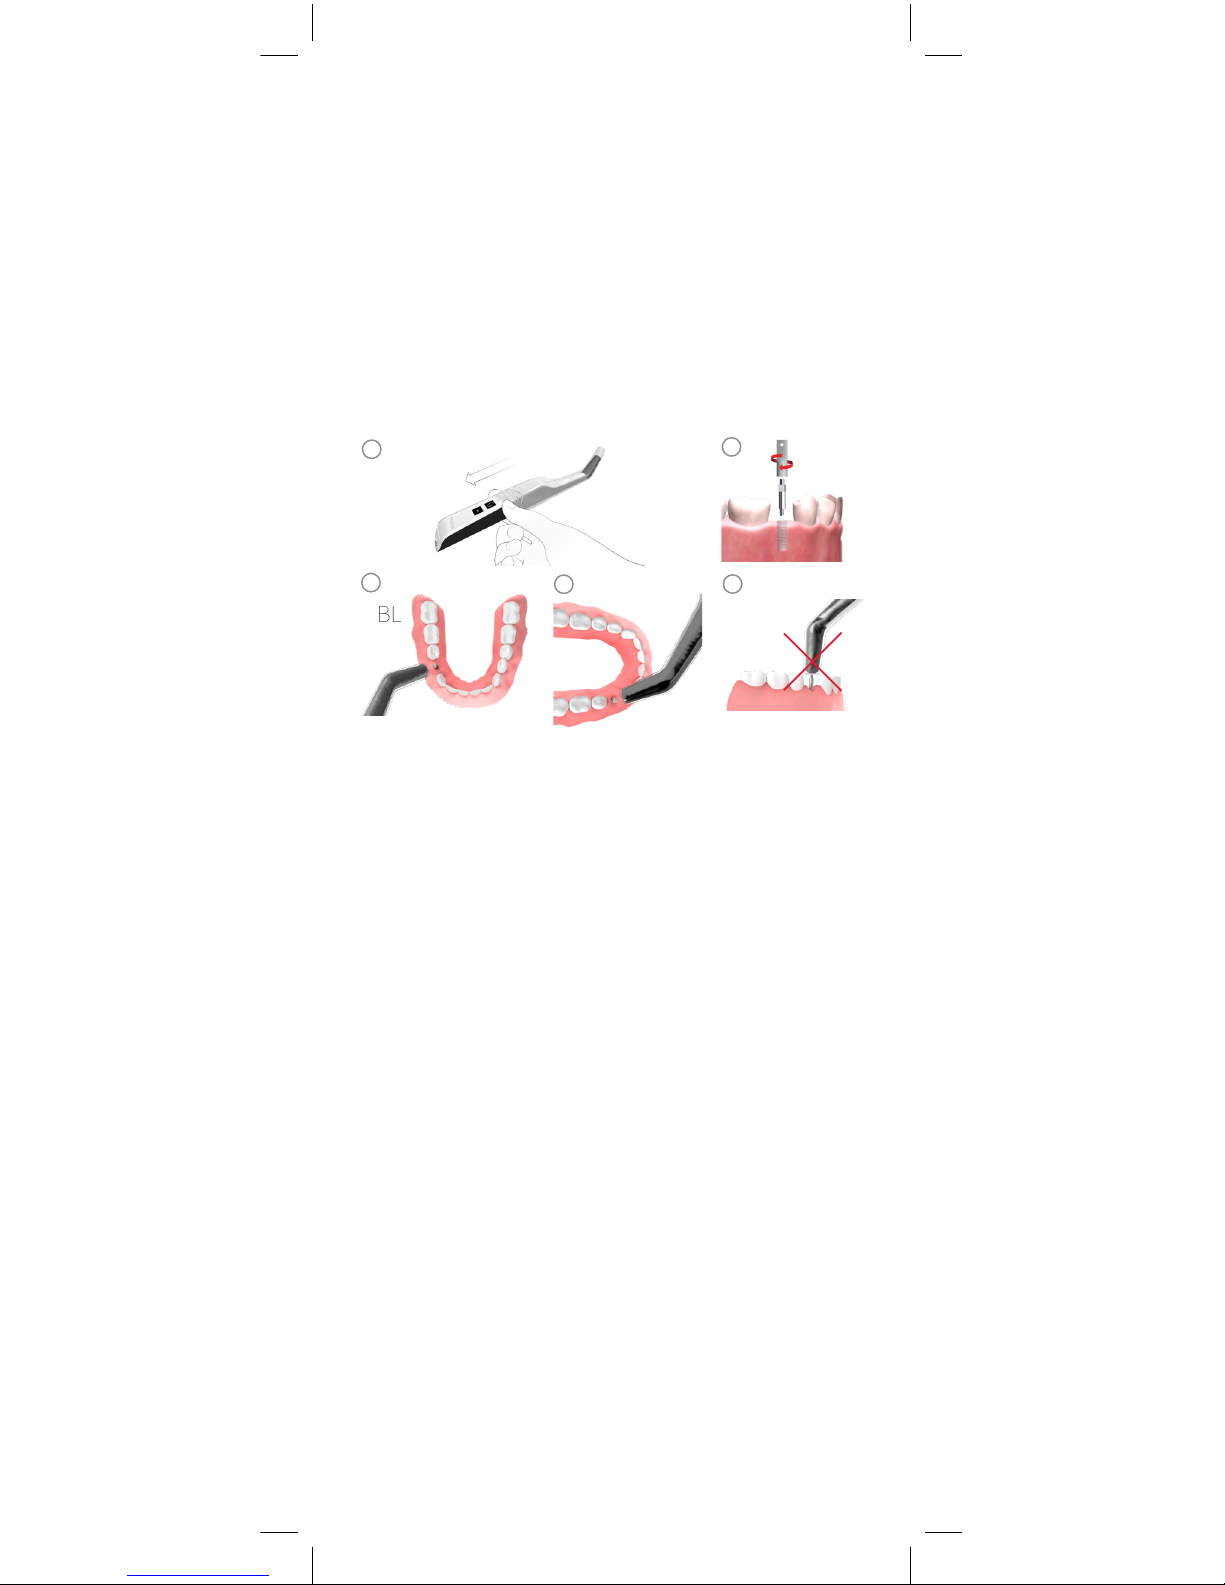
2. Place a barrier sleeve over the Osstell Beacon instrument. See g 1.
3. Place the SmartPeg into the SmartPeg Mount. The SmartPeg is
magnetic, and the SmartPeg Mount will hold the SmartPeg. See fig 2.
Attach the SmartPeg to the implant or abutment by screwing the
SmartPegMountusingngerforceofapproximately4-6Ncm.
Do not over-tighten, to avoid damaging the SmartPeg threads.
4.Hold the instrument tip close (3-5mm) to the top of the SmartPeg
without touching it. An audible sound indicates when measure-
ment has started, and measured data will be shown in the upper
display combined with a colored light indication below the
instrument tip. Bring the instrument out of the mouth to clearly
read the ISQ value and the colored indication.

25087-00 ML
7
The measured ISQ values will be displayed in the upper display
for a couple of seconds and then switch to indicate ready for
measurement in mesial-distal direction. See g 3 and 4.
Note! Do not bring the instrument tip to the SmartPeg until the
upper display has switched to next direction.
5.Do not measure from above. See g 5.
6.Repeat step 4 and the sequence starts over and the Osstell Beacon
is ready for measurement in the BL (Buccal- Lingual) direction
again. See g 3.
7.When all measurements are performed, remove the SmartPeg by
using the SmartPeg Mount.
8.Theinstrumentisautomaticallyturnedoaer60secondsofno
motion.
12) How to Measure on an Abutment
When a measurement is made on an abutment or on an implant
with a “built-in” abutment, the ISQ value will be lower compared to
ameasurementmadeontheimplant.Thisisduetothedierence
inheightabovebonelevel.TondouttheISQdierencetothe
measurement performed at implant level, a measurement should
be taken on the implant before the abutment is attached and then
a second measurement on the abutment.
13) Interpret the Result
Implant Stability
Animplantcanhavedierentstabilityindierentdirections.The
stability of the implant is dependent of the surrounding bone
conguration.Thereisoenadirectionwherethestabilityis
lowest, and a direction where the stability is highest and these two
directionsaremostoenperpendiculartoeachother.
Tondtheloweststability(lowestISQvalue)itisrecommended
tomeasurefromtwodierentdirections.Theloweststabilityisin
most cases found in the buccal-lingual direction. The highest stabil-
ity is in most cases found in the mesial-distal direction.
The ISQ Value
Assuming there is access to the implant, ISQ measurements should
be performed at implant placement and before the implant is load-
edortheabutmentisconnected.Aereachmeasurement,theISQ
values are recorded and used as the baseline for the next
measurementperformed.AchangeintheISQvaluereectsa
change in implant stability. In general, an increase in ISQ values
from one measurement time to the next indicates a progression
4
MD
5
BL
12
3

25087-00 ML
8
towards higher implant stability while a decrease in ISQ values
indicates a loss in stability and, possibly, implant failure. A stable
ISQ value would indicate no change in stability.
14) Data Connection to Osstell Connect
The Osstell Connect (osstellconnect.com) is an online tool for
statistical analysis and valuable insights based on your data, with
benchmarks against the entire Osstell Connect database. You can
have your Osstell Beacon online connected to Osstell Connect for
data collection.
Before you can start using data connection to Osstell Connect you
have to register your Osstell Beacon. The serial number can be
found on the back of the instrument. For registration assistance and
features of data connection to Osstell Connect, please visit:
osstell.com/get-started-beacon
15) Cleaning and Maintenance
Beforeeachuse,moistenagauzeorsoclothwithanacceptable
(see list below) surface disinfectant and wipe the whole Osstell
Beacon instrument.
Note! Do not autoclave the Osstell Beacon instrument.
Routinely check the surface of the instrument tip and overall surface
for possible cracks and residuals.
Acceptable Cleaners:
Isopropyl alcohol
Ethyl alcohol-based cleaners
Do not use:
Strong alkali detergent of any type, including hand soaps and dish soaps
Bleach based cleaners
Hydrogen Peroxide based cleaners
Abrasive cleaners
Acetone of hydrocarbon based cleaners
MEK (Methyl Ethyl Ketone)
Birex
Gluteraldehyde
Quaternary Ammonium Chloride salt-based cleaners
The instrument does not require regular maintenance. In the event
of an instrument malfunction, contact the local sales representative
or distributor for further instructions.
SmartPegs: Delivered sterile. The SmartPegs™ are disposable and
should only be used for one or multiple measurements at one
treatment session, for a single patient only (to avoid cross-con-
tamination).
TestPeg: Is not used intra-orally, does not require sterilization.

25087-00 ML
9
The Smartpeg Mount should be cleaned and sterilized before each
use according to the instructions below.
SmartPeg Mount: Must be autoclaved according to the recom-
mended sterilization method, validated to sterility assurance
levels (SAL), according to ISO 17665-1 and ISO 17664. The
SmartPeg Mount should be placed in suitable packaging for the
sterilization process.
Sterilization
Exposure Exposure
Method: temperature time
Pre-vacuum 132° C (270° F) 4 min
Pre-vacuum 134° C (273° F) 3 min
Gravity 134° C (273° F) 10 min
Warnings: do not exceed 135° C (275° F). Drying time: 30 minutes
Carefully inspect the Smartpeg Mount for damage or wear. Hand
wash the Smartpeg Mount using a neutral instrument detergent.
Rinse and dry; carefully inspect the Smartpeg Mount for damage
and wear. Sterilize the Smartpeg Mount according to the auto-
clave manufacturer´s instructions. Do not wash in dishwasher.
Store sterile goods dust-free and dry.
16) Technical information
Technical description
Osstell Beacon is CE-marked according to MDD in Europe (Class IIa,
internally powered, type BF applied parts. Not AP or APG equip-
ment, not protected against ingress of water).
Osstell Beacon is in accordance with applicable parts of IEC 60601-
1/ANSI/AAMI ES 60601-1.
The symbols used, follow the European standard EN 60601-1 and
ISO standards 9687 and 15223 as far as possible.
Notes on electromagnetic compatibility (EMC)
Medical electrical equipment is subjected to particular precautions
with regards to EMC and must be put into operation in accordance
with the EMC notes included below:
Osstell guarantees the compliance of the device with the EMC
requirements only when used with original accessories and spare
parts. The use of other accessories / other spare parts can lead to an
increased emission of electromagnetic interference or to a reduced
resistance against electromagnetic interference.
YoucanndthecurrentEMCmanufacturer’sdeclarationonour
website at osstell.com/products/Osstell-Beacon.
Alternatively, you can obtain it directly from your local sales repre-
sentative or distributor.
The Osstell Beacon contains a Bluetooth module.
FCC ID: QOQBLE113, IC5123A-BGTBLE113
Battery
The instrument contains a rechargeable lithium-ion battery.
The instrument should be charged using the Osstell USB cable
connected to a standard USB 2.0 or 3.0 type A outlet. Battery status
and charging is indicated in the lower display with a battery symbol
having 4 levels: 100 % (fully charged), 75 %, 50 % and less than 25%.
When the level is less than 10 %, the Osstell Beacon will change the
battery symbol to alert that it is time to charge the instrument.
Note! It is not possible to perform an ISQ measurement during
charging.

25087-00 ML
10
Accuracy
The Osstell Beacon instrument has an ISQ accuracy/resolution of
+/- 1 ISQ. When the SmartPeg is attached to an implant, the ISQ value
can vary up to 2 ISQ depending on SmartPeg attachment torque.
Power, weight & size:
Lithium-ion battery: 3.7V DC
Charging: USB cable (USB type C / USB type A)
connected to standard USB 2.0 or 3.0
(type A) outlet
Instrument size: 210 x 35 x 25 mm
Package size: 272 x 140,2 x 74,60 mm
Instrument weight: 0,07 kg
Gross weight: 0,75 kg
Environmental conditions during transport:
Temperature: -40º C to +70º C
Relative humidity: 10% to 95%
Pressure: 500 hPa to 1060 hPa
Environmental conditions during use:
Temperature: +10º C to +35º C
Relative humidity: 30% to 75%
Pressure: 700 hPa to 1060 hPa
IP class: IP20
17) Troubleshooting
No measurement or unexpected value
Re-Used SmartPeg.
The SmartPegs™ are disposable and should only be used for one
or multiple measurement at one treatment session, for a single
patient only. Repeated re-use may result in false readings due to
wearandtearofthesoaluminiumSmartPegthreads.
Wrong SmartPeg type selected for the Implant.
See SmartPeg reference list, osstell.com/smartpegguide
Bone or so tissue in between SmartPeg and Implant.
Make sure to clean the Implant prosthetic connection before
attaching the SmartPeg.
Electromagnetic interference.
Remove the source of electromagnetic interference.
Instrument tip is held too far away from the SmartPeg.
Hold the instrument tip 3-5mm away from the SmartPeg.
Instrument does not sense the SmartPeg, hence no measure-
ment.
Perform a 2 cm circular movement of the instrument and then
try to measure again.

25087-00 ML
11
Unit is not charging when USB cable is connected
Wrong USB cable used.
Only use Osstell USB cable connected to a standard USB type
connector.
Instrument does not start
Uncharged battery.
Charge the Osstell Beacon.
Instrument in transport mode.
See section 7 for instruction on how to de-activate transport
mode.
Instrument starts up with
Self-tests failed
Contact the local sales representative or distributor for further
instructions.
The instrument does not show red-green-yellow color
during start-upn
Theinstrumentwillashred-yellow-greenduringstart-upasa
functional test of the color indication. If any or all colors are not
shown, the instrument must not be used. Contact the local sales
representative or distributor for further instructions.
Diicult to measure in an exact recommended directionn
No space, e.g. due to adjacent teeth.
Trytomeasureataslightlydierentangle.
Diiculties attaching the SmartPeg
Wrong SmartPeg
Ensure that the SmartPeg is compatible with the implant system.
18) Service and Support
In the event of an instrument malfunction contact the local sales repre-
sentative or distributor for further instructions.
19) Waste and Disposal
The Osstell Beacon instrument should be recycled as electrical equip-
ment. SmartPegs should be recycled as metal. Whenever possible, the
battery should be disposed in a discharged state to avoid heat generation
through inadvertent short-circuiting.
Followyourlocalandcountry-speciclaws,directives,standardsand
guidelines for disposal.
• Waste electrical equipment
• Accessories and spare parts
• Packaging

Osstell AB
Stampgatan 14, 411 01 Göteborg, Sweden
Phone: +46 31 340 82 50 | info@osstell.com
www.osstell.com
Osstell AB Date of issue: 2018-05-25 25087-00 ML
OSSTELL Beacon USER MANUAL
Table of contents
Other Osstell Medical Equipment manuals