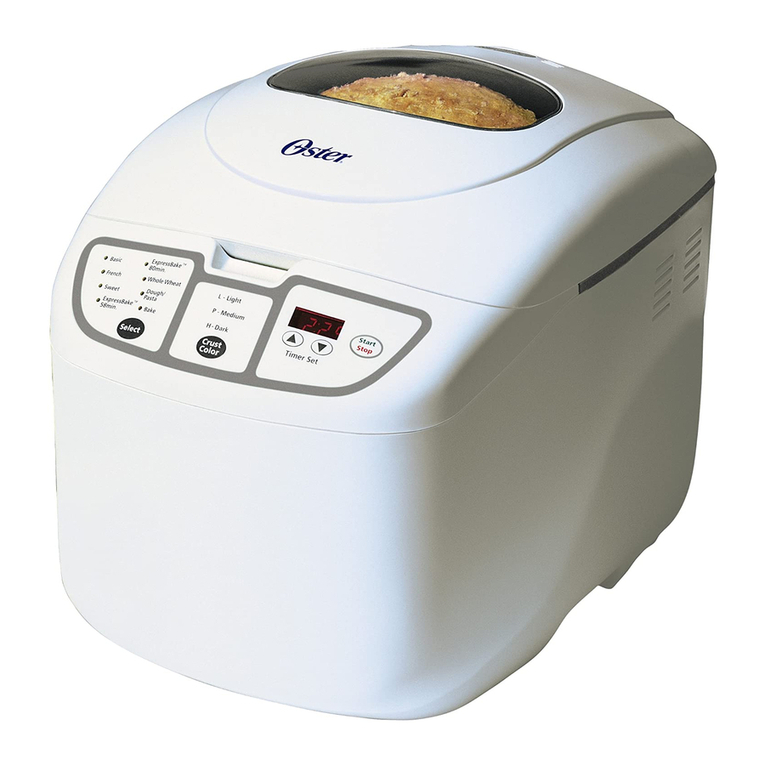
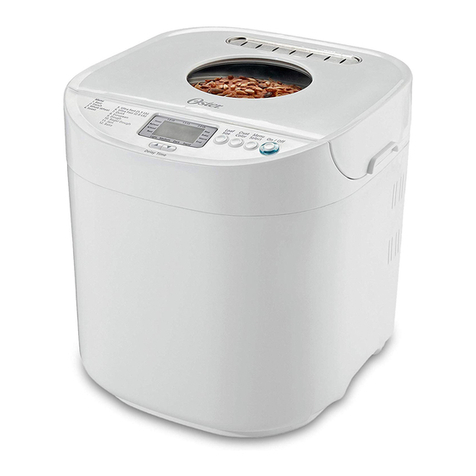
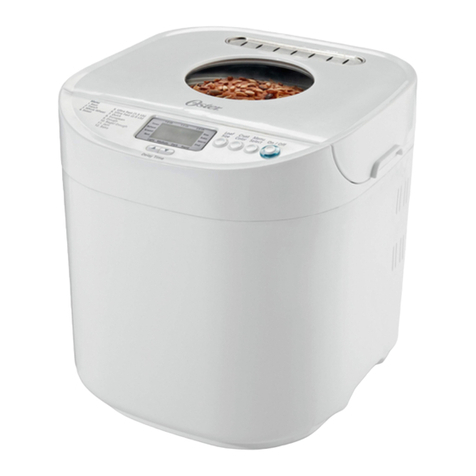
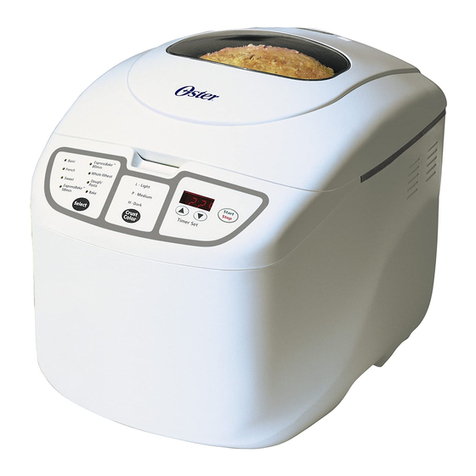
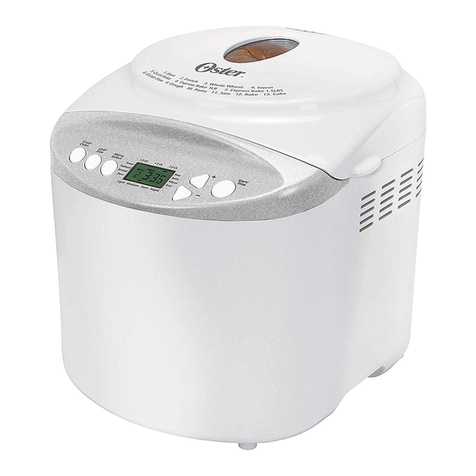
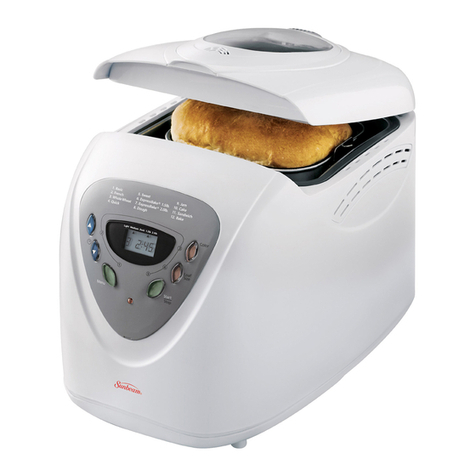
Oster EXPRESSBAKE CKSTBRTW21 User manual

2LB. EXPRESSBAKE® BREADMAKER
2LB. MÁQUINA PARA HACER PAN EXPRESSBAKE®
User Guide & Recipes/ Guía del Usuario & Recetas
CKSTBRTW21
www.oster.com
ART0000863963 Rev B
For product questions contact:
Sunbeam Consumer Service
USA: 1.800.334.0759
www.oster.com
© 2020 Sunbeam Products, Inc. All rights reserved. Distributed by Sunbeam Products, Inc.,
Boca Raton, Florida 33431.
Para preguntas sobre los productos llame:
Sunbeam Consumer Service
EE.UU.: 1.800.334.0759
www.oster.com
© 2020 Sunbeam Products, Inc. Todos los derechos reservados. Distribuido por Sunbeam
Products, Inc., Boca Ratón, Florida 33431.
GCDS-OST-SL
Printed in China
Impreso en China
Safety
Seguridad
How to use
Cómo usar
Cleaning
Cuidado y Limpieza
FAQs
Preguntas frecuentes
Recipes
Rectas
Warranty
Garantía

www.oster.com www.oster.com
23
IMPORTANT SAFEGUARDS
WHEN USING ELECTRICAL APPLIANCES, BASIC SAFETY PRECAUTIONS SHOULD ALWAYS BE FOLLOWED INCLUDING
THE FOLLOWING:
1. Read all instructions before using this product.
2. This appliance generates heat during use. Do not touch hot surfaces. Use handles or knobs.Wear oven mitts as
needed.
3. To protect against electric shock, do not place or immerse cord, plugs, or appliance in water or other liquid.
4. This appliance is not intended for use by children or by persons with reduced physical, sensory, or mental
capabilities, or lack of experience and knowledge. Close supervision is necessary when any appliance is used
near children. Children should be supervised to ensure that they do not play with the appliance. Keep the
appliance and its cord out of reach of children.
5. Unplug from outlet when not in use, before putting on or taking o parts and before cleaning. Allow to cool
before putting on or taking o parts, and before cleaning.To disconnect, turn any control to OFF, then unplug
power cord from outlet. Do not disconnect by pulling on cord.
6. Do not operate any appliance with a damaged cord or plug or after the appliance malfunctions, or has
been damaged in any manner. Do not attempt to replace or splice a damaged cord. Return appliance to the
manufacturer (see warranty) for examination, repair or adjustment.
7. The use of accessory attachments not recommended by the appliance manufacturer may cause re, electric
shock or injury.
8. Avoid contact with moving parts.
9. Do not use outdoors or for commercial purposes.
10. Do not let cord hang over edge of table or counter, or touch hot surfaces.
11. Do not place on or near wet surfaces, or heat sources such as a hot gas or electric burner, or in a heated oven.
12. Extreme caution must be used when moving an appliance containing hot oil or other hot liquids.
13. The heating base is subject to residual heat from cooking cycle. Do not touch heating base immediately after
using. Allow to cool before handling.
14. Use caution when opening the lid during or after a cooking cycle. Escaping steam can cause burns.
15. Do not use appliance for other than intended use. Misuse can cause injuries.
16. Intended for household countertop use only. Keep 6 inches (152 mm) clear from the wall and on all sides.
Always use appliance on a dry, stable, level surface.
17. If electric circuit is overloaded with other appliances, your bread maker may not operate properly. The bread
maker should be operated on a separate electrical circuit from other operating appliances.
HOUSEHOLD USE ONLY
SAVE THESE INSTRUCTIONS
a. North American models with polarized plugs:
POLARIZED PLUG
This appliance has a polarized plug (one blade is wider than the other).To reduce the risk
of electric shock, this plug is intended to t into a polarized outlet only one way. If the plug
does not t fully into the outlet, reverse the plug. If it still does not t, contact a qualied electrician. Do not
attempt to modify the plug in any way. If the plug ts loosely into the AC outlet or if the AC outlet feels warm do
not use that outlet.
POWER CORD INSTRUCTIONS:
A short power-supply cord or detachable power-supply cord is provided to reduce risks resulting from becoming
entangled in or tripping over a longer cord. Longer detachable power-supply cords or extension cords are available
and may be used if care is exercised in their use. If a long detachable power-supply cord or extension cord is used:
a. The marked electrical rating of the cord set, or extension cord should be at least as great as the electrical rating
of the appliance;
b. The cord should be arranged so that it will not drape over the countertop or tabletop where it can be pulled on
by children or tripped over unintentionally; and
c. If the appliance is of the grounded type, the cord set, or extension cord should be a grounding-type 3-wire
cord. Do not pull, twist or otherwise abuse the power cord.
NOTICES
1. Some countertop and table surfaces are not designed to withstand the prolonged heat generated by certain
appliances. Do not set the heated unit on a nished wood table.We recommend placing a hot pad or trivet
under your Breadmaker to prevent possible damage to the surface.
2. During initial use of this appliance, some slight smoke and/or odor may be detected.This is normal and should
go away after a few uses.

www.oster.com www.oster.com
45
INTRODUCTION OF CONTROL PANELGENERAL DESCRIPTION (FIG.1)
1. Lid
2. Viewing Window
3. Ingredient
compartment
4. Bread Basket
5. Kneading blade
6. Control Panel
7. Housing
8. Fruit & nuts dispenser
9. Measuring cup
10. Hook
11. Measuring Spoon
This indicates
the chosen
program
1
2
3
4
5
6
7
8
11
10
9
The operation
time for each
program
MENU
COLOR
TIME
LOAF
/
TIME
LIGHT MEDIUM DARK 1.5lb 2lb
BASIC .1
WHOLE GRAIN .2
EXPRESS BAKE .3
GLUTEN FREE .4
FRENCH .5
SWEET .6
7. OATMEAL
8. YOGURT
9. DOUGH
10. BAKE
11. CAKE
12. JAM

www.oster.com www.oster.com
67
Display screen – Indicates your Menu, current baking cycle, Loaf, Color and
baking time.
Menu – The Oster ExpressBake® Bread Maker oers 12 dierent menu cycles. Press
the Menu button to scroll through and select a cycle. The numbers on the Display
screen will correspond with the numbers on the viewing window. Please see list of
program options on pages 11 for reference.
Color: Press Crust to select desired Color. An indicator arrow will appear above the
color selected: Light, Medium or Dark.
Loaf – Press Loaf to select desired Loaf: (1.5lb & 2lb). This button is not applicable
for the program, Dough, Jam, Yogurt, Cake and Bake.
START/ STOP
The button is used for starting and stopping the selected baking program. To
start a program, press the START/STOP button once. A short beep will be heard
and the two dots in the LCD begin to ash, the working light illuminates and the
program starts. Any other button is inactivated except the START/STOP button
after a program has begun. This feature will help to prevent any unintentional
disruption to the operation of program.
To cancel the program, press the START/STOP button for approx. 2 seconds, then
a beep will be heard, it means that the program has been cancelled.
INTRODUCTION OF CONTROL PANEL INTRODUCTION OF CONTROL PANEL
PAUSE FUNCTION
After the program starts up, you can press START/STOP button once to interrupt
at any time, the operation will be paused but the setting will be memorized, the
working time will be ashed on the LCD. Touch START/STOP button again or
within 10 min without touching any button, the program will continue.
DELAY START TIMER
If you do not want the appliance to start working immediately you can use this
button to set the delay time. You must decide how long it will be before your
bread is ready by pressing the TIME ( ) or TIME ( ). Please note the delay time
should include the baking time of program
KEEP WARM
Bread can be automatically kept warm for 60 minutes after baking. If you would
like to take the bread out, switch the program o with the START/STOP button.
AUTOMATIC FRUIT & NUT DISPENSER:
Before operation, put the fruit and/or nuts in the ingredient pan, and they will add
into the bread automatically when making bread.
MEMORY
If the power supply has been broken o during the course of bread making, the
process of bread making will be continued automatically within 10 minutes, even
without pressing Start/stop button. If the break time exceeds 10 minutes the
memory cannot be kept, and the bread maker must be restarted.

www.oster.com www.oster.com
89
HOW TO:
BEFORE FIRST USE
1. Place the breadmaker on a counter where the plug will reach an outlet. DO NOT yet
plug the machine into the wall outlet. You will be shown later when to do this.
2. Make sure you can open the breadmaker top without
hitting the bottom of kitchen cabinets.
3. Open the lid and remove the baking pan. To do this,
simply grasp the handle of the pan and turn the pan
counterclockwise. Use a gentle, non-abrasive soap
and wash, rinse, and dry the pan thoroughly.
4. Attach the kneading blade (a) to the baking pan (b),
as shown. You will nd the kneading blade packed
inside the included measuring cup.
5. Set the pan aside. Do not yet place the pan into the
breadmaker.
6. Remove the polyfoam that is sitting next to the
heating element.
7. Attach automatic Fruit & nuts dispenser by simply pushing it straight down into the
ingredient compartment.
You’re ready to start!
a
b
Important tips:
The simplest way to learn how to bake bread is to follow a basic recipe. Before you begin,
make sure you have the following measuring equipment: -
- Liquid measuring cup
- Dry measuring cups
- Measuring spoons
Measuring ingredients
The most important secret of making bread is exact measurements, that’s the key to
successfully baking bread. With wet ingredients, use ONLY measuring cups with the cups/
ounces marked clearly on the side. After lling the measuring cup, place it on a at surface
and view it at eye level to make sure the amount of liquid is exact. Then, double check.
With dry ingredients, always“level o ”the measurement with the back of a knife or a spatula
to make sure the measurement is exact. Another helpful tip is to never use the cup to scoop
the ingredients (for example, our). By scooping, you could add up to one tablespoon of extra
ingredients. Fill the measuring cup with a spoon before leveling o.
Order of adding ingredients
The SECOND most important secret of making bread is putting the ingredients into the
breadmaker in the EXACT order given in the recipe.
This means:
- FIRST, liquid ingredients
- SECOND, dry ingredients
- LAST, yeast
Also, make sure ALL ingredients are at room temperature, (between 77°–85° F) unless
otherwise noted in the recipe.
Note: Temperatures too low or too high can aect the way the bread rises and bakes. It’s a
good idea to start with all new, fresh ingredients (especially fresh our and yeast)

www.oster.com www.oster.com
10 11
How to make bread
Please refer to the relative recipe and follow the below process
1. Insert the kneading blade into the bread pan.
2. Place ingredients in the bread pan in the following order: liquid ingredients rst, dry
ingredients (except yeast) second and yeast last. Note: Yeast must NEVER come into
contact with a liquid when you are adding ingredients.
3. Insert bread pan into breadmaker and twist clockwise to lock, then gently close the lid.
4. Plug in the breadmaker, the LCD will display“MENU 1 TIMER 3:00”.
5. Press the Menu button to choose the type of bread desired.
Note: Display will indicate the Menu number corresponding to the bread type selected
from 1 to 12.
6. Press the Color Button to select the color crust desired (Light, Medium, Dark).
Note: Display will indicate the Color with an arrow pointing to the corresponding Color
selected (select programs have xed settings).
7. Press Loaf button to select Loaf (1.5lb or 2lb).
Note: Display will indicate the Loaf with an arrow pointing to the corresponding Loaf
selected (select programs have xed settings).
8. If delay time is needed, press the up or down delay time arrows to adjust the delay timer
accordingly, the delay timer can be set for up to 10 hours. Note: The delay time is
calculated as the working time plus the delayed time (example for basic bread 2.0 lbs:
delay time set to 13:00 hours = a delay time of 10 hrs. plus the working time of 3 hrs. for
basic bread 2.0 lbs).
9. Press the“Start/Stop”button to start the breadmaker.
10. If you need to stop the breadmaker, press the“Start/Stop”button for about 2 seconds, the
breadmaker will stop, however you will need to redo the process.
11. Once the program is complete and the display shows“0:00”, it will beep 10 times as a
warning then it will switch to keep warm mode. In keep warm mode, the“0:00” will ash.
Note: Keep warm mode will last for up to 1 hour, after 1 hour it will beep 10 times and go
back to the initial status.
12. When the machine beeps, indicating the program is nished, turn the pan
counterclockwise to take out of the machine with oven mitts. Turn the bread pan upside
down and gently shake until bread falls out. Take out the kneading blade from the bottom
of bread using the included kneading blade removal tool and you are ready to eat.
Overview of Breadmaker Functions
Your breadmaker can bake almost any kind of bread. Recipes are included to clearly show
you which setting you should use. This model has 12 settings total (BASIC, WHOLE GRAIN,
ExpressBake®, GLUTEN FREE, FRENCH, SWEET, OATMEAL, YOGURT, DOUGH, BAKE,
CAKE, JAM).
1. Basic 2 lbs. (Time: 3 hours)
2. Whole Grain 2 lbs. (Time: 3 hours, 40 minutes)
3. ExpressBake®: 2 lbs. (Time: 59 minutes)
4. Gluten Free: 2 lbs (Time: 2 hours, 55 minutes)
5. French: 2 lbs ( Time: 3 hours, 50 minutes)
6. Sweet: 2 lbs (Time: 2 hours, 55 minutes)
7. Oatmeal (Time: 3 hours)
8. Yogurt (Time: 8 hours)
9. Dough (Time: 1 hour 30 minutes)
10. Bake: (Time: 1 hour)
11. Cake (Time: 1 hour, 50 minutes)
12. Jam: (Time: 1 hour, 20 minutes)
Note: Times are approximate based on Loaf.
Basic - This setting is probably used more than any other because it gives you the best results
with just about any recipe.
Whole Grain - The Whole Grain setting oers a longer rise time for breads that contain more
than 50% whole wheat our.
ExpressBake®(1.5LB) - Use this setting for baking smaller loaves of bread in under one hour.
ExpressBake® (2.0LB) - Use this setting for baking larger loaves of bread in under one hour.
Gluten Free - Use this setting for baking gluten free breads. It is necessary to make sure that
all ingredients being used are marked as gluten free. Note that wheat-free does
not always mean Gluten-free, you must read all labels carefully. It is important
to clean your unit thoroughly before and after using the Gluten Free setting to
ensure no cross contamination of gluten.
French - Use this setting for making French breads. French bread takes longer to knead, rise,
and bake, providing a heartier crust.
Sweet - The sweet setting is for baking breads with high amounts of sugar, fats, and proteins,
all of which tend to increase browning.
Oatmeal: This setting lets you prepare a bread avored with oatmeal or rolled oats
Yogurt: To make delicious homemade Yogurt
Dough: This setting lets you prepare dough for rolls, specialty breads, pizza, etc. which you
shape by hand, allow to rise, then bake in a conventional oven.
Bake: This setting is for baking dough.
Cake: Kneading, rising, and baking occurs, but with the aid of baking soda or baking powder.
Jam: This setting is for baking jams and marmalades.

www.oster.com www.oster.com
12 13
ExpressBake® Breadmaker Setting
Making Bread In Under 1 Hour
Your OSTER® breadmaker can bake great bread in under 1 hour.
This is called the“ExpressBake® Breadmaker setting. ExpressBake® Breadmaker setting
loaves are a little dierent from loaves baked on non-ExpressBake® Breadmaker settings.
Make sure to try the dierent settings to see which of them you prefer.
There are a few things you should know about the ExpressBake® Breadmaker settings that
are dierent than the other settings.
• ExpressBake® Breadmaker setting breads tend to have a darker, thicker crust than other
kinds of bread. Sometimes there will be a crack in the top of the crust. This is because
baking is done at higher temperatures. They also tend to be shorter, denser loaves.
• You CANNOT use the Delay Timer for the ExpressBake® Breadmaker settings. This would
cool the liquid ingredients and aect the way that the bread rises.
• You CANNOT use the“Color” buttons for ExpressBake® Breadmaker setting breads.
• DO NOT open the cover while making ExpressBake® Breadmaker setting breads.
• If the loaf is hard to remove from the pan let it sit for about 5 minutes to cool. Gently
shake the bread out of the pan and wait for 15 minutes before slicing.
• If you wish to bake another Loaf of bread, you must let the bread maker cool for 20
minutes with the cover open.
• You can use standard bread mixes for ExpressBake® Breadmaker setting breads, but the
results may not be as good as the results when using the recipes within this book
ExpressBake® Breadmaker Setting Tips and Hints
Yeast
Always use a fast rising yeast. DO NOT use active dry yeast for ExpressBake® Breadmaker
settings because the loaves will be much shorter when baked.
Liquids
Always use hot water in the range of 115°–125° F. You must use a cooking thermometer to
gauge the temperature; hotter water can kill the yeast while cooler water may not activate it.
Salt
As a rule, you should use LESS salt for ExpressBake® Breadmaker setting breads. Less salt
provides you with a higher loaf. Make sure to follow your Oster® Breadmaker recipe
suggestions for best results.
Other Ingredients
Make sure all other ingredients (like our, sugar, dry milk, butter, etc.) are at room
temperature. Always use bread our for the ExpressBake® Breadmaker settings.
Things You May Need to Buy
• You should only use “Bread Machine”our for the ExpressBake® Breadmaker setting
recipes.
• You may need a cooking thermometer to measure the temperature of the water you use
in these recipes. You should only use hot water (between 115° and 125° F)
Using the Delay Timer
You can delay the time your bread maker starts to have fresh bread ready when you get up in
the morning or when you come from work.
We recommend that before you use the Delay Timer, you try out a few recipes. Use recipes
that have produced good results for you in the past.
Important: You CANNOT use the Delay Timer for ExpressBake® Breadmaker settings.
Before using the Delay Timer
1. Add all of the ingredients of the recipe.
2. Select the correct setting for the kind of bread you are making (French, Sweet, etc.).
3. Select the Color.
Caution: Do not use recipes with ingredients that can spoil like eggs or milk.
To Use the Delay Timer:
1. Figure out how many hours and minutes there are between now and when you want
nal, baked bread. For example, if it is 8:00 AM and you want bread ready for dinner at
6:00 PM, that is 10 hours.
2. Use the delay timer up button to advance the time in 10 minute increments. In our
example, you will do this until the timer reads“10:00.”If necessary, use the delay timer
down button to decrease the time. (To advance the time quickly, simply press and hold
down the delay timer up/down buttons.)
Important: If you make a mistake or wish to start over, press and hold down the“Start/
Stop”button until you hear a beep, then press the“Start/Stop”button one
more time. The display will show the original setting and cycle time. The delay
timer is cancelled and you can start again.
3. When the delay timer is set where you want it, make sure to press the“Start/Stop”button.
The colon“:”will ash and your bread will be ready when you planned.
Important: When using the delay timer during times of hot weather, you may wish to
reduce the liquid in your recipe by 1 or 2 tablespoons. This is to prevent the
dough from rising too much. You may also reduce the salt by 1/8 or 1/4
teaspoons and try cutting the amount of sugar you use by 1/4 teaspoon at a
time.

www.oster.com www.oster.com
14 15
For Baking at High Altitudes
If you live above 3000 feet, you probably already know how to adjust other recipes like
cakes and muns.
Higher altitudes tend to:
• Make dough rise faster
• Make our drier
To compensate for high altitude baking, we recommend the following:
If the dough is too dry
• Increase the amount of water to the recipe, sometimes as much as 2–4 tablespoons per
cup.
If the bread rises too high
• Reduce the amount of yeast. For each teaspoon of yeast, try reducing the yeast by 1/8 to
1/4 teaspoon.
• Reduce the amount of sugar. For each tablespoon of sugar, reduce the amount by 1 to 2
teaspoons.
Measurement Equivalency Chart
The following chart will help you convert measurements used in the recipes.
For example: 1/2 tablespoon = 1–1/2 teaspoons
Tips and Hints
Experienced cooks consider bread making to be as much of an art as a science. Keep in mind
that some recipes may require a little experimentation before they are exactly the way you
want them. Just don’t give up. Still, there are special hints to ensuring quality bread almost
every time.
Use Exact Measurements
We’ve already mentioned how important it is to use exact measurements when baking bread,
but it should be said again. Level o all dry ingredients and make sure that all liquid
ingredients are measured in a glass cup with the markings clearly labeled on the side.
Use Fresh Ingredients
You should always use fresh ingredients. The reasons are:
• Flour - If you have stored your our for a long time, it may have become wet from
absorbing moisture, or dry, depending on the area of the country in which you live.
We recommend using fresh bread our.
• Yeast - Fresh yeast is probably the most important ingredient in baking bread. If the yeast
is not fresh, your bread may not rise. It is better to buy new yeast than to take a chance on
yeast that has been stored for a long time.
You can test the freshness of your yeast. Simply ll a cup with warm water, then add and stir in
2 teaspoons of sugar. Sprinkle a few teaspoons of yeast on the surface of the water and wait.
After 15 minutes, the yeast should foam and there should be distinct odor. If neither reaction
happens, the yeast is old and should be thrown away.
Add Ingredients in the Correct Order
Read all recipes from top to bottom, and remember:
- FIRST, liquid ingredients
- SECOND, dry ingredients
- LAST, yeast
Fluid Ounce(s) Cup(s) Tablespoon(s) Teaspoon(s)
8 = 1 = 16 = 48
7 = 7/8 = 14 = 42
6 = 3/4 = 12 = 36
5 = 5/8 = 10 = 30
4 = 1/2 = 8 = 24
3 = 3/8 = 6 = 18
2 = 1/4 = 4 = 12
1 = 1/8 = 2 = 6
= = 1 = 3
1/2 = 1 1/2

www.oster.com www.oster.com
16 17
CARE & CLEANING
Taking Care of Your Bread Machine
Caution: Do not put the breadmaker in water or in a dishwasher, Do not use benzene,
scrubbing brushes, or chemical cleaners as these will damage the machine. Do not immerse
in liquids. Press Stop Button and remove cord plug from wall outlet. Allow to cool.
Use only a mild, non-abrasive cleaner to clean the breadmaker.
General cleaning
1Remove all bread crumbs by wiping them away with a slightly damp cloth.
2DO NOT bend the heating element which is located on the inside of the breadmaker.
Cleaning the baking pan and kneading blade
1Wipe the baking pan and kneading blade with a damp cloth and dry completely.
2DO NOT wash the pan or parts in the dishwasher. This will damage the nish of the pan
and the other parts.
Caring for your bread maker
1 Keep your breadmaker clean at all times.
Caution: Do not use metal utensils with the breadmaker. This will damage the non-stick
pan and other parts.
2Don’t worry if the color of the bread pan changes over time. The color change is a result
of steam and other moisture and does not aect the machine’s performance.
3If you have trouble removing the kneading blade, place warm water in the bread pan
for 10–15 minutes and this will loosen the blade.
Storing your breadmaker
1Make sure the machine is clean and dry before storing.
2Store the breadmaker with the lid closed.
3Do not place heavy objects on the lid.
4Remove the kneading blade and place inside the bread pan.
This appliance has no user serviceable parts. Any servicing beyond that described in the
Cleaning Section should be performed by an Authorized Service Representative only. See
warranty available online.
FAQs
Troubleshooting
If you experience diculties when operating the breadmaker, review the troubleshooting
information in this section to nd a solution. If you are unable to nd a solution, please call
our Consumer Relations Department at 1(800)334–0759.
If you have a power outage
This unit has a memory function if the power goes out while you are using your breadmaker.
1If the power goes out while working and is out for less than 10 min., when the power
comes back on the unit will resume the program from where it left o.
2If the power goes out while working and is out for more than 10 min., when the power
comes back on the unit will not resume the program.
When the power is out for more than 10 min., when it comes back on, you should do
the following:
1Hold down the“Start/Stop” button for at least 3 seconds. If the display does not return to
the time setting before the outage, unplug the bread maker and then plug it back in.
2If the machine still does not start, hold down the“Start/Stop”button a second time for
3 seconds. Continue to unplug and re-plug the machine and hold down the“Start/Stop”
button until the display returns to the cycle time before the power outage.
Understanding Display Information
What do I do if my display does not light up?
Conrm your breadmaker is plugged in.
What do I do if my display shows 0:00 and the colon “:” is ashing?
There is no problem.This just means the baking cycle is over and the breadmaker is keeping
your bread warm. Press the“Start/Stop”button to turn o the keep warm feature.
What do I do if my display shows “HHH” or “LLL” and continuously beeps?
This happens when the internal temperature of the chamber is too high (>305°F)
or too low (< 23°F).
1 Let the unit sit and come back to room temperature then check if it can operate again.
2 If it still does not operate, call the service center for repair.
What do I do if my display shows “EE0” and continuously beeps?
Temperature sensor circuit is broken. Call the service center for repair.
What do I do if my display shows “EE1” and continuously beeps?
Temperature sensor circuit is bypassed. Call the service center for repair.
Troubleshooting Breadmaker Problems
What do I do if I see smoke or smell a burning odor from the back of the machine?
Ingredients have spilled out of the bread pan and into the machine itself. Stop the
breadmaker and allow it to cool o. Clean the breadmaker before using it again.
Please see the“Care & Cleaning”section of the manual.
What do I do if the dough does not mix?
Make sure the baking pan and kneading blade are properly installed in the machine.

www.oster.com www.oster.com
18 19
Troubleshooting Baking Problems
What do I do if the sides of the bread collapse and the bottom of the bread is damp?
There are several possible solutions. The bread may have been left in the bread pan too
long after baking. Remove the bread from the pan sooner and allow it to cool. Try using
more our (a teaspoon at a time), or less yeast (1/4 teaspoon at a time), or less water
or liquid (a teaspoon at a time). This could also be the result of forgetting to add salt
to the recipe.
What do I do if the bread has a heavy, thick texture?
Try using less our (a teaspoon at a time), or more yeast (1/4 teaspoon at a time). This
could also be the result of using old our or the wrong type of our for the recipe.
What do I do if the bread is not baked completely in the center?
Try using more our (a teaspoon more at a time), or less water or liquid (a teaspoon
less at a time). Do not lift the lid too often during baking.
What do I do if the bread has a coarse or holey texture?
This is usually the result of forgetting to add salt to the recipe.
What do I do if the bread rose too much?
Try using less yeast (1/4 teaspoon less at a time). This could also be the result of
forgetting to add salt to the recipe or forgetting to put the kneading blade into
the baking pan.
What do I do if the bread did not rise enough?
There are several possible solutions. Try using less our (a teaspoon less at a time), more
yeast (1/4 teaspoon more at a time), or less water (a teaspoon less at a time). This could
also be the result of:
•forgetting to add salt to the recipe,
•using old our or the wrong kind of our for the recipe,
•using old yeast,
•or not using hot water (except for the ExpressBake® Breadmaker cycles).
What do I do if the bread has a oured top?
This is usually a result of using too much our or not enough water. Try using less our
(a teaspoon or less at a time), or try using more yeast (1/4 teaspoon less at a time).
What do I do if the bread is too brown?
This is usually the result of adding too much sugar to the recipe. Try using less sugar
(1 tablespoon at a time). You can also try selecting a lighter Color selection.
What do I do if the bread is not brown enough?
This is usually the result of repeatedly lifting the lid of the bread machine or leaving
the lid open while the bread is baking. Be sure the lid is shut while the breadmaker is
in operation.
RECIPES
Basic Setting Recipes (Menu 1)
Basic bread machine stages (for 1.5 lb. loaves)
For the basic cycle, you can expect the following things to happen as the timer counts down to zero.
To begin: The ingredients are kneaded for the rst time (11 minutes)
At 2:42, the dough rests for 20 minutes
At 2:22, the dough is kneaded for the second time (17 minutes)
At 2:05, the dough begins to rise (25 minutes)
At 1:40, the dough is“punched down”(10 seconds)
At 1:40, the dough continues to rise (40 minutes)
At 1:00, the dough begins to bake (60 minutes)
At 0:00, the bread is nished. Fruit and Nut Dispenser will automatically release at 2:10.
Traditional White Bread
1.5 pound loaf
1 cup water
2 tablespoons butter or margarine
1 and 1/2 teaspoons salt
3 cups bread our
2 tablespoons dry milk
1 tablespoon sugar
1 and 3/4 teaspoons active dry yeast
1Measure and add liquid ingredients to the bread pan.
2Measure and add dry ingredients (except yeast) to the bread pan.
3Use your nger to form a well (hole) in the our where you will pour the yeast. Yeast must NEVER
come into contact with a liquid when you are adding ingredients. Measure the yeast and carefully
pour it into the well.
4Put the baking pan into the bread maker and close the lid.
5Press the“Menu”button to choose the Basic setting.
6Press the“Loaf” button to choose 1.5 lb or 2 lb.
7Press the“Color” button to choose light, medium or dark.
8Press the“Start/Stop”button.
2 pound loaf
1 and 3/8 cups water
2 tablespoons butter or margarine
1 and 3/4 teaspoons salt
4 cups bread our
2 tablespoons dry milk
2 tablespoons sugar
2 teaspoons active dry yeast
Basic (1)

www.oster.com www.oster.com
20 21
Raisin Bread (no Delay Timer)
1.5 pound loaf
7/8 cup water
1 and 1/2 tablespoons butter or margarine
1 teaspoon salt
3 cups bread our
2 tablespoons sugar
1 and 1/2 tablespoons dry milk
1 teaspoon cinnamon
1 and 1/2 teaspoons active dry yeast
3/4 cups raisins (see note below)
1Measure and add liquid ingredients to the bread pan.
2Measure and add dry ingredients (except yeast) to the bread pan.
3Use your nger to form a well (hole) in the our where you will pour the yeast. Yeast must NEVER
come into contact with a Liquid when you are adding ingredients. Measure the yeast and carefully
pour it into the well.
4Snap the baking pan into the breadmaker and close the lid.
5Press the“Menu”button to choose the Basic setting.
6Press the“Loaf” button to choose 1.5 lb., or 2 lb.
7Press the“Color” button to choose light, medium or dark.
8Press the“Start/Stop”button.
Whole Grain
Setting recipes (Menu 2)
Whole Wheat Bread Machine Stages (for 1.5 lb. loaves)
For the Whole Wheat bread cycle you can expect the following things to happen as the timer counts
down to zero.
To begin: The ingredients are kneaded for the rst time (11 minutes)
At 3:21, the dough rests for 25 minutes
At 2:56, the dough is kneaded for the second time (21 minutes)
At 2:35, the dough begins to rise (35 minutes)
At 2:00, the dough is“punched down” (10 seconds)
At 2:00, the dough continues to rise (60 minutes)
At 1:00, the dough begins to bake (60 minutes)
At 0:00, the bread is nished.
Fruit and Nut Dispenser will automatically release at 2:45.
2 pound loaf
1 and 1/4 cups water
2 tablespoons butter or margarine
1 and 1/2 teaspoons salt
4 cups bread pour
3 tablespoons sugar
2 tablespoons dry milk
1 and 1/2 teaspoons cinnamon
2 teaspoons active dry yeast
1 cup raisins (see note below)
4 and 2/3 cups whole wheat our
3 teaspoons active dry yeast
100% Whole Grain Bread - 2 lb. loaf
1 and 5/8 cups water
1/3 cup packed brown sugar
2 teaspoons salt
1 Measure and add liquid ingredients to the bread pan.
2 Measure and add dry ingredients (except yeast) to the bread pan.
3 Use your nger to form a well (hole) in the our where you will pour the yeast. Yeast must NEVER come
into contact with a liquid when you are adding ingredients. Measure the yeast and carefully pour it
into the well.
4 Snap the baking pan into the breadmaker and close the lid.
5 Press the“Menu”button to choose the Whole Grain setting.
6 Press the“Loaf” button to choose 1.5 lb., or 2 lb.
7 Press the“Color” button to choose light, medium or dark.
8 Press the“Start/Stop”button
Honey Grain Bread
1.5 pound loaf
1 cup water
2 tablespoons butter or margarine
1 and 1/2 tablespoons honey
1 teaspoon salt
2 and 1/4 cups bread our
1 cup whole wheat our
1/2 cup quick cook oats
1 and 3/4 teaspoons active dry yeast
1Measure and add liquid ingredients to the bread pan.
2Measure and add dry ingredients (except yeast) to the bread pan.
3Use your nger to form a well (hole) in the our where you will pour the yeast. Yeast must NEVER
come into contact with a liquid when you are adding ingredients. Measure the yeast and carefully
pour it into the well.
4 Snap the baking pan into the breadmaker and close the lid.
5Press the“Menu”button to choose the Whole Grain setting.
6 Press the“Loaf” button to choose 1.5 lb., or 2 lb.
7Press the“Color” button to choose light, medium or dark.
8 Press the“Start/Stop”button.
2 pound loaf
1 and 3/8 cups water
2 and 1/2 tablespoons butter or margarine
2 tablespoons honey
1 and 3/4 teaspoons salt
2 and 1/2 cups bread our
1 and 1/4 cups whole wheat our
2/3 cup quick cook oats
2 teaspoons active dry yeast
Whole Grain (2)
Whole Grain (2)
Basic (1)

www.oster.com www.oster.com
22 23
Buttermilk Bread
1.5 lb. loaf Grain
1 and 1/4 cups water
1 and 1/2 tablespoons butter or margarine
1 teaspoon white vinegar
2 tablespoons packed brown sugar
2 cups bread our
1 cup whole wheat our
1 cup rye our
2 tablespoons powdered buttermilk
1 tablespoon vital gluten
1 and 1/2 teaspoons caraway seeds
1 and 3/4 teaspoons active dry yeast
1 Measure and add liquid ingredients to the bread pan.
2 Measure and add dry ingredients (except yeast) to the bread pan.
3 Use your nger to form a well (hole) in the our where you will pour the yeast. Yeast must NEVER
come into contact with a liquid when you are adding ingredients. Measure the yeast and carefully
pour it into the well.
4 Snap the baking pan into the breadmaker and close the lid.
5 Press the“Menu”button to choose the Whole Grain setting.
6 Press the“Loaf” button to choose 1.5 lb., or 2 lb.
7 Press the“Color” button to choose light, medium or dark.
8 Press the“Start/Stop”button.
ExpressBake®
Setting Recipes (Menu 3)
ExpressBake® Bread Machine Stages
For the ExpressBake® Breadmaker cycle you can expect the following things to happen as the timer
counts down to zero.
To begin: The ingredients are kneaded (12 minutes)
At 0:47, the dough begins to rise (14 minutes)
At 0:33, the dough begin to bake (33 minutes)
At 0:00, the bread is nished.
Important: You CANNOT use the delay timer for ExpressBake® Breadmaker setting breads.
You CANNOT change the Color.
White Bread ExpressBake®
1.5 pound loaf
1 cup and 2 tablespoons hot water (115°–125°F)
2 tablespoons oil
2 tablespoons sugar
1 teaspoon salt
3 cups bread our
4 teaspoons fast rising yeast
Important: Carefully measure the hot water and make sure it is between 115°–125°F by using a cooking
thermometer.
1 Measure and add liquid ingredients to the bread pan.
2 Measure and add dry ingredients (except yeast) to the bread pan.
3 Use your nger to form a well (hole) in the our where you will pour the yeast. Yeast must NEVER
come into contact with a liquid when you are adding ingredients. Measure the yeast and carefully
pour it into the well.
4 Snap the baking pan into the breadmaker and close the lid.
5 Press the“Menu”button to choose the ExpressBake® setting
a. ExpressBake® (1.5 lb) for 1.5 pound loaves
b. ExpressBake® (2 lb) for 2.0 pound loaves
6 Press the“Start/Stop”button.
Cheese & Rye Bread ExpressBake®
1.5 pound loaf
1 cup and 2 tablespoons hot water (115°–125°F)
1 tablespoon oil
1 tablespoon sugar
1 teaspoon salt
2 and 1/2 cups bread our
1/2 cup rye our
1 tablespoon grated Parmesan cheese
1 cup shredded cheddar cheese
4 teaspoons fast rising yeast
Important: Carefully measure the hot water and make sure it is between 115°–125°F by using a cooking
thermometer.
1 Measure and add liquid ingredients to the bread pan.
2 Measure and add dry ingredients (except yeast) to the bread pan.
3 Use your nger to form a well (hole) in the our where you will pour the yeast. Yeast must NEVER
come into contact with a liquid when you are adding ingredients. Measure the yeast and carefully
pour it into the well.
4 Snap the baking pan into the breadmaker and close the lid.
5 Press the“Menu”button to choose the ExpressBake® setting
a. ExpressBake® (1.5 lb) for 1.5 pound loaves
b. ExpressBake® (2 lb) for 2.0 pound loaves
6 Press the“Start/Stop”button.
2.0 pound loaf
1 and 1/2 cups hot water (115°–125°F)
3 tablespoons oil
3 tablespoons sugar
1 and 1/2 teaspoons salt
4 cups bread our
5 teaspoons fast rising yeast
2.0 pound loaf
1 and 1/2 cups hot water (115°–125°F)
4 teaspoons oil
2 tablespoons sugar
1 and 1/2 teaspoons salt
3 and 1/4 cups bread our
2/3 cup rye our
2 tablespoons grated Parmesan cheese
1 and 1/4 cups shredded cheddar cheese
5 teaspoons fast rising yeast
EXPRESS (3)
EXPRESS (3)
Whole Grain (2)

www.oster.com www.oster.com
24 25
Gluten Free Setting Recipe (Menu 4)
Gluten Free bread machine stages (for 1.5 lb. loaves)
For the Gluten Free cycle, you can expect the following things to happen as the timer counts down to
zero.
To begin: The ingredients are kneaded for the rst time (12 minutes)
At 2:38, the dough rises (5 minutes)
At 2:33, the dough is kneaded for the second time (13 minutes)
At 2:20, the dough rises (70 minutes)
At 1:10, the dough begins to bake (70 minutes)
At 0:00, the bread in nished. Fruit and Nut Dispenser will automatically release at 2:28.
Traditional Gluten Free Bread
Important: Carefully check labels to make sure all ingredients are Gluten Free
1.5 pound loaf
1 cup and 3 tablespoons water
2 tablespoons oil
1 teaspoon salt
3 cups gluten free our
2 tablespoons sugar
1 and 1/2 teaspoons yeast
1 Measure and add liquid ingredients to the bread pan.
2 Measure and add dry ingredients (except yeast) to the bread pan.
3 Use your nger to form a well (hole) in the our where you will pour the yeast. Yeast must NEVER
come into contact with a liquid when you are adding ingredients. Measure the yeast and carefully
pour it into the well.
4 Snap the baking pan into the breadmaker and close the lid.
5 Press the“Menu”button to choose the Gluten Free setting.
6 Press the“Start/Stop”button.
Gluten Free (4)
French Setting Recipes (Menu 5)
French Bread Machine Stages (for 1.5 lb. loaves)
For the French cycle you can expect the following things to happen as the timer counts down to zero.
To begin: The ingredients are kneaded for the rst time (18 minutes)
At 3:22, the dough rests for 40 minutes
At 2:42, the dough is kneaded for the second time (22 minutes)
At 2:20, the dough begins to rise (30 minutes)
At 1:50, the dough is“punched down”(10 seconds)
At 1:50, the dough continues to rise (44 minutes and 50 seconds)
At 1:05, the dough begins to bake (65 minutes)
At 0:00, the bread is nished.
Fruit and Nut Dispenser will automatically release at 2:30.
French Countryside Bread - 2 lb. loaf
1 and 3/8 cups water
1 and 1/2 tablespoons vegetable or olive oil
1 and 1/2 teaspoons salt
1 Measure and add liquid ingredients to the bread pan.
2 Measure and add dry ingredients (except yeast) to the bread pan.
3 Use your nger to form a well (hole) in the our where you will pour the yeast. Yeast must NEVER
come into contact with a liquid when you are adding ingredients. Measure the yeast and carefully
pour it into the well.
4 Snap the baking pan into the bread maker and close the lid.
5 Press the“Menu”button to choose the French setting.
6 Press the“Loaf” button to choose 1.5 lb., or 2 lb.
7 Press the“Color” button to choose light, medium or dark.
8 Press the“Start/Stop”button
4 cups bread our
1 tablespoon sugar
1 and 3/4 teaspoons active dry yeast
French (5)
2.0 pound loaf
1 cup and 7 tablespoons water
3 tablespoons oil
1 and 1/2 teaspoons salt
4 cups gluten free our
2 tablespoons sugar
1 and 1/2 teaspoons yeast

www.oster.com www.oster.com
26 27
Sweet Setting Recipes (Menu 6)
Sweet Bread Machine Stages (for 1.5 lb. loaves)
For the Sweet bread cycle you can expect the following things to happen as the timer counts down
to zero.
To begin: The ingredients are kneaded for the rst time (12 minutes)
At 2:38, the dough rests for 5 minutes
At 2:33, the dough is kneaded for the second time (23 minutes)
At 2:10, the dough begins to rise (30 minutes)
At 2:10, the dough is“punched down”(10 seconds)
At 1:40, the dough continues to rise (40 minutes)
At 1:00, the dough begins to bake (60 minutes)
At 0:00, the bread is nished.
Fruit and Nut Dispenser will automatically release at 2:20.
Springtime favorite Bread (no Delay Timer) - 1.5 lb. loaf
1 cup water
1/4 cup butter or margarine
1 large egg
1 and 1/2 teaspoons vanilla extract
1 and 1/4 teaspoons almond extract
1 teaspoon salt
1 Measure and add liquid ingredients to the bread pan.
2 Measure and add dry ingredients (except yeast) to the bread pan.
3 Use your nger to form a well (hole) in the our where you will pour the yeast. Yeast must NEVER
come into contact with a liquid when you are adding ingredients. Measure the yeast and carefully
pour it into the well.
4 Snap the baking pan into the breadmaker and close the lid.
5 Press the“Menu”button to choose the Sweet setting.
6 Press the“Loaf” button to choose 1.5 lb., or 2 lb.
7 Press the“Start/Stop”button.
3 and 3/4 cups bread our
1/2 cup sugar
3 tablespoons dry milk
1 and 3/4 teaspoons active dry yeast
3/4 cup raisins
1 and 1/2 teaspoons of shredded orange peel
Sweet (6)
Apple Walnut Bread - 1.5 lb. loaf
3/4 cup unsweetened apple sauce
3/8 cup apple juice
3 tablespoons butter or margarine
1 large egg
1 teaspoon salt
4 cups bread our
1Measure and add liquid ingredients to the bread pan.
2 Measure and add dry ingredients (except yeast) to the bread pan.
3 Use your nger to form a well (hole) in the our where you will pour the yeast. Yeast must NEVER
come into contact with a liquid when you are adding ingredients. Measure the yeast and carefully
pour it into the well.
4 Snap the baking pan into the breadmaker and close the lid.
5 Press the“Menu”button to choose the Sweet setting.
6 Press the“Loaf” button to choose 1.5 lb., or 2 lb.
7 Press the“Start/Stop”button.
Oatmeal Bread (Menu setting 7)
Oatmeal bread machine stages (for 1.5 lb. loaves)
For the basic cycle, you can expect the following things to happen as the timer counts down to zero.
To begin: The ingredients are kneaded for the rst time (11 minutes)
At 2:42, the dough begins to rise (20 min)
At 2:22, the dough is kneaded for the second time (17 min)
At 2:05, the dough continues to rise (25 min)
At 1:40, the dough is shaped (15 seconds)
At 1:40, the dough comes to the last period of rise (40 min)
At 1:00, the dough begins to bake (60 min) at 0:0 the bread is nished
Fruit and Nut Dispenser will automatically release at 2:10
1 and 1/4 cups water
3 tablespoons honey
2 tablespoons butter or margarine
3/4 cup quick-cook oats
1 and 3/4 teaspoons salt
1 Measure and add liquid ingredients to the bread pan.
2Measure and add dry ingredients (except yeast) to the bread pan.
3 Use your nger to form a well (hole) in the our where you will pour the yeast. Yeast must NEVER
come into contact with a Liquid when you are adding ingredients. Measure the yeast and carefully
pour it into the well.
4 Snap the baking pan into the breadmaker and close the lid.
5 Press the“Menu”button to choose the oatmeal setting.
6 Press the“Loaf” button to choose 1.5 lb., or 2 lb.
7Press the“Color” button to choose light, medium or dark.
8Press the“Start/Stop”button
3 and 3/4 cups bread our
2 tablespoons oat bran
2 tablespoons dry milk
1 and 3/4 teaspoons active dry yeast
1/4 cup packed brown sugar
1 and 1/4 teaspoons cinnamon
1/2 teaspoon baking soda
2 teaspoons active dry yeast
1/2 cup chopped walnuts
Sweet (6)

www.oster.com www.oster.com
28 29
Dough Setting Recipe (Menu 9)
Dough Bread Machine Stages
For the Dough cycle you can expect the following things to happen as the timer counts down to zero.
Dough:
To begin: The ingredients are kneaded for the rst time (25 minutes)
At 1:05, the dough rests for 30 minutes
At 1:05, the dough is kneaded for the second time (10 minutes)
At 0:35, the dough begins to rise (35 minutes)
At 0:00, the dough is nished.
Dough recipe ingredients (2 lbs.):
2 teaspoons oil
2 teaspoons salt
2 teaspoons dry milk
1 teaspoon sugar
Measure and add liquid ingredients to the bread pan.
Snap the baking pan into the breadmaker and close the lid.
Press the“Menu”button to choose the Dough setting.
Press the“Start/Stop”button.
1 and 3/4 cups water
4 and 1/2 cups our
1 teaspoon active dry yeast
Dough (9)
Preparing Dough for Baking
1 Lightly sprinkle all-purpose our onto a pastry mat or board. Using a rubber spatula or wooden
spoon, remove dough from the bread pan and place on lightly oured surface. Knead by hand 2 or 3
times to release the air. If the dough is easy to handle without our, shape on a lightly oiled, clean
countertop.
2 Shape dough into your favorite rolls, coee cake, etc. (suggestions follow). Place on greased baking
pan. Cover dough with a clean cloth and let rise until almost doubled in size (about 1 hour).
3 Bake as directed in the recipe. Remove from pan and cool on a wire rack or serve warm.
Preparing Dough for Baking
Easy Dinner Rolls
Divide dough into 12 equal pieces, shape into balls and place in greased mun cups. Cover,
let rise and bake as directed. Makes 12.
Swirls
Lightly grease baking sheet. Divide dough into 10 equal pieces. On a lightly oured surface,
using your hand, roll each piece into a pencil like strand about 10 inches long. Beginning at
one end of the strand, continue wrapping each piece around the center to form a swirl.
Place rolls 2 to 3 inches apart on prepared baking sheet. Cover, let rise and bake as directed.
Makes 10.
Butterhorns
Lightly grease baking sheet and set aside. On a lightly oured surface, roll dough into a
12-inch circle. Brush dough with melted butter. Cut into 12 wedges. To shape rolls, begin
at wide end of wedge and roll towards the point. Place rolls point side down, 2 to 3 inches
apart, on prepared baking sheet. Cover, let rise and bake as directed. Makes 12.
Rising
To Reduce Rising Time of Dough Preheat conventional oven to 200°F for 5 minutes, then
turn o oven. Shape dough, place on baking pan as directed and cover with a clean kitchen
towel. Place dough in oven until doubled in size. This will reduce rising time by about one
half.
Recipes using whole grain or unrened ours contain less gluten and may not rise as much
as those using white bread our. As a result, these heavier breads may fall slightly in the
center. This is normal and will not aect the taste of the bread. Wheat gluten can also be
added to improve the shape and volume of bread made with low gluten ours.
Storing
Keeping Your Bread Fresh There are no preservatives in your homemade bread, so store
cooled loaf in a lightly sealed plastic bag.
If desired, enclose a stalk of celery in the bag to keep bread fresh longer. Do not store in the
refrigerator as this causes bread to dry out faster
Yogurt Setting Recipe (Menu 8)
Yogurt machine stages
To begin: Yogurt setting is automatically set to 8 hours at 110°F. The machine will heat up the
ingredients and keep warm for the fermentation to take place.
1/2 gallon of milk
1/2 cup of yogurt containing live active cultures
1 Measure and add ingredients to the bread pan and mix ingredients thoroughly.
2 Put the baking pan into the bread machine and close the lid.
3 Press the“Menu”button to choose the Yogurt setting.
4 Press the“Start/Stop”button

www.oster.com www.oster.com
30 31
Bread Pretzel Dough
All ingredients at room temperature (70–80°F)
2 cups bread our
1 and 1/2 teaspoons active dry yeast
1/4 teaspoon salt
1 Measure all ingredients into bread pan, except egg and coarse salt.
2 Press and hold down the“Start/Stop”button to clear the display.
3 Press the“Menu”button to choose the dough setting.
4 Press the“Start/Stop”button. The display will begin counting down the time on the Dough setting.
When dough is ready, the unit will signal and the display will read“0:00.”
5 Press“Start/Stop”button and hold it down until you hear a beep and the display clears.
6 To remove the bread pan, grasp the handle rmly and lift the pan out.
7Preheat oven to 450°F.
8Divide dough into 12 pieces. Roll each into 8-inch rope. Form into pretzel shape or leave in stick
shape. Place on a greased cookie sheet, brush each with beaten egg. Sprinkle with coarse salt.
9 Bake in preheated oven for 12 to 15 minutes
Butter Rolls (no Delay Timer) Dough
All ingredients at room temperature
(70–80°F), except milk
2 tablespoons sugar
1 teaspoon salt
2 and 3/4 cups bread our
2 teaspoon active dry yeast
1 Measure all ingredients into bread pan.
2 Press and hold down the“Start/Stop”button to clear the display.
3 Press the“Menu”button to choose the dough setting.
4 Press the“Start/Stop”button. The display will begin counting down the time on the Dough setting.
When dough is ready, the unit will signal and the display will read“0:00.”
5Press“Start/Stop”button and hold it down until you hear a beep and the display clears.
6 Gasp the handle of the pan and turn the pan counterclockwise.
7 Shape as desired (see“Preparing Dough for Baking,” pg. 29).
8 Bake at 350°F for 25 to 30 minutes. Makes 12 rolls.
1/2 teaspoon sugar
7/8 cup water
1 to 2 tablespoons coarse (Kosher) salt
1 egg, slightly beaten
1/4 cup water
1 egg
3/4 to 7/8 cup milk
1/4 cup butter
Pizza Crust Dough
All ingredients at room temperature (70–80°F)
1.5 pound
1/2 teaspoon salt
3 cups all-purpose our
1–1/2 teaspoons active dry yeast
1 cup water
2 tablespoons olive oil or vegetable oil
1 Measure all ingredients into bread pan.
2 Press and hold down the“Start/Stop”button to clear the display.
3 Press the“Menu”button to choose the dough setting.
4 Press the“Start/Stop”button. The display will begin counting down the time on the Dough setting.
When dough is ready, the unit will signal and the display will read“0:00.”
5 Press“Start/Stop”button and hold it down until you hear a beep and the display clears.
6 To remove the bread pan, grasp the handle rmly and lift the pan out.
7 Pat dough into 12 x 15-inch jelly roll pan or greased 12-inch round (1–1/2 pound recipe) or 14-inch
round pizza pan (2 pound recipe).
8 Preheat oven to 400°F.
9 Spread pizza sauce over dough. Sprinkle toppings over sauce.
10 Bake 15 to 20 minutes or until crust is golden brown.
Pizza Toppings (optional)
1 cup (8 oz) prepared pizza sauce
1/2 lb. bulk pork sausage, browned and drained
1/3 cup chopped onions
1 pkg. (3–4 oz) sliced pepperoni
1 can (4 oz) mushroom stems and pieces, drained
1 cup chopped green peppers
2 pound
3/4 teaspoon salt
4 cups all-purpose our
2 teaspoon active dry yeast
1–3/8 cup water
3 tablespoons olive oil or vegetable oil
Bake Setting Recipe (Menu 10)
To begin: After all ingredients are added to the bread pan, the machine will begin to heat up and a
countdown of the time selected will start.
Bake setting is for baking dough. the predetermined time of the machine for baking is 60 min however
you can adjust the timing according to the recipe using the time ( ) and time ( ) buttons.
Note: For recipes, you can refer to the dough recipes provided in this instruction manual, and use the
bake setting instead of your oven.
1 Measure and add ingredients to the bread pan.
2 Put the baking pan onto the breadmaker and close the lid.
3 Press the“Menu”button to choose the Bake setting.
4 Adjust the time of baking using the“Time (arrow down)”and “Time (arrow up)”buttons.
5 Press the“Start/Stop”button”
Dough (9) Dough (9)
Dough (9)

www.oster.com www.oster.com
32 33
Strawberry Jam (no Delay Timer)
1 cup sugar
1 tablespoon powdered low-sugar fruit pectin
1–1/2 cups fresh strawberries, sliced
2 teaspoons lemon juice
1 Measure all ingredients into bread pan.
2 Press and hold down the“Start/Stop”button to clear the display.
3 Press the“Menu”button to choose the jam setting.
4 Press the“Start/Stop”button. The display will begin counting down the time on the Jam setting.
When jam is ready, the unit will signal and the display will read“0:00.”
5 Using hot pads, remove bread pan. Pour jam into containers; cover. Refrigerate to set. Makes about 3
cups.
Orange Marmalade (no Delay Timer)
1–1/4 cups sugar
2 tablespoons powdered low-sugar fruit pectin
3 large oranges
1 lemon
1 With a vegetable peeler, shave o the bright layer of peel from one orange and the lemon; chop
nely.
2 Remove and discard remaining white peel from orange and lemon.
3 Peel remaining oranges, and discard peels. Slice fruit into 1/2-inch pieces.
4 Combine chopped peels, fruit, sugar and pectin in bread pan.
5 Press and hold down the“Start/Stop”button to clear the display.
6 Press the“Menu”button to choose the jam setting.
7 Press the“Start/Stop”button. The display will begin counting down the time on the Jam setting.
When jam is ready, the unit will signal and the display will read“0:00.”
8 Using hot pads, remove bread pan. Pour jam into containers; cover. Refrigerate to set.
Makes about 3 cups.
1 pouch (3 oz) liquid fruit pectin
1 tablespoon lemon juice
Frozen Berry Jam (no Delay Timer)
1–3/4 cups sugar
1 package (10 to 12 oz) frozen berries
(strawberries and raspberries are ideal)
1 Measure all ingredients into bread pan.
2 Press and hold down the“Start/Stop”button to clear the display.
3 Press the“Menu”button to choose the jam setting.
4 Press the“Start/Stop”button. The display will begin counting down the time on the Jam setting.
When jam is ready, the unit will signal, and the display will read“0:00.”
5 Using hot pads, remove bread pan. Pour jam into containers; cover. Refrigerate to set.
Makes about 3 cups.
Jam (12)
Cake (11)
Jam (12)
Jam (12)
Jam Setting Recipes (Menu 12)
(Jams and Marmalades)
Jam Bread Machine Stages
For the Jam cycle you can expect the following things to happen as the timer counts down to zero.
To begin: The ingredients are heated to 220F for fermentation to take place while kneading are done at
set intervals (60 min).
At 0:20, the Jam is left to set.
At 0:00, the Jam is nished.
Cake Setting Recipe (Menu 11)
Cake bread machine stages
To begin: The ingredients are kneaded for the rst time (7 minutes)
At 1:43, the dough rises (4 minutes)
At 1:39, the dough is kneaded again (10 minues)
At 1:29, the dough rises (9 minutes)
At 1:20, the dough begins to bake (80 minutes)
At 0:00, the Cake is nished
The Fruit and Nut Dispenser will automatically release at 1:34.
Vanilla Pound Cake
3 large eggs, beaten
1/3 cup milk
2 cups bread our
3 tsp baking powder
1/2 cup butter, melted
1 cup sugar
1 tsp vanilla extract
1 Measure and add ingredients to the bread pan, adding the wet ingredients rst.
2 Put the baking pan onto the breadmaker and close the lid.
3 Press the“Menu”button to choose the Cake setting.
4 Select the Color by selecting the “Color” button.
5 Press the“Start/Stop”button

www.oster.com www.oster.com
34 35
1 Year Limited Warranty
Sunbeam Products, Inc. or if in Canada, Newell Brands Canada ULC (collectively, “Sunbeam”) warrants that
for a period of one year from the date of purchase, this product will be free from defects in material and
workmanship. Sunbeam, at its option, will repair or replace this product or any component of the product
found to be defective during the warranty period. Replacement will be made with a new or remanufactured
product or component. If the product is no longer available, replacement may be made with a similar
product of equal or greater value. This is your exclusive warranty. Do NOT attempt to repair or adjust any
electrical or mechanical functions on this product. Doing so will void this warranty.
This warranty is valid for the original retail purchaser from the date of initial retail purchase and is not
transferable. Keep the original sales receipt. Proof of purchase is required to obtain warranty performance.
Sunbeam dealers, service centers, or retail stores selling Sunbeam products do not have the right to alter,
modify or any way change the terms and conditions of this warranty.
This warranty does not cover normal wear of parts or damage resulting from any of the following: negligent
use or misuse of the product, use on improper voltage or current, use contrary to the operating instructions,
disassembly, repair or alteration by anyone other than Sunbeam or an authorized Sunbeam service center.
Further, the warranty does not cover: Acts of God, such as re, ood, hurricanes and tornadoes.
What are the limits on Sunbeam’s Liability?
Sunbeam shall not be liable for any incidental or consequential damages caused by the breach of any
express, implied or statutory warranty or condition.
Except to the extent prohibited by applicable law, any implied warranty or condition of merchantability or
tness for a particular purpose is limited in duration to the duration of the above warranty.
Sunbeam disclaims all other warranties, conditions or representations, express, implied, statutory or
otherwise.
Sunbeam shall not be liable for any damages of any kind resulting from the purchase, use or misuse of, or
inability to use the product including incidental, special, consequential or similar damages or loss of prots,
or for any breach of contract, fundamental or otherwise, or for any claim brought against purchaser by any
other party.
Some provinces, states or jurisdictions do not allow the exclusion or limitation of incidental or consequential
damages or limitations on how long an implied warranty lasts, so the above limitations or exclusion may
not apply to you.
This warranty gives you specic legal rights, and you may also have other rights that vary from province to
province, state to state or jurisdiction to jurisdiction.
How to Obtain Warranty Service
In the U.S.A.
If you have any question regarding this warranty or would like to obtain warranty service, please call
1-800-334-0759 and a convenient service center address will be provided to you.
In the U.S.A., this warranty is oered by Sunbeam Products, Inc. located in Boca Raton, Florida 33431. If
you have any other problem or claim in connection with this product, please write our Consumer Service
Department.
PLEASE DO NOT RETURNTHIS PRODUCT TO ANY OFTHESE ADDRESSES
OR TO THE PLACE OF PURCHASE.
MEDIDAS DE SEGURIDAD IMPORTANTES
Cuando se utilizan aparatos eléctricos, siempre se deben Seguir precauciones básicas de seguridad, incluyendo
las Siguientes:
1. Lea todas las instrucciones antes de utilizar este producto.
2. No toque las supercies calientes, utilice las asas. Use guantes de cocina si es necesario.
3. A n de protegerse contra una descarga eléctrica, no sumerja el cuerpo del aparato, el cable ni el enchufe en
agua ni en ningún otro líquido.
4. Este aparato no debe ser utilizado por niños. Mantenga el aparato y su cable fuera del alcance de niños. Los niños
no deben jugar con el aparato. Los aparatos no pueden ser utilizados por personas con discapacidades físicas,
sensoriales o mentales o sin experiencia ni conocimientos o instrucciones relativas al uso seguro del aparato y
comprendan los riesgos que implica.
5. Desenchufe el aparato del tomacorriente cuando no esté en uso y antes de limpiarlo. Espere a que el aparato se
enfríe antes de instalarle o retirarle piezas y antes de limpiarlo.
6. No utilice un producto que tenga un cables o enchufes dañado o después de presentar un problema de
funcionamiento, o que se haya dañado de manera alguna. Devuelva el aparato al centro de servicio autorizado
de Oster para que lo examinen, reparen o ajusten.
7. El uso de accesorios no recomendados por el fabricante del producto podría ocasionar lesiones.
8. Evite el contacto con partes sueltas.
9. No la utilice al aire libre ni con nes comerciales.
10. No permita que el cable cuelgue del borde de la mesa o del mostrador ni que entre en contacto con supercies
calientes.
11. No coloque el aparato cerca de supercies mojadas o cerca de una hornilla de gas o eléctrica ni en un horno
caliente.
12. Proceda con extrema precaución al mover de un lugar a otro un aparato que contenga aceite u otros líquidos
calientes.
13. La base de calentamiento está sujeta al calor residual del ciclo de cocción. No toque la base de calentamiento
inmediatamente después de usar. Dejar enfriar antes de manipular.
14. Tenga cuidado al abrir la tapa durante o después de un ciclo de cocción. El escape de vapor puede causar
quemaduras.
15. No use el aparato para otro uso que no sea el previsto.
16. Este aparato está destinado solo para el uso doméstico en hogares, para el uso de huéspedes en habitaciones
de hotel, para grandes casas de campo, para cocinas y comedores en lugares de trabajo, ocinas y tiendas.
Mantenga 6 pulgadas (152 mm) despejadas de la pared y de todos los lados. Siempre use el electrodoméstico en
una supercie seca, estable y nivelada.
17. Si el circuito eléctrico se encuentra sobrecargado con otros artefactos, tal vez maquina para hacer pan no
funcione adecuadamente. Maquina para hacer pan debe funcionar con un circuito eléctrico distinto de los otros
artefactos en funcionamiento.
ESTA UNIDAD ESTÁ DISEÑADA PARA USO DOMÉSTICO ÚNICAMENTE.
GUARDA ESTAS INSTRUCCIONES

www.oster.com www.oster.com
36 37
Modelos Estadounidenses con enchufes polarizados:
ENCHUFE POLARIZADO
Este artefacto cuenta con una clavija polarizada (una hojilla es mas ancha que la otra).
Como medida de seguridad para reducir el riesgo de descarga eléctrica, esta clavija entra
sólo de una manera en un enchufe polarizado. Si la clavija no encaja en el enchufe, simplemente colóquela
al revés. Si aún así no encaja, contacte a un electricista calicado. De ninguna manera intente modicar esta
medida de seguridad o modicar el enchufe. Si el enchufe queda ojo en el tomacorriente o el tomacorriente se
recalienta no utilice ese tomacorriente.
INSTRUCCIONES DEL CABLE ELÉCTRICO:
Se proporciona un cable corto de suministro de energía o un cable de electricidad que se desconecta para reducir
los riesgos que resultan al enredarse o tropezarse con un cable más largo. Se encuentran disponibles cordones de
extensión o cables eléctricos desmontables más largos que pueden usarse si se tiene cuidado. Si se usa un cable de
extensión o un cable de desconexión inmediata:
a. La calicación eléctrica marcada del juego de cables o del cable de extensión debe ser al menos tan alta como
la clasicación eléctrica del aparato;
b. El cable debe colocarse de modo que no cuelgue del tope o de la mesa donde los niños puedan tirar de él o
tropezarse involuntariamente; y
c. Si el electrodoméstico es de tipo con conexión a tierra, el juego de cables o el cable de extensión deben ser un
cable de 3 hilos con conexión a tierra. No hale, ni tuerza, ni abuse del cable eléctrico
NOTAS
1. Algunas supercies de topes y mesas no están diseñadas para soportar el calor prolongado generado por
ciertos electrodomésticos. No coloque la unidad caliente sobre una mesa de madera.
2. Durante el uso inicial de este aparato, puede detectarse un poco de humo y / u olor. Esto es normal y debería
desaparecer después de algunos usos.
DESCRIPCIÓN GENERAL (FIG.1)
1. Tapa
2. Ventana de visualización
3. Compartimiento de
Ingredientes
4. Cesta de pan
5. Cuchilla para amasar
6. Panel de control
7. Cuerpo de Maquina para hacer
pan
8. Dispensador de frutas y nueces
9. Taza medidora
10. Gancho para desmontar la cuchilla
para amasar
11. Cuchara medidora
1
2
3
4
5
6
7
8
11
10
9

www.oster.com www.oster.com
38 39
INTRODUCCION AL PANEL DE CONTROL
Esto indica
el programa
elegido
Tiempo de
operacion para
cada programa
MENU
COLOR
TIME
LOAF
/
TIME
LIGHT MEDIUM DARK 1.5lb 2lb
BASIC .1
WHOLE GRAIN .2
EXPRESS BAKE .3
GLUTEN FREE .4
FRENCH .5
SWEET .6
7. OATMEAL
8. YOGURT
9. DOUGH
10. BAKE
11. CAKE
12. JAM
INTRODUCCION AL PANEL DE CONTROL
Pantalla de visualización: indica su menú, ciclo de cocción actual, tamaño del
pan, color y tiempo de cocción.
Menú: la máquina para hacer pan Oster ExpressBake® ofrece 12 programas
diferentes. Presione el botón Menú para desplazarse y seleccionar el programa
deseado. Los números en la ventana de visualización corresponderán con los
números en el panel de control. como referencia consulte la lista de los diferentes
programas en las páginas 44.
Color: Presione Crust para seleccionar el color deseado. Aparecerá una echa
indicadora sobre el color seleccionado: Claro, Medio u Oscuro.
Loaf - Presione Loaf para seleccionar el tamaño de pan deseado: (1.5lb y 2lb).
Este botón no es aplicable para el programa, Masa, Mermelada, Yogurt, Pastel y
Hornear.
START / STOP
El botón START/ STOP se usa para iniciar y detener el programa de horneado
seleccionado. Para iniciar un programa, presione el botón START / STOP una vez.
Se escuchará un breve pitido y los dos puntos en la pantalla LCD comenzarán a
parpadear, la luz de encendido se iluminará y se iniciará el programa. Cualquier
otro botón está desactivado excepto el botón START / STOP después de que
un programa ha comenzado. Esta característica ayudará a prevenir cualquier
interrupción involuntaria en la operación del programa. Para cancelar el programa,
presione el botón START / STOP durante aprox. 2 segundos, cuando escuche un
pitido, signica que el programa ha sido cancelado.
Table of contents
Languages:
Other Oster Bread Maker manuals

Oster
Oster P. N. 101017 User manual

Oster
Oster EXPRESSBAKE 102819 User manual

Oster
Oster CKSTBR9050 User manual

Oster
Oster 5839 User manual

Oster
Oster Bread & Dough Maker User manual

Oster
Oster 5844 User manual

Oster
Oster 5845 User manual

Oster
Oster FPSTPQM623 User manual

Oster
Oster Bread & Dough Maker User manual

Oster
Oster 5834 User manual

Oster
Oster 5858 User manual

Oster
Oster EXPRESSBAKE CKSTBRTW20 Quick guide

Oster
Oster 5814 User manual

Oster
Oster 5838-EXPRESSBAKE-BREAD-MAKER User manual

Oster
Oster EXPRESSBAKE CKSTBRTW20 User manual

Oster
Oster 102817 User manual

Oster
Oster 5846 User manual

Oster
Oster EXPRESSBAKE CKSTBRTW20 User manual

Oster
Oster 5843 User manual

Oster
Oster 5836 User manual