Oster 3308 User manual

MODEL/MODÈLE
MODELO
MODEL/MODÈLE
MODELO
Instruction Manual
PROGRAMMABLE THERMAL COFFEEMAKER
READ ALL INSTRUCTIONS BEFORE USING THIS APPLIANCE
Manual de Instrucciones
CAFETERA PROGRAMABLE CON JARRA TÉRMICA
LEA TODAS LAS INSTRUCCIONES ANTES DE USAR ESTE APARATO
Manuel d’Instructions
CAFETIÈRE PROGRAMMABLE À VERSEUSE THERMIQUE
LIRE TOUTES LES INSTRUCTIONS AVANT D ’ UTILISER CET APPAREIL
Manual de Instruções
CAFETEIRA PROGRAMÁVEL COM GARRAFA TÉRMICA
LEIA TODAS AS INSTRUÇÕES ANTES DE USAR ESTE APARELHO
3308
3308
Programar
Hora
Min.
Max
10
8
6
4
2
Intensidad
Selec. / Apg.
T e mporizador
de Frescura
Regular
Fuerte
Colar
Colado
Prog.
Limpiar
AM
6
9

English-1
IMPORTANT SAFEGUARDS
To reduce the risk of fire, electric shock and/or injury to persons, basic safety precautions
should always be followed when using electrical appliances, including the following:
READ ALL INSTRUCTIONS BEFORE USING THE COFFEEMAKER.
• DO NOT touch the coffeemaker’s hot surfaces. Use handles or knobs.
• DO NOT open the brew basket lid while brewing. Scalding may occur if the lid is
removed during brewing cycles
• Toprotectagainstelectricshock,DO NOT immerse the power cord, power plug or
coffeemaker in water or in any other liquid.
• Closeadultsupervisionisnecessarywhenthisapplianceisusednearchildren.
• TurnthecoffeemakerOFFandunplugthepowercordfromthepowersourcewhenthe
coffeemaker and clock are not in use and before cleaning. Allow the coffeemaker parts
to cool before putting on or taking off parts and before cleaning the appliance.
• DO NOT operate any appliance with a damaged power cord or power plug, or operate
it after the appliance malfunctions, or has been damaged in any manner. Return this
applianceonlytothenearestAuthorizedOster® ServiceCenterforexamination,repair
or adjustment.
• Theuseofaccessoryattachmentsotherthanrecommendedbythemanufacturermay
cause hazards or injuries.
• DO NOT use the coffeemaker outdoors.
• DO NOT let the power cord hang over edge of table or counter, or allow it to come into
contact with hot surfaces.
• DO NOT place this coffeemaker on or near a hot gas stove or electric burner or in a
heated oven.
• Todisconnectthecoffeemaker,turnitOFF,andthenremovethepowerplugfromthe
power supply.
• Placetheapplianceonahard,flatlevelsurfacetoavoidinterruptionofairflow
underneath the coffeemaker.
• Avoidcontactwithanymovingparts.
• Thiscoffeemakerisdesignedforhouseholduseonly.
• DO NOT use appliance for other than intended use.
SAVE THESE INSTRUCTIONS

English-2
WARNING! To reduce the risk of fire or electric shock, do not remove any service covers.
Therearenouserserviceablepartsinsidethecoffeemaker.Onlyauthorizedpersonnel
shouldrepairthecoffeemaker.PleasereadALLoftheinstructionsinthismanualcarefully
beforeyoubegintousethisappliance.Propercareandmaintenancewillensurealong
lifeandatrouble-freeoperationforthisappliance.Pleasesavetheseinstructionsand
refer to them for cleaning and care tips.
SPECIAL CORD SET INSTRUCTIONS
1.A short power supply cord is provided to reduce the hazards resulting from a person or
pet becoming entangled in, or tripping over, a longer cord.
2.Anextensioncordmaybepurchasedandusedifcareisexercisedinitsuse.
3.Ifanextensioncordisused,themarkedelectricalratingoftheextensioncordmust
bethesameorhigherthanthatoftheappliance.Theresultingextendedcordmustbe
arranged so that it will not drape over a countertop or tabletop where it can be
pulled on by children or tripped over accidentally.
4.(For 120V & 127V units only) This appliance has a polarized plug (one blade is wider
than the other). To reduce the risk of electric shock, this plug will fit in a polarized outlet
only one way. If the plug does not fit fully in the outlet, reverse the plug. If it still does
not fit, contact a qualified electrician. Do not modify the plug in any way.
Youcancustomizethelengthofthepowercordsothatitistheexactlengthyoudesire.
To increase the length of the power cord: grasp the power cord (not the power plug)
and gently lift it out of the slot, then pull it away from the coffeemaker. To decrease the
length of the power cord: grasp the power cord (not the power plug), lift it out of the slot
andgentlyfeeditintothecoffeemaker.Lockthecordintheslotwhenfinished.

English-3
1. BrewBasketLid
2. ShowerHeadCover
3. Water Reservoir
4. Pause‘nServe
5. Dual Water Windows
6. ThermalCarafe
7. RemovableFilterBasket
8. PourThroughReservoirLid
9. RemovablePermanentFilter
DESCRIPTION OF THE APPLIANCE
2
9
7
Max
10
8
6
4
2
AM
6
9
Programar
Hora
Min.
Intensidad
Selec. / Apg.
T e mporizador
de Frescura
Regular
Fuerte
Colar
Colado
Prog.
Limpiar
8
1
3
5
4
6

English-4
COFFEEMAKER FEATURES AND BENEFITS
Your new OSTER®coffeemaker has the following features:
• Brewing Capacity–10Cups
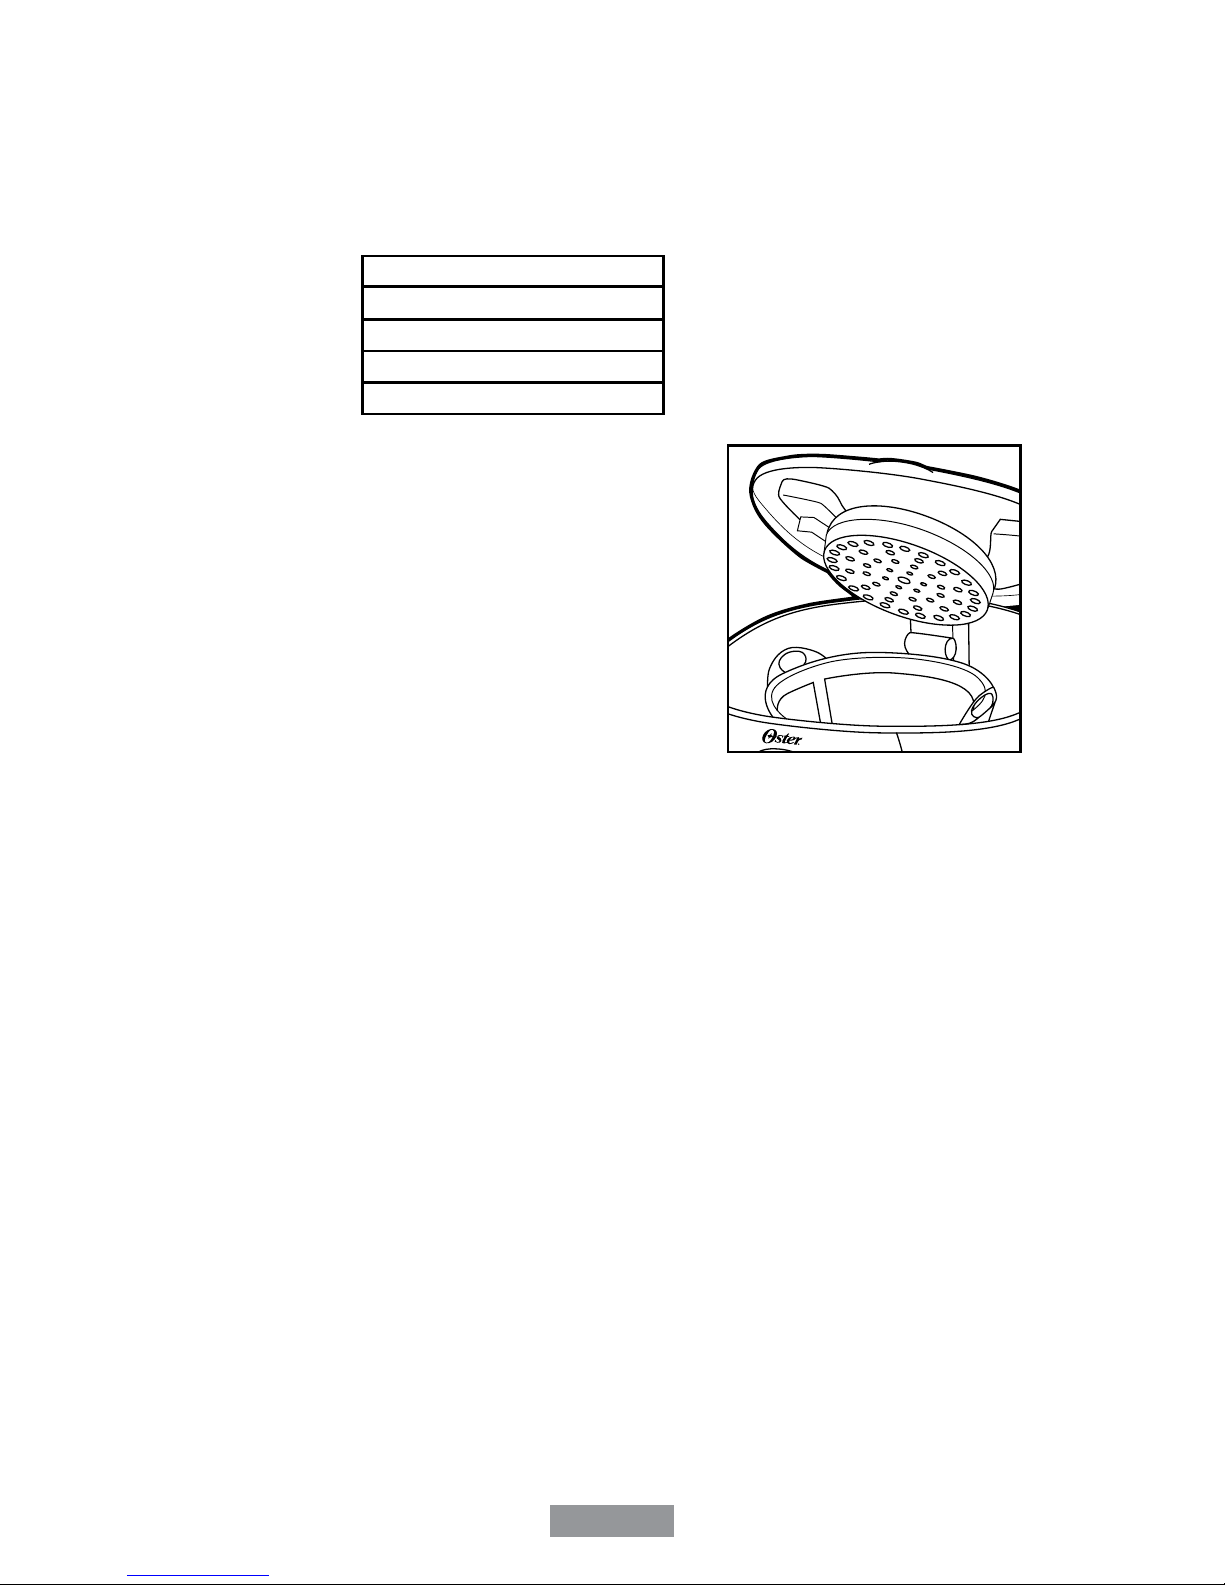
• Removable Filter Basket – The filter basket lifts out for fast and easy cleaning and filling.
• Pause ‘n Serve–Can’twaitforthecoffeetofinishbrewing?ThePause‘nServe
feature allows you up to 30 seconds to pour a cup of coffee while the coffeemaker is
stillbrewing.CarefullyremovethethermalcarafeandthePause’nServefeaturewill
be automatically activated, temporarily stopping the flow of coffee into the thermal
carafe.
• Dual Water Windows – Show amount of water in the reservoir for accurate filling.
• Decanter Plate –The plate under the thermal carafe will heat up while your coffee is
brewing and will switch off once the process is completed.
• Brew Strength (INTENSIDAD) Selector – Adjusts the brewing time to create a more
full-flavored coffee.
• Cord Storage–Safelystoresexcesscordtokeepyourcountertopneat.
• Auto Shut-Off – The coffeemaker shuts-off when brewing cycle is completed.
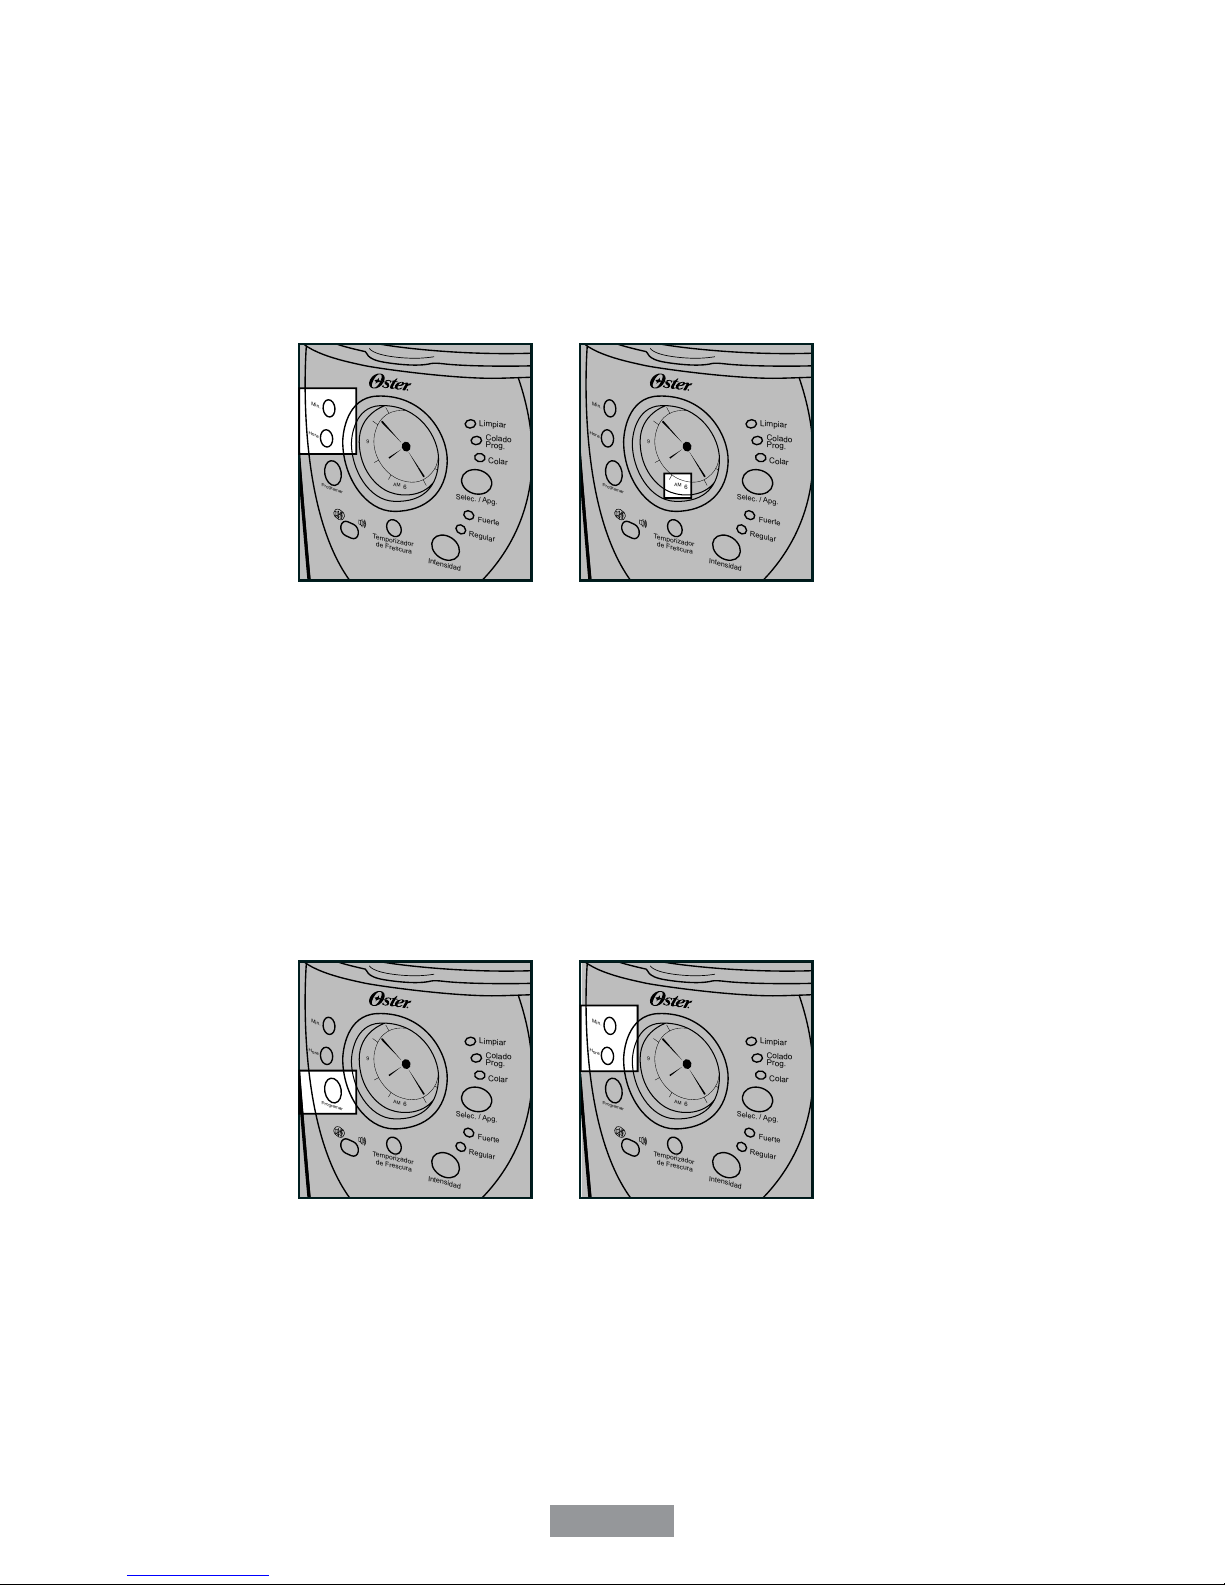
• Programmable Controls:
- Clock – The clock serves as a handy kitchen clock and allows you to set the
DelayBrew(COLADOPROG.)featureandfunctionsastheFreshBrewTimer
(TEMPORIZADORDEFRESCURA)feature.
- Fresh Brew Timer (TEMPORIZADOR DE FRESCURA) feature–Letsyouknow
how long your coffee has been waiting for you.
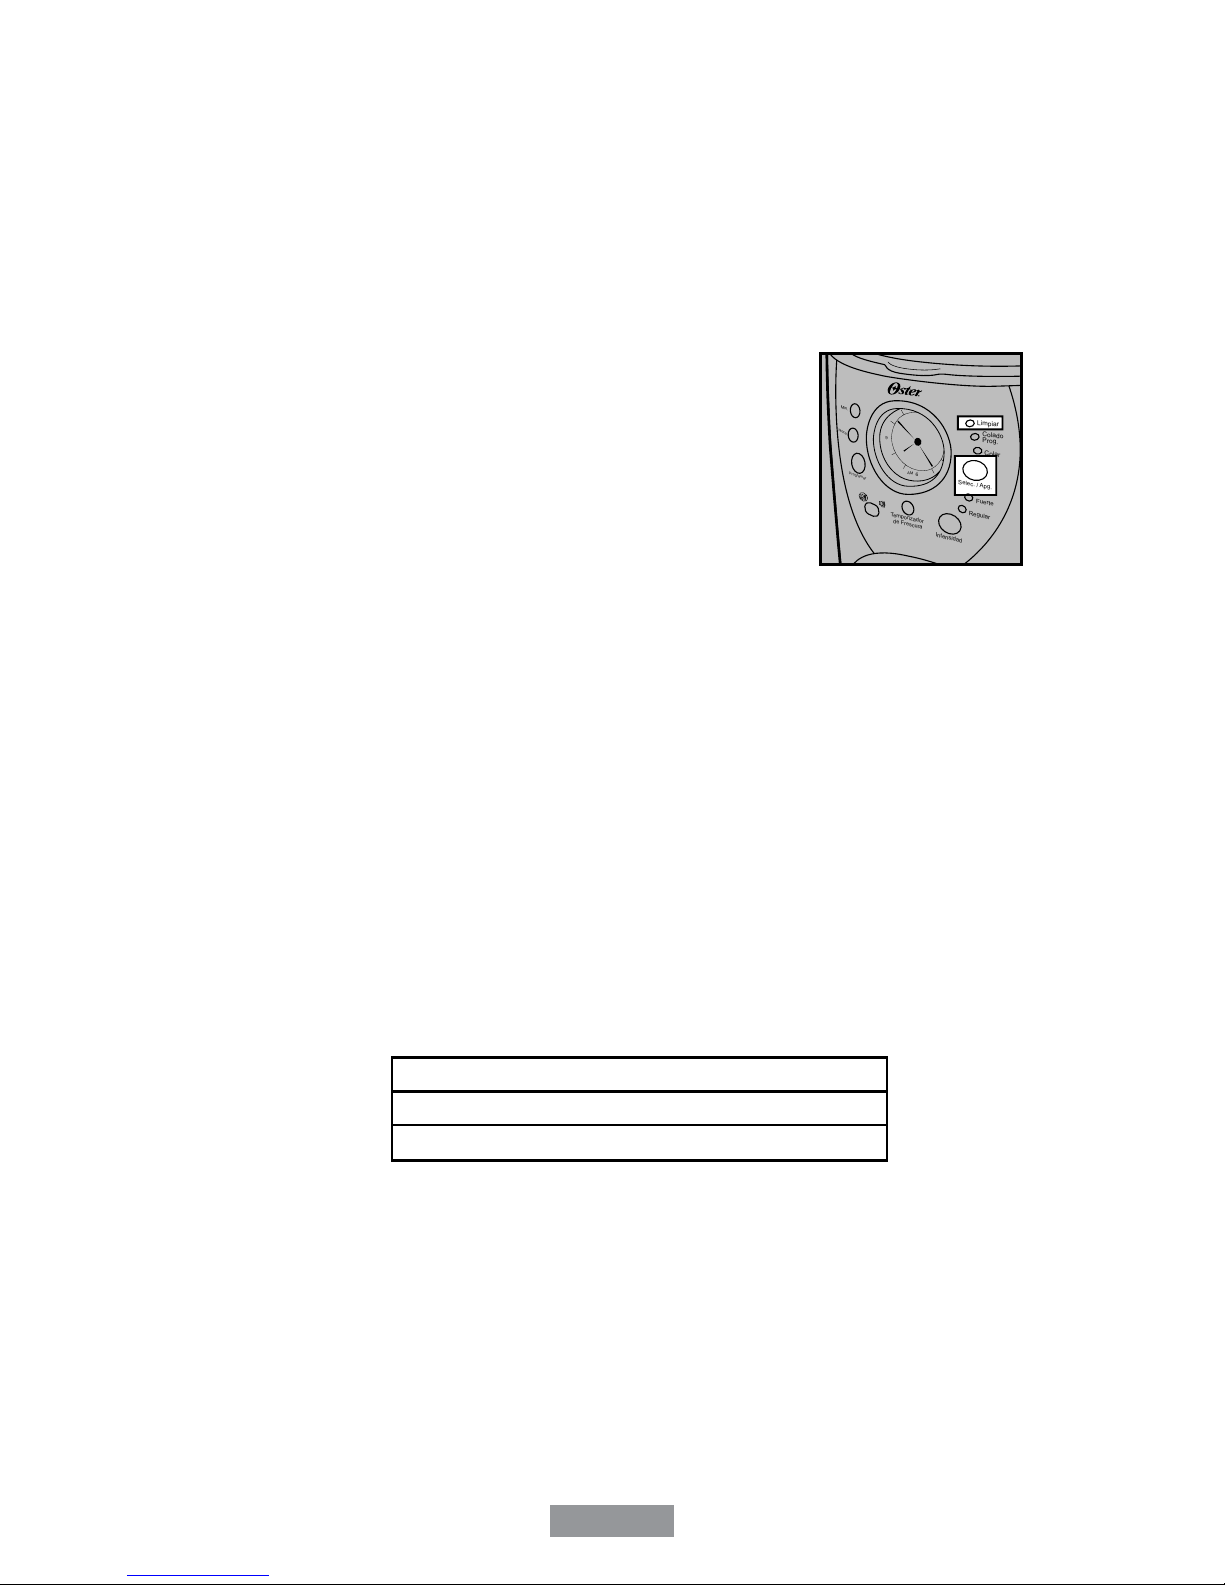
- On / Off Audible Signal–Choosetobealertedattheendofbreworcleancycle.
- Delay Brew (COLADO PROG.) – Would you like to wake up to a fresh pot of
coffee?Thetimerallowsyoutopresetwhenyouwouldlikethecoffeemaker
to automatically begin brewing your coffee, up to 24 hours in advance.
- Special Cleaning Cycle – Enables you to easily maintain and clean mineral
deposits from your coffeemaker.
NOTE: If you have selected any of the operating functions, the coffeemaker will act upon
the last operation selected if the power is restored within 10 seconds after a power outage.
• Thermal Carafe – Ensures your coffee will stay hot longer
NOTE:Tomaximizetheamountoftimethecoffeewillremainhotdonotopenthethermal
carafelidoncethecoffeehasbrewed.Pressdownonthebuttonfoundonthelidinorder
to pour the coffee.
CLEAN YOUR COFFEEMAKER BEFORE
USING THE FIRST TIME
MakesureyourfirstcupofcoffeeisasgoodascanbebycleaningyourOSTER®
Coffeemakerbeforeitsfirstuse.Justfollowthesesimplesteps:
1.Washthedecanter,decanterlidandthefilterbasketinamixtureofmilddetergentand
water. Rinse each thoroughly (please refer to the Description of the Appliance section).
2.Replace all the parts and close the lid. Then, run a brew cycle with water only, without
adding coffee and coffee filter.
3.When brewing is complete, turn your coffeemaker off, discard the water in the decanter
and rinse the decanter, decanter lid, and filter basket.
Your coffeemaker is now ready to use. Enjoy it!

English-5
SETTING THE CLOCK AND DELAY BREW TIME
To Set the Clock:
1.Plugthepowercordintoastandardelectricaloutlet.Theclockwillflashonthecontrol
panel to indicate that the time has not been set yet.
2.Pressandholdthehour(HORA)andminute(MIN.)buttonsuntilyoureachthecurrent
time.TheAMorPMindicatorwilllightatthebottomofthedisplay(Figures1and2).
Figure1 Figure2
The clock is now set!
NOTE:Pressinganybuttonbeforesettingtheclockwillcausetheclocktostartkeeping
time from 12:00 a.m. You must set the clock if you want to use the Delay Brew feature.
To Set the Delay Brew Time:
Whilethedisplayisintheclockmode,simplypresstheSetDelay(PROGRAMAR)button
(Figure3)and,whiletheDelayBrew(COLADOPROG.)yellowlightisflashingsetthe
brewtimebypressingthehour(HORA)andminute(MIN.)buttons(Figure4).TheAMor
PMindicatorwilllightatthebottomoftheclockdisplay.Withinafewsecondsthedisplay
will change to the current time.
Figure3 Figure4
The Delay Brew Time is now set!
NOTE:ToactivatetheDelayBrew(COLADOPROG.)cycle,seetheBrewing Coffee
Latersection(p.8).Tochecktheprogrammedtime,pushtheSetDelay(PROGRAMAR)
button. The display will show the time you have programmed the coffee to brew. If you
presstheSetDelay(PROGRAMAR)buttonagainorwaitafewseconds,thedisplaywill
switch back.
Max
10
8
6
4
2
AM
6
9
Programar
Hora
Min.
Intensidad
Selec. / Apg.
Te mporizador
de Frescura
Regular
Fuerte
Colar
Colado
Prog.
Limpiar
Max
10
8
6
4
2
AM
6
9
Programar
Hora
Min.
Intensidad
Selec. / Apg.
Te mporizador
de Frescura
Regular
Fuerte
Colar
Colado
Prog.
Limpiar
Max
10
8
6
4
2
AM
6
9
Programar
Hora
Min.
Intensidad
Selec. / Apg.
Te mporizador
de Frescura
Regular
Fuerte
Colar
Colado
Prog.
Limpiar
Max
10
8
6
4
2
AM
6
9
Programar
Hora
Min.
Intensidad
Selec. / Apg.
Te mporizador
de Frescura
Regular
Fuerte
Colar
Colado
Prog.
Limpiar

English-6
PREPARING FOR USE
Selecting and Measuring Ground Coffee
Forbestresults,usealeveltablespoonforgroundcoffeemeasurement.Makesureyou
use medium grind coffee for a perfect brew.
A. Suggested Coffee Measurement Chart
To Brew Ground Coffee
10 Cups 7.5tbsp.
8 Cups 6.5tbsp.
6 Cups 4.5tbsp.
4 Cups 3 tbsp.
1 level tablespoon (tbsp) = 5 gr./0.17 oz.
1 cup = 148 ml/ 5 fl. oz. of brewed coffee
Use more or less coffee to suit your taste.
B. Adding Water and Ground Coffee
1.Openthebrewbasketlid.Foryourconvenience,you
can lift out the removable filter basket.
2.PlacetheOster®permanent filter or if you prefer a 10
cup paper basket-style filter into the removable filter
basket(Figure5).
NOTE: If using paper filters, it is important that the
sides of the filter fit flush against the side of the filter
basket. If filter collapse occurs, dampen the filter
before placing in the filter basket and adding ground
coffee and water.
3.Add the desired amount of coffee and gently shake to level the coffee. See the
SuggestedCoffeeMeasurementChart.
4.Be sure the removable filter basket is properly centered and all the way down in the
brew basket and close the lid.
5.Fillthecarafewithcold,freshwatertothedesiredcapacity(1cupequals148ml/5
ounces).Foreasyandaccuratefilling,thewatermarkingsonthedualwaterwindows
show the amount of water needed to make the corresponding desired number of cups
Do not fill past the “10 cup MAX line” or water will flow out of the overfill hole in the
back of the coffeemaker.
The amount of coffee brewed will always be slightly less than the amount of water
poured in the water reservoir. This is due to the minimum absorption of water by the
coffee grounds.
6.Liftthepourthroughreservoirlidandpourthewaterintothewaterreservoir.Closethe
lid and place the empty carafe onto the decanter plate.
NOTE: Make sure the carafe is fully placed on the decanter plate or the water and the
grounds will overflow from the filter basket. An overflow may cause personal injury or
damage to property.
Fortheoptimumcoffeetemperature,werecommendpreheatingthestainlesssteel
thermal carafe.
• Before brewing coffee, fill the carafe with hot tap water.
• Letwaterstandincarafeforafewminutes(2-5minutes).
• Empty water into sink.
• Placecarafeonwarmerplateandstartbrewingcycle.
Max
10
8
6
4
2
AM
6
9
Programar
Hora
Min.
Intensidad
Selec. / Apg.
Te mporizador
de Frescura
Regular
Fuerte
Colar
Colado
Prog.
Limpiar
Figure5

English-7
BREWING COFFEE NOW
1.After completing the steps in the Adding Water and Coffee
(p. 6) section. With the thermal carafe and the filter basket
securely in place, turn the coffeemaker on by pressing the
Select(SELEC./APG.)buttononce.TheBrewNow(COLAR)
green light will turn on to signal that the coffeemaker is on and
brewing(Figure6).
2.To enjoy a more full flavored cup of coffee, press the Brew
Strength(INTENSIDAD)buttononce.TheStrong(FUERTE)
brew strength red light will turn on. The coffeemaker will remain
in the brew strength you have selected until you change it back
to regular strength by pressing the Brew Strength
(INTENSIDAD)buttonoruntilyouunplugthemachine(Figure7).
3.After the used coffee grounds have cooled, carefully remove the
filter basket and discard them.
NOTE: The showerhead cover is hot after brewing. Always allow
the coffeemaker to cool down before cleaning.
4.Priortomakingasecondpotofcoffee,turnthecoffeemakeroff.
ThiswillresettheFreshBrewTimer(TEMPORIZADORDE
FRESCURA)feature.Toturnthecoffeemakeroff,pressthe
Select(SELEC./APG.)buttonuntilalllightsturnoff.
5.Make sure the carafe is empty before starting to brew coffee.
6.Be sure to turn your coffeemaker off when no longer using it.
The Fresh Brew Timer (TEMPORIZADOR DE FRESCURA)
Feature
The FreshBrewTimer(TEMPORIZADORDEFRESCURA)
feature lets you know how long your coffee has been waiting for
you.Atthestartofthebrewcycle,theFreshBrewTimer
(TEMPORIZADORDEFRESCURA)featurewillautomaticallybe
activated and the clock display will change to show the time since
brewingbegan.IncrementalsegmentsoftheFreshBrewTimer
(TEMPORIZADORDEFRESCURA)featurewillstarttodarkenas
an indication of how long the coffee has been waiting for you.
PresstheFreshBrewTimer(TEMPORIZADORDEFRESCURA)
buttononce(Figure8)togobacktotheclockfunction(whileonthe
clockmode,theFreshBrewTimer(TEMPORIZADORDE
FRESCURA)featurewillkeepcounting).Thedisplaywill
automatically change back to the clock after 2 hours or when the
unit is turned off.
NOTE: The BrewNow(COLAR) green light must be on for the
FreshBrewTimer(TEMPORIZADORDEFRESCURA) feature
to operate. The time and delay brew time cannot be set when the
fresh brew time is displayed.
On/Off Audible Ready Signal
The coffeemaker will beep five times at the end of the brew or
clean cycle. You may choose not to be alerted by turning the
audiblereadysignaloff(Figure9).
Max
10
8
6
4
2
AM
6
9
Programar
Hora
Min.
Intensidad
Selec. / Apg.
T e mporizador
de Frescura
Regular
Fuerte
Colar
Colado
Prog.
Limpiar
Max
10
8
6
4
2
AM
6
9
Programar
Hora
Min.
Intensidad
Selec. / Apg.
T e mporizador
de Frescura
Regular
Fuerte
Colar
Colado
Prog.
Limpiar
Max
10
8
6
4
2
AM
6
9
Programar
Hora
Min.
Intensidad
Selec. / Apg.
T e mporizador
de Frescura
Regular
Fuerte
Colar
Colado
Prog.
Limpiar
Max
10
8
6
4
2
AM
6
9
Programar
Hora
Min.
Intensidad
Selec. / Apg.
T e mporizador
de Frescura
Regular
Fuerte
Colar
Colado
Prog.
Limpiar
Figure6
Figure7
Figure8
Figure9

English-8
BREWING COFFEE LATER
1.You must first set the time for when you would like the coffeemaker to begin brewing
your coffee as described in Setting the Clock and the Delay Brew Timer (p. 5) section.
2.PrepareyourcoffeemakerasdescribedinAddingWaterandGroundCoffeesection.
3.ToactivateDelayBrew(COLADOPROG.)andprogramyourcoffeemakertobrew
coffeeatalatertime,presstheSelect(SELEC./APG.)buttontwice(Figure10).The
yellowDelayBrew(COLADOPROG.)lightwillturnon.Thecoffeemakerisnowsetto
automatically brew coffee at the pre-set later time. At this time the brew strength light
will turn on. You can select the strength that you desire by pressing the Brew Strength
(INTENSIDAD)button.
4.Atthepre-settime,thegreenBrewNow(COLAR)lightwillturn
onandtheDelayBrew(COLADOPROG.)yellowlightwillturn
off, indicating the brewing has started in the selected brew
strength.TheFreshBrewTimer(TEMPORIZADORDE
FRESCURA)featurewillstart.
5.The coffeemaker decanter plate will turn off at the end of the
brew cycle.
As a safety feature, your coffeemaker will NOT start again
automatically the next day. If you want your coffee to brew at
the same time the following day, simply place the filter, coffee
and water and set Delay Brew (COLADO PROG.), by repeating
Steps 2 and 3 above.
To cancel Delay Brew:
PresstheSelect(SELEC./APG.)buttonuntilalllightsturnoff(Figure10).
Daily Cleaning
Always unplug the coffeemaker and allow it to cool before cleaning. Remove the filter
basket, permanent filter, carafe and carafe lid and wash them in a solution of hot water
andmildliquidsoap.Neveruseabrasivecleansers,steelwoolpadsorotherabrasive
materials. Dishwasher top rack safe parts: thermal carafe and lid, filter basket and
permanent filter.
CAUTION!Neverimmersethecoffeemakeritselfinwater,inanyotherliquidorplacein
the dishwasher.
Figure10
CLEANING AND MAINTAINING
YOUR COFFEEMAKER
Max
10
8
6
4
2
AM
6
9
Programar
Hora
Min.
Intensidad
Selec. / Apg.
T e mporizador
de Frescura
Regular
Fuerte
Colar
Colado
Prog.
Limpiar

English-9
REGULAR CLEANING AND MAINTENANCE
Decalcifying your OSTER®Coffeemaker
Minerals (calcium/limestone) found in water will leave deposits in your coffeemaker and
affect its performance. It’s recommended that you regularly remove these deposits using
white household vinegar.
1. Pourfourcups(32fluidounces)ofundilutedwhitehouseholdvinegarintothewater
reservoir.
2. Placethepermanentfilterorifyoupreferanempty10-12cupbasket-stylepaperfilter
into the filter basket and close the brew basket lid.
3. Placetheemptycarafebackintheunit,centeredonthe
plate.
4. PresstheSelect(SELEC./APG.)buttonuntiltheredClean
(LIMPIAR)indicatorlightturnson(Figure11).Foryour
convenience the cleaning cycle is automatic. The entire cycle
will take 45-60 minutes to complete. During the cleaning your
coffeemaker will:
a. Slowbrewapprox.3cupsofvinegar.
b. Pausefor30minutes(theClean(LIMPIAR)lightwill
remain on to alert you that the process is active).
c. After 30 minutes, your coffeemaker will brew the remainder
of the vinegar.
d. Whencomplete,theClean(LIMPIAR)lightwillturnoffandyourcoffeemaker
will turn off.
5. Discard the vinegar and rinse the carafe thoroughly with clean water.
6. Fillthewaterreservoirwithclean,freshwater.
7. Placetheemptycarafebackonthecoffeemaker,centeredontheplate.
8. Remove and discard the paper filter used during the cleaning cycle. If a permanent
filter was used during cleaning, remove it and rinse it thoroughly before replacing it in
the filter basket.
9. Begin brewing and allow the full brew cycle to complete.
10. Repeat steps 5 through 9 one more time. Your coffeemaker is now clean and ready to
brewthenextpotofdelicious,hotcoffee!
Suggested Decalcifying Interval
TypeofWaterCleaning Frequency
SoftWater Every80BrewCycles
HardWater Every40BrewCycles
or when red light is flashing.
Cleaning the Carafe
Hard water can leave a whitish stain on the carafe, and coffee may then turn this stain
brown.
To remove carafe stains:
1.Fillthecarafewithasolutionofequalpartswaterandvinegarandletthesolution
standinthecarafeforapproximately20minutes.
2. Discard the solution, then wash and rinse the carafe. Do not use harsh abrasive
cleaners that may scratch the carafe.
Figure11
Max
10
8
6
4
2
AM
6
9
Programar
Hora
Min.
Intensidad
Selec. / Apg.
T e mporizador
de Frescura
Regular
Fuerte
Colar
Colado
Prog.
Limpiar

English-10
TROUBLESHOOTING YOUR OSTER®COFFEEMAKER
YourOSTER®Coffeemakerhasbeencarefullydesignedtogiveyoumanyyearsof
trouble-free service. In the unlikely event that your new coffeemaker does not operate
satisfactorily, please review the following potential problems and try the steps recommended
BEFOREyoucallanAuthorizedOster®ServiceCenter.
PROBLEM POSSIBLE CAUSE SOLUTION
TheBrewNow(COLAR)
Lightdoesnotlightup •Theapplianceis
unplugged. •Plugunitin.
•There’sapoweroutage. •Waitforpowertobe
restored.
The coffee is not brewing •Theapplianceis
unplugged. •Plugunitin.
•There’sapoweroutage. •Waitforpowertobe
restored.
•Thewaterreservoiris
empty. •Checkthewater
windows.
•Thefilterbasketisnot
properly inserted. •Insertfilterbasket
correctly.
•Thecarafeisnot
placed all the way on the
plate.
•Placecarafecorrectly
on plate.
The coffeemaker only
brews water •Therearenocoffee
grounds in the filter basket. •Addthedesiredamount
of coffee to the filter.
The coffeemaker brews
slowly •Thecoffeemakerneeds
cleaning. •Cleancoffeemakeras
described in “cleaning
and maintaing” section
(p. 8).
The filter basket overflows •Thefilterbasketisnot
properly inserted. •Insertfilterbasket
correctly.
•Thecarafeisnot
placed all the way on plate. •Placecarafecorrectly
on the plate.
•Thecarafelidisnoton
carafe. •Placelidonthecarafe.
•Toomanycoffeegrounds
were placed in the filter. •Removefilterdiscard
grounds. If paper filter,
replace. If permanent
filter, rinse. Begin brewing
process again.
•Thecarafewas
removed from the warmer
plate for more than 30
seconds.
•Turnoffandunplugthe
unit. Allow to cool. Wipe
up the sill.
The coffee is not hot •There’sapoweroutage. •Waitforpowertobe
restored.

English-11
PROBLEM POSSIBLE CAUSE SOLUTION
The coffee tastes bad •Coffeegroundsother
than for automatic drip
coffeemakers were used.
•Usecoffeegrounds
recommended for
automatic drip
coffeemakers.
•Thegroundcoffee-to-
water ratio. •Usecorrectground
coffee-to-water ratio.
•Thecoffeemakerneeds
cleaning. •Cleancoffeemakeras
described in “maintaing
your coffeemaker” section
(p. 8).
The grounds are in the
coffee •Thefilterisnotproperly
seated in the basket. •Seatfilterproperlywithin
the filter basket.
•Ifyouareusingapaper
filter, it might have
collapsed.
•Removefilterand
replace.

Español-1
PRECAUCIONES IMPORTANTES
Paradisminuirelriesgodeincendio,descargaeléctricay/olesionespersonales,se
deben seguir siempre las precauciones básicas de seguridad al utilizar artefactos
eléctricos,incluyendolassiguientes:
LEA TODAS LAS INSTRUCCIONES ANTES DE UTILIZAR LA CAFETERA.
• NO toque las superficies calientes de la cafetera. Utilice las asas o las perillas.
•NOabralatapadelrecipienteparacolarmientrasestécolando.Puedenproducirse
quemaduras por vapor si se retira la tapa durante el ciclo de colado.
• Paraprotegersecontradescargaseléctricas,NO sumerja el cable de alimentación, el
enchufe del cable ni la cafetera en agua ni en ningún otro líquido.
• Serequiereestrictasupervisiónporpartedeunadultocuandoesteartefactosea
operado cerca de niños.
• Apaguelacafeteraydesconecteelcabledealimentacióndeltomacorrientecuandola
cafeterayelrelojnoesténenusoyantesdelimpiarla.Dejequelaspiezasde
la cafetera se enfríen antes de colocar o sacar piezas y antes de limpiar el
electrodoméstico.
• NOutiliceunelectrodomésticoquetengauncabledealimentaciónounenchufe
dañado,nilohagafuncionardespuésdequeelartefactohayapresentadofallas,o
hayasufridocualquierotrodaño.DevuelvaelartefactoalCentrodeServicioAutorizado
Oster®más cercano para su inspección, reparación o ajuste.
• Elusodeaccesoriosdistintosalosrecomendadosporelfabricantepuedeocasionar
peligros o lesiones.
• NO utilice la cafetera al aire libre.
• NO deje que el cable de alimentación cuelgue del borde de una mesa o mesada, ni
permita que entre en contacto con superficies calientes.
• NO coloque esta cafetera cerca o sobre un quemador caliente, ya sea a gas o
eléctrico,nidentrodeunhornocaliente.
• Paradesconectarlacafetera,apáguelayseguidamentesaqueelenchufedel
tomacorriente.
• Coloqueelelectrodomésticosobreunasuperficieplana,durayniveladaparaevitar
interrumpir el flujo de aire por debajo de la cafetera.
• Eviteelcontactoconcualquierpiezamovible.
• Estacafeteraestádiseñadasóloparausodoméstico.
• NO utilice este producto para otros fines distintos a los recomendados.
CONSERVE ESTAS INSTRUCCIONES

Español-2
¡ADVERTENCIA!Paradisminuirelriesgodeincendioodescargaeléctrica,noretirela
tapadeningúncompartimientodeservicio.Lacafeteranocontienepiezasqueelusuario
pueda reparar. Únicamente un personal autorizado deberá reparar la cafetera. Antes de
empezarautilizaresteelectrodoméstico,lerogamosqueleacuidadosamenteTODAS
las instrucciones contenidas en este manual. El cuidado y mantenimiento adecuados
garantizaránlavidaprolongadayelfuncionamientosinproblemasdeesteelectrodomés-
tico.Porfavorguardeestasinstruccionesyrefiéraseaellasparaobtenerconsejospara
la limpieza y el cuidado de la unidad.
INSTRUCCIONES ESPECIALES PARA EL CABLE
1.Se proporciona un cable de alimentación corto para disminuir el peligro de que una
persona o una mascota se enrede o tropiece con un cable largo.
2.Sepuedecompraryutilizarunaextensiónsiseempleanlasdebidasprecauciones.
3.Siseusaunaextensión,lapotencianominalindicadaenlamismadebeserigualo
mayoraladesuelectrodoméstico.Elcablealargadoresultantedebecolocarsede
manera que no cuelgue del mostrador o de la mesa, donde los niños podrían halarla o
podría ocasionar tropiezos accidentales.
4.(Para modelos de 120V y 127V únicamente)Esteartefactoeléctricocuentacon
unenchufepolarizado(unaclavijaesmásanchaquelaotra).Paradisminuirelriesgo
dedescargaeléctrica,esteenchufeentrarásólodeunamaneraenuntomacorriente
polarizado.Sielenchufenoentraporcompletoeneltomacorriente,inviértalo.Si
aunnoencaja,comuníqueseconunelectricistacalificado.Nomodifiqueelenchufe
de ninguna forma.
Puedeadaptarellargodelcabledealimentaciónparaquequededellargoexactoque
usteddesee.Paraalargarelcabledealimentación:tomeelcabledealimentación(no
el enchufe) y tire suavemente hacia arriba para sacarlo de la ranura; a continuación,
háleloalejándolodelacafetera.Paraacortarelcabledealimentación:tomeelcable
de alimentación (no el enchufe), tire hacia arriba para sacarlo de la ranura e introdúz
calosuavementedentrodelacafetera.Cuandohayaterminado,fijeelcableenla
ranura.

Español-3
1. Tapa del recipiente para colar
2. Cubiertadeldispensadordeagua
3. Tanque de agua
4. Pausaautomáticaparaservir
5. Ventanillas dobles para medir el nivel del agua
6. Jarratérmica
7. Recipiente removible del filtro
8. Tapa del tanque para verter
9. Filtropermanente
DESCRIPCION DEL ARTEFACTO
2
9
7
Max
10
8
6
4
2
AM
6
9
Programar
Hora
Min.
Intensidad
Selec. / Apg.
T e mporizador
de Frescura
Regular
Fuerte
Colar
Colado
Prog.
Limpiar
8
1
3
5
4
6

Español-4
CARACTERISTICAS Y BENEFICIOS DE LA CAFETERA
Su nueva cafetera OSTER®tiene las siguientes características:
• Capacidad de Colado – 10 tazas
• Recipiente Removible del Filtro – El recipiente del filtro se levanta y se saca para
facilitar su limpieza y reabastecimiento.
• Pausa Automática para Servir-¿Nopuedeesperaraqueelcaféterminede
colarse?LafuncióndePausaAutomáticaparaServirleproporcionahasta30
segundosparaservirunatazadecafémientraslacafeteracontinúacolando.Saque
concuidadolajarratérmicaylafuncióndePausaAutomáticaparaServirseactivará
automáticamente,interrumpiendotemporalmenteelflujodecaféhacialajarratérmica.
• Ventanillas Dobles para Medir el Nivel del Agua - Muestran la cantidad de agua que
se encuentra en el tanque para llenarlo con precisión.
• Placa para la Jarra–Laplacaubicadadebajodelajarratérmicasecalentarámientras
elcaféseestécolandoyseapagaráunavezfinalizadoelproceso.
• Selector de Intensidad de Colado–Ajustaeltiempodecoladoparacrearuncafécon
un sabor más fuerte.
• Almacenaje del Cable–Guardaelcablesobrantedemodoseguroparamantenersu
mesada bien organizada.
• Apagado Automático –Lacafeteraseapagacuandohaterminadoelciclodecolado.
• Controles Programables:
- Reloj – El reloj sirve como un práctico reloj de cocina; le permite ajustar la
característicadeColadoProgramadoyademásfuncionacomoTEMPORIZADOR
DEFRESCURA.
- TEMPORIZADOR DE FRESCURA –Lepermitesabercuántotiempohace que el
caféestálisto.
- Indicador Audible de Encendido / Apagado – Elija que se le alerte al final del
ciclo de colado o de limpieza.
- Colado Programado –¿Legustaríadespertarseytenerunajarradecaférecién
hecha?Elcronómetrodecuentaregresivalepermitepredeterminarcuándodesea
quelacafeteracuelesucaféautomáticamente,conhasta24horasdeanticipación.
- Ciclo de Limpieza Especial –Lepermitemantenersucafeteraconfacilidady
limpiar los depósitos de minerales.
NOTA: Si ha seleccionado alguna de las funciones operativas, la cafetera funcionará de
acuerdoalaúltimafunciónseleccionadasiserestituyeelsuministroeléctricodentrode
los 10 segundos siguientes a la suspensión temporal del servicio.
• Jarra térmica–Garantizaquesucafésemantendrácalientepormástiempo.
NOTA:Paramaximizareltiempoqueelcafépermanecerácaliente,noabralatapade
lajarratérmicadespuésdehabercoladoelcafé.Aprieteelbotónqueseencuentraenla
tapaparaservirelcafé.
LIMPIE LA CAFETERA ANTES DE UTILIZARLA
POR PRIMERA VEZ
AsegúresedequesuprimeratazadecaféseainmejorablelimpiandosucafeteraOSTER®
antes de utilizarla por primera vez. Sólo siga estos tres pasos sencillos:
1.Lavelajarra,latapadelajarrayelrecipientedelfiltroutilizandounapreparaciónde
detergentesuaveyagua.Enjuaguebiencadapieza(refiérasealasección
Descripción del Artefacto).
2.Vuelva a colocar todas las piezas y cierre la tapa. A continuación, ejecute un ciclo de
coladosóloconagua,sinañadircafé,nicolocarelfiltro.
3.Cuandohayaterminadodecolar,apaguelacafetera,desecheelaguadelajarray
enjuáguela junto con la tapa y el recipiente del filtro.
Su cafetera ya está lista para usar. ¡Disfrútela!

Español-5
AJUSTE DEL RELOJ Y DEL COLADO PROGRAMADO
Para Ajustar el Reloj:
1.Enchufe el cable de alimentación en un tomacorriente estándar. El reloj del panel de
control parpadeará, indicando que aún no se ha fijado la hora.
2.PulseymantengaapretadoslosbotonesdeHORAyMIN.(minuto),hastaquemarque
lahoraactual.ElindicadordeAMoPMseencenderáenlaparteinferiordelapantalla
(Figuras1y2).
Figura1 Figura2
¡El reloj ha quedado ajustado!
NOTA:Sipulsacualquierbotónantesdeajustarelreloj,ésteempezaráamarcarla
horaapartirdelas12:00a.m.DebeajustarelrelojsideseautilizarlafuncióndeColado
Programado
Para Fijar la Hora del Colado Programado:
Mientraslapantallaestéenelmodoreloj,simplementepulseelbotónPROGRAMAR
(Figura3)ymientraslaluzamarilladeCOLADOPROG.estéparpadeando,ajustela
horaparacolarpulsandolosbotonesHORAyMIN.(minuto)(Figura4).Elindicadorde
AMoPMseencenderáenlaparteinferiordelapantalladelreloj.Enpocossegundosla
pantalla cambiará a la hora actual.
Figura3 Figura4
¡LahoradelColadoProgramadohaquedadoajustada!
NOTA:ParaactivarelciclodelColadoProgramado,consultelasecciónPara Colar Café
Más Tarde (p.8).Paraverificarlahoraprogramada,pulseelbotónPROGRAMAR.La
pantallamostrarálahoraqueustedhaprogramadoparacolarelcafé.Sipulsanue-
vamenteelbotónPROGRAMARoesperaunospocossegundos,lapantallacambiará
nuevamente.
Max
10
8
6
4
2
AM
6
9
Programar
Hora
Min.
Intensidad
Selec. / Apg.
Te mporizador
de Frescura
Regular
Fuerte
Colar
Colado
Prog.
Limpiar
Max
10
8
6
4
2
AM
6
9
Programar
Hora
Min.
Intensidad
Selec. / Apg.
Te mporizador
de Frescura
Regular
Fuerte
Colar
Colado
Prog.
Limpiar
Max
10
8
6
4
2
AM
6
9
Programar
Hora
Min.
Intensidad
Selec. / Apg.
Te mporizador
de Frescura
Regular
Fuerte
Colar
Colado
Prog.
Limpiar
Max
10
8
6
4
2
AM
6
9
Programar
Hora
Min.
Intensidad
Selec. / Apg.
Te mporizador
de Frescura
Regular
Fuerte
Colar
Colado
Prog.
Limpiar

Español-6
PREPARACIÓN PARA EL USO
Selección y medida del café molido
Paraobtenerlosmejoresresultados,utiliceunacucharadarasaparamedirelcafé
molido.Asegúresedeutilizarcafémolidoamedianogrosorparalograruncaféperfecto.
A. Tabla de Medidas de Café Sugeridas
Paracolar Cantidaddecafémolido
10 tazas 7,5 cdas.
8 tazas 6,5 cdas.
6 tazas 4,5 cdas.
4 tazas 3 cdas.
1 cucharada rasa (cdas.) = 5 gr/0,17 oz.
1taza=148ml/5onzaslíquidasdecafécolado
Utilicemásomenoscafédependiendodesugusto.
B. Cómo Añadir el Agua y el Café Molido
1.Abralatapadelrecipienteparacolar.Parasu
comodidad, puede levantar y sacar el recipiente
removible del filtro.
2.ColoqueelfiltropermanenteOster®, o si lo prefiere,
coloque un filtro de papel estilo canasta para 10 tazas
enelrecipienteremovibledelfiltro(Figura5).
NOTA: Si utiliza filtros de papel es importante que los
bordes del filtro queden a ras del borde del recipiente
delfiltro.Sielfiltrosedobla,humedézcaloantesde
colocarloenelrecipientedelfiltroyañadaelcafé
molido y el agua.
3.Añadalacantidaddecafédeseadayagítelosuavementeparanivelarelcafé.Veala
Tablademedidasdecafésugeridas.
4.Asegúresedequeelrecipienteremovibledelfiltroestédebidamentecentradoe
introducido por completo dentro del recipiente para colar y cierre la tapa.
5.Llenelajarraconaguafríahastaelniveldeseado(1tazaequivalea148ml/5onzas).
Parallenarconmayorfacilidadyprecisión,lasmarcasenlasventanillasdoblespara
medir el nivel del agua muestran la cantidad de agua necesaria para elaborar la
cantidaddetazascorrespondientes.Nollenemásalládelalínea“10cupMAX”
(máximode10tazas)oelaguasedesbordaráporeltanquedeaguaenlaparte
posterior de la cafetera.
Lacantidaddecafécoladosiempreseráligeramentemenoralacantidaddeagua
vertidaeneltanque.Estosedebeaqueelcafémolidoabsorbelevementeelagua.
6.Levantelatapadeltanqueparaverteryviertaelaguaeneltanque.Cierrelatapay
coloque la jarra vacía en la placa calentadora.
NOTA:Asegúresedequelajarraestébiencolocadaenlaplacacalentadoraoelaguay
elcafémolidosedesbordarándelrecipientedelfiltro.Undesbordamientopuedeproducir
lesiones o daños a la propiedad.
Paralograrqueelcaféalcancelatemperaturaóptimarecomendamosprecalentarlajarra
térmicadeaceroinoxidable.
•Llenelajarraconaguacalienteantesdecolarelcafé.
•Dejereposarelaguaenlajarradurantealgunosminutos(2-5minutos).
•Viertaelaguaenelfregadero.
•Coloquelajarraenlaplacacalentadoraycomienceelciclodecolado.
Max
10
8
6
4
2
AM
6
9
Programar
Hora
Min.
Intensidad
Selec. / Apg.
Te mporizador
de Frescura
Regular
Fuerte
Colar
Colado
Prog.
Limpiar
Figura5

Español-7
PARA COLAR CAFE AL MOMENTO
1.LuegodecompletarlospasosdescritosenlasecciónCómo
Añadir el Agua y el Café Molido (p.6)yteniendolajarratérmica
y el recipiente del filtro fijados en su lugar, encienda la cafetera
pulsandounavezelbotónSELEC./APG.Seencenderálaluz
verdedeCOLARindicandoquelacafeteraestáencendiday
colando(Figura6).
2.Paradisfrutardeunatazadecafémásfuerte,pulseunavez
elbotónINTENSIDAD.Seencenderálaluzrojadeintensidad
decoladoFUERTE.Lacafeteraconservarálaintensidadde
colado seleccionada hasta que la cambie a la intensidad
normalpulsandoelbotónINTENSIDADohastaque
desconectelaunidad(Figura7).
3.Despuésdequelospososdelcafésehayanenfriado,abra
cuidadosamenteelrecipientedelfiltroydeséchelos.
NOTA:Lacubiertadeldispensadordeaguaestácalientedespués
de colar. Siempre deje que la cafetera se enfríe antes de limpiarla.
4.Antesdeelaborarunasegundajarradecafé,apaguela
cafetera.EstoreestablecerálafuncióndeTEMPORIZADOR
DEFRESCURA.Paraapagarlacafetera,pulseelbotón
SELEC./APG.hastaquetodaslaslucesseapaguen
5.Asegúresedequelajarraestévacíaantesdecomenzara
colarcafé.
6.Asegúresedeapagarlacafeteracuandoyanolaestéusando.
La Función de TEMPORIZADOR DE FRESCURA
LafuncióndeTEMPORIZADORDEFRESCURAlepermitesaber
cuántotiempohacequeelcaféestálisto.Alcomienzodelciclo
decoladoseactivaráautomáticamentelafuncióndeTEMPO-
RIZADORDEFRESCURAylapantalladelrelojcambiarápara
mostrardesdecuándocomenzóacolar.Lossegmentosgraduales
delafuncióndeTEMPORIZADORDEFRESCURAcomenzarána
oscurecerse,indicandodesdecuándoestálistoelcafé.Pulseuna
vezelbotóndeTEMPORIZADORDEFRESCURA(Figura8)para
volver a la función de reloj (mientras se encuentre en el modo
reloj,lafuncióndeTEMPORIZADORDEFRESCURAcontinuará
\corriendo).Lapantallacambiaráautomáticamentealrelojdespués
de 2 horas o cuando se apague la unidad.
NOTA:LaluzverdedeCOLARdebeestarencendidapara
quefuncioneelTEMPORIZADORDEFRESCURA.Nosepuede
ajustar la hora ni el programa de colado cuando se muestre en
pantalla el medidor de tiempo de colado.
Indicador Audible de Encendido/Apagado
Lacafeterasonarácincovecesalfinaldelciclodecoladoode
limpieza.Puedeoptarporquenoselealerteapagandoelindica-
doraudible(Figura9).
Max
10
8
6
4
2
AM
6
9
Programar
Hora
Min.
Intensidad
Selec. / Apg.
T e mporizador
de Frescura
Regular
Fuerte
Colar
Colado
Prog.
Limpiar
Max
10
8
6
4
2
AM
6
9
Programar
Hora
Min.
Intensidad
Selec. / Apg.
T e mporizador
de Frescura
Regular
Fuerte
Colar
Colado
Prog.
Limpiar
Max
10
8
6
4
2
AM
6
9
Programar
Hora
Min.
Intensidad
Selec. / Apg.
T e mporizador
de Frescura
Regular
Fuerte
Colar
Colado
Prog.
Limpiar
Max
10
8
6
4
2
AM
6
9
Programar
Hora
Min.
Intensidad
Selec. / Apg.
T e mporizador
de Frescura
Regular
Fuerte
Colar
Colado
Prog.
Limpiar
Figura6
Figura7
Figura8
Figura9

Español-8
PARA COLAR CAFE MAS TARDE
1.Deberáfijarlahoraalaquedeseequelacafeteraempieceacolarcafé,segúnse
describe en la sección Ajuste del Reloj y del Colado Programado (p. 5).
2.PreparelacafeteratalycomosedescribeenlasecciónCómoañadirelaguayel
cafémolido.
3.ParaactivarelprogramadeCOLADOPROG.yprogramarlacafeterapara que cuele
elcafémástarde,pulsedosveceselbotónSELEC./APG./(Figura10).Seencenderá
laluzamarilladeCOLADOPROG..Ahoralacafeteraestálista
paracolarcaféautomáticamentealahorapredeterminada.En
ese momento se encenderá la luz de intensidad de colado.
Puedeseleccionarlaintensidaddeseadapulsandoelbotón
INTENSIDAD.
4.Alahorapredeterminada,laluzverdedeCOLARseencenderá
ylaluzamarilladeCOLADOPROG.seapagará,indicandoque
hacomenzadoacolaralaintensidadseleccionada.Comenzará
lafuncióndeTEMPORIZADORDEFRESCURA.
5.Laplacaparalajarradelacafeteraseapagaráalfinaldelciclo
de colado.
Como medida de seguridad, la cafetera NO se encenderá automáticamente otra
vez al día siguiente. Si desea que el café se cuele a la misma hora al día siguiente,
simplemente coloque el filtro, añada agua y café, y fije el programa de colado repit-
iendo los pasos 2 y 3 descritos anteriormente.
Para Cancelar el Colado Programado:
PulseelbotónSELEC./APG.hastaquetodaslaslucesseapaguen(Figura10).
Limpieza Diaria
Desconecte siempre la cafetera y deje que se enfríe antes de limpiarla. Saque el
recipiente del filtro, el filtro permanente, la jarra y la tapa, y lávelos en una solución
deaguacalienteydetergentelíquidosuave.Noutilicenuncalimpiadoresabrasivos,
almohadillasdelanadeaceronicualquierotromaterialabrasivo.Lassiguientespiezas
pueden colocarse de modo seguro en la parte superior del lavaplatos automático: la jarra
térmicaylatapa,elrecipientedelfiltroyelfiltropermanente.
¡CUIDADO!Nuncasumerjalapropiacafeteraenaguanienningúnotrolíquido,nila
coloque en el lavaplatos automático.
Figura10
LIMPIEZA Y MANTENIMIENTO
DE SU CAFETERA
Max
10
8
6
4
2
AM
6
9
Programar
Hora
Min.
Intensidad
Selec. / Apg.
T e mporizador
de Frescura
Regular
Fuerte
Colar
Colado
Prog.
Limpiar
Table of contents
Languages:
Other Oster Coffee Maker manuals

Oster
Oster Counterforms 4281 User manual

Oster
Oster BVSTDC3390 User manual

Oster
Oster BVSTPSTX95-033 User manual

Oster
Oster RF Series User manual

Oster
Oster BVSTDC4403 User manual

Oster
Oster BVSTDCP12B User manual

Oster
Oster Counterforms 4281 User manual

Oster
Oster 7982-33 User manual

Oster
Oster BVSTEM8000RD User manual

Oster
Oster BVSTDC4411 User manual

Oster
Oster 3296 Technical specifications

Oster
Oster BVSTDCS12B User manual

Oster
Oster BVSTDC3401013 User manual

Oster
Oster OEMP50 User manual

Oster
Oster BVSTEM8100-013 User manual

Oster
Oster 3262 User manual

Oster
Oster 3301 User manual

Oster
Oster BVSTEM3299 User manual

Oster
Oster BVSTDC12 User manual

Oster
Oster BVSTDC4410 User manual