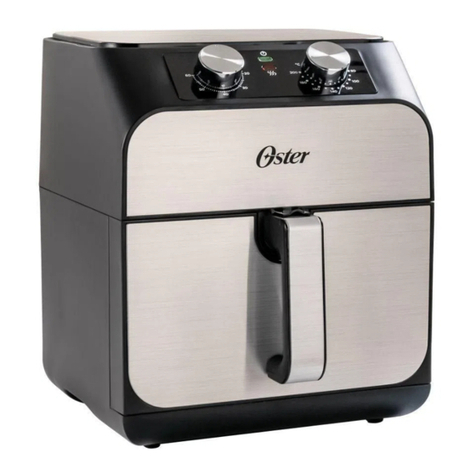
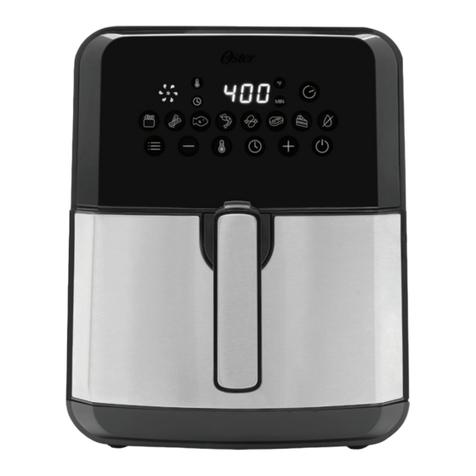
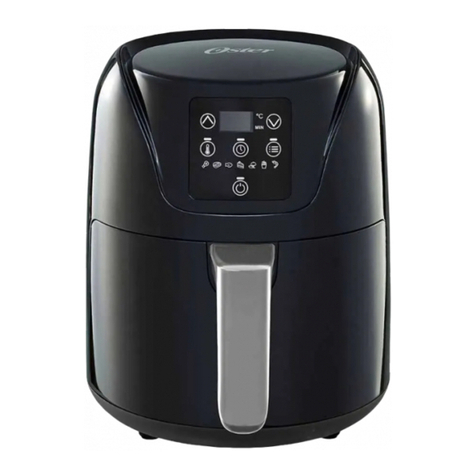
Oster CKSTAFLC-DM User manual

5Q Air FRYER
5Q FREIDORA DE AIRE
User Manual / Manual de Instrucciones
Model / Modelo: CKSTAFLC-DM
For product questions:
Sunbeam Consumer Service
USA : 1.800.334.0759
www.oster.com
© 2020 Sunbeam Products, Inc. All rights reserved. Distributed by Sunbeam
Products, Inc. Boca Raton, Florida 33431.
Para preguntas sobre los productos llame:
Sunbeam Consumer Service
EE.UU.: 1.800.334.0759
www.oster.com
© 2020 Sunbeam Products, Inc. Todos los derechos reservados. Distribuido por
Sunbeam Products, Inc. Boca Raton, Florida 33431.
Printed in China Impreso en China
CKSTAFLC-DM_20ESM2 GCDS-QST1115145-LD
P.N. 202540 Rev A
Safety
Seguridad
How to use
Cómo usar
Cleaning
Cuidado y Limpieza
Recipes
Recetas
Warranty
Garantía
www.oster.com
CKSTAFLC-DM_20ESM2 (US).indd 1-2 5/5/20 11:00 AM

IMPORTANT SAFEGUARDS
When using electrical appliances, basic safety precautions should always be
followed to reduce the risk of fire, electric shock, and/or injury to persons
including the following:
1. Read all instructions before using this product.
2. This appliance generates heat during use. Do not touch hot surfaces.
Use handles or knobs.
3. To protect against electric shock, do not place or immerse cord, plugs,
or appliance in water or other liquid.
4. This appliance is not intended for use by children or by persons with reduced
physical, sensory, or mental capabilities, or lack of experience and
knowledge. Close supervision is necessary when any appliance is used near
children. Children should be supervised to ensure that they do not play with
the appliance. Keep the appliance and its cord out of reach of children.
5. Unplug from outlet when not in use, before putting on or taking off
parts and before cleaning. Allow to cool before putting on or taking off
parts, and before cleaning. To disconnect, turn any control to OFF, then
unplug power cord from outlet. Do not disconnect by pulling on cord.
6. Do not operate any appliance with a damaged cord or plug or after the
appliance malfunctions, or has been damaged in any manner. Do not
attempt to replace or splice a damaged cord. Return appliance to the
manufacturer (see warranty) for examination, repair or adjustment.
7. The use of accessory attachments not recommended by the appliance
manufacturer may cause injuries.
8. Do not use outdoors or for commercial purposes.
9. Do not let cord hang over edge of table or counter, or touch hot surfaces.
10. Do not place on or near wet surfaces, or heat sources such as a hot gas
or electric burner, or in a heated oven.
11. Extreme caution must be used when moving an appliance containing
hot oil or other hot liquids.
12. The heating base is subject to residual heat from cooking cycle. Do not touch
heating base immediately after using. Allow to cool before handling.
13. Use caution when opening the lid during or after a cooking cycle.
Escaping steam can cause burns.
14. Do not use appliance for other than intended use. Misuse can cause injuries.
15. Intended for household countertop use only. Keep 6 inches (152 mm)
clear from the wall and on all sides. Always use appliance on a dry,
stable, level surface.
16. When the appliance is in the tilted position, the lid will not stay open on
its own. Always return the appliance to the level position before
opening the lid.
17. Never operate this appliance by means of an external timer or separate
remote-control system.
18. WARNING: Spilled food can cause serious burns. Keep appliance and
cord away from children. Never drape cord over edge of counter and
never use outlet below counter.
SAVE THESE INSTRUCTIONS
HOUSEHOLD USE ONLY
POLARIZED PLUG
This appliance has a polarized plug (one blade wider than the other).
As a safety feature to reduce the risk of electrical shock, this plug is
intended to t in a polarized outlet only one way. If the plug does not
t fully in the outlet, reverse the plug. If it still does not t, contact a qualied electrician. Do
not attempt to defeat this safety feature or modify the plug in any way. If the plug ts loosely
into the AC outlet or if the AC outlet feels warm do not use that outlet.
POWER CORD INSTRUCTIONS:
A short power-supply cord or detachable power-supply cord is provided to
reduce risks resulting from becoming entangled in or tripping over a longer
cord. Longer detachable power-supply cords or extension cords are available
and may be used if care is exercised in their use. If a long detachable power-
supply cord or extension cord is used:
a. The marked electrical rating of the cord set, or extension cord should be
at least as great as the electrical rating of the appliance;
b. The cord should be arranged so that it will not drape over the countertop
or tabletop where it can be pulled on by children or tripped over
unintentionally; and
c. If the appliance is of the grounded type, the cord set, or extension cord
should be a grounding-type 3-wire cord. Do not pull, twist or otherwise
abuse the power cord.
www.oster.com www.oster.com
2 3
CKSTAFLC-DM_20ESM2 (US).indd 3-4 5/5/20 11:00 AM

www.oster.com www.oster.com
4 5
BEFORE FIRST USE
Never immerse any part of the Air Fryer body, power cord or plug in
water or any other liquid. Before assembling or disassembling your
Air Fryer, ensure it is unplugged and all parts are cool. Unpack the
appliance and remove all packaging, promotional materials and
stickers. Remove all printed documents.Wash the inner cooking
basket with hot, soapy water. Rinse then dry all of the parts.Wipe
the body and lid with a damp cloth only—see page 9 for cleaning instructions.
7
8
1
2
3
4
5
6
Fig.3 Fig.4
7
8
1
2
3
4
5
6
Fig.6
7
8
1
2
3
4
5
6
Fig.5
NOTICES
1. Some countertop and table surfaces are not designed to withstand the
prolonged heat generated by certain appliances. Do not set the heated
unit on a finished wood table.
2. During initial use of this appliance, some slight smoke and/or odor may
be detected.This is normal and should go away after a few uses.
PARTS:
TECHNICAL DATA:
-----Voltage: 120V~50/60Hz
-----Wattage: 1700 Watts
-----Capacity of basket: 5 quart
-----Adjustable temperature: 80-400 ºF (25-200 ºC)
----- Timer (0-60 min)
GENERAL DESCRIPTION (Fig.1)
1. Control panel
2. Basket
3. Basket release button
4. Basket handle
5. Main housing
6. Pot
7.Air outlet
8. Main cord (Electrical cord)
Fig.1
F.P.O
7
8
1
2
3
4
5
6
Fig.2
CKSTAFLC-DM_20ESM2 (US).indd 5-6 5/5/20 11:01 AM

www.oster.com www.oster.com
67
PREPARING FOR USE
1. Place the appliance on a stable, horizontal and even surface. Do not
place the appliance on non-heat-resistant surface.
2. Place the basket in the pot (Fig.3). Do not fill the pot with oil or any
other liquid. Do not put anything on top of the appliance, the airflow will
be disrupted and affects the hot air frying result.
COOKING
1. Plug the Air Fryer into an electrical outlet.
2. Carefully pull the pot out of the Hot-air fryer (Fig.6)
3. Put the ingredients in the basket. (Fig.5)
4. Slide the pot back into the Hot-air fryer (Fig 4). Noting to carefully align
with the guides in the body of the fryer. Never use the pot without the
basket in it.
Caution: Do not touch the pot during and after use, as it gets very
hot. Only hold the pot by the handle.
5. Determine the required preparation time for the ingredient ( see section
‘Settings’in this chapter).
6. Some ingredients require shaking halfway through the preparation time
(see section“Settings”in this chapter).To shake the ingredients, pull the
pot out of the appliance by the handle and shake it. Then slide the pot
back into the air fryer.
Caution: Do not press the button the handle during shaking. (Fig.3)
Tip: If you set the timer to half the preparation time, you hear the
timer buzzer when you have to shake the ingredients. However, this
means that you have to set the timer again to the remaining preparation
time after shaking.
7. When you hear the timer buzzer, the set preparation time has elapsed.
Pull the pot out of the appliance
Note: You can also switch off the appliance manually. To do this, set
the time to 1.
8. Check if the ingredients are ready. If the ingredients are not ready yet,
simply slide the pot back into the appliance and set the timer to a few
extra minutes.
9. To remove ingredients (e.g. fries), pull the pot out of the Hot-air fryer
and place it on heat resistant surface, and press the basket release
button and lift the basket out of the pan.
Do not turn the basket upside down with the pot still attached
to it, as any excess oil that has collected on the bottom of the
pot will leak onto the ingredients.
The pot and the ingredients are hot. Depending on the type of
the ingredients in the air fryer, steam may escape from the pot.
10.Empty the basket into a bowl or onto a plate.
11.When a batch of ingredients is ready, the Hot-air fryer is instantly ready
for preparing another batch.
CONTROL PANEL INSTRUCTIONS
Control Panel icons will only be visible once the unit is turned on.
OPERATION INSTRUCTIONS:
Key –Power Key
Once the Basket and pot are properly placed in the main housing, the Power light
will be illuminated. Selecting the power key will set the unit default temperature
(400 ºF), while the cooking time will be set to 15 minutes. Selecting the Power
key a second time will start the cooking process. During cooking, press the power
key once to pause the cooking cycle and twice to resume. Press and hold the
power key for 3 seconds to turn the unit off. The lights will go off and fan will
continue to run until the unit has sufficiently cooled.
Note: The red light in the center of the fan icon indicates that the cooking
cycle is in process, If the fan icon is on without this red light, the fan is
running to cool the unit down.
CKSTAFLC-DM_20ESM2 (US).indd 7-8 5/5/20 11:01 AM

SETTINGS
The following table provides basic cooking guidelines for popular,
convenience and frozen foods. Please note that due to the variations in
thickness and size of the foods being cooked some experimentation may be
required for the best cooking results. Always ensure that the food is
thoroughly cooked to food-safe temperature throughout before consuming.
Tips
• Smaller ingredients usually require a slightly shorter preparation time
than larger ingredients.
• Shaking smaller ingredients halfway through the preparation time
optimizes the end result and can help prevent unevenly fried ingredients.
• Add some oil to fresh potatoes for a crispy result.
• The optimal amount for preparing crispy fries is about 1 lb.
• Use pre-made dough to prepare filled snacks quickly and easily. Pre-made
dough also requires a shorter preparation time than home-made dough.
• Place a baking tin or oven dish in the Hot-air fryer basket if you want to bake
a cake or quiche or if you want to fry fragile ingredients or filled ingredients.
• You can also use the Hot-air fryer to reheat ingredients. To reheat
ingredients, set the temperature to (300 ºF)for up to 10 minutes.
Defaults Temperature Range
Food Cooking Temp
(Degrees in F)
Cooking
Time (Mins) Temp (°F)
Fries 400 21 160 400
Bacon 375 10 160 400
Fish 375 18 160 400
Shrimp 375 12 160 400
Chicken 400 25 160 400
Steak 375 16 160 400
BakedGoods 350 17 160 400
Dehydrate 160 4h 80 160
Dehydrate mode: 2 - 24h
All other modes: 0-60 minutes
www.oster.com www.oster.com
8 9
Key –Preset Key
Selecting the “ ”. Preset key enables you to scroll through the 8 popular
food choices. Once selected, the predetermined time and cooking
temperature function begins.
Key & Key —Temperature Control Keys
Selecting the Key“ ”. The Key and Key symbols enable you to
add or decrease cooking temperature (10 ºF) at a time. Keeping the Key
held down will rapidly change the temperature.Temperature Control range:
(175-400 ºF)
Selecting the Key“ ”. The Key and Key symbols enable you to
add or decrease cooking time, one minute at a time. Keeping the key held
down will rapidly change the time, Maximum 60 minutes;
Key & Temperature/Timer Control Keys
key —Booking
Selecting the key“ ”. The Key” ”or Set time and temperature, can
be booked 24 hours, countdown;
Indicator light “ ” Fan indicator
Indicator light “ ”Temperature light
Indicator light “ ”Timer light
Indicator light “ ”Temperature indicator
Indicator light “ ”Timer indicator
Indicator light “ ” Recipe
indicator
CKSTAFLC-DM_20ESM2 (US).indd 9-10 5/5/20 11:01 AM

www.oster.com
10
CARE AND CLEANING
Always unplug your Air Fryer and allow it to cool completely before cleaning
it. NEVER immerse the MAIN body, power cord or plug in water or any other
liquid. Never use harsh abrasive cleaners or cleaning materials.
• Carefully wipe any oil spatter from the heating fan cover with kitchen
paper. Wipe over the outer body with a clean, slightly damp cloth and dry.
• Wash the removable cooking basket, cooking tray and handle with
warm soapy water using a cloth, sponge or non-abrasive brush or on the
dishwasher. Dry completely before use or storage.
To remove the cooking basket from the tray:
1. Slide the basket release shield forward.
2. Press the basket release button.
3. To refit basket to the cooking tray, position the basket over the top of the
body then pivot the basket downward into place until the lock clicks.
This appliance has no user serviceable parts. Any servicing beyond that
described in the Cleaning Section should be performed by an Authorized
Service Representative only. See Warranty section.
Food Temp. Setting Time (minutes)
Chicken Strips 375°F/190°C 5–8
Chicken Pieces, Bone-In 360°F/180°C 15–20
Fish, Battered 340°F/170°C 8–10
French Fries, Frozen 375°F/190°C 3–5
Fritters 375°F/190°C 2–4
Onion Rings 375°F/190°C 3–5
Shrimp, Breaded 375°F/190°C 2–4
1 YEAR LIMITED WARRANTY
Sunbeam Products, Inc. warrants that for a period of one year from the date of purchase, this product will
be free from defects in material and workmanship. Sunbeam, at its option, will repair or replacethis
product or any component of the product found to be defective during the warranty period. Replacement will
be made with a new or remanufactured product or component. If the product is no longer available,
replacement may be made with a similar product of equal or greater value.This is your exclusive
warranty. Do NOT attempt to repair or adjust any electrical or mechanical functions on this product.
Doing so will void this warranty.
This warranty is valid for the original retail purchaser from the date of initial retail purchase and is not
transferable. Keep the original sales receipt. Proof of purchase is required to obtain warranty
performance. Sunbeam dealers, service centers, or retail stores selling Sunbeam products do not have the
right to alter, modify or any way change the terms and conditions of this warranty.
This warranty does not cover normal wear of parts or damage resulting from any of the following: negligent
use or misuse of the product, use on improper voltage or current, use contrary to the operating instructions,
disassembly, repair or alteration by anyone other than Sunbeam or an authorized Sunbeam service center.
Further, the warranty does not cover: Acts of God, such as fire, flood, hurricanes and tornadoes.
What are the limits on Sunbeam’s Liability?
Sunbeam shall not be liable for any incidental or consequential damages caused by the breach of any
express, implied or statutory warranty or condition.
Except to the extent prohibited by applicable law, any implied warranty or condition of merchantability
or fitness for a particular purpose is limited in duration to the duration of the above warranty.
Sunbeam disclaims all other warranties, conditions or representations, express, implied, statutory or
otherwise.
Sunbeam shall not be liable for any damages of any kind resulting from the purchase, use or misuse of, or
inability to use the product including incidental, special, consequential or similar damages or loss of
profits, or for any breach of contract, fundamental or otherwise, or for any claim brought against
purchaser by any other party.
Some provinces, states or jurisdictions do not allow the exclusion or limitation of incidental or
consequential damages or limitations on how long an implied warranty lasts, so the above limitations or
exclusion may not apply to you.
This warranty gives you specific legal rights, and you may also have other rights that vary from province
to province, state to state or jurisdiction to jurisdiction.
www.oster.com 11
CKSTAFLC-DM_20ESM2 (US).indd 11-12 5/5/20 11:01 AM
How to Obtain Warranty Service
In the U.S.A.
If you have any question regarding this warranty or would like to obtain warranty service,
please call 1-800-334-0759 and a convenient service center address will be provided to you.
In the U.S.A., this warranty is oered by Sunbeam Products, Inc located in Boca Raton, Florida
33431. If you have any other problem or claim in connection with this product, please write our
Consumer Service Department.
PLEASE DO NOT RETURN THIS PRODUCT TO ANY OF THESE ADDRESSES ORTO THE PLACE
OF PURCHASE.
www.oster.com
12
MEDIDASDESEGURIDADIMPORTANTES
Cuando se utilizan aparatos eléctricos, siempre se deben Seguir
precauciones básicas de seguridad, incluyendo las Siguientes:
1. Lea todas las instrucciones antes de utilizar este producto.
2. No toque las superficies calientes, utilice las asas.
3. A fin de protegerse contra una descarga eléctrica, no sumerja el cuerpo
del aparato, el cable ni el enchufe en agua ni en ningún otro líquido.
4. Este aparato no debe ser utilizado por niños. Mantenga el aparato y su
cable fuera del alcance de niños. Los niños no deben jugar con el
aparato. Los aparatos no pueden ser utilizados por personas con
discapacidades físicas, sensoriales o mentales o sin experiencia ni
conocimientos o instrucciones relativas al uso seguro del aparato y
comprendan los riesgos que implica.
5. Desenchufe el aparato del tomacorriente cuando no esté en uso y antes
de limpiarlo. Espere a que el aparato se enfríe antes de instalarle o
retirarle piezas y antes de limpiarlo.
6. No utilice un producto que tenga un cables o enchufes dañado o
después de presentar un problema de funcionamiento, o que se haya
dañado de manera alguna. Devuelva el aparato al centro de servicio
autorizado de Oster para que lo examinen, reparen o ajusten.
7. El uso de accesorios no recomendados por el fabricante del producto
podría ocasionar lesiones.
8. No utilice el aparato a la intemperie.
9. No permita que el cable cuelgue del borde de la mesa o del mostrador
ni que entre en contacto con superficies calientes. No coloque sobre o
cerca de una hornilla de gas o eléctrica ni en un horno caliente.
10. Proceda con extrema precaución al mover de un lugar a otro un aparato
que contenga aceite u otros líquidos calientes.
11. No utilice el aparato para otro fin que no sea para el que ha sido diseñado.
12. Tenga cuidado al abrir la tapa durante o después de un ciclo de cocción.
El escape de vapor y el derrame de comida puede causar quemaduras.
13. Vapor caliente es liberado del aparato mientras se está friendo por aire.
Mantenga sus manos y rostro a una distancia segura de la salida de aire.
14. No use el aparato para otro uso que no sea el previsto. El mal uso puede
causar lesiones.
15. Este aparato está destinado solo para el uso doméstico en hogares, para
el uso de huéspedes en habitaciones de hotel, para grandes casas de
campo, para cocinas y comedores en lugares de trabajo, oficinas y
www.oster.com 13
CKSTAFLC-DM_20ESM2 (US).indd 13-14 5/5/20 11:01 AM

5Q Air FRYER
5Q FREIDORA DE AIRE
User Manual / Manual de Instrucciones
Model / Modelo: CKSTAFLC-DM
For product questions:
Sunbeam Consumer Service
USA : 1.800.334.0759
www.oster.com
© 2020 Sunbeam Products, Inc. All rights reserved. Distributed by Sunbeam
Products, Inc. Boca Raton, Florida 33431.
Para preguntas sobre los productos llame:
Sunbeam Consumer Service
EE.UU.: 1.800.334.0759
www.oster.com
© 2020 Sunbeam Products, Inc. Todos los derechos reservados. Distribuido por
Sunbeam Products, Inc. Boca Raton, Florida 33431.
Printed in China Impreso en China
CKSTAFLC-DM_20ESM2 GCDS-QST1115145-LD
P.N. 202540 Rev A
Safety
Seguridad
How to use
Cómo usar
Cleaning
Cuidado y Limpieza
Recipes
Recetas
Warranty
Garantía
www.oster.com
CKSTAFLC-DM_20ESM2 (US).indd 1-2 5/5/20 11:00 AM
Table of contents
Other Oster Fryer manuals

Oster
Oster CKSTHF2-049 User manual

Oster
Oster CKSTDFZM55 User manual

Oster
Oster ODF540 User manual

Oster
Oster Frysmart 3243 Technical specifications

Oster
Oster TSSTTVLS25 User manual

Oster
Oster CKSTAF32-TECO User manual

Oster
Oster TSSTTVFDMAF User manual

Oster
Oster CKSTAFOV3 User manual

Oster
Oster ODF550 User manual

Oster
Oster CKSTDFZM55 User manual

Oster
Oster CKSTAF55-013 User manual

Oster
Oster ODF 510 Technical specifications

Oster
Oster CKSTDFFM15-B User manual

Oster
Oster CKSTAF40M Series User manual

Oster
Oster TSSTTVDFL2-AF User manual

Oster
Oster CKSTDFZM70 User manual

Oster
Oster CKSTDF1111 User manual

Oster
Oster CKSTAF15 User manual

Oster
Oster CKSTDF102-SS User manual

Oster
Oster CKSTDFFM40 User manual