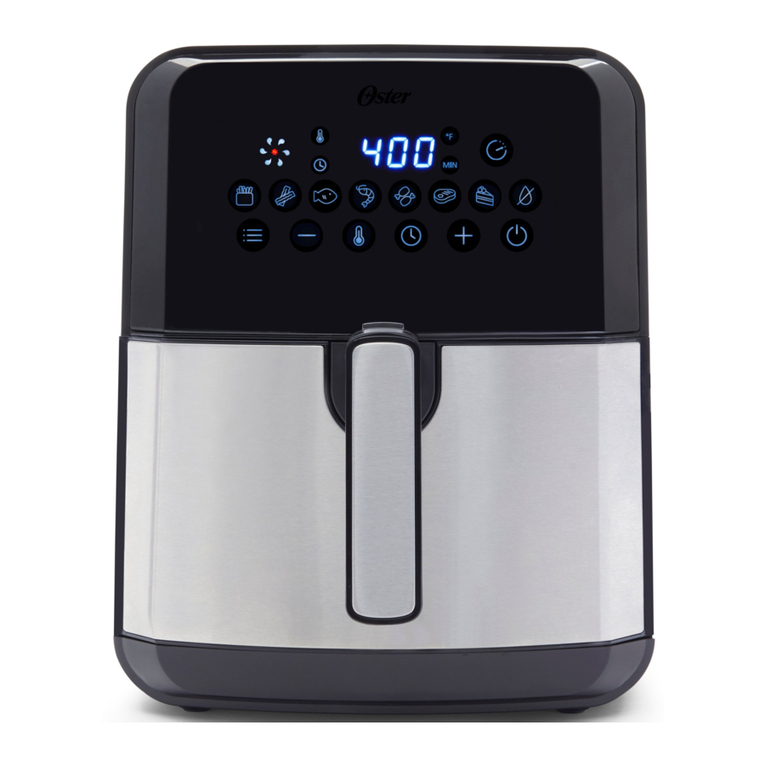
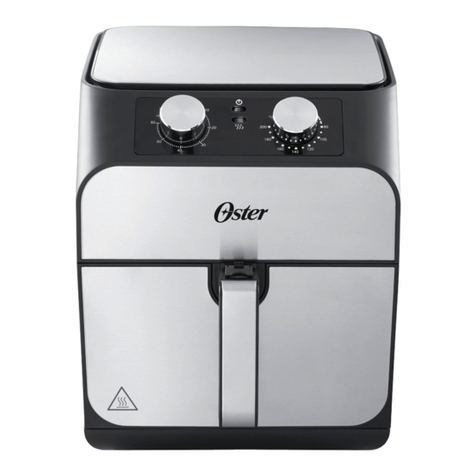
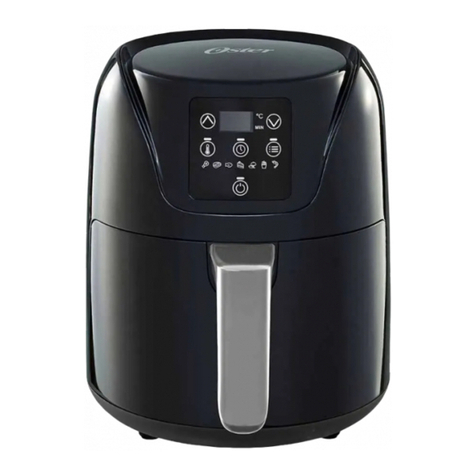
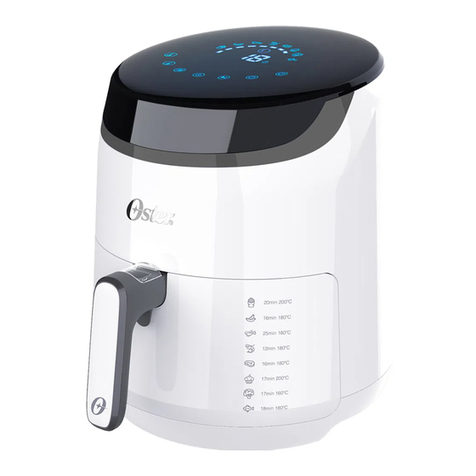
Oster CKSTAF47DDF User manual

Manual de Instrucciones
4.7L FREIDORA DE AIRE DIGITAL
LEA TODAS LAS INSTRUCCIONES ANTES DE USAR ESTE APARATO
Instruction Manual
4.7L DIGITAL AIR FRYER
READ ALL INSTRUCTIONS BEFORE USING THIS APPLIANCE
MODELOS
MODELS CKSTAF47DDF
CKSTAF47DDF_22SEM1 (LA).indd 1CKSTAF47DDF_22SEM1 (LA).indd 1 5/12/2022 10:53:30 AM5/12/2022 10:53:30 AM

Español - 2
MEDIDAS DE SEGURIDAD
IMPORTANTES
Cuando se utilizan aparatos eléctricos, siempre se deben seguir precauciones básicas
de seguridad, incluyendo las siguientes:
1. Lea todas las instrucciones antes de utilizar este producto.
2. No toque las supercies calientes, utilice las asas.
3. A n de protegerse contra una descarga eléctrica, no sumerja el cuerpo del aparato,
el cable ni el enchufe en agua ni en ningún otro líquido.
4. Este aparato no está diseñado para que lo usen niños o personas con capacidades
físicas, sensoriales o mentales reducidas, o falta de experiencia y conocimiento,
a menos que una persona responsable de su seguridad los supervise o les dé
instrucciones sobre el uso del aparato. Los niños deben ser supervisados para
asegurarse de que no jueguen con el aparato. Mantenga el aparato y su cable fuera
del alcance de los niños.
5. Desenchufe el aparato del tomacorriente cuando no esté en uso y antes de limpiarlo.
Espere a que el aparato se enfríe antes de instalarle o retirarle piezas y antes de
limpiarlo. Para desconectar, apague los controles y luego desconecte el cable de
alimentación del tomacorriente. No desconecte tirando del cable.
6. No utilice un producto que tenga un cables o enchufes dañado o después de
presentar un problema de funcionamiento, o que se haya dañado de manera alguna.
Devuelva el aparato al centro de servicio autorizado de Oster para que lo examinen,
reparen o ajusten.
7. El uso de accesorios no recomendados por el fabricante del producto podría
ocasionar lesiones.
8. No utilice el aparato a la intemperie.
9. No permita que el cable cuelgue del borde de la mesa o del mostrador ni que entre
en contacto con supercies calientes. No coloque sobre o cerca de una hornilla de
gas o eléctrica ni en un horno caliente.
10. Proceda con extrema precaución al mover de un lugar a otro un aparato que
contenga aceite u otros líquidos calientes.
11. No utilice el aparato para otro n que no sea para el que ha sido diseñado.
12. La base de calentamiento está sujeta al calor residual del ciclo de cocción. No toque la base
de calentamiento inmediatamente después de usar. Dejar enfriar antes de manipular.
13. Tenga cuidado al abrir la tapa durante o después de un ciclo de cocción. El escape
de vapor y el derrame de comida puede causar quemaduras.
14. No use el aparato para otro uso que no sea el previsto. El mal uso puede causar lesiones.
15. Este aparato está destinado solo para el uso doméstico en hogares. Mantenga 6
pulgadas (152 mm) despejadas de la pared y de todos los lados. Siempre use el
electrodoméstico en una supercie seca, estable y nivelada.
16. Cuando el aparato está en la posición inclinada, la tapa no permanecerá abierta por
sí sola. Siempre regrese el aparato a la posición nivelada antes de abrir la tapa.
17. ADVERTENCIA: Los alimentos derramados pueden causar quemaduras graves.
Mantenga el electrodoméstico y el cable fuera del alcance de los niños. Nunca
coloque el cable sobre el borde del mostrador, nunca use el tomacorriente debajo del
mostrador y nunca lo use con un cable de extensión.
18. No lo use con un programador, temporizador, adaptador de enchufe inalámbrico o toma
de corriente que permita el control de forma remota, ni conecte a un circuito que la utilidad
enciende y apaga regularmente.
19. No lo use con un programador, temporizador, adaptador de enchufe inalámbrico o
toma de corriente que permita el control de forma remota, ni conecte a un circuito
que la utilidad enciende y apaga regularmente.
CKSTAF47DDF_22SEM1 (LA).indd 2CKSTAF47DDF_22SEM1 (LA).indd 2 5/12/2022 10:53:30 AM5/12/2022 10:53:30 AM
Español - 3
Este aparato está diseñado para ser utilizado en aplicaciones domésticas y
similares, tales como:
– áreas de cocina para el personal en tiendas, ocinas y otros entornos de trabajo;
– casas de campo;
– por clientes en hoteles, moteles y otros entornos de tipo residencial;
– ambientes tipo bed and breakfast.
NOTAS
1. Algunas supercies de topes y mesas no están diseñadas para soportar el calor
prolongado generado por ciertos electrodomésticos. No coloque la unidad calentada
sobre una mesa de madera. Recomendamos colocar un protector térmico o un
trébede debajo de su artefacto para evitar posibles daños a la supercie.
2. Durante el uso inicial de este aparato, puede detectarse un poco de humo y / u olor.
Esto es normal con muchos aparatos de calefacción y no volverá a ocurrir después de
algunos usos.
GUARDA ESTAS INSTRUCCIONES
CKSTAF47DDF_22SEM1 (LA).indd 3CKSTAF47DDF_22SEM1 (LA).indd 3 5/12/2022 10:53:30 AM5/12/2022 10:53:30 AM

Español - 4
PIEZAS
1. Panel de control
2. Canasta de cocción removible
3. Protección de liberación de canasta
4. Manilla
5. Carcasa principal de Freidora de Aire
6. Bandeja de cocción
7. Salida de aire
8. Cable principal (cable eléctrico)
Fig.1
7
8
1
2
3
4
5
6
DATOS TÉCNICOS:
----- Voltaje: 120V~50/60Hz
----- Potencia: 1700 vatios
----- Capacidad de la cesta: 4.7 litros
----- Temperatura ajustable: 80-400 ºF (27-204 ºC)
----- Temporizador (0-60 min)
DESCRIPCIÓN GENERAL (Fig.1)
CKSTAF47DDF_22SEM1 (LA).indd 4CKSTAF47DDF_22SEM1 (LA).indd 4 5/12/2022 10:53:32 AM5/12/2022 10:53:32 AM

Español - 5
ANTES DEL PRIMER USO
Nunca sumerja ninguna parte del cuerpo, del cable de poder o del
enchufe de la Freidora de Aire en agua o cualquier otro líquido. Antes
de ensamblar o desensamblar tu Freidora de Aire, asegure que este
desenchufada y que todas las partes estén frías.
Desempaque el aparato y remueva todo el empaque, materiales
promocionales y stickers. Remueva todos los documentos impresos. Lave la canasta de
cocción interna con agua caliente y jabonosa. Enjuague y luego seque todas las partes.
Limpie el cuerpo y la bandeja de cocción con una toalla húmeda solamente - reérase a
la página (21) para instrucciones de limpieza.
7
8
1
2
3
4
5
6
Fig.3 Fig.4
7
8
1
2
3
4
5
6
Fig.6
7
8
1
2
3
4
5
6
Fig.5
Fig.2
CKSTAF47DDF_22SEM1 (LA).indd 5CKSTAF47DDF_22SEM1 (LA).indd 5 5/12/2022 10:53:36 AM5/12/2022 10:53:36 AM

Español - 6
PREPARACION PARA EL USO
1. Coloque la Freidora de aire sobre una superficie estable, horizontal y uniforme. No
coloque la freidora de aire sobre una superficie no resistente al calor.
2. Coloque la canasta de cocción en la bandeja de cocción (Fig. 3). No llene la canasta de
cocción con aceite o cualquier otro líquido. No coloque nada encima del aparato, el flujo
de aire se interrumpirá y afectará el resultado.
COCINANDO
1. Enchufe la freidora a una toma de corriente.
2. Saque con cuidado la bandeja de cocción de la freidora de aire caliente (Fig. 6)
3. Ponga los ingredientes en la canasta. (Fig.5)
4. Deslice la bandeja de cocción nuevamente dentro de la freidora de aire caliente (Fig.
4). Observando alinear cuidadosamente cuidadosamente con las guías en la carcasa
principal de la freidora. Nunca use la bandeja de cocción sin la canasta adentro.
Precaución: No toque la bandeja de cocción durante y después del uso, ya que se
pone muy caliente. Solo sostenga la bandeja por el manilla.
5. Determine el tiempo de preparación requerido para el ingrediente (consulte la sección
“Configuracion” en este capítulo).
6. Algunos ingredientes requieren agitar a la mitad del tiempo de preparación (consulte
la sección “Configuración” en este capítulo). Para agitar los ingredientes, saque la
bandeja cocción de la freidora de aire usando la manilla y agitela. Luego deslice la
bandeja de cocción nuevamente dentro de la freidora.
Precaución: No presione el botón del mango durante la agitación. (Fig. 3)
Consejo: Si configura el temporizador a la mitad del tiempo de preparación, escuchará el
timbre temporizador cuando tiene que agitar los ingredientes. Sin embargo, esto significa
que debe configurar el temporizador nuevamente con el tiempo de preparación restante
después de agitar.
7. Cuando escuche el timbre del temporizador, habrá transcurrido el tiempo de
preparación establecido. Saque la bandeja de cocción del aparato.
Nota: También puede apagar el dispositivo manualmente. Para hacer esto, configure
el tiempo en 1 minuto,
8. Compruebe si los ingredientes están listos. Si los ingredientes aún no están listos,
simplemente deslice la bandeja de cocción nuevamente dentro del aparato y configure
el temporizador con unos minutos adicionales.
9. Para remover los ingredientes (por ejemplo, papas fritas), saque la bandeja de
cocción de la freidora de aire caliente y colóquela en una superficie resistente al
calor, presione el botón de liberación de la canasta y saque la canasta de la bandeja
de cocción.
No ponga la bandeja de cocción al revés con la canasta todavía unida, ya que
cualquier exceso de aceite que se haya acumulado en el fondo de la canasta se
derramara encima de los ingredientes.
La bandeja de cocción y los ingredientes están calientes. Dependiendo del tipo
de ingredientes en la freidora de aire, vapor puede escapar de la bandeja de
cocción.
10. Vacíe la canasta en un tazón o en un plato.
11. Cuando un lote de ingredientes está listo, la freidora de aire caliente está lista
instantáneamente para preparar otro lote.
CKSTAF47DDF_22SEM1 (LA).indd 6CKSTAF47DDF_22SEM1 (LA).indd 6 5/12/2022 10:53:37 AM5/12/2022 10:53:37 AM

Español - 7
INSTRUCCIONES DEL PANEL DE CONTROL
Los iconos del Panel de control solo serán visibles una vez que la unidad esté
encendida.
INSTRUCCIONES DE OPERACIÓN:
Tecla –Tecla de encendido
Una vez que la bandeja de cocción y la canasta esten colocadas correctamente en la
carcasa principal, la luz de encendido se iluminará. Al seleccionar la tecla de encendido la
temperatura predeterminada de la unidad sera de (400 ºF), mientras que el tiempo de
cocción se establecerá en 15 minutos. Al seleccionar la tecla encendido por segunda vez, se
iniciará el proceso de cocción. Durante la cocción, presione la tecla de encendido una vez
para pausar el ciclo de cocción y dos veces para reanudar. Mantenga presionada la tecla de
encendido durante 3 segundos para apagar la unidad. Las luces se apagarán y el ventilador
continuará funcionando hasta que la unidad se haya enfriado lo suficiente.
Nota: La luz roja en el centro del ícono del ventilador indica que el ciclo de cocción está en
proceso. Si el ícono del ventilador está encendido sin esta luz roja, el ventilador está
funcionando para enfriar la unidad.
Tecla –Tecla de preajustes de cocción
Tecla de preajustes de cocción “ ”. La tecla de preajustes le permite desplazarse por las 8
opciones populares de alimentos. Una vez seleccione el alimento que quiere cocinar,
comienza el tiempo y temperatura predeterminado de cocción.
Tecla y Tecla Teclas de control de temperatura
Seleccionar la tecla “ ”. y las teclas “ ” “ ” le permiten agregar o disminuir la
temperatura de cocción (10 ºF) a la vez. Mantener presionada la tecla le permitira cambiar la
temperatura rápidamente. Rango de control de temperatura: (175-400 ºF)
Seleccionando la tecla “ “. y las teclas “ ” “ ” le permite agregar o disminuir el
tiempo de cocción, un minuto a la vez. Mantener presionada la tecla le permitira cambiar el
tiempo rápidamente, tiempo máximo 60 minutos.
CKSTAF47DDF_22SEM1 (LA).indd 7CKSTAF47DDF_22SEM1 (LA).indd 7 5/12/2022 10:53:37 AM5/12/2022 10:53:37 AM

Español - 8
Teclas & Teclas de control de temperatura & temporizador
Tecla “ “ Tecla de programación de tiempo
Utilice la tecla de programación de tiempo para programar un retraso de inicio de cocción de
hasta 1 hora. Para utilizar: Programe la función, el tiempo y la temperatura deseados para la
cocción. Luego seleccione la tecla de programación de tiempo y ajuste el tiempo de retraso
de 1 a 60 minutos. Presione la tecla de encendido para confirmar la selección e iniciar el
temporizador de retardo.
Luz indicadora “ ” Indicador del ventilador
Luz indicadora “ ” Luz de temperatura
Luz indicadora “ ” Luz del temporizador
Luz indicadora “ ” Indicador de temperatura
Luz indicadora “ ” Indicador del temporizador
Luz Indicadora “ ”Indicador de alimentos con
preajustes de cocción
AJUSTES
La siguiente tabla provee guías básicas para cocinar comidas congeladas y comidas
comunes. Por favor note que dadas las variaciones de grosor y tamaño de las comidas
cocinadas algo de prueba y error puede ser necesario para mejores resultados de
cocción. Siempre asegure que la comida este completamente cocinada, por seguridad
antes de consumirla.
Consejos
•Los ingredientes más pequeños generalmente requieren un tiempo de preparación
un poco más corto que los ingredientes más grandes.
• Agitar ingredientes más pequeños a la mitad del tiempo de preparación. optimiza el
resultado final y puede ayudar a prevenir frituras desiguales
• Agregue un poco de aceite a las papas frescas para obtener un resultado crujiente.
• La cantidad óptima para preparar papas fritas crujientes es 1.1 lbs.
• Use masa preparada para preparar bocadillos rellenos de manera rápida y fácil. La
masa prefabricada también requiere un tiempo de preparación más corto que la
masa hecha en casa.
• Coloque un model de pastel para horno en la canasta de la freidora de aire caliente
si desea hornear un pastel o quiche o si desea freír ingredientes frágiles o
ingredientes de relleno.
• También puede usar la freidora de aire caliente para recalentar ingredientes, para esto
ajuste la temperatura a (300 ºF) por hasta 10 minutos.
CKSTAF47DDF_22SEM1 (LA).indd 8CKSTAF47DDF_22SEM1 (LA).indd 8 5/12/2022 10:53:38 AM5/12/2022 10:53:38 AM

CUIDADO Y LIMPIEZA
Siempre desconecte su Freidora de Aire y permita que se enfríe completamente antes
de limpiarla. Nunca sumerja el cuerpo principal, el cable eléctrico o el enchufe en agua
o en ningún otro líquido. Nunca use limpiadores o utensilios de limpieza abrasivos.
• Cuidadosamente limpie cualquier salpicadura de aceite de la guarda del ventilador de
calefacción con papel toalla. Limpie sobre el cuerpo externo con una toalla limpia y
ligeramente húmeda.
• Lave la canasta removible de cocción, bandeja de cocción y la manilla con agua
jabonosa usando una toalla, esponja, utensilio no abrasivo o la lavadora de platos.
Seque completamente antes de usar o guardar.
Para remover la canasta de cocción de la bandeja de cocción:
1. Deslice el protector de liberación de la canasta hacia adelante.
2. Presione el botón de liberación de la canasta.
3. Para volver a poner la canasta en la bandeja de cocción, coloque la canasta en la
parte superior de la bandeja, deslice hacia abajo hasta que calce la guía con el riel
de la bandeja.
Cualquier ajuste o arreglo tendrá que ser llevado a cabo en el centro de servicio técnico
autorizado de Oster. Vea tarjeta de garantía adjunta.
Español - 9
Valores predeterminados Rango de temperatura
Comida Temperatura de
cocción
(Grados en F)
Tiempo de
cocción
(Min) Temperatura (°F)
Papas fritas 400 21 160 400
Tocino 375 10 160 400
Pescado 375 18 160 400
Camarones 375 12 160 400
Pollo 400 25 160 400
Filete 375 16 160 400
Productos horneados 350 17 160 400
Deshidratar 160 4h 80 160
Modo para deshidratado: 2-24 Horas.
Todos los otros modos: 0-60 minutos
CKSTAF47DDF_22SEM1 (LA).indd 9CKSTAF47DDF_22SEM1 (LA).indd 9 5/12/2022 10:53:38 AM5/12/2022 10:53:38 AM

English - 1
IMPORTANT SAFEGUARDS
SAVE THESE INSTRUCTIONS
WHEN USING ELECTRICAL APPLIANCES, BASIC SAFETY PRECAUTIONS
SHOULD ALWAYS BE FOLLOWED TO REDUCE THE RISK OF FIRE, ELECTRIC
SHOCK, AND/OR INJURY TO PERSONS INCLUDING THE FOLLOWING:
1. Read all instructions before using this product.
2. This appliance generates heat during use. Do not touch hot surfaces. Use
handles or knobs.
3. To protect against electric shock, do not place or immerse cord, plugs, or appliance
in water or other liquid.
4. This appliance is not intended for use by children or by persons with reduced
physical, sensory, or mental capabilities, or lack of experience and knowledge,
unless they have been given supervision or instruction concerning use of the
appliance by a person responsible for their safety. Children should be supervised to
ensure that they do not play with the appliance. Keep the appliance and its cord out
of reach of children.
5. Unplug from outlet when not in use, before putting on or taking off parts and before
cleaning. Allow to cool before putting on or taking off parts, and before cleaning.
To disconnect, turn any control to OFF, then unplug power cord from outlet. Do not
disconnect by pulling on cord.
6. Do not operate any appliance with a damaged cord or plug or after the appliance
malfunctions, or has been damaged in any manner. Do not attempt to replace or
splice a damaged cord. Return appliance to the manufacturer (see warranty) for
examination, repair or adjustment.
7. The use of accessory attachments not recommended by the appliance manufacturer
may cause injuries.
8. Do not use outdoors or for commercial purposes.
9. Do not let cord hang over edge of table or counter, or touch hot surfaces.
10. Do not place on or near wet surfaces, or heat sources such as a hot gas or electric
burner, or in a heated oven.
11. Extreme caution must be used when moving an appliance containing hot oil or other
hot liquids.
12. The heating base is subject to residual heat from cooking cycle. Do not touch
heating base immediately after using. Allow to cool before handling.
13. Use caution when opening the lid during or after a cooking cycle. Escaping steam
can cause burns.
14. Do not use appliance for other than intended use. Misuse can cause injuries.
15. Intended for household countertop use only. Keep 6 inches (152 mm) clear from the
wall and on all sides. Always use appliance on a dry, stable, level surface.
16. When the appliance is in the tilted position, the lid will not stay open on its own.
Always return the appliance to the level position before opening the lid.
17. WARNING: Spilled food can cause serious burns. Keep appliance and cord away
from children. Never drape cord over edge of counter, never use outlet below
counter, and never use with an extension cord.
18. Do not use with a programmer, timer, wireless plug adapter or outlet that allows control
remotely, or connect to a circuit that is regularly switched on and off by the utility.
19. Please see the Cleaning section for instructions on how to clean surfaces in
contact with food.
CKSTAF47DDF_22SEM1 (LA).indd 1CKSTAF47DDF_22SEM1 (LA).indd 1 5/12/2022 10:53:38 AM5/12/2022 10:53:38 AM

English - 2
This appliance is intended to be used in household and similar applications such
as:
– staff kitchen areas in shops, ofces and other working environments;
– farm houses;
– by clients in hotels, motels and other residential type environments;
– bed and breakfast type environments.
NOTICES
1. Some countertop and table surfaces are not designed to withstand the prolonged heat
generated by certain appliances. Do not set the heated unit on a nished wood table.
We recommend placing a hot pad or trivet under your air fryer to prevent possible
damage to the surface.
2. During initial use of this appliance, some slight smoke and/or odor may be detected.
This is normal with many heating appliances and will not recur after a few uses.
CKSTAF47DDF_22SEM1 (LA).indd 2CKSTAF47DDF_22SEM1 (LA).indd 2 5/12/2022 10:53:38 AM5/12/2022 10:53:38 AM

English - 3
PARTS
Fig.1
7
8
1
2
3
4
5
6
TECHNICAL DATA:
----- Voltage: 120V~50/60Hz
----- Wattage: 1700 Watts
----- Capacity of basket: 5 quart
----- Adjustable temperature: 80-400 ºF (27-204 ºC)
----- Timer (0-60 min)
GENERAL DESCRIPTION (Fig.1)
1. Control panel
2. Basket
3. Basket release button
4. Basket handle
5. Main housing
6. Pot
7. Air outlet
8. Main cord (Electrical cord)
CKSTAF47DDF_22SEM1 (LA).indd 3CKSTAF47DDF_22SEM1 (LA).indd 3 5/12/2022 10:53:40 AM5/12/2022 10:53:40 AM

English - 4
BEFORE FIRST USE
Never immerse any part of the Air Fryer body, power cord or plug in
water or any other liquid. Before assembling or disassembling your Air
Fryer, ensure it is unplugged and all parts are cool.
Unpack the appliance and remove all packaging, promotional materials and
stickers. Remove all printed documents. Wash the inner cooking basket with
hot, soapy water. Rinse then dry all of the parts. Wipe the body and lid with a damp cloth
only—see page 9 for cleaning instructions.
7
8
1
2
3
4
5
6
Fig.3 Fig.4
7
8
1
2
3
4
5
6
Fig.6
7
8
1
2
3
4
5
6
Fig.5
Fig.2
CKSTAF47DDF_22SEM1 (LA).indd 4CKSTAF47DDF_22SEM1 (LA).indd 4 5/12/2022 10:53:45 AM5/12/2022 10:53:45 AM

English - 5
PREPARING FOR USE
1. Place the appliance on a stable, horizontal and even surface. Do not place the
appliance on non-heat-resistant surface.
2. Place the basket in the pot (Fig.3). Do not fill the pot with oil or any other liquid. Do
not put anything on top of the appliance, the airflow will be disrupted and affects the
hot air frying result.
COOKING
1. Plug the Air Fryer into an electrical outlet.
2. Carefully pull the pot out of the Hot-air fryer (Fig.6)
3. Put the ingredients in the basket. (Fig.5)
4. Slide the pot back into the Hot-air fryer (Fig 4). Noting to carefully align with the
guides in the body of the fryer. Never use the pot without the basket in it.
Caution: Do not touch the pot during and after use, as it gets very hot. Only hold the
pot by the handle.
5. Determine the required preparation time for the ingredient ( see section ‘Settings’ in
this chapter).
6. Some ingredients require shaking halfway through the preparation time (see section
“Settings” in this chapter). To shake the ingredients, pull the pot out of the appliance
by the handle and shake it. Then slide the pot back into the air fryer.
Caution: Do not press the button the handle during shaking. (Fig.3)
Tip: If you set the timer to half the preparation time, you hear the timer buzzer when
you have to shake the ingredients. However, this means that you have to set the
timer again to the remaining preparation time after shaking.
7. When you hear the timer buzzer, the set preparation time has elapsed. Pull the pot
out of the appliance
Note: You can also switch off the appliance manually. To do this, set the time to 1.
8. Check if the ingredients are ready. If the ingredients are not ready yet, simply slide
the pot back into the appliance and set the timer to a few extra minutes.
9. To remove ingredients (e.g. fries), pull the pot out of the Hot-air fryer and place it on
heat resistant surface, and press the basket release button and lift the basket out of
the pan.
Do not turn the basket upside down with the pot still attached to it, as any
excess oil that has collected on the bottom of the pot will leak onto the
ingredients.
The pot and the ingredients are hot. Depending on the type of the ingredients in
the air fryer, steam may escape from the pot.
10.Empty the basket into a bowl or onto a plate.
11.When a batch of ingredients is ready, the Hot-air fryer is instantly ready for preparing
another batch.
CKSTAF47DDF_22SEM1 (LA).indd 5CKSTAF47DDF_22SEM1 (LA).indd 5 5/12/2022 10:53:45 AM5/12/2022 10:53:45 AM

English - 6
CONTROL PANEL INSTRUCTIONS
Control Panel icons will only be visible once the unit is turned on.
OPERATION INSTRUCTIONS:
Key –Power Key
Once the Basket and pot are properly placed in the main housing, the Power light will be
illuminated. Selecting the power key will set the unit default temperature (400 ºF), while the
cooking time will be set to 15 minutes. Selecting the Power key a second time will start the
cooking process. During cooking, press the power key once to pause the cooking cycle and
twice to resume. Press and hold the power key for 3 seconds to turn the unit off. The lights
will go off and fan will continue to run until the unit has sufficiently cooled.
Note: The red light in the center of the fan icon indicates that the cooking cycle is in
process, If the fan icon is on without this red light, the fan is running to cool the unit
down.
Key –Preset Key
Selecting the “ ”. Preset key enables you to scroll through the 8 popular food choices.
Once selected, the predetermined time and cooking temperature function begins.
Key & Key —Temperature Control Keys
Selecting the Key“ ”. The Key and Key symbols enable you to add or
decrease cooking temperature (10 ºF) at a time. Keeping the Key held down will rapidly
change the temperature. Temperature Control range: (175-400 ºF)
Selecting the Key “ ”. The Key and Key symbols enable you to add or
decrease cooking time, one minute at a time. Keeping the key held down will rapidly
change the time, Maximum 60 minutes;
CKSTAF47DDF_22SEM1 (LA).indd 6CKSTAF47DDF_22SEM1 (LA).indd 6 5/12/2022 10:53:46 AM5/12/2022 10:53:46 AM

English - 7
Key & Temperature/Timer Control Keys
key —Booking
Use the booking feature to program a cooking start delay of up to 1 h.
To use: Program the desired function, time, and temperature for the cooking. Then
select the booking key and adjust the time delay from 1-60 minutes. Press Power to
confirm selection and start delay timer.
Indicator light “ ” Fan indicator
Indicator light “ ” Temperature light
Indicator light “ ” Timer light
Indicator light “ ”Temperature indicator
Indicator light “ ” Timer indicator
Indicator light “ ” Recipe indicator
SETTINGS
The following table provides basic cooking guidelines for popular, convenience and
frozen foods. Please note that due to the variations in thickness and size of the foods
being cooked some experimentation may be required for the best cooking results.
Always ensure that the food is thoroughly cooked to food-safe temperature throughout
before consuming.
Tips
• Smaller ingredients usually require a slightly shorter preparation time than larger
ingredients.
• Shaking smaller ingredients halfway through the preparation time optimizes the end
result and can help prevent unevenly fried ingredients.
• Add some oil to fresh potatoes for a crispy result.
• The optimal amount for preparing crispy fries is about 1 lb.
• Use pre-made dough to prepare filled snacks quickly and easily. Pre-made dough
also requires a shorter preparation time than home-made dough.
• Place a baking tin or oven dish in the Hot-air fryer basket if you want to bake a cake
or quiche or if you want to fry fragile ingredients or filled ingredients.
• You can also use the Hot-air fryer to reheat ingredients. To reheat ingredients, set the
temperature to (300 ºF)for up to 10 minutes.
CKSTAF47DDF_22SEM1 (LA).indd 7CKSTAF47DDF_22SEM1 (LA).indd 7 5/12/2022 10:53:46 AM5/12/2022 10:53:46 AM

English - 8
Defaults Temperature Range
Food Cooking Temp (Degrees in F)Cooking Time (Mins) Temp (°F)
Fries 400 21 160 400
Bacon 375 10 160 400
Fish 375 18 160 400
Shrimp 375 12 160 400
Chicken 400 25 160 400
Steak 375 16 160 400
Baked Goods 350 17 160 400
Dehydrate 160 4h 80 160
Dehydrate mode: 2 - 24h
All other modes: 0-60 minutes
CARE AND CLEANING
Always unplug your Air Fryer and allow it to cool completely before cleaning it. NEVER
immerse the MAIN body, power cord or plug in water or any other liquid. Never use
harsh abrasive cleaners or cleaning materials.
• Carefully wipe any oil spatter from the heating fan cover with kitchen paper. Wipe over
the outer body with a clean, slightly damp cloth and dry.
• Wash the removable cooking basket, cooking tray and handle with warm soapy water
using a cloth, sponge or non-abrasive brush or on the dishwasher. Dry completely
before use or storage.
To remove the cooking basket from the tray:
1. Slide the basket release shield forward.
2. Press the basket release button.
3. To refit basket to the cooking tray, position the basket over the top of the body then
pivot the basket downward into place until the lock clicks.
This appliance has no user serviceable parts. Any servicing beyond that described in the
Cleaning Section should be performed by an Authorized Service Representative only.
See Warranty section.
CKSTAF47DDF_22SEM1 (LA).indd 8CKSTAF47DDF_22SEM1 (LA).indd 8 5/12/2022 10:53:47 AM5/12/2022 10:53:47 AM

© 2022 Sunbeam Products, Inc. Todos los derechos reservados. Distribuido por Sunbeam Latin America, LLC,
5200 Blue Lagoon Drive, Suite 860, Miami, FL 33126. Garantía limitada de un año – por favor consulte los
detalles en el inserto.
© 2022 Sunbeam Products, Inc. All rights reserved. Distributed by Sunbeam Latin America, LLC,
5200 Blue Lagoon Drive, Suite 860, Miami, FL 33126. One year limited warranty – please see insert for details.
www.oster.com
CKSTAF47DDF_22SEM1 (LA)_GCDS-LD P.N. NWL0001428670
Impreso en China Printed in China
La siguiente información es para México solamente.
The following information is intended for Mexico only.
FREIDORA DE AIRE DIGITAL
MODELOS: CKSTAF47DDF-013
LEA EL INSTRUCTIVO ANTES DE USAR EL APARATO
LA SIGUIENTE INFORMACIÓN ES PARA MÉXICO:
IMPORTADOR:NEWELL BRANDS DE MEXICO S.A. DE C.V.
Av. Juárez Nº 40-201, Colonia ExHacienda de Santa Mónica,
Tlalnepantla de Baz, C.P. 54050, Estado de México, México.
Atención al Consumidor: 55 5366-0800 /800 506 1700
RFC SME570928G90
PAÍS DE ORIGEN: CHINA
PAÍS DE PROCEDENCIA: CHINA, E.U.A.
CONTENIDO: 1 PIEZA
CARACTERÍSTICAS ELÉCTRICAS
60 Hz 120 V ~ 1 700 W
Características eléctricas de los modelos de la serie:
Electric characteristics of series models:
Voltaje/Voltage Frecuencia/Frequency Potencia/Power
127 V~ 60 Hz 1 700 W
220 V~ 50 Hz 1 700 W
220 V~ 60 Hz 1 700 W
XXX en donde X es cualquier numero entre 0 y 9 o cualquier letra entre A y Z.
XXX where X is any number between 0 and 9 or any letter between A and Z.
CKSTAF47DDF-XXX
CKSTAF47DDF_22SEM1 (LA).indd 9CKSTAF47DDF_22SEM1 (LA).indd 9 5/12/2022 10:53:47 AM5/12/2022 10:53:47 AM
Table of contents
Languages:
Other Oster Fryer manuals

Oster
Oster TSSTTVFDMAF User manual

Oster
Oster 7716 User manual

Oster
Oster CKSTDFZM70 User manual

Oster
Oster CKSTAF15 User manual

Oster
Oster CKSTHF-049 User manual

Oster
Oster CKSTAF3202D User manual

Oster
Oster CKSTHF2-049 User manual

Oster
Oster CKSTAF18D-013 User manual

Oster
Oster CKSTDFZM55 User manual

Oster
Oster TSSTTVDAF1 User manual

Oster
Oster CKSTDFFM15-B User manual

Oster
Oster CKSTDFFM40 User manual

Oster
Oster CKSTDFZM55 User manual

Oster
Oster CKSTDF102-SS User manual

Oster
Oster ODF 510 Technical specifications

Oster
Oster TSSTTVLS25 User manual

Oster
Oster CKSTDFZM53 User manual

Oster
Oster CKSTAF18DDF-013 User manual

Oster
Oster CKSTAF68T-013 User manual

Oster
Oster TSSTTVFDDAF User manual