Assembly Instructions
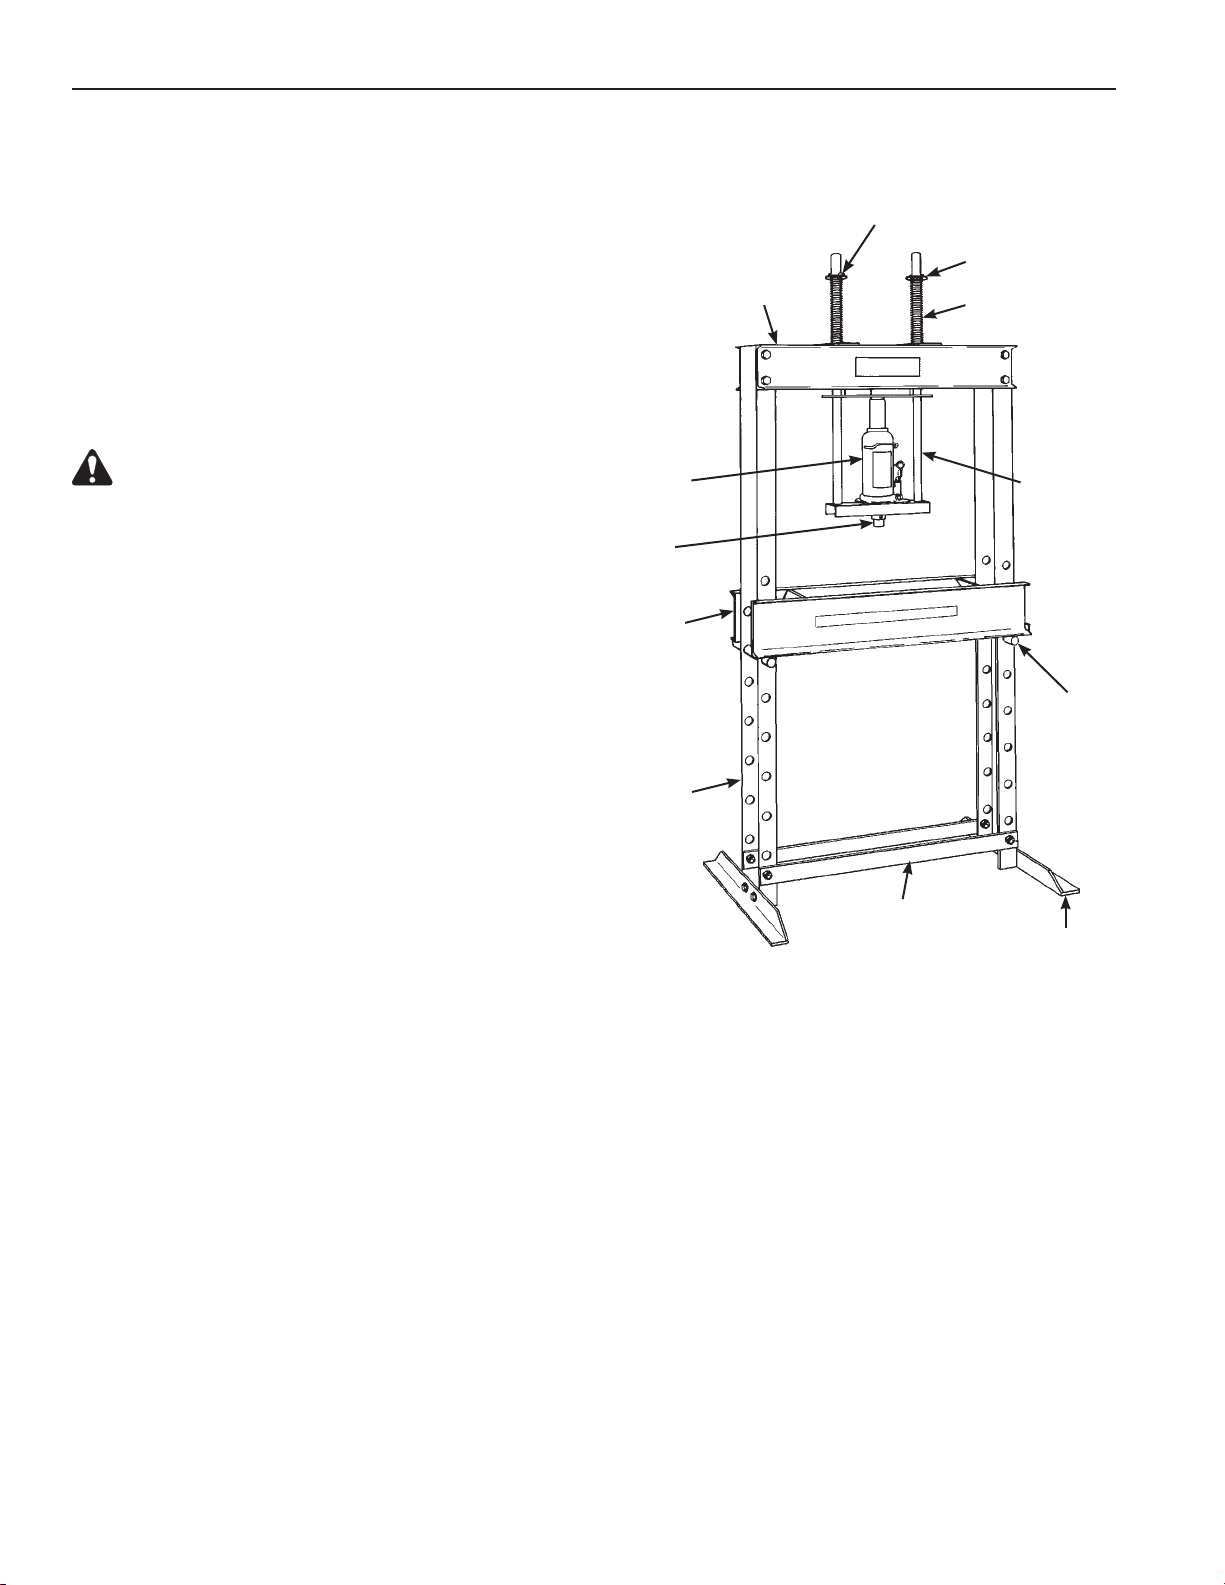
1. Withtheleftandrightuprightsplacedhorizontally
on the oor, bolt the upper bolster to both uprights
using ⅝-11 x 1¼-in. cap screws and ⅝-11 nuts.
2. Slide the lower bolster onto the uprights.
3. Bolt the two straps to the uprights using ½-13 x
1¼-in. cap screws and ½-13 nuts.
4. Bolt an angle foot to each upright using ½-13 x
1¼-in.capscrews,washers,and½-13nuts.Note:
The 20 ton press uses at washers on the slots
in the angle foot.
WARNING:Topreventpersonalinjurywhile
performing the next step, use an overhead
crane (or similar lifting device) to lift the
shoppressassemblyofftheoorandinto
its standing, upright position.
5. Lift the press to its standing, upright position.
6. Slidethelowerbolsteruptothemid-pointposition
of the upright assembly and install two bolster
pins to secure the bolster.
7. Insert the pressing bracket through the holes
in the upper bolster. Then place a spring and
washer on each tube of the pressing bracket
and install a roll pin through each tub to secure
the washer and spring. Note: Use the top holes
in the pressing bracket tubes for a 20-ton press;
use the lower holes for a 12-ton press.
8. Usethesetscrewprovidedtosecurethepressing
pin to the bottom of the pressing bracket.
9. Slide the pressing bracket downward and install
the bottle jack in its normal upright position. The
saddle on the end of the bottle jack extension
screw must nest in the round hole in the guide
plate along the bottom of the bolster. The pump
handlereceiverandthepumpreleasevalvemust
face out, as shown.
Operating Instructions
1. Tightly close the release valve on the bottle jack, by turning it clockwise.
2. Insert the bottle jack handle into the receiver and start pumping the jack. To release pressure and lower
the jack, slowly turn the release valve counterclockwise. Note: A notch in the end of the jack handle can
be used to turn the release valve.
To adjust the lower bolster, hold one end of the lower bolster in place and adjust the bolster pin up or down,
one or two holes. Then hold in place the other end of the bolster and adjust its associated bolster pin so the
lower bolster is level.
To change press adapters, unscrew the set screw in the pressing bracket sleeve. Remove the adapter, and
insert the desired adapter, seating it completely. Tighten the set screw.
Operating Instructions
Pressing
Bracket
Angle
Foot
12 Ton Press: Install roll pin in lower holes (as shown).
20 Ton Press: Install roll pin in upper holes.
Spring
Washer
Upper
Bolster
Bottle
Jack
Pressing
Pin
Lower
Bolster
Bolster
Pin
Upright
Strap


