Introduction
Congratulations and thank you for selecting an Ovation Acous-
tic/Electric guitar equipped with the Optima®preamp. Please
read this brief manual thoroughly to insure you get “Optima-l”
performance from your new Ovation.
The Ovation Optima preamp represents the cutting edge of
acoustic/electric guitar circuitry. This preamp offers the player
tremendous control and sonic flexibility while maintaining
acoustic “transparency.” In addition, this new preamp in-
cludes a built-in digital tuner - an Ovation first! In other
words, whether in the recording studio or on stage, your
Ovation will sound more “acoustic” and in-tune than ever.
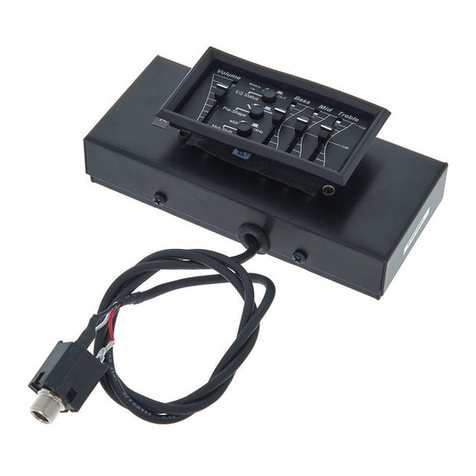
Referring to fig. 1, you’ll see the layout and nomenclature
associated with the control features of the unit. To simplify
the explanation of the functions and features, it’s convenient
to discuss the preamp and tuner functions separately.
Preamp Features & Functions
The Optima’s audio circuitry is studio-quiet with super low
distortion (see specifications table). Tone control is greatly
enhanced with a precise four-band graphic equalizer. More-
over, you can connect your guitar to a wide range of audio
amplification and recording equipment. Since the Optima
features both a low impedance balanced XLR connector as
well as a standard ¼” Hi-Z, unbalanced phone jack, you
can even use your mixer’s phantom power capability to elimi-
nate the preamp’s drain on the battery!
Connections
On the rear of the guitar, near the endpin, you’ll notice two
audio connectors. One is a three pin XLR (mic) type, balanced
output, while the other is a conventional, ¼” phone jack.
Hi-Z Connection
If you wish to connect your guitar to a high impedance (Hi-
Z) acoustic guitar amp or mixer, use a standard, shielded,
¼” guitar cable inserted into the ¼” jack on the guitar. If
you have a battery installed in the guitar, you’re ready to
play (of course you’ll read the rest of this manual first)!
Lo-Z Connection
If you have chosen to connect the guitar to a low impedance
mixer or amp, there are a couple of options. If you have a
conventional, Lo-Z balanced line XLR (or mic) cable, con-
nect the guitar to the amp/mixer and insert a ¼” “activation
plug1” into the phone jack on the guitar. This plug connects
the battery’s current to the preamp circuitry. If you have
purchased an Ovation Lo-Z XLR Activation Cable2, simply
connect your guitar to your amp or mixer and play!
Phantom Power
Here’s another unique Ovation feature: If your mixer or acous-
tic guitar amp has phantom power available (a voltage source
that is superimposed inaudibly on the same wires as the sig-
nal), using the XLR connector on the guitar (with any bal-
anced XLR cable) will direct this voltage to your preamp.
This will dramatically extend battery life, as only the tuner
will require battery current. Even without a battery, using
the phantom powering option will ensure that you’re getting
the ultimate response and output from your preamp. Please
note however, that the tuner will not function without a ser-
viceable battery installed in the guitar.
Controls
Please refer again to fig. 1 to note control names and functions.
Gain
This “retractable” control allows you to set the output level
of the preamp. If you depress and release this knob, it will
“pop” out and allow easy access for adjustment. Clockwise
rotation increases the output level. Depress and release the
knob again and it will return to its original, recessed posi-
figure 1.
tion. This low-profile position helps avoid unintentional con-
tact... your level setting “stays put.”
Battery Low
This indicator will illuminate if the voltage of the battery
installed in the guitar dips below 7.7V. This means you should
replace the battery as soon as possible to avoid degraded
performance. If this indicator is not lit and your guitar has
no output, it likely means that the battery is completely dead.
Either replace the battery or use phantom power (see above).
With average tuner use, expect 100-150 hours of use per battery.
EQ Controls
The EQ section allows you to accent or attenuate certain
frequency bands within the guitar’s audio spectrum. When
all of the controls are in the center (detent) position, signals
pass through the circuit unaltered. Raising an EQ knob above
the center position increases the energy contained within that
spectrum. Likewise, moving the control below the center po-
sition decreases the signals within that band.
The Optima preamp offers ±12dB control over four discrete
ranges of the guitar’s sonic spectrum.
The Low EQ control allows you to increase or reduce the
sound in the bass region. Raise this control above the center
position to add fullness or bottom to your sound. De-em-
phasizing this band results in a lighter, less ponderous sound
quality.
The High EQ control performs similarly to the “Low” control
except that its effect shapes the high frequency, or treble
band. Increase this control for bright or airy sounds, or de-
crease for darker or round tonalities.
Much like the High and Low controls, the two mid-band
controls add coloration to the lower and upper midrange
frequencies. The 600Hz EQ is effective controlling “nasal”
tone qualities while the 6K control can add edge or help
your sound "cut” without loss of musicality.
EQ In/Out
This push-button enables you to engage or defeat the EQ
section. When the switch is in the depressed position, the
EQ is active. Return the switch to the “up” position and the
EQ circuit is bypassed. The bypass of the EQ circuit is de-
sirable in some studio environments where external EQ is
preferable. You can also use this defeat switch to quickly
check the results of your EQ adjustments relative to the origi-
nal sound or even as instant access to a discrete second EQ
“channel.”
Notch In/Out
This switch enables the notch circuitry in the down position
and disables it in the up position.
Notch
A Notch filter is a very special type of EQ. Essentially, it is
an extremely narrow and deep cut of an audio frequency
band. The Optima has a “tunable” notch filter which em-
powers you to select the specific frequency band that will
be affected by the notch. With the Optima’s tunable notch
filter you can “surgically” remove troublesome feedback fre-
quencies which occur due to the guitar’s natural resonances.
The Notch control provides control of the center frequency
of the notch effect. Like the Gain Control it is “retractable.”

