manuals.online logo
Brands
  1. Home
  2. •
  3. Brands
  4. •
  5. Oxford Instruments
  6. •
  7. Digital Camera
  8. •
  9. Oxford Instruments Andor Neo User manual

Oxford Instruments Andor Neo User manual

Neo Quick Start Guide
Unpacking your Camera and Accessories
2
Installing Software (Solis, SDK3 or iQ)
You must have administrator access on your PC to perform this installation.
The same instructions cover the installation procedure for Andor’s Solis, SDK or iQ software, which is used in
conjunction with third party software. If you are planning to run your camera through a third party interface you will
require the Andor Drivers, called SDK3.
Switch on the PC, insert CD and run the Solis (or SDK) setup .exe le on the CD or
download location.
• Conrm the version of software.
• Follow the on screen prompts.
• Select the installation directory when prompted.
• If prompted for camera type select Neo.
• On the nal window click on “Install”. During the installation a number of other
windows will appear as various drivers are installed.
• Click on the nish button when prompted.
3
For more information visit: http://www.andor.com/scientic-software
Please turn over
Power Supply
Unit (x1)
Software or Driver
CD and User
Manual on CD
Anti-Static Strap
Camera Link
PCIe Card
1
Country Specic
Power Cord
Multi I/O
Timing Cable
Camera Link Cable
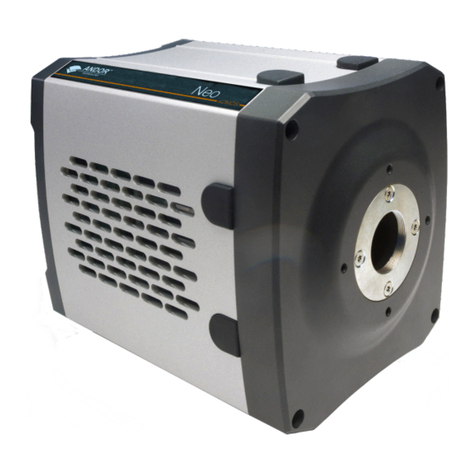
Neo sCMOS Camera
23
Coolant Pipes
Refer to the user manual for further information.
For information on water cooling, please refer
to the user manual.
* USB A to B cable also supplied (only used when
updating rmware)
Preparing your Facility
Handle the camera and accessories with care.
Neo sCMOS weighs 3.4 kg [7 lb 8 oz].
Observe anti-static precautions when
installing the controller card and camera.
Ensure 100 mm clearance around camera
and power supply vents (Do not block
vents when operating on benchtop).
Operation of the camera close to intense
pulsed sources (e.g. plasma and X-ray
sources) may compromise performance.
Keep dry, <70% humidity non-condensing.
Use correct power supply and cables.
Store between -10°C and 50°C.
operate between 0°C and 30°C
1
1. Unplug all cables from the rear of the computer.
2. Remove the PC enclosure so as to gain access to the expansion slots.
3. Locate a PCIe x16, x8 or x4 slot. If you are unsure which PC slot is correct,
please consult the PC user manual.
4. Remove the ller bracket corresponding to the slot you intend to use.
5. Remove the controller card carefully from its protective ESD packaging and
rmly press the card connector into the chosen expansion slot and ensure it
is securely locked in.
6. Making sure that the card’s mounting bracket is ush with any other
mounting brackets or ller brackets to either side of it, secure the controller
card in place.
7. Replace the cover of the computer and secure it with the mounting screws
if applicable.
8. Reconnect any accessories you were using previously.
9. For PCs not supplied by Andor, refer to Setting & Checking BIOS options
Installing the Camera Link (PCIe) Card
4
Ensure your PC is powered off. Ensure anti-static precautions
using anti-static strap provided. Keep all screws safe.
Installing the PCI Card Device Driver
5
Restart your PC
Mounting the Camera
• Attach the camera to lens or optical system using the camera
C-mount (or F-mount) interface as required
Connecting the Signal and Power Cables
• Before inserting the 12V DC power connector to the rear of the
camera, ensure the orientation is correct. Never forcibly insert the
connector.
• Securely connect the camera link cable between the CL1
connector on the rear of the unit and the appropriate port on the
PCIe card.
• If required connect the I/O expander cable to the 26 way I/O
connector.
• Switch the Camera on using the ON/OFF switch.
• Turn on the PC.
• Start your software.
• View and adjust the acquisition settings as required.
• Start acquiring data.
Troubleshooting
Camera buzzer does not sound on start-up
• The camera buzzer should be audible momentarily when the camera is switched to ON.
• If this does not occur, ensure that power is connected to the camera and the ON/OFF switch is set to ON.
Camera is not recognized by PC
• Ensure camera is switched to ON (The camera must be powered up before the software is initiated).
• Check that the camera cable(s) are securely and correctly connected between the camera head and the PCIe
card in the PC (shown in step 6).
• Check that the PCIe card and drivers have been installed properly:
Control Panel – System – Hardware – Device Manager – Imaging Devices (refer also to user manual Section
3.4 and 3.5.
Connecting your Camera and Switching it on
Ensure that the Camera ON/OFF switch is in the OFF position
AND your PC is switched OFF.
6
Fasten the Card
to the slot with
a screw Unused ller brackets
Gently press the
card into
the slot
PCI Slot
ISA Slot
MAN-06733
NQSG 1217 R1
For additional troubleshooting information please refer to the user manual
For further technical information about the Andor Neo go to: andor.com/Neo
You can nd the latest user manuals on MyAndor (http://my.andor.com/login.aspx)
USB 2.0
CL1
Connector
TTL/DAC 26 DAC
26-Way D Type
Connector
ON/OFF
Switch
12 V DC
Power
Connector
Water Cooling Guidelines
• If you require ultimate cooling please refer to the Neo user manual for guidelines on installation and operation.
Windows 7, 8 or 10: Drivers are installed automatically at start-up. NOTE: For Windows 7, 8 and 10, users should
deactivate sleep mode functions of the PC where possible (refer to Windows 7 or 8 help on your PC). Otherwise the
computer would enter sleep mode. This would stop the software connecting to the camera and a reboot would be
required.
Windows Vista: you may be asked to specify the directory containing the Bitow drivers. These are located in ‘C:\
Bitow SDK 5.60\PlugAndPlay’.
Windows XP: the ‘Found New Hardware Wizard’ dialog will be displayed following boot up. When prompted ‘Can
Windows connect to Windows Update to search for software?’, select ‘No’ and click on Next. Select ‘Install the
software automatically’ option and click on ‘Install’. The Camera drivers will now be installed.
Linux: please refer to the SDK CD. Any distribution specic differences will be noted in the installation instructions.
Checking & Setting BIOS options (for PCs not supplied by Andor)
Enter the BIOS menu when starting PC. For Dell workstations, press F12 at start-up and select System Setup in the
One Time Boot Menu. For Dell workstations 3 options in the Performance menu of the BIOS need to be checked/set:
• C-States Control – Disable C-States
• Intel Speed-step – Disable Speed-step
• Memory Node Interleaving – Set from NUMA to SMP. Note: This option is only available on larger workstations with
2 physical processors and may have a different name- ensure that NUMA is disabled.
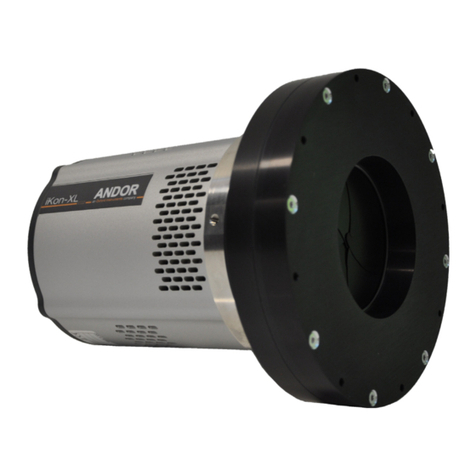
Other Oxford Instruments Digital Camera manuals

Oxford Instruments Andor Apogee Alta User manual

Oxford Instruments

Oxford Instruments Andor Apogee Alta User manual

Oxford Instruments Andor iKon-XL Flexi User manual

Oxford Instruments

Oxford Instruments Andor iKon-XL Flexi User manual

Oxford Instruments ANDOR iStarsCMOS User manual

Oxford Instruments

Oxford Instruments ANDOR iStarsCMOS User manual

Oxford Instruments Andor Apogee Alta Series Installation instructions

Oxford Instruments

Oxford Instruments Andor Apogee Alta Series Installation instructions

Oxford Instruments Andor Balor User manual

Oxford Instruments

Oxford Instruments Andor Balor User manual

Oxford Instruments ANDOR iKon-M Installation instructions

Oxford Instruments

Oxford Instruments ANDOR iKon-M Installation instructions

Oxford Instruments Andor Zyla USB 3.0 Series User manual

Oxford Instruments

Oxford Instruments Andor Zyla USB 3.0 Series User manual

Oxford Instruments Andor Zyla User manual

Oxford Instruments

Oxford Instruments Andor Zyla User manual

Oxford Instruments Andor Marana-X User manual

Oxford Instruments

Oxford Instruments Andor Marana-X User manual

Oxford Instruments Andor Apogee Aspen Series Installation instructions

Oxford Instruments

Oxford Instruments Andor Apogee Aspen Series Installation instructions

Oxford Instruments ANDOR iXon Ultra 888 User manual

Oxford Instruments

Oxford Instruments ANDOR iXon Ultra 888 User manual

Oxford Instruments Andor Sona 4.2B-11 Installation instructions

Oxford Instruments

Oxford Instruments Andor Sona 4.2B-11 Installation instructions

Oxford Instruments ANDOR Sona User manual

Oxford Instruments

Oxford Instruments ANDOR Sona User manual

Oxford Instruments Neo User manual

Oxford Instruments

Oxford Instruments Neo User manual

Oxford Instruments ANDOR iXon Ultra 897 User manual

Oxford Instruments

Oxford Instruments ANDOR iXon Ultra 897 User manual

Oxford Instruments ANDOR Newton CCD Installation instructions

Oxford Instruments

Oxford Instruments ANDOR Newton CCD Installation instructions

Popular Digital Camera manuals by other brands

Sony Cyber-shot DSC-HX350 instruction manual

Sony

Sony Cyber-shot DSC-HX350 instruction manual

PenRecorderPro HD2 user manual

PenRecorderPro

PenRecorderPro HD2 user manual

Sony DSC-P7 - Cyber-shot Digital Still Camera operating instructions

Sony

Sony DSC-P7 - Cyber-shot Digital Still Camera operating instructions

NED RMSL8K39CL user manual

NED

NED RMSL8K39CL user manual

Samsung Digimax A502 user manual

Samsung

Samsung Digimax A502 user manual

Sony Cybershot,cyber-shot dsc-wx10 instruction manual

Sony

Sony Cybershot,cyber-shot dsc-wx10 instruction manual

Samsung i8 manual

Samsung

Samsung i8 manual

HP lc200w user manual

HP

HP lc200w user manual

Rollei Dk4010 user guide

Rollei

Rollei Dk4010 user guide

Canon EOS M50 manual

Canon

Canon EOS M50 manual

FujiFilm FINEPIX XP170 owner's manual

FujiFilm

FujiFilm FINEPIX XP170 owner's manual

Polaroid PDC 2070 user guide

Polaroid

Polaroid PDC 2070 user guide

GE J1456W Specifications

GE

GE J1456W Specifications

Polaroid ONESTEP LAND CAMERA manual

Polaroid

Polaroid ONESTEP LAND CAMERA manual

Dometic PerfectView CAM301 Installation and operating manual

Dometic

Dometic PerfectView CAM301 Installation and operating manual

Olympus VR-310/D-720VR-310/D-720 Manual de instrucciones

Olympus

Olympus VR-310/D-720VR-310/D-720 Manual de instrucciones

Sony MHS-TS22 Handbook

Sony

Sony MHS-TS22 Handbook

Dometic CAM360AHD installation manual

Dometic

Dometic CAM360AHD installation manual

manuals.online logo
manuals.online logoBrands
  • About & Mission
  • Contact us
  • Privacy Policy
  • Terms and Conditions

Copyright 2025 Manuals.Online. All Rights Reserved.